Let the mixing begin. I only wore my mask till all the powders were wetted out and not floating in the air. Now watching the heat. A watched vat does not get hot fast. Thanks to everyone that mixed before me in the February class by Elisabeth so I could ponder the process. Here is a link to her classes.
Ferrous sulfate and calcium hydroxide measured out. Got an idea of dry volume and water needed to dissolve.
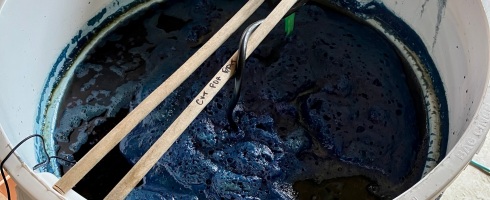
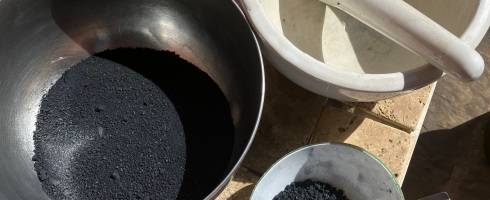
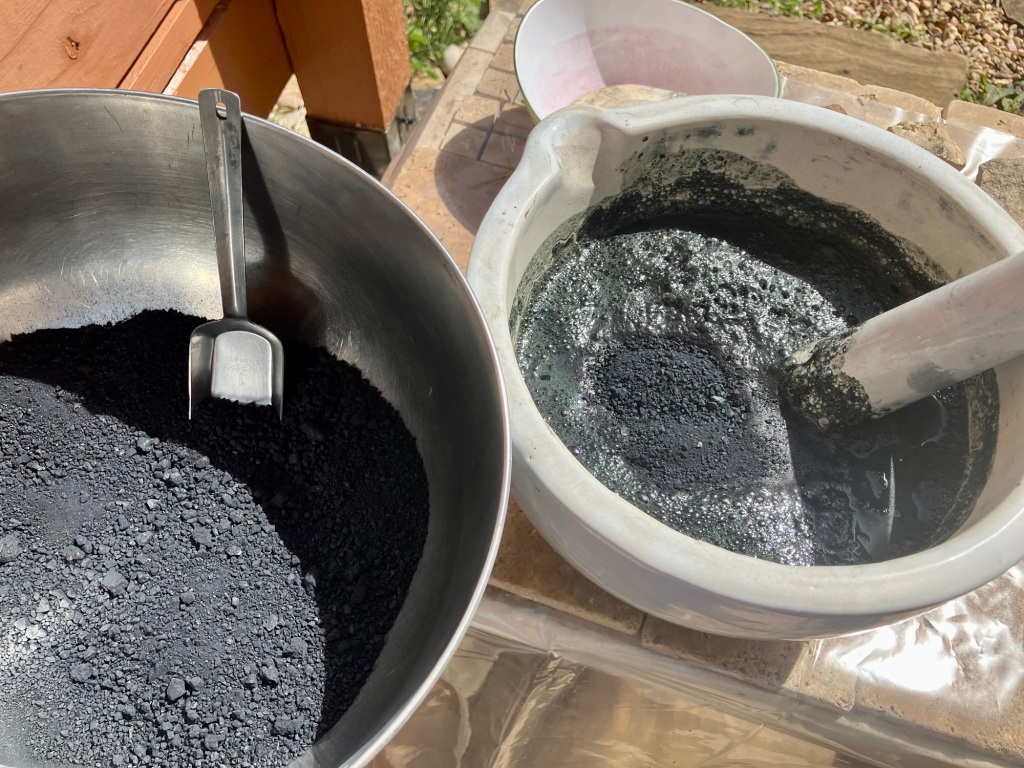
Pasted indigo gets one more stir to suspend pigment in the water. I left it overnight to let lumps soften & settle.
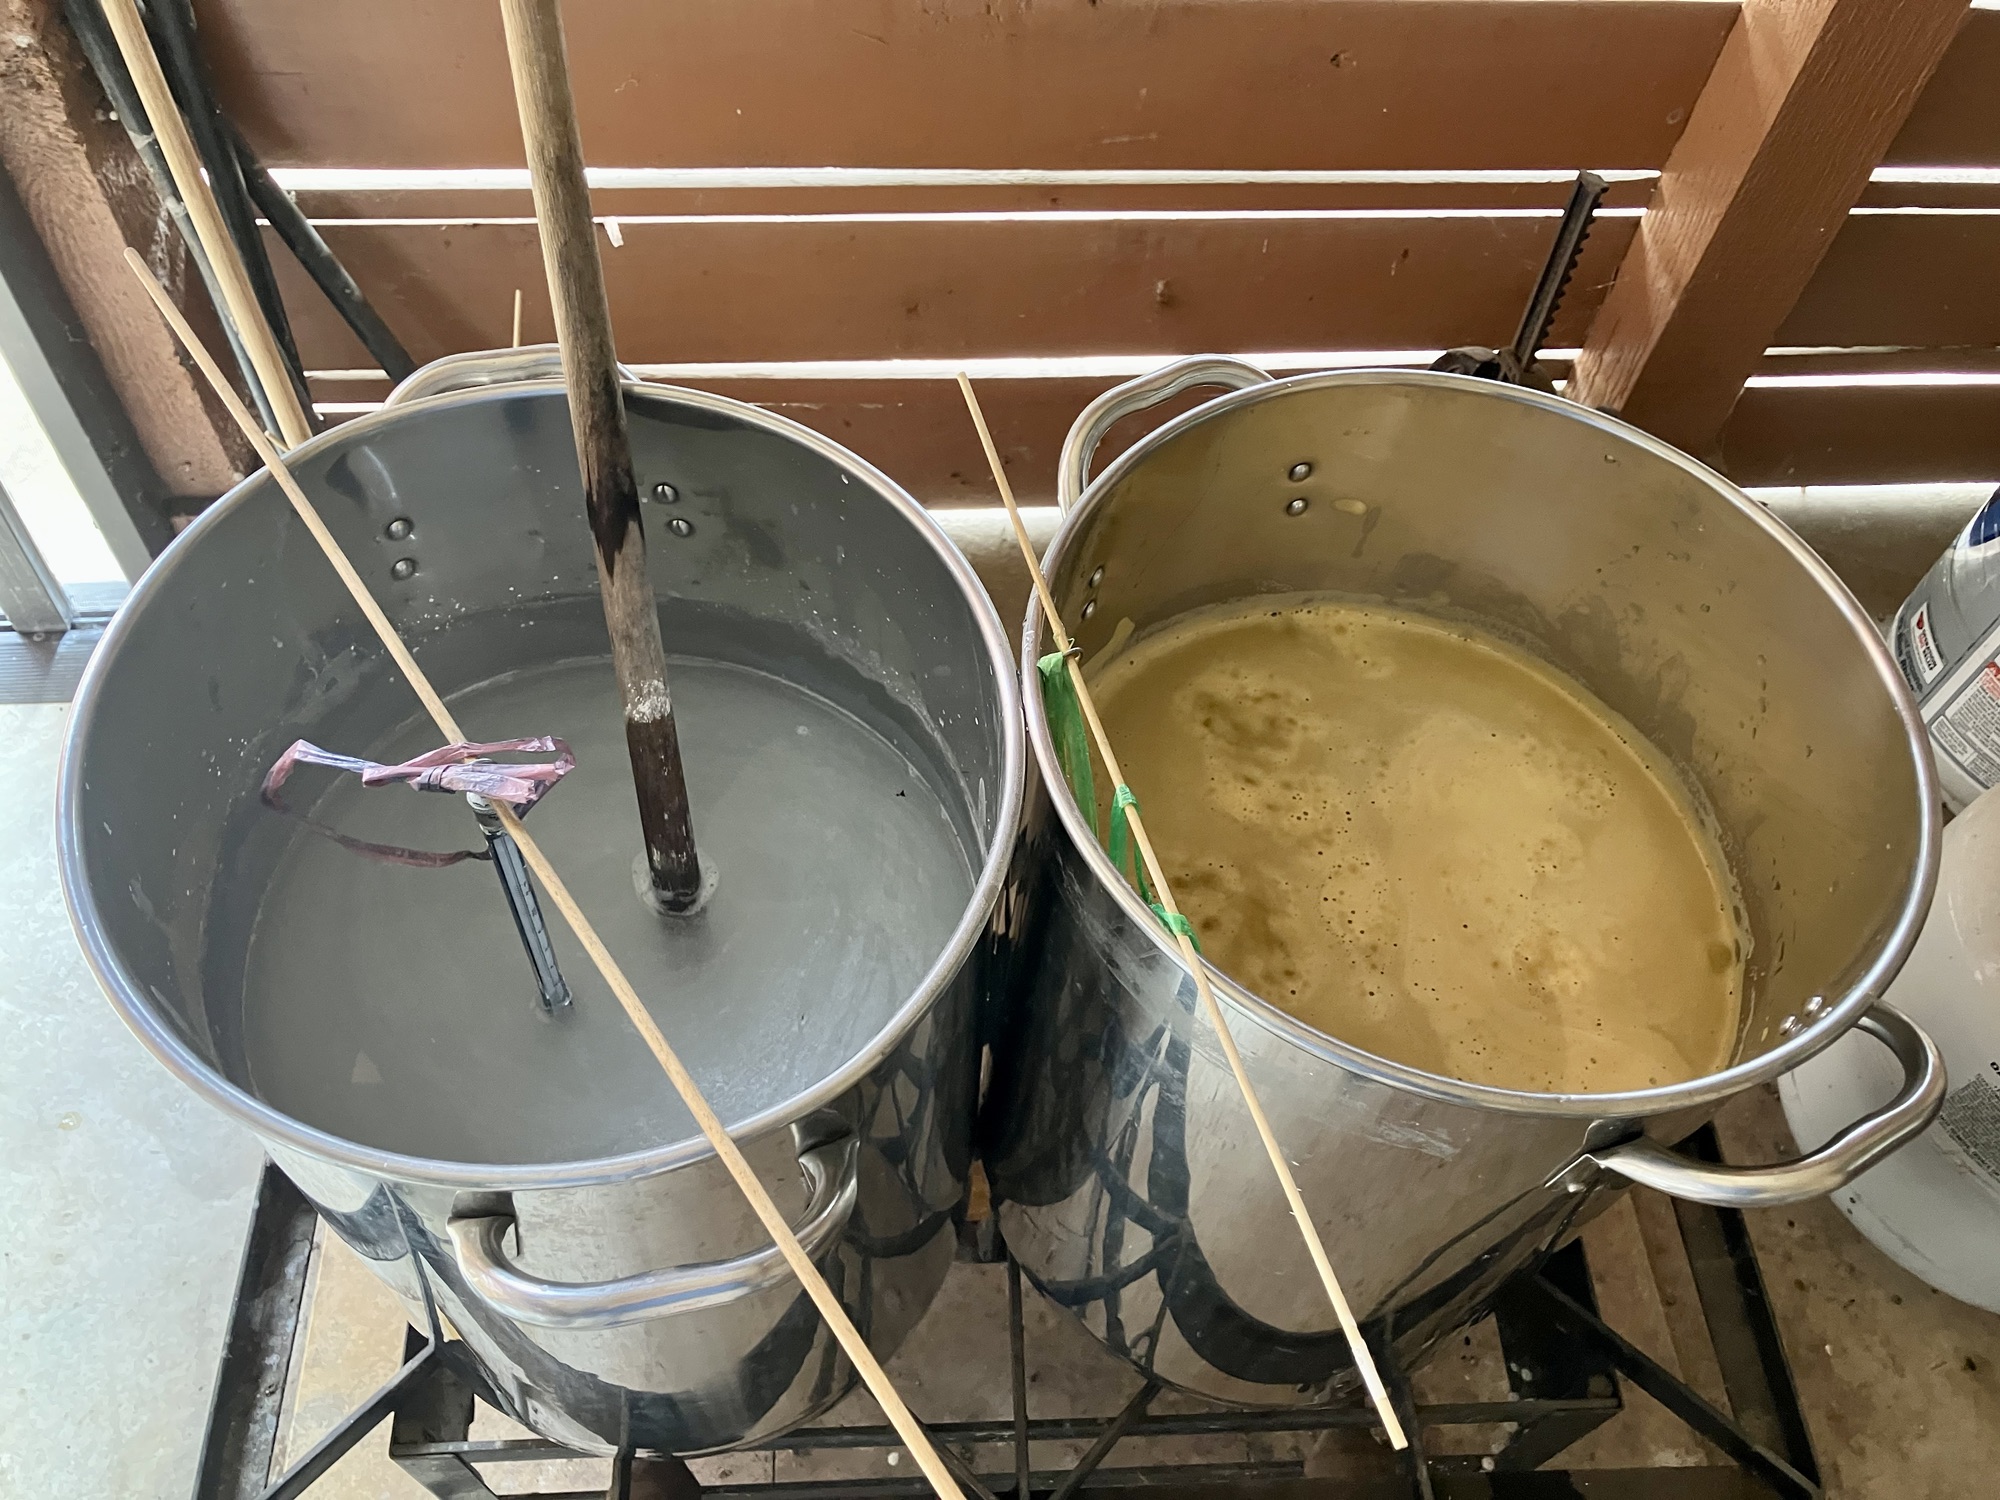
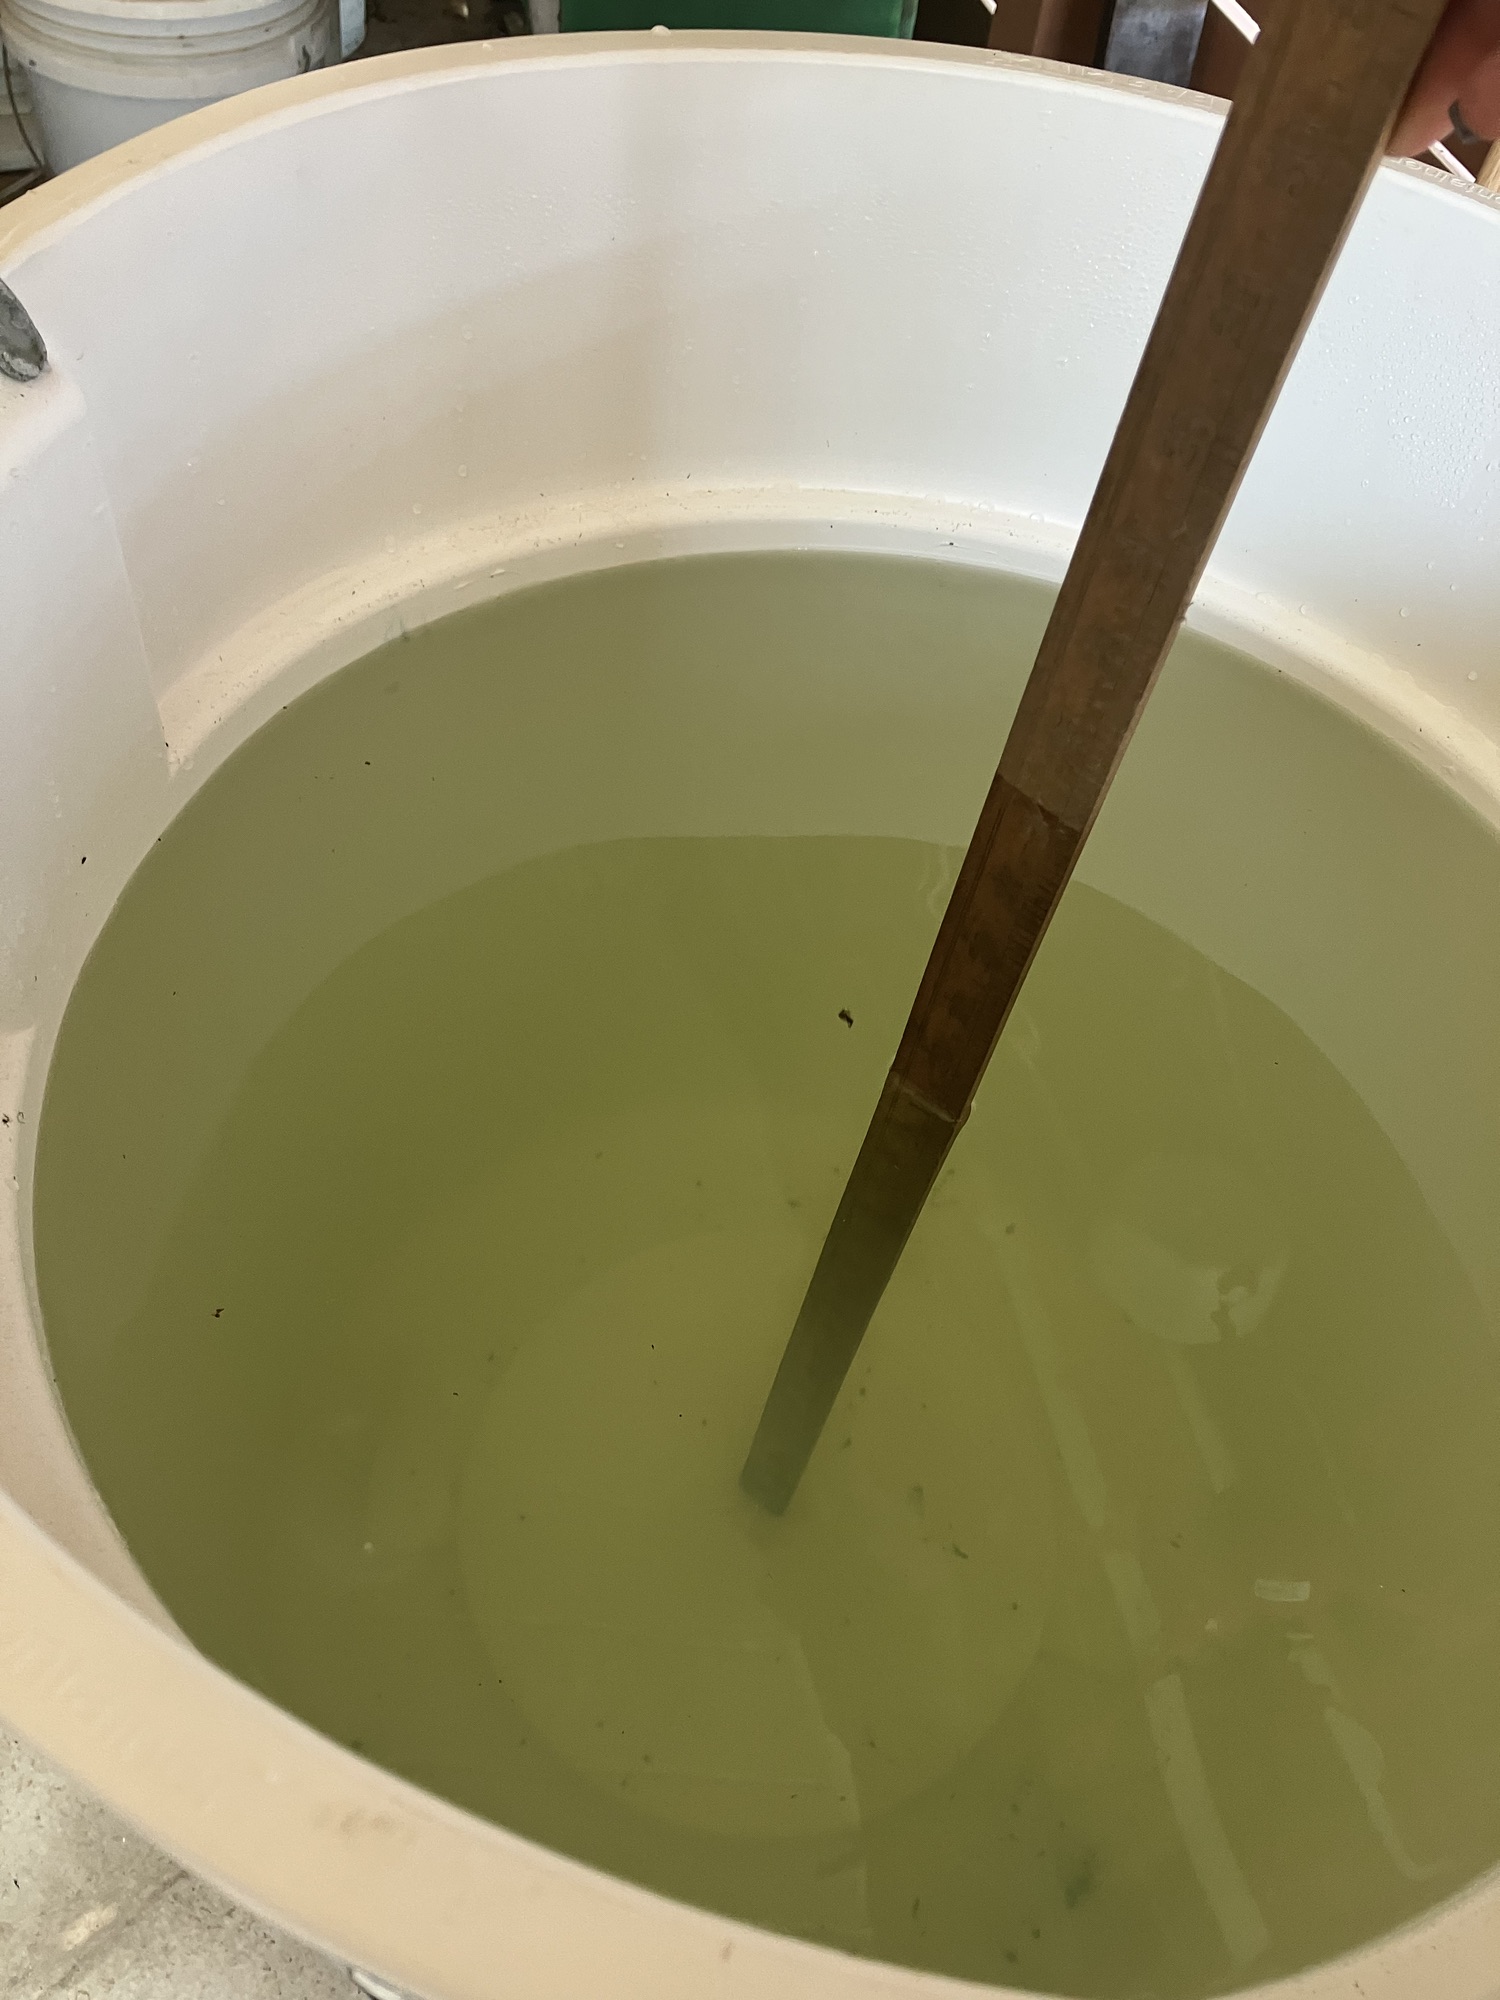
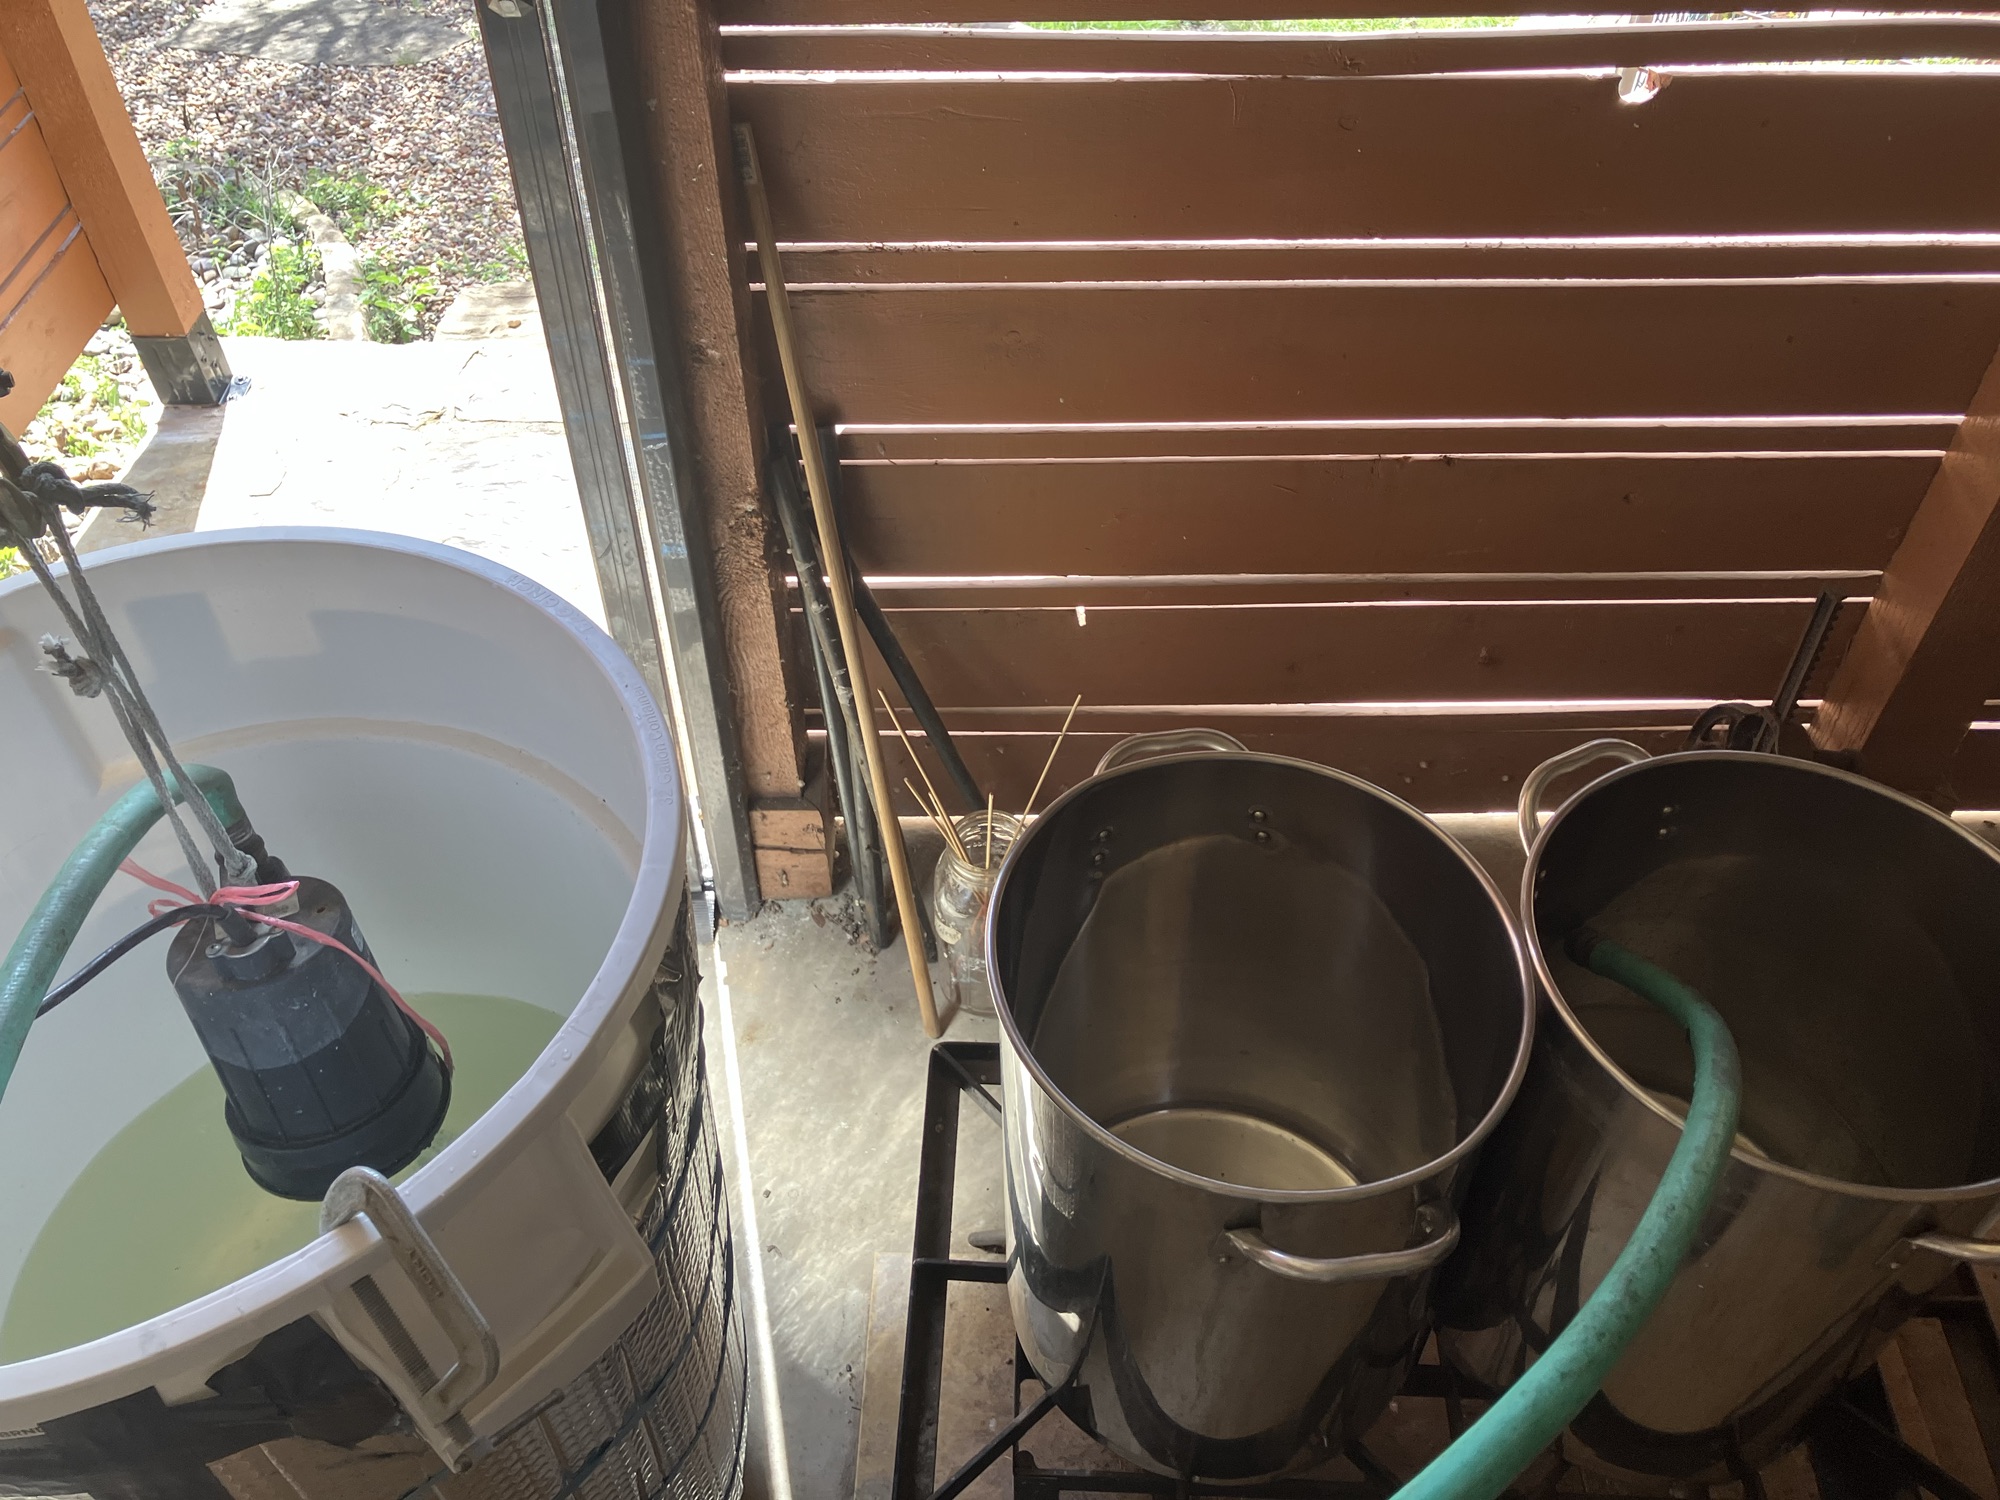
Vessels have heated water and ingredients added to dissolve
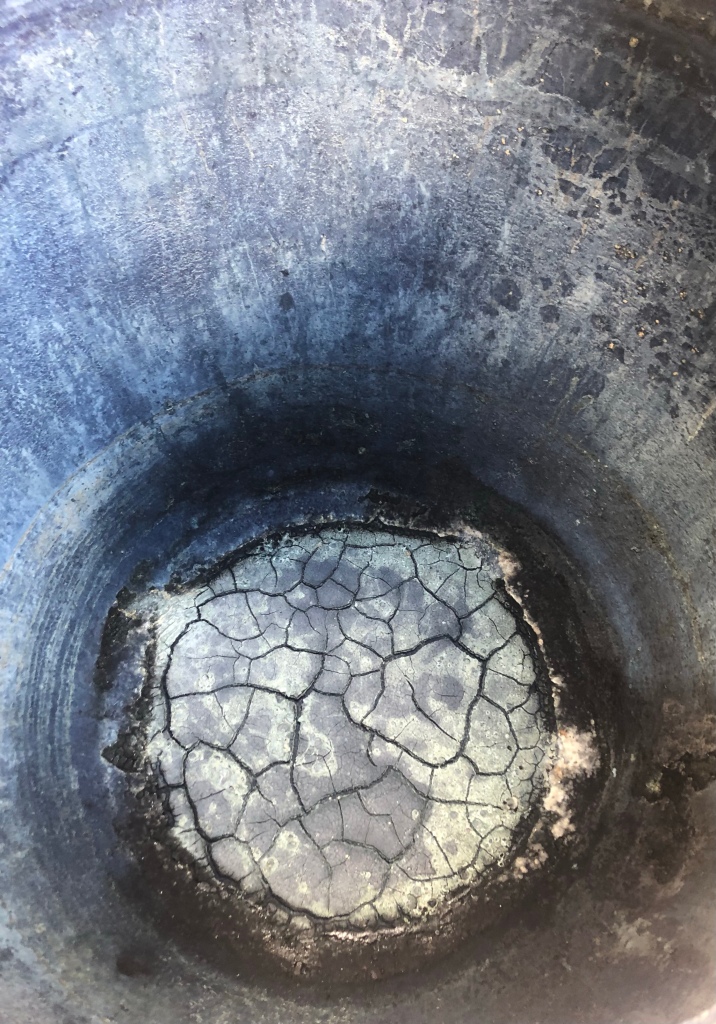
Mental note, this vat has an indent on the bottom I need to stir into and around. Wish I had measured the width before I started dumping ingredients into the vat. There is always an “if only”.
And splat! I wish I could set up neat & tidy but I always find a way to drip with large vats.
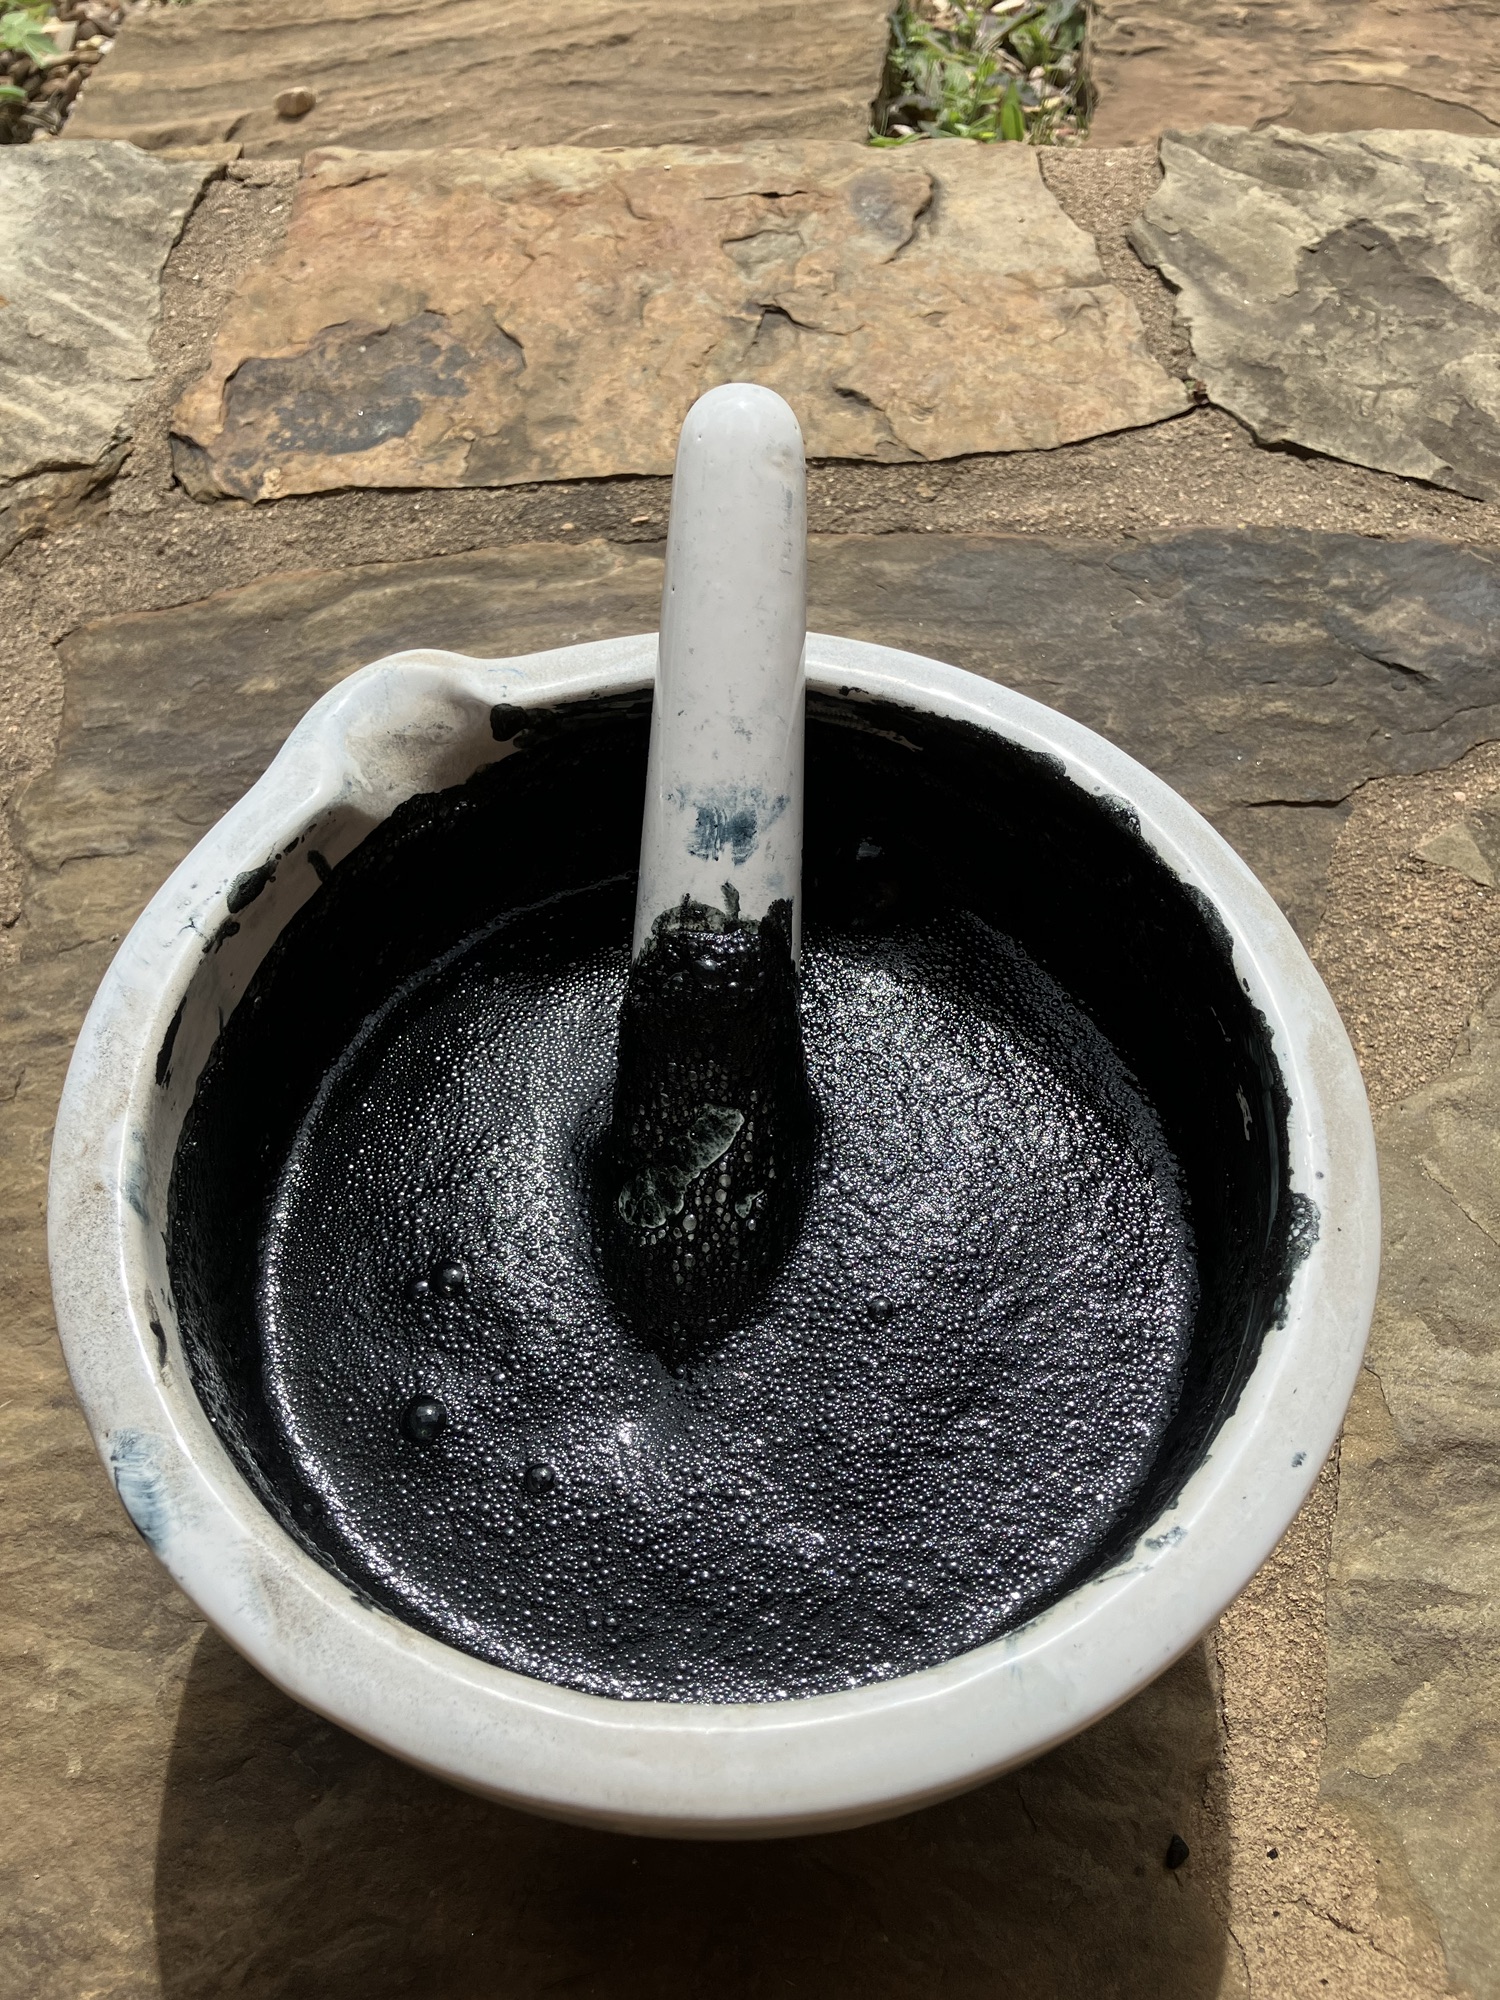
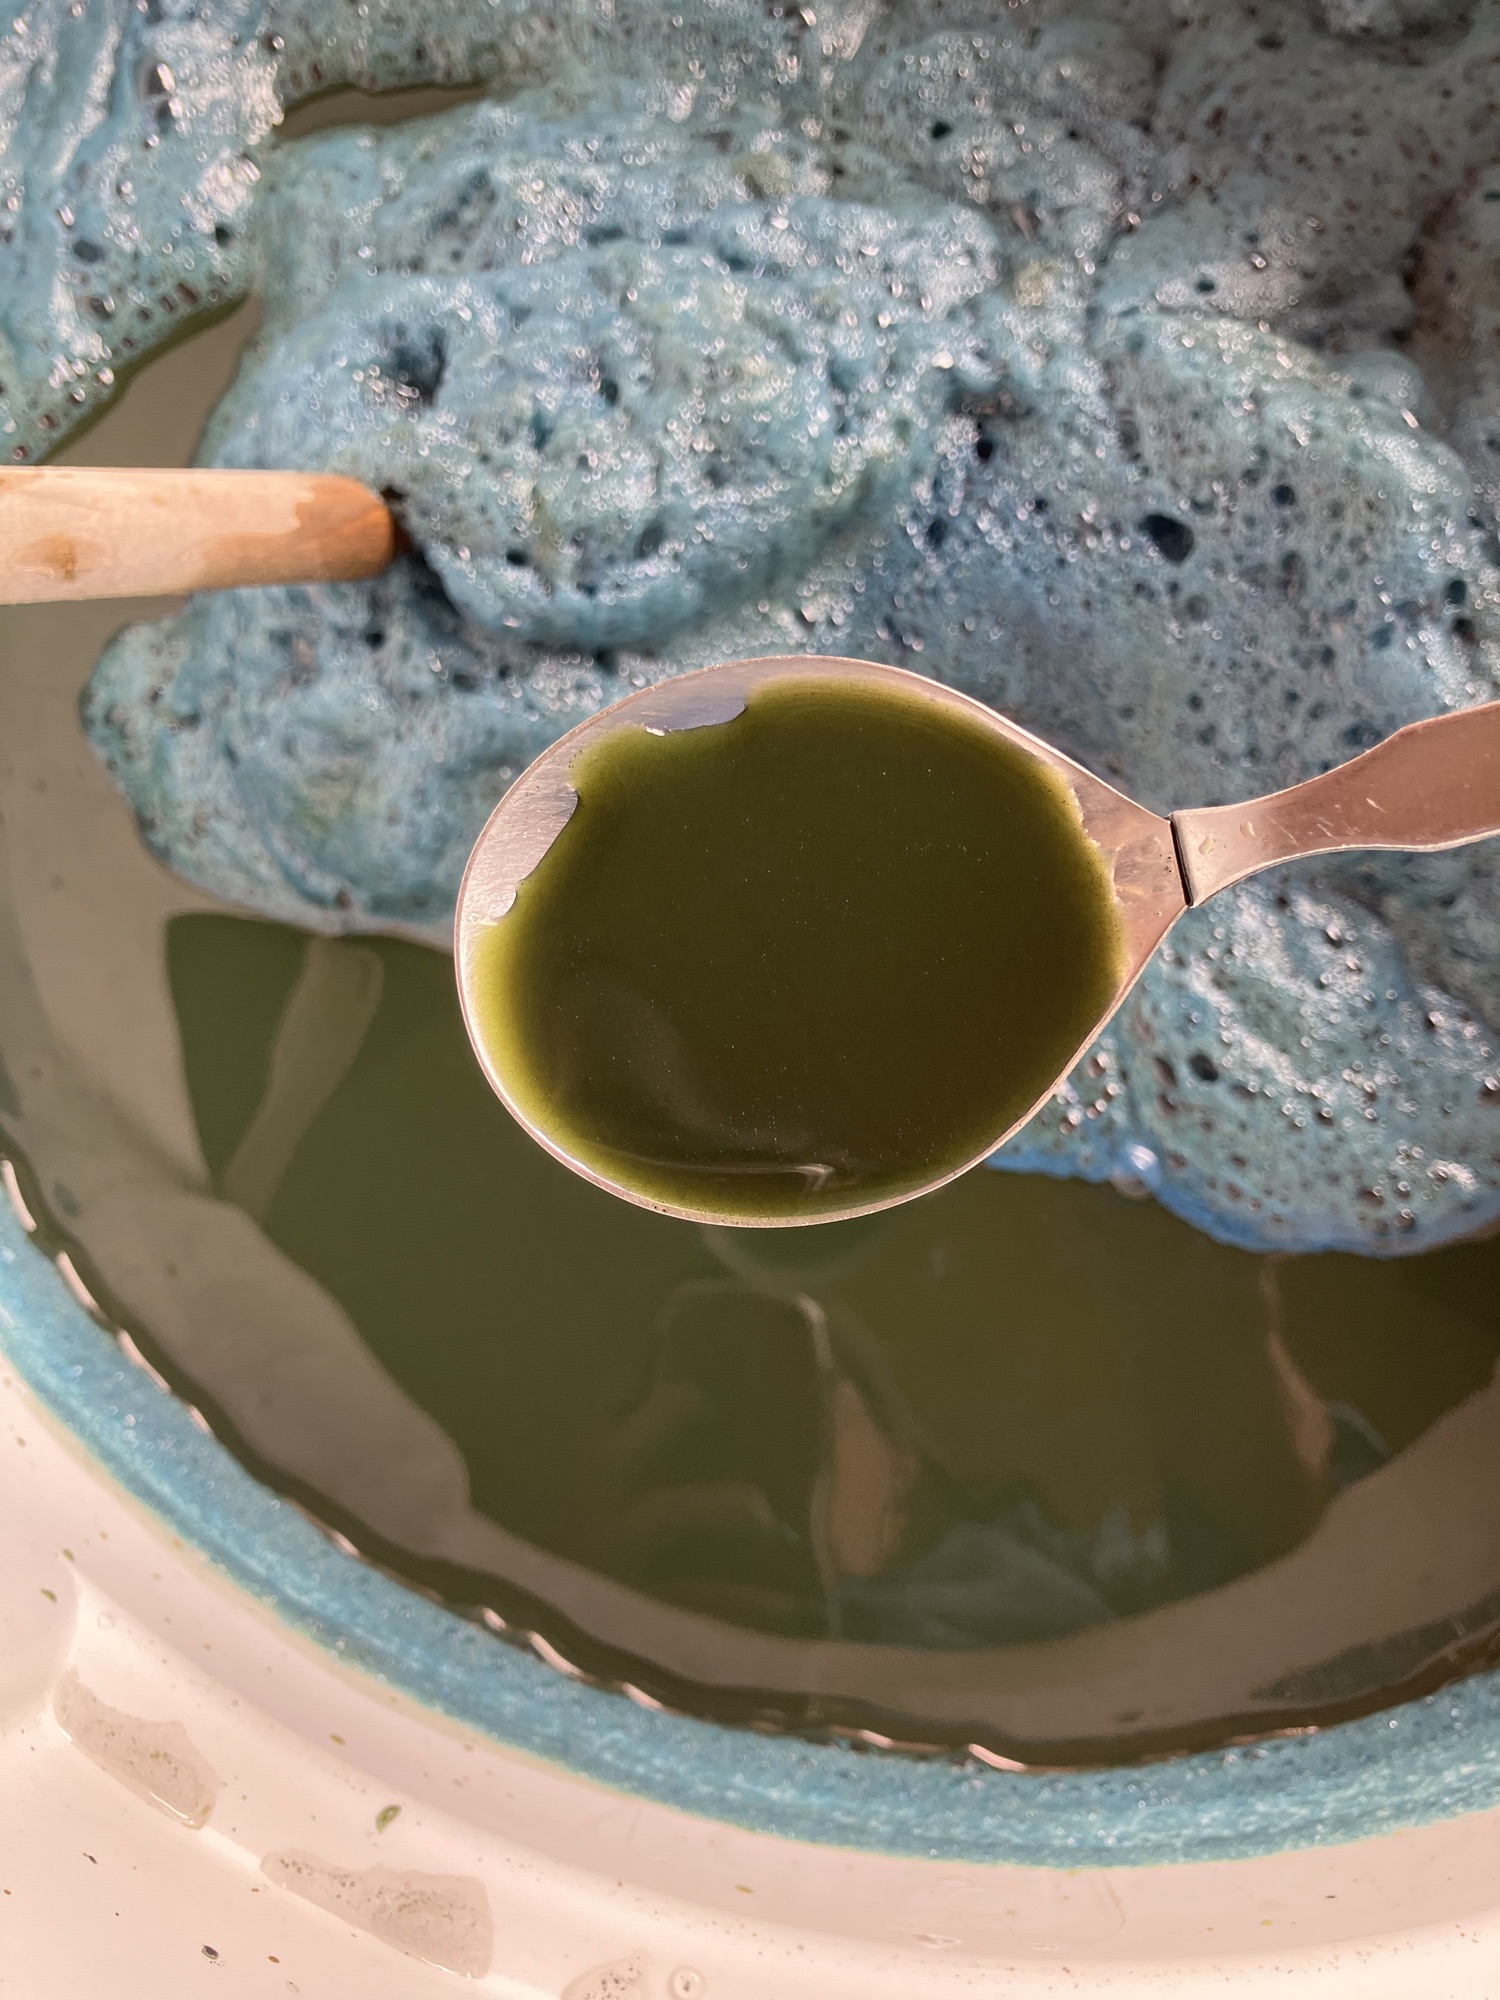
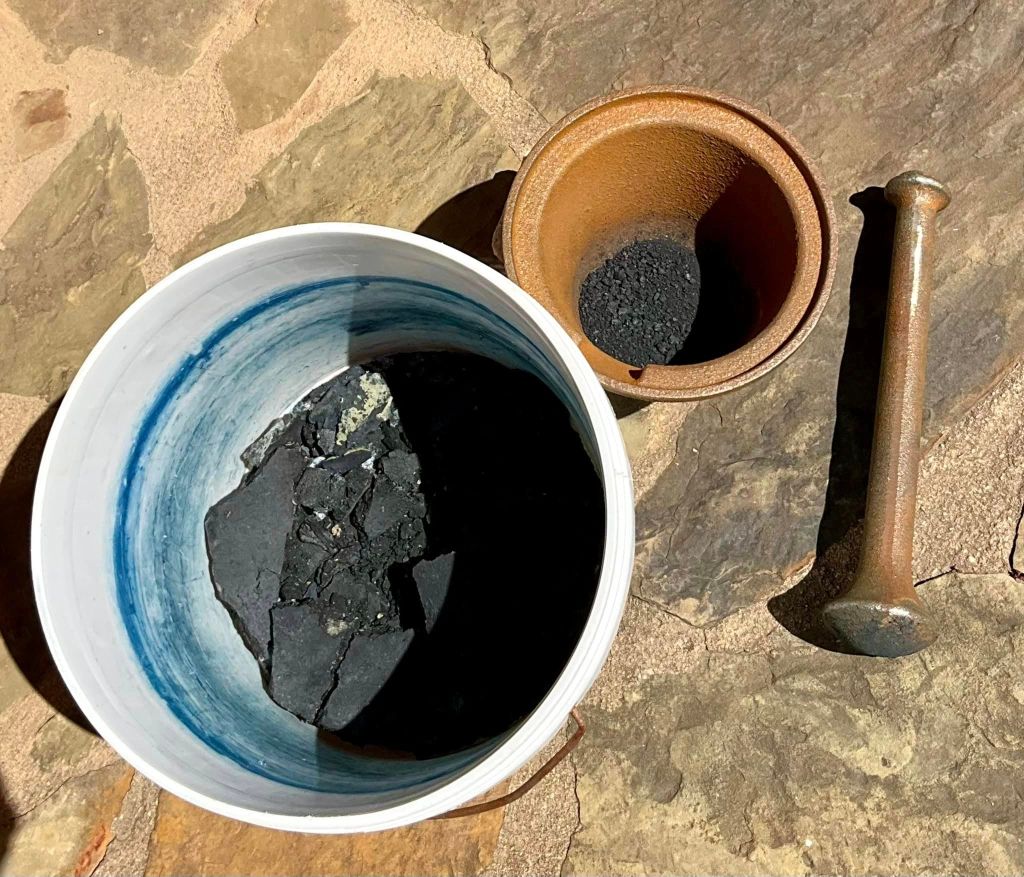
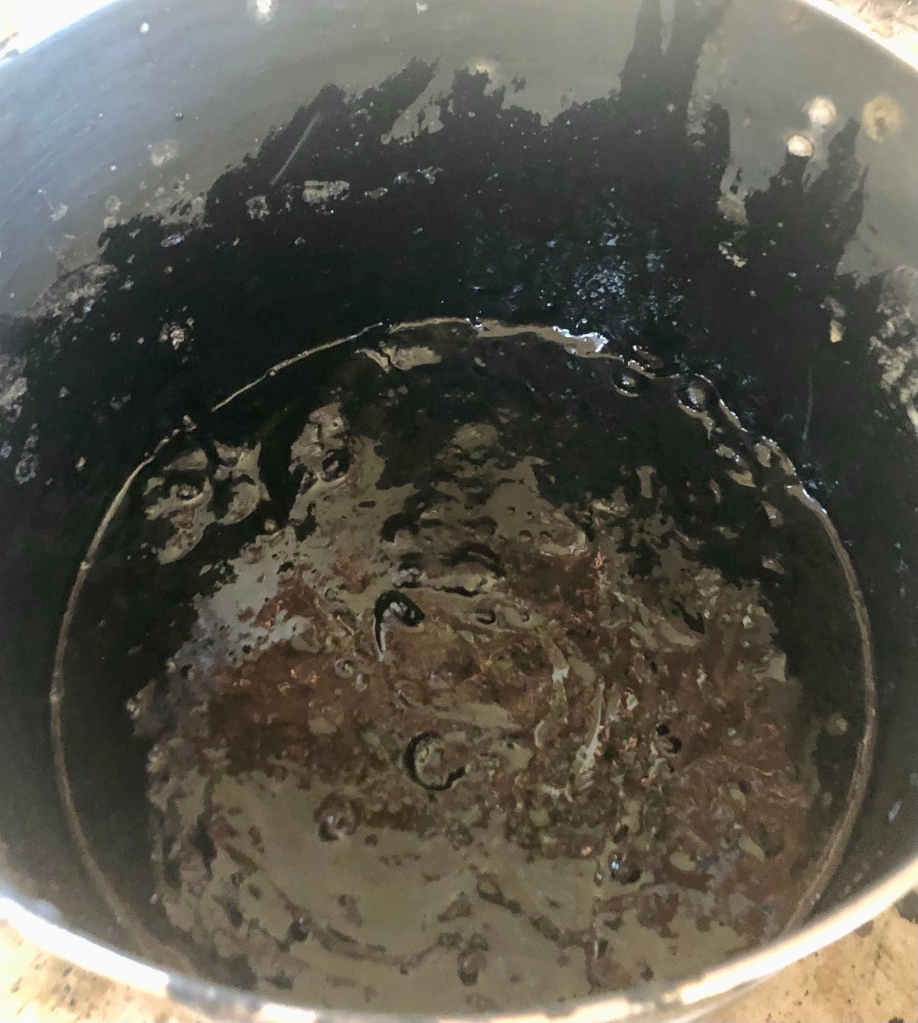
Pasting the leftover lumps. This is washed & dried pigment from my large Fructose vat. I wash my old fructose paste with 9% vinegar to remove the calcium carbonate and drain thru filters. Solely for the purpose of removing sludge volume and storage. We will find out how the pigment works after washing on a large scale.
My plan is to find out if same process works for “iron sludge”. I do NOT know if this process works for iron vat sludge or the chemical impact, yet. I need to create some iron sludge. Hence this vat is starting up. The Sapa indigo dyers use their pigment season to season in a wood ash vat. I decided to try using vinegar to reduce the calcium in a sludge reduction effort and clean up for use.
Old lady way of moving water from point A to point B
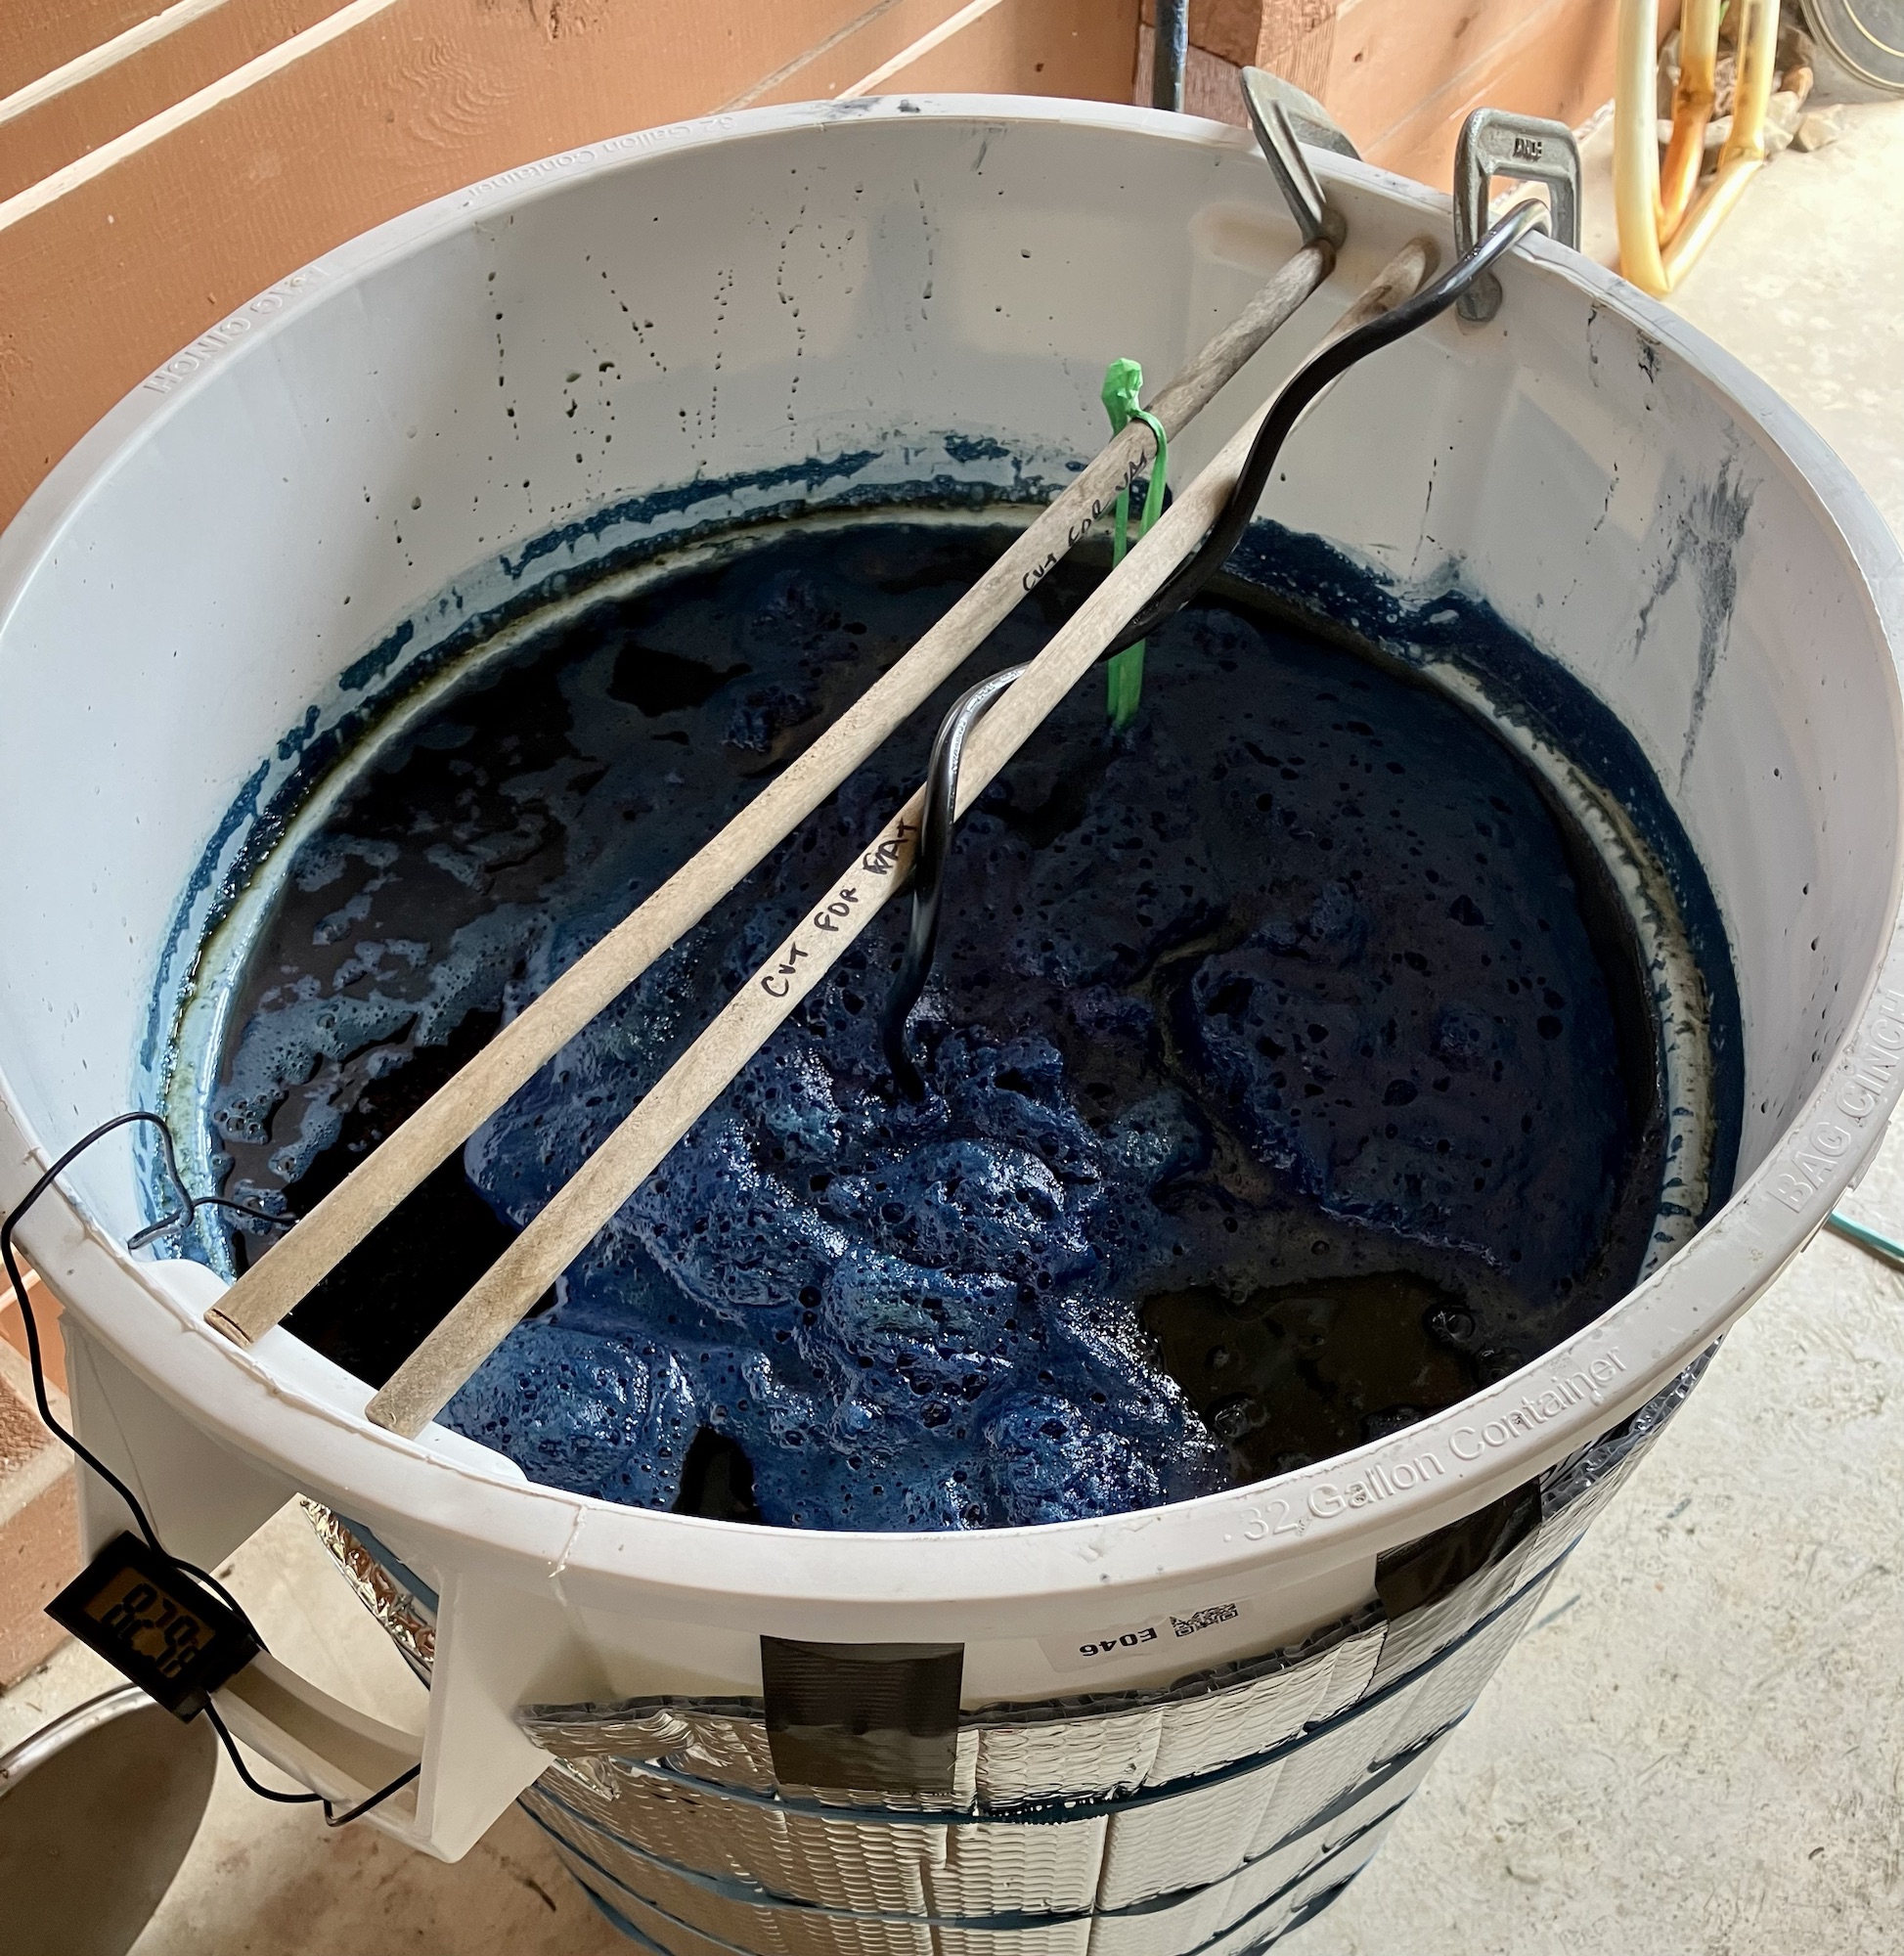
Nice & soupy, time to stir.
Stirring & stirring
Now I heat & wait for reduction. My sticks that support my heater are sitting on the handle indents within the bucket. No holes were made. I suppose holes would be safer. To me, if the sticks were left in place in the holes not much heat would escape. More importantly, I would be concerned with disturbing the structural integrity of the bucket sides by putting holes into the plastic. I am leaning towards putting holes or screw eyes in sticks and hold sticks by tying the handle. Right now I am still developing a relationship with my vat configuration. I’ll improve later.
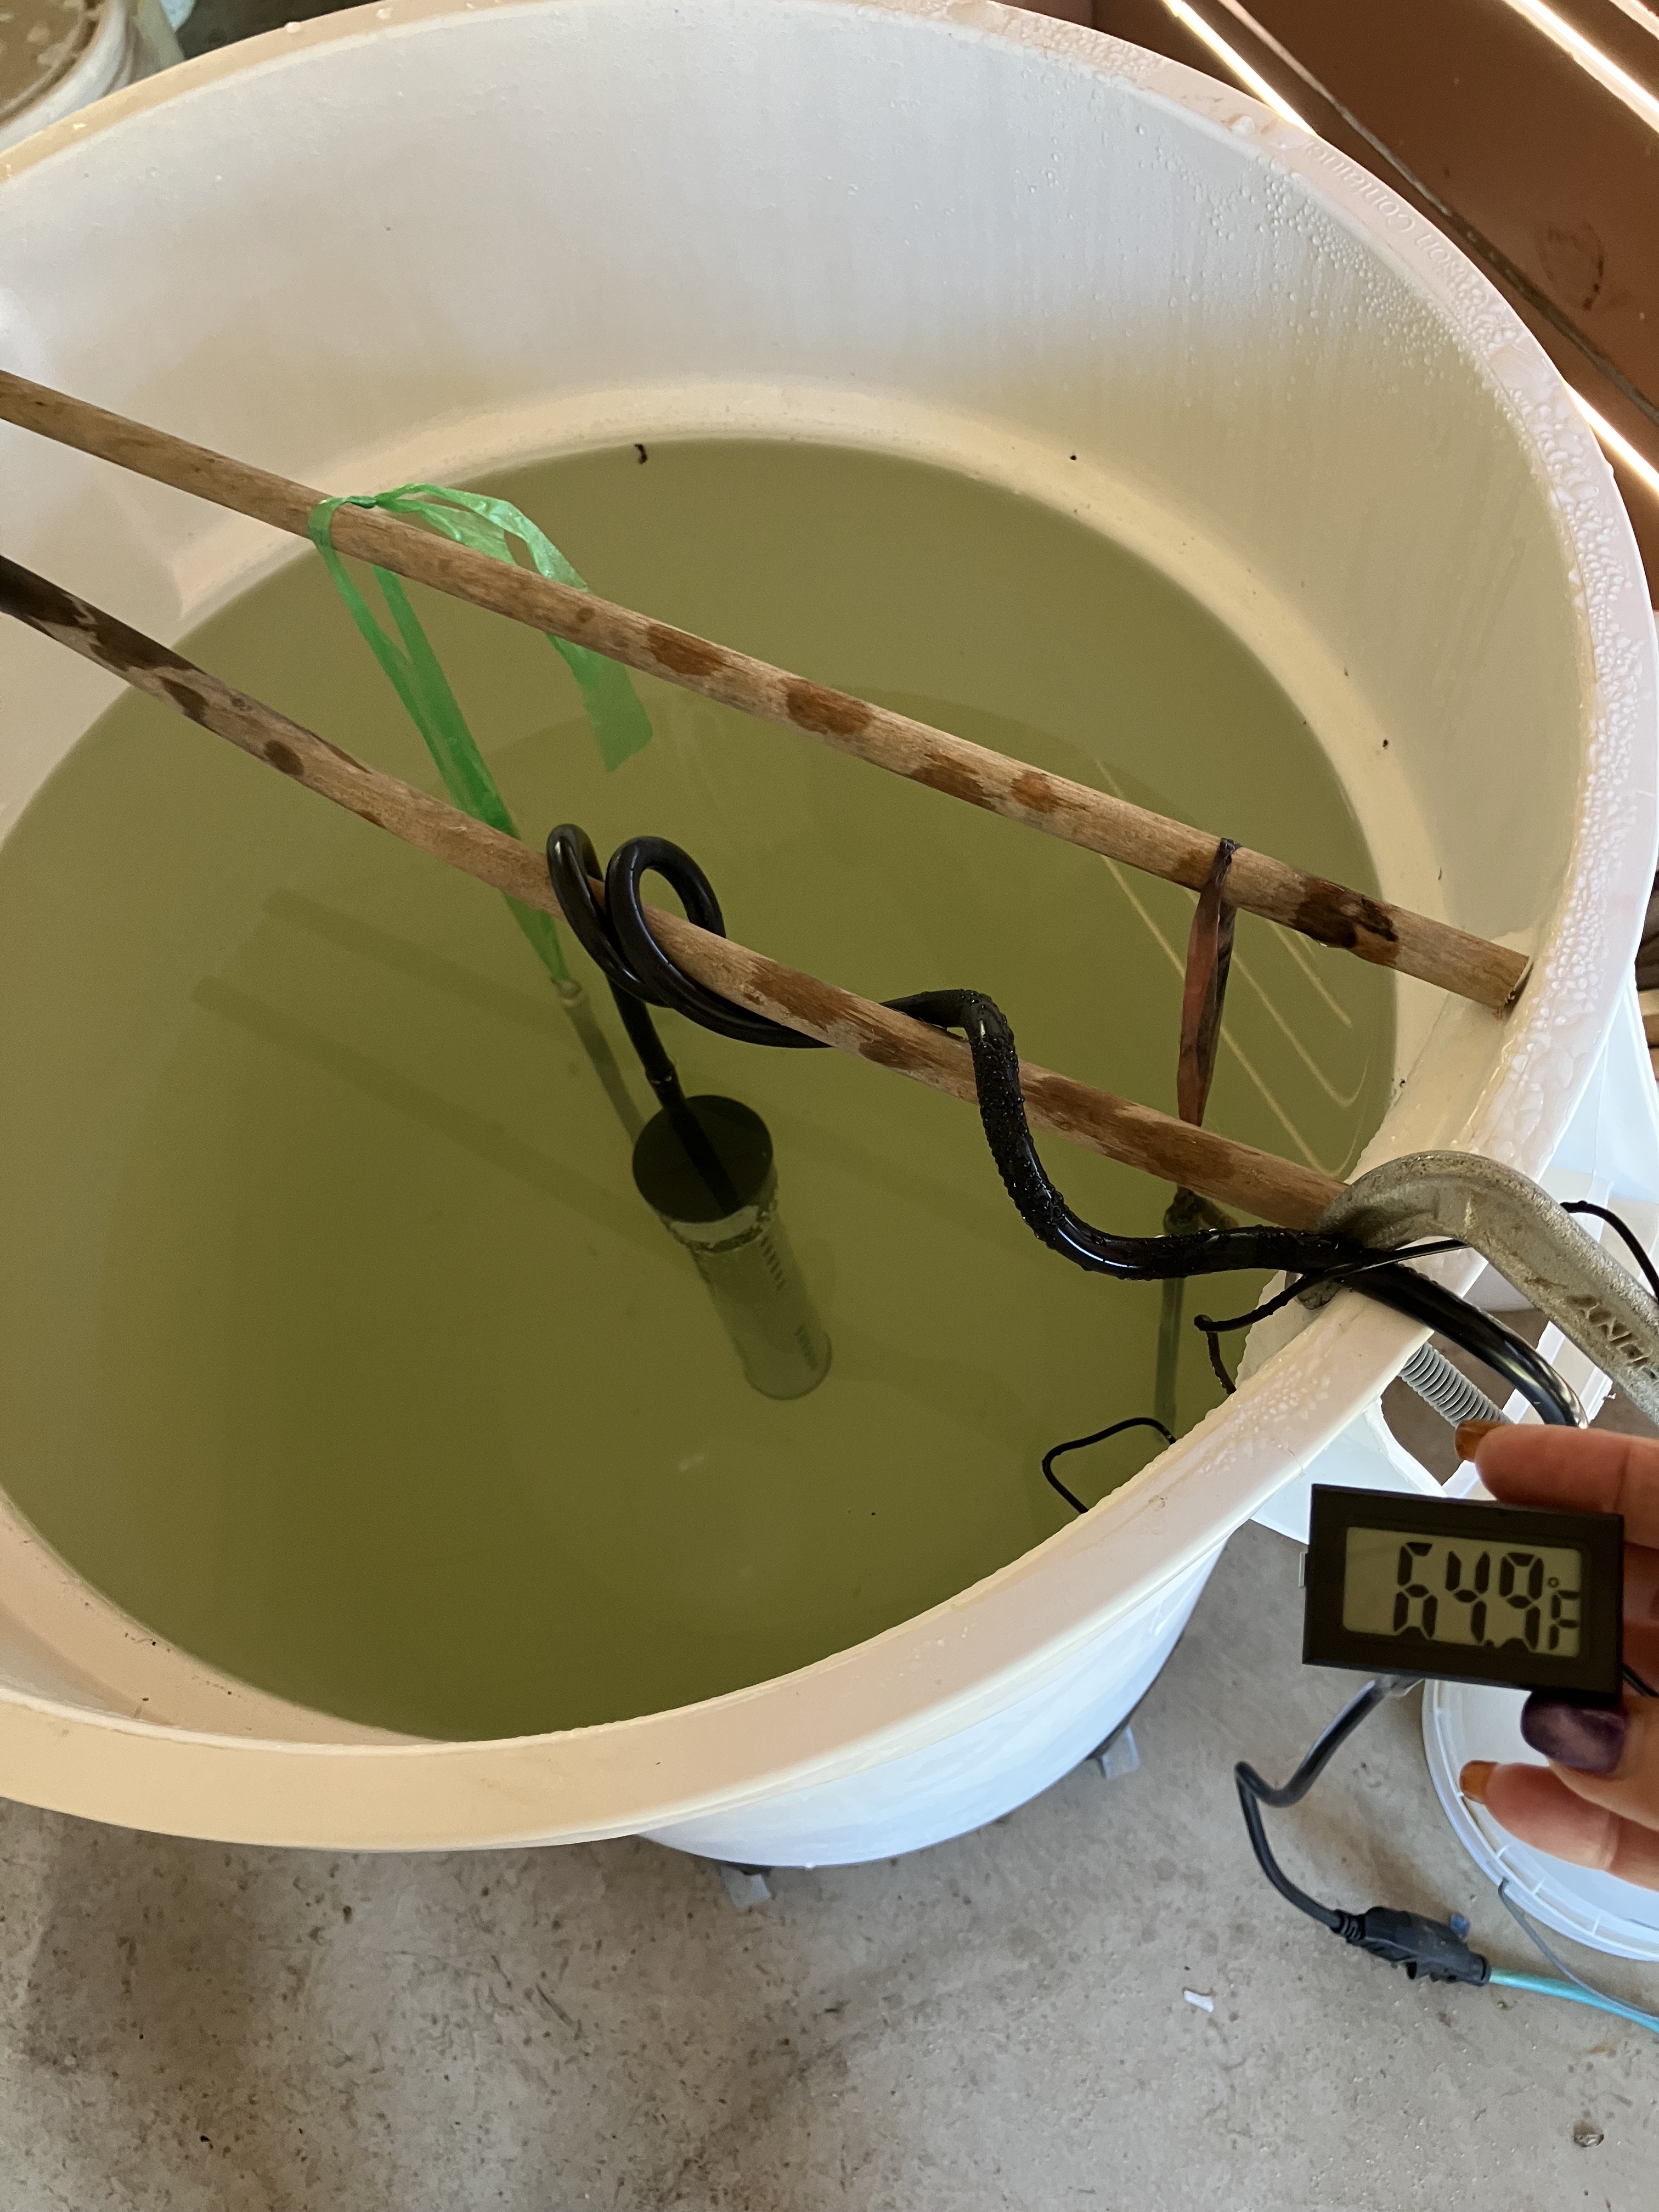
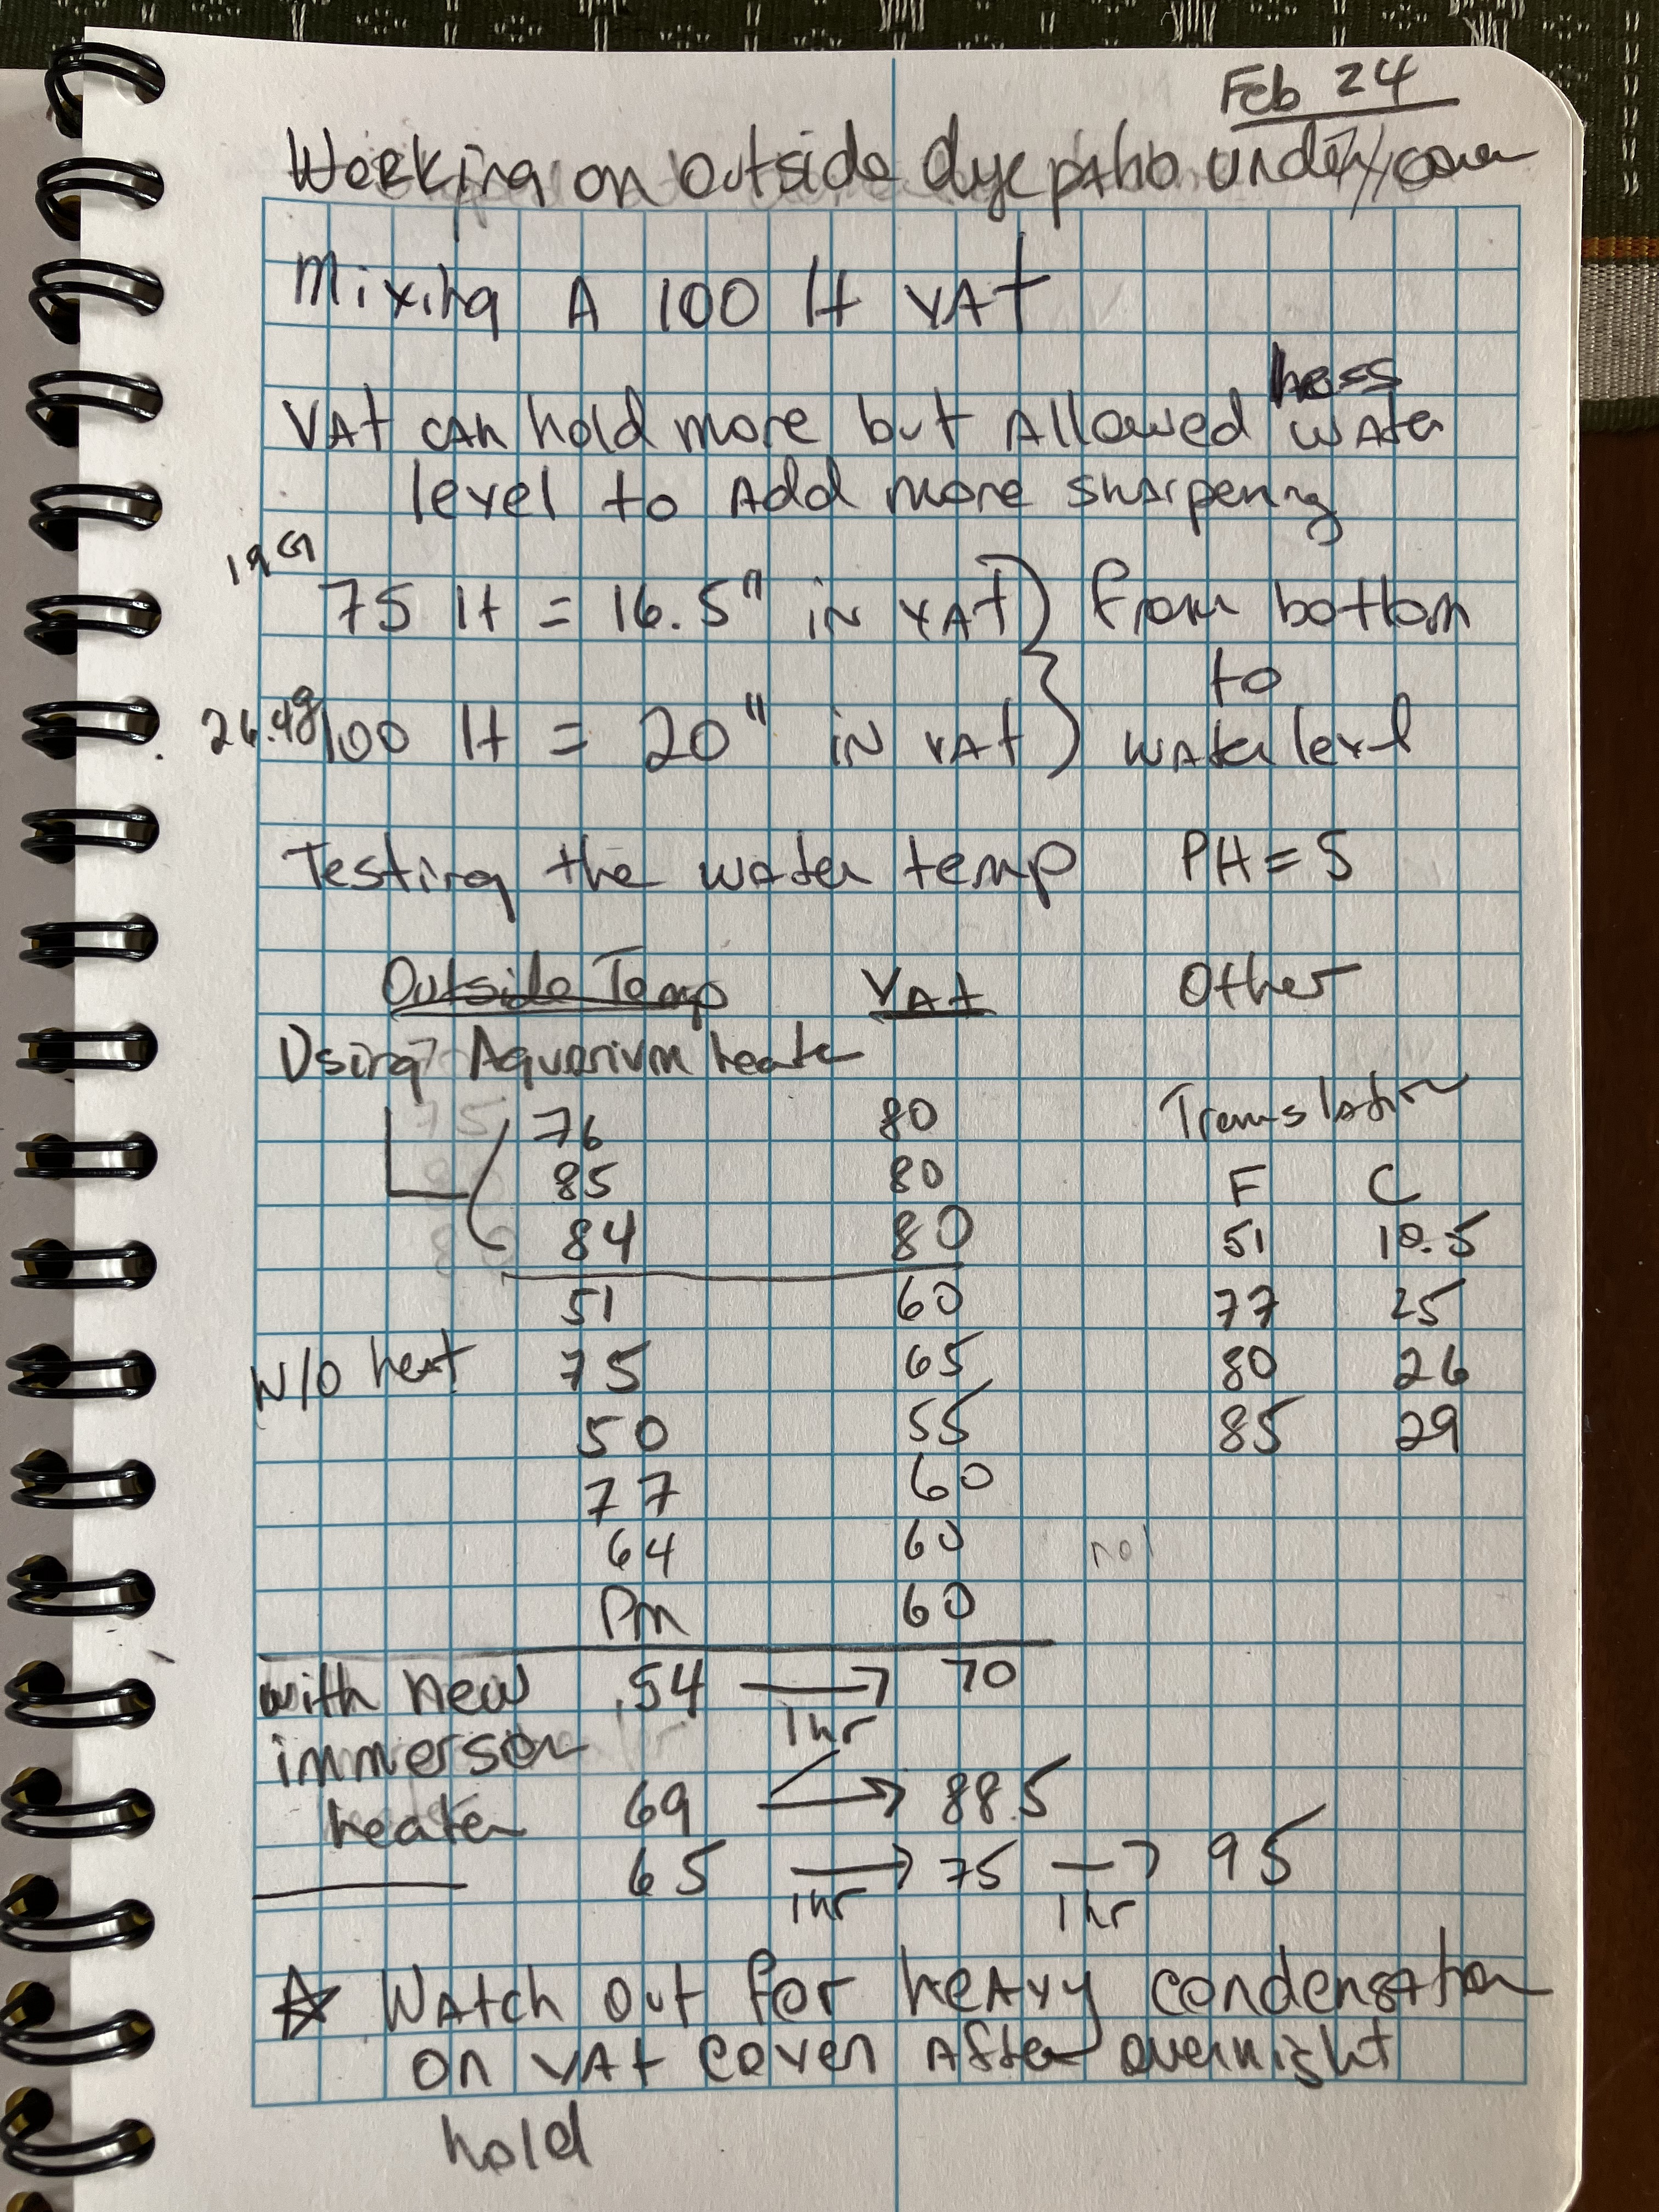
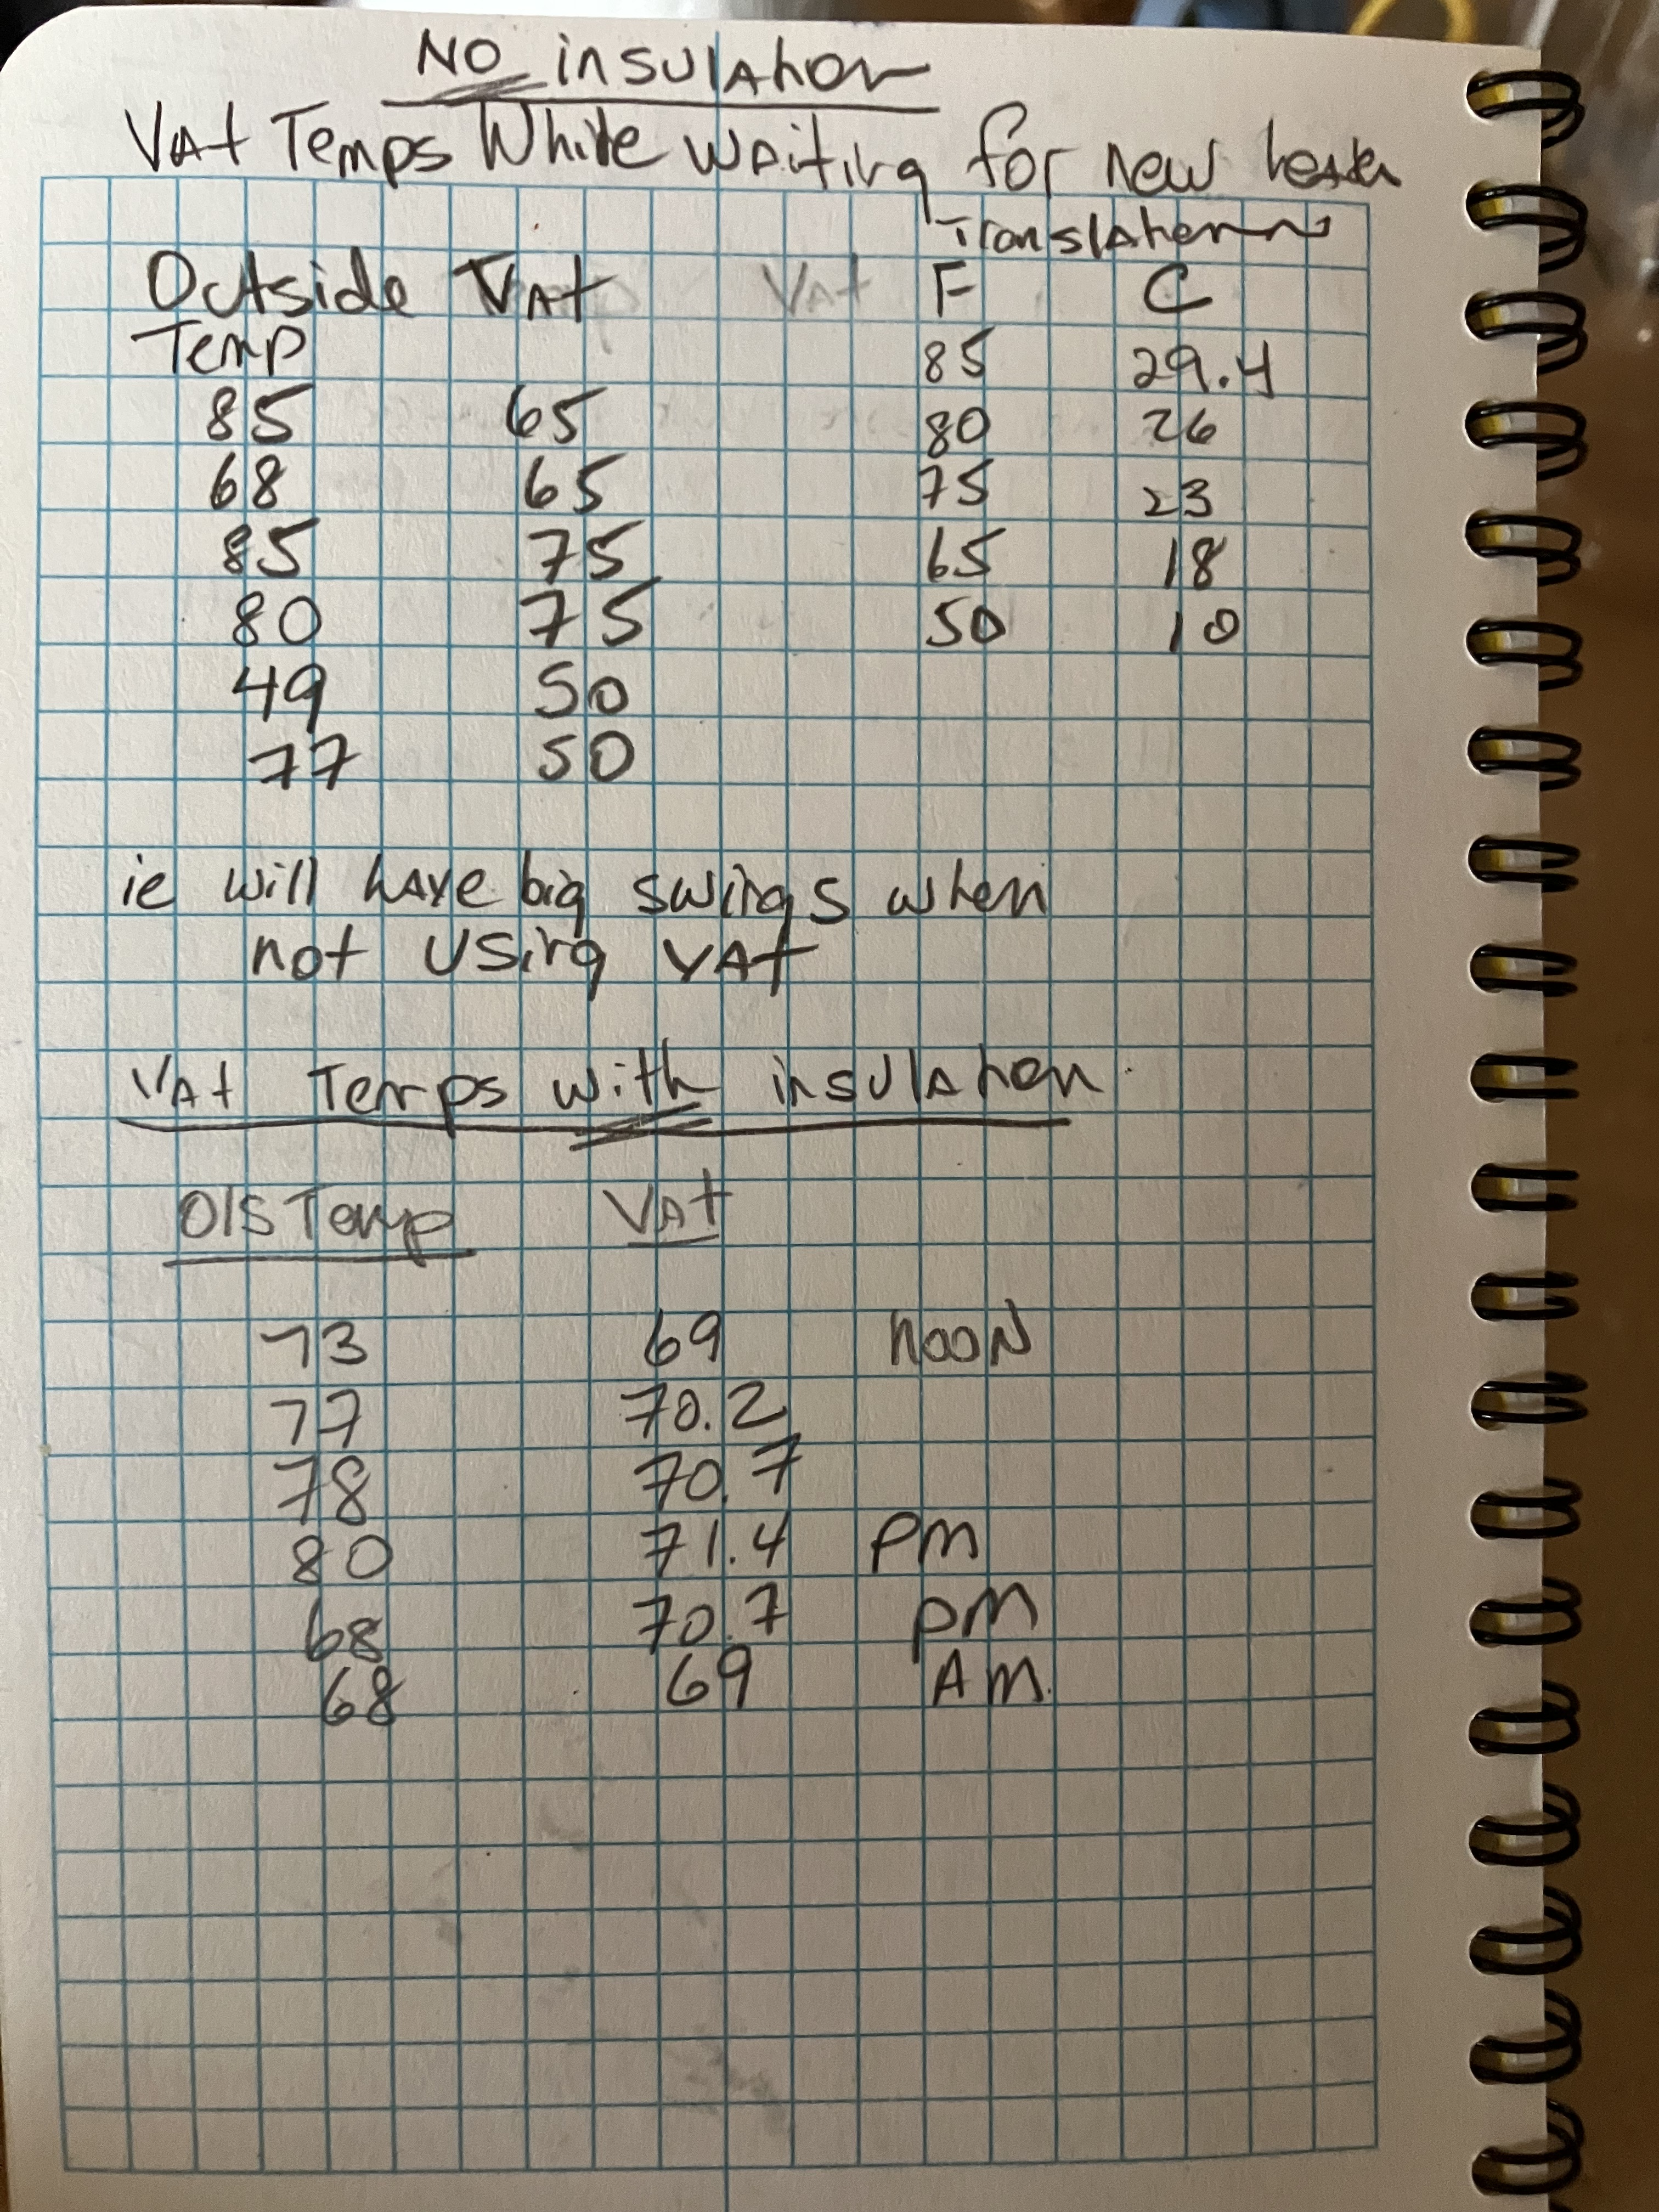
Monday was all about moving water, pasting indigo and prepping other ingredients. For me it is getting an idea of how many prep vessels one needs to dissolve everything properly. Earlier this month I tested temperatures on my outside dye patio in my new 100 liter vat with and without heat. I captured the temperature range info for future reference.
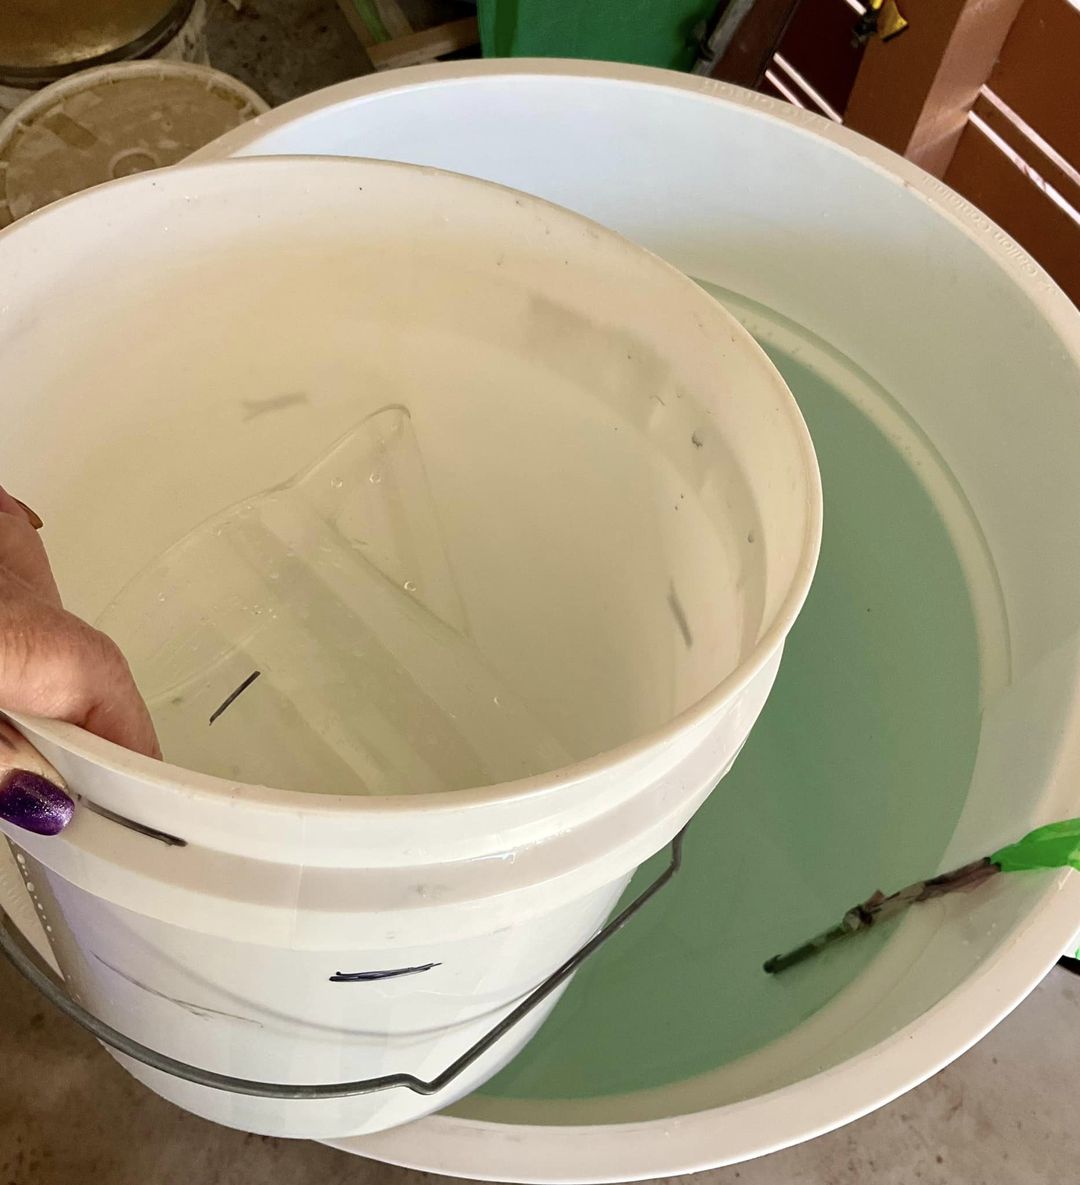
The vat is shaded from sun so I wanted to get an idea of the temperature range here in very early spring in the Texas Hill country. I measured the initial 100 liters to measure and see water depth for the proper water volume. Plus to see if I had any vessel leaks. Now time to move water and prep the ingredients to mix.
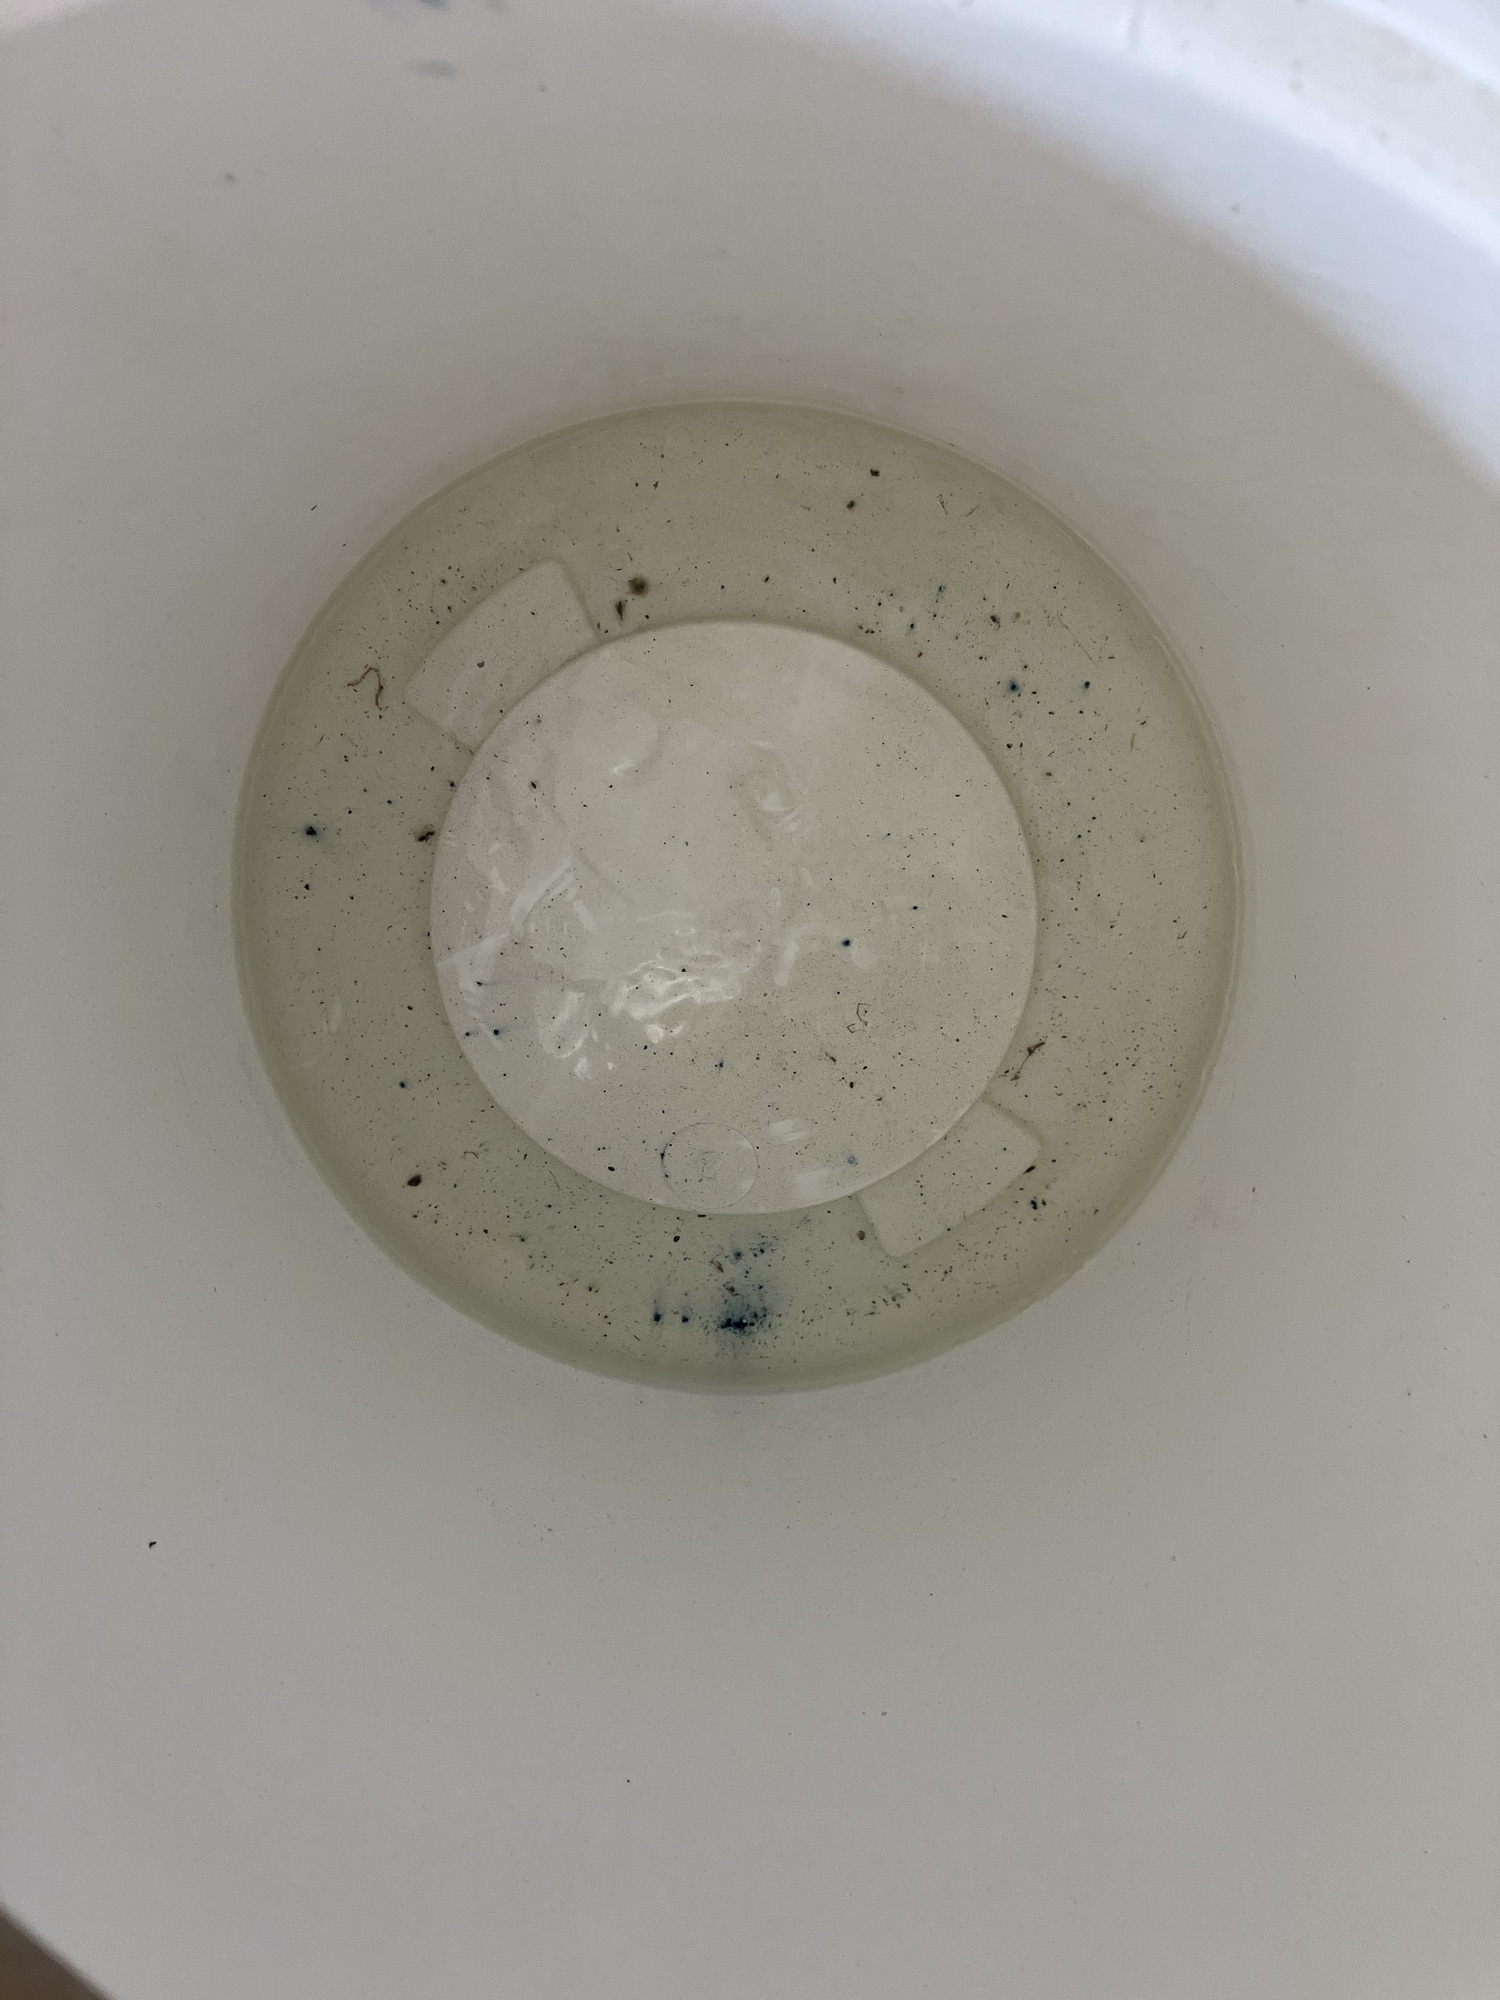
A ruler to record depth of 100 liter of water
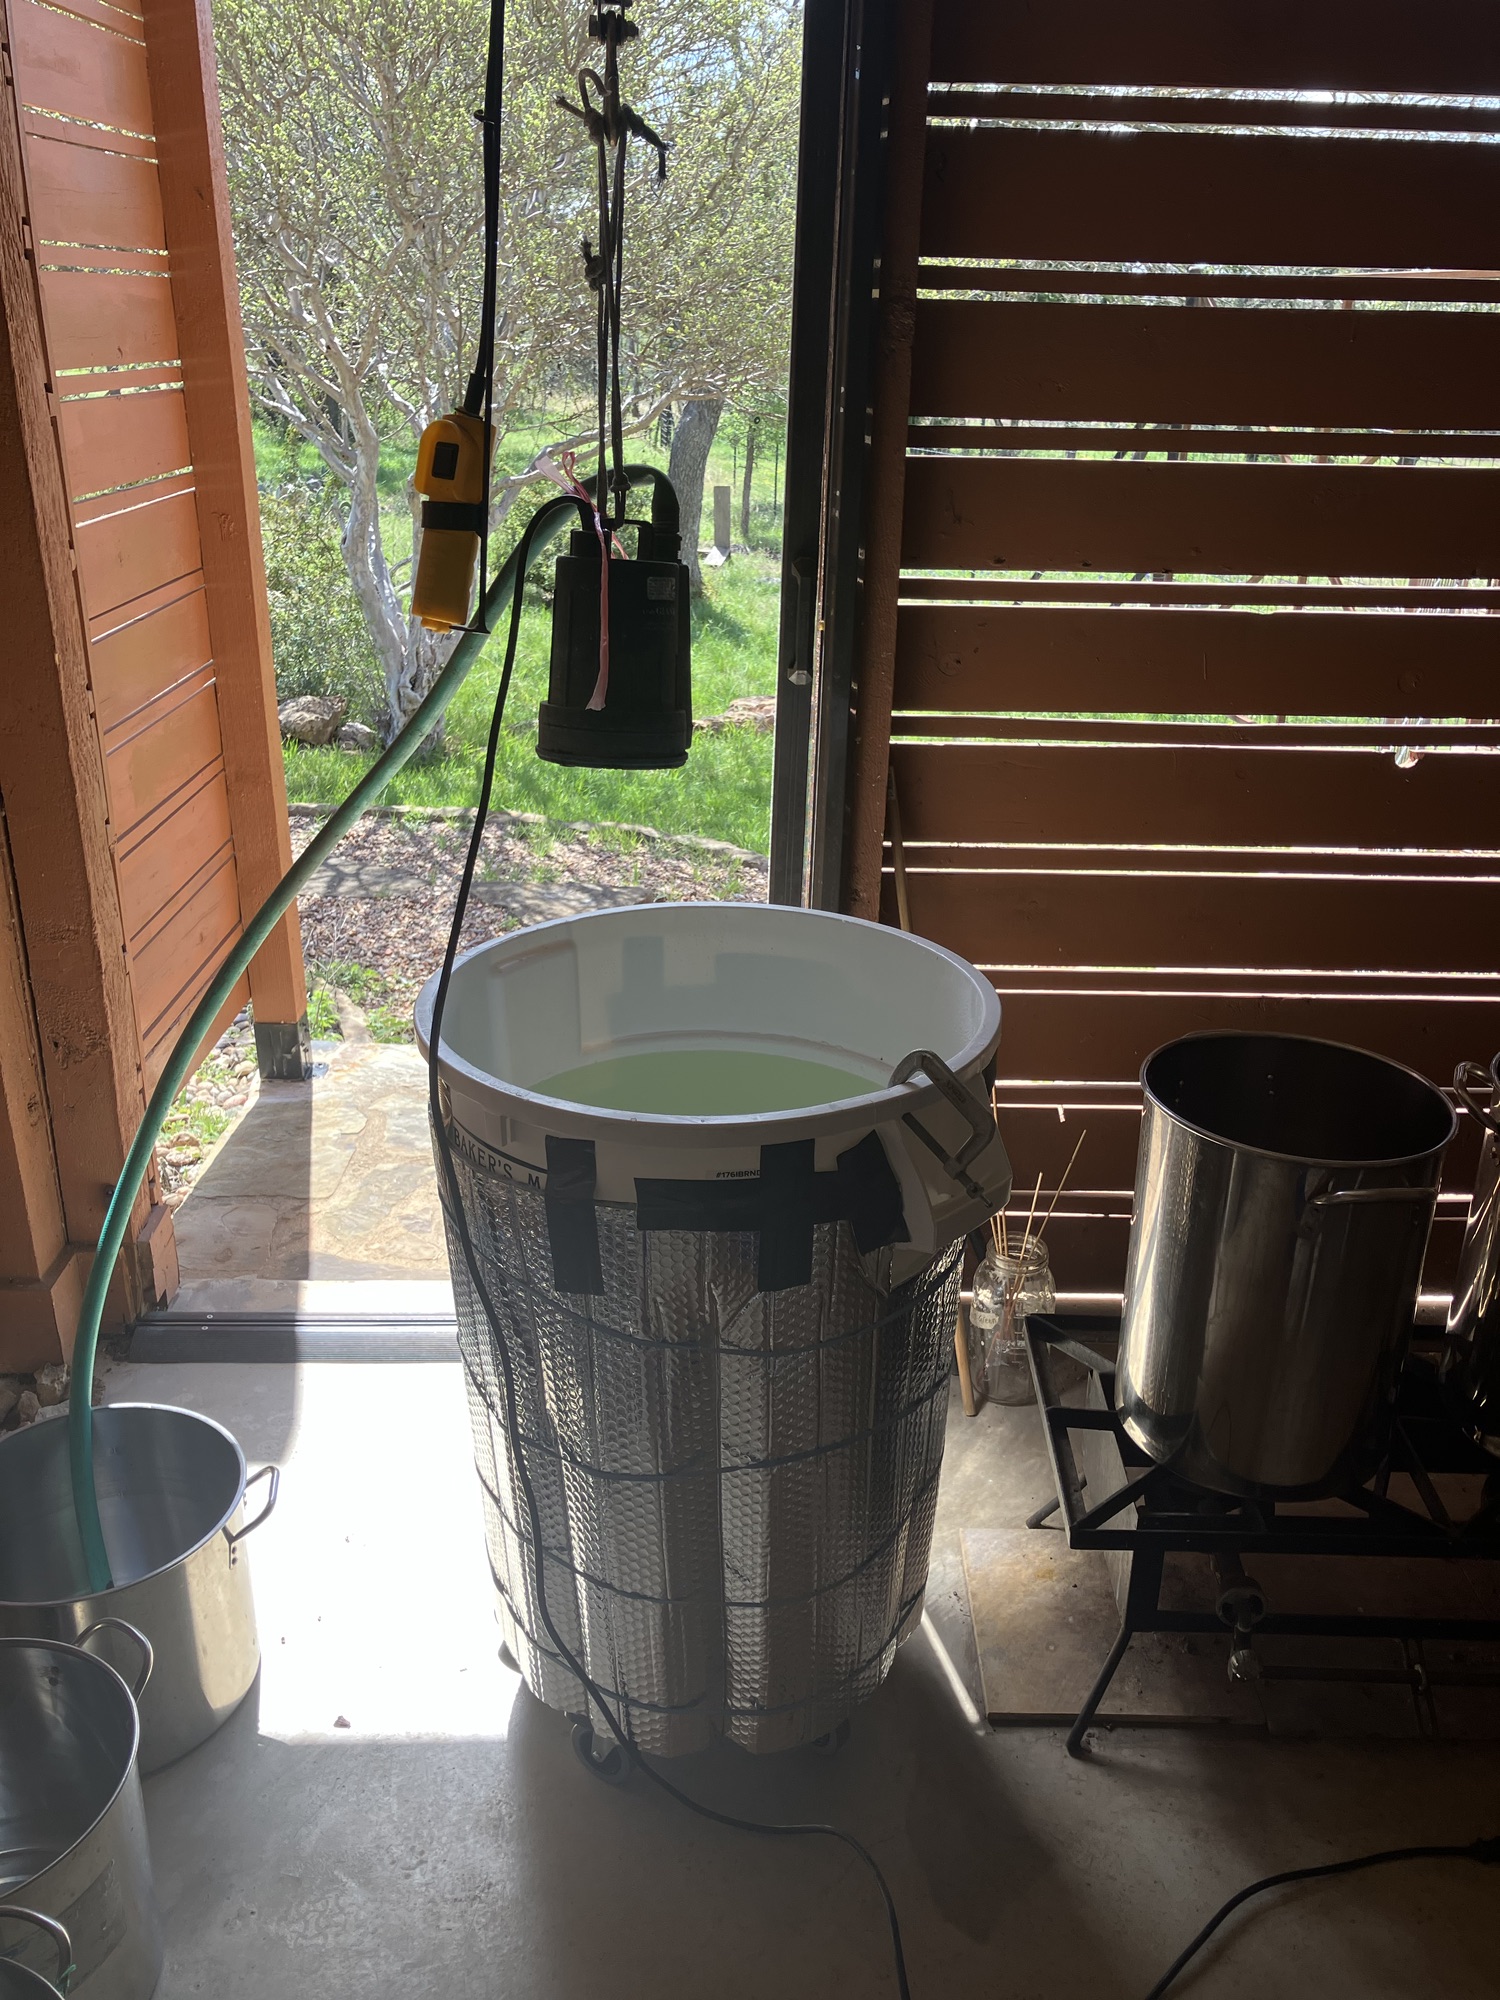
Now time to move water and prep the ingredients to mix. My husband and a good friend decided I needed a hoist to lift heavy loads a couple of years back. I thank them mentally every time I use it to avoid stressing old back & arm surgeries. This time I combined using the hoist with my sump pump and quickly moved water out of the vat into various containers to start dissolving ingredients.
A sump pump makes easy work of moving water
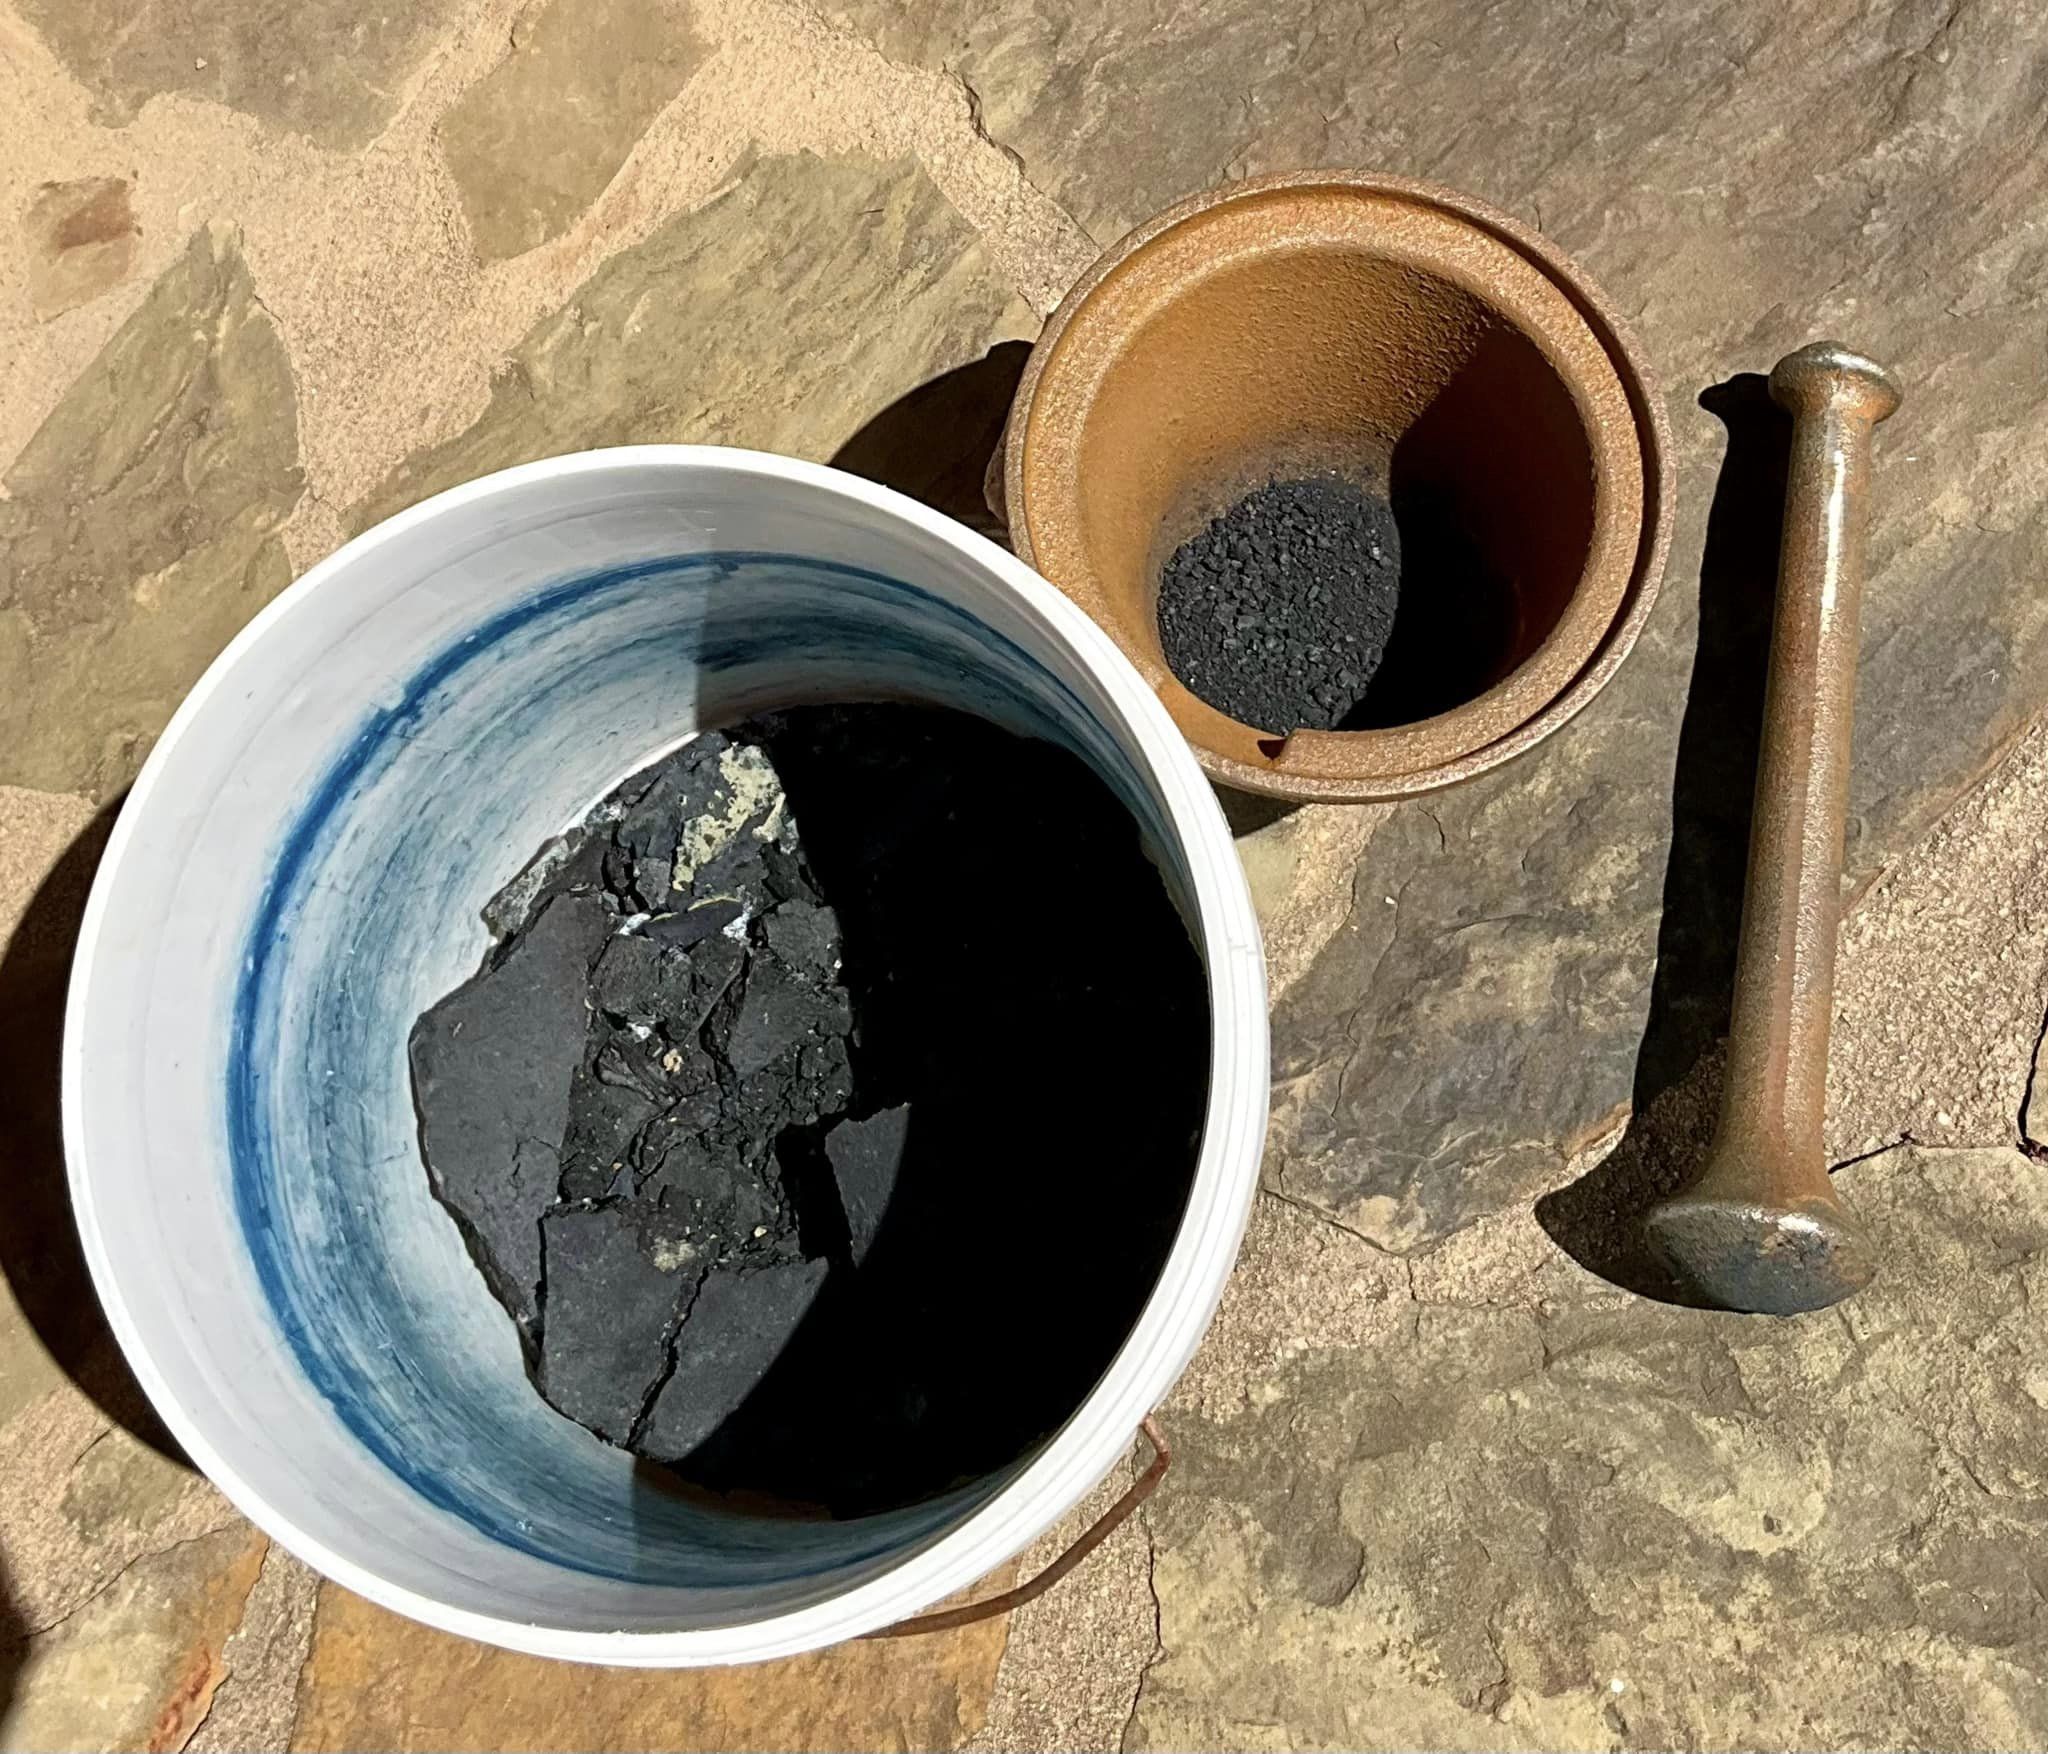
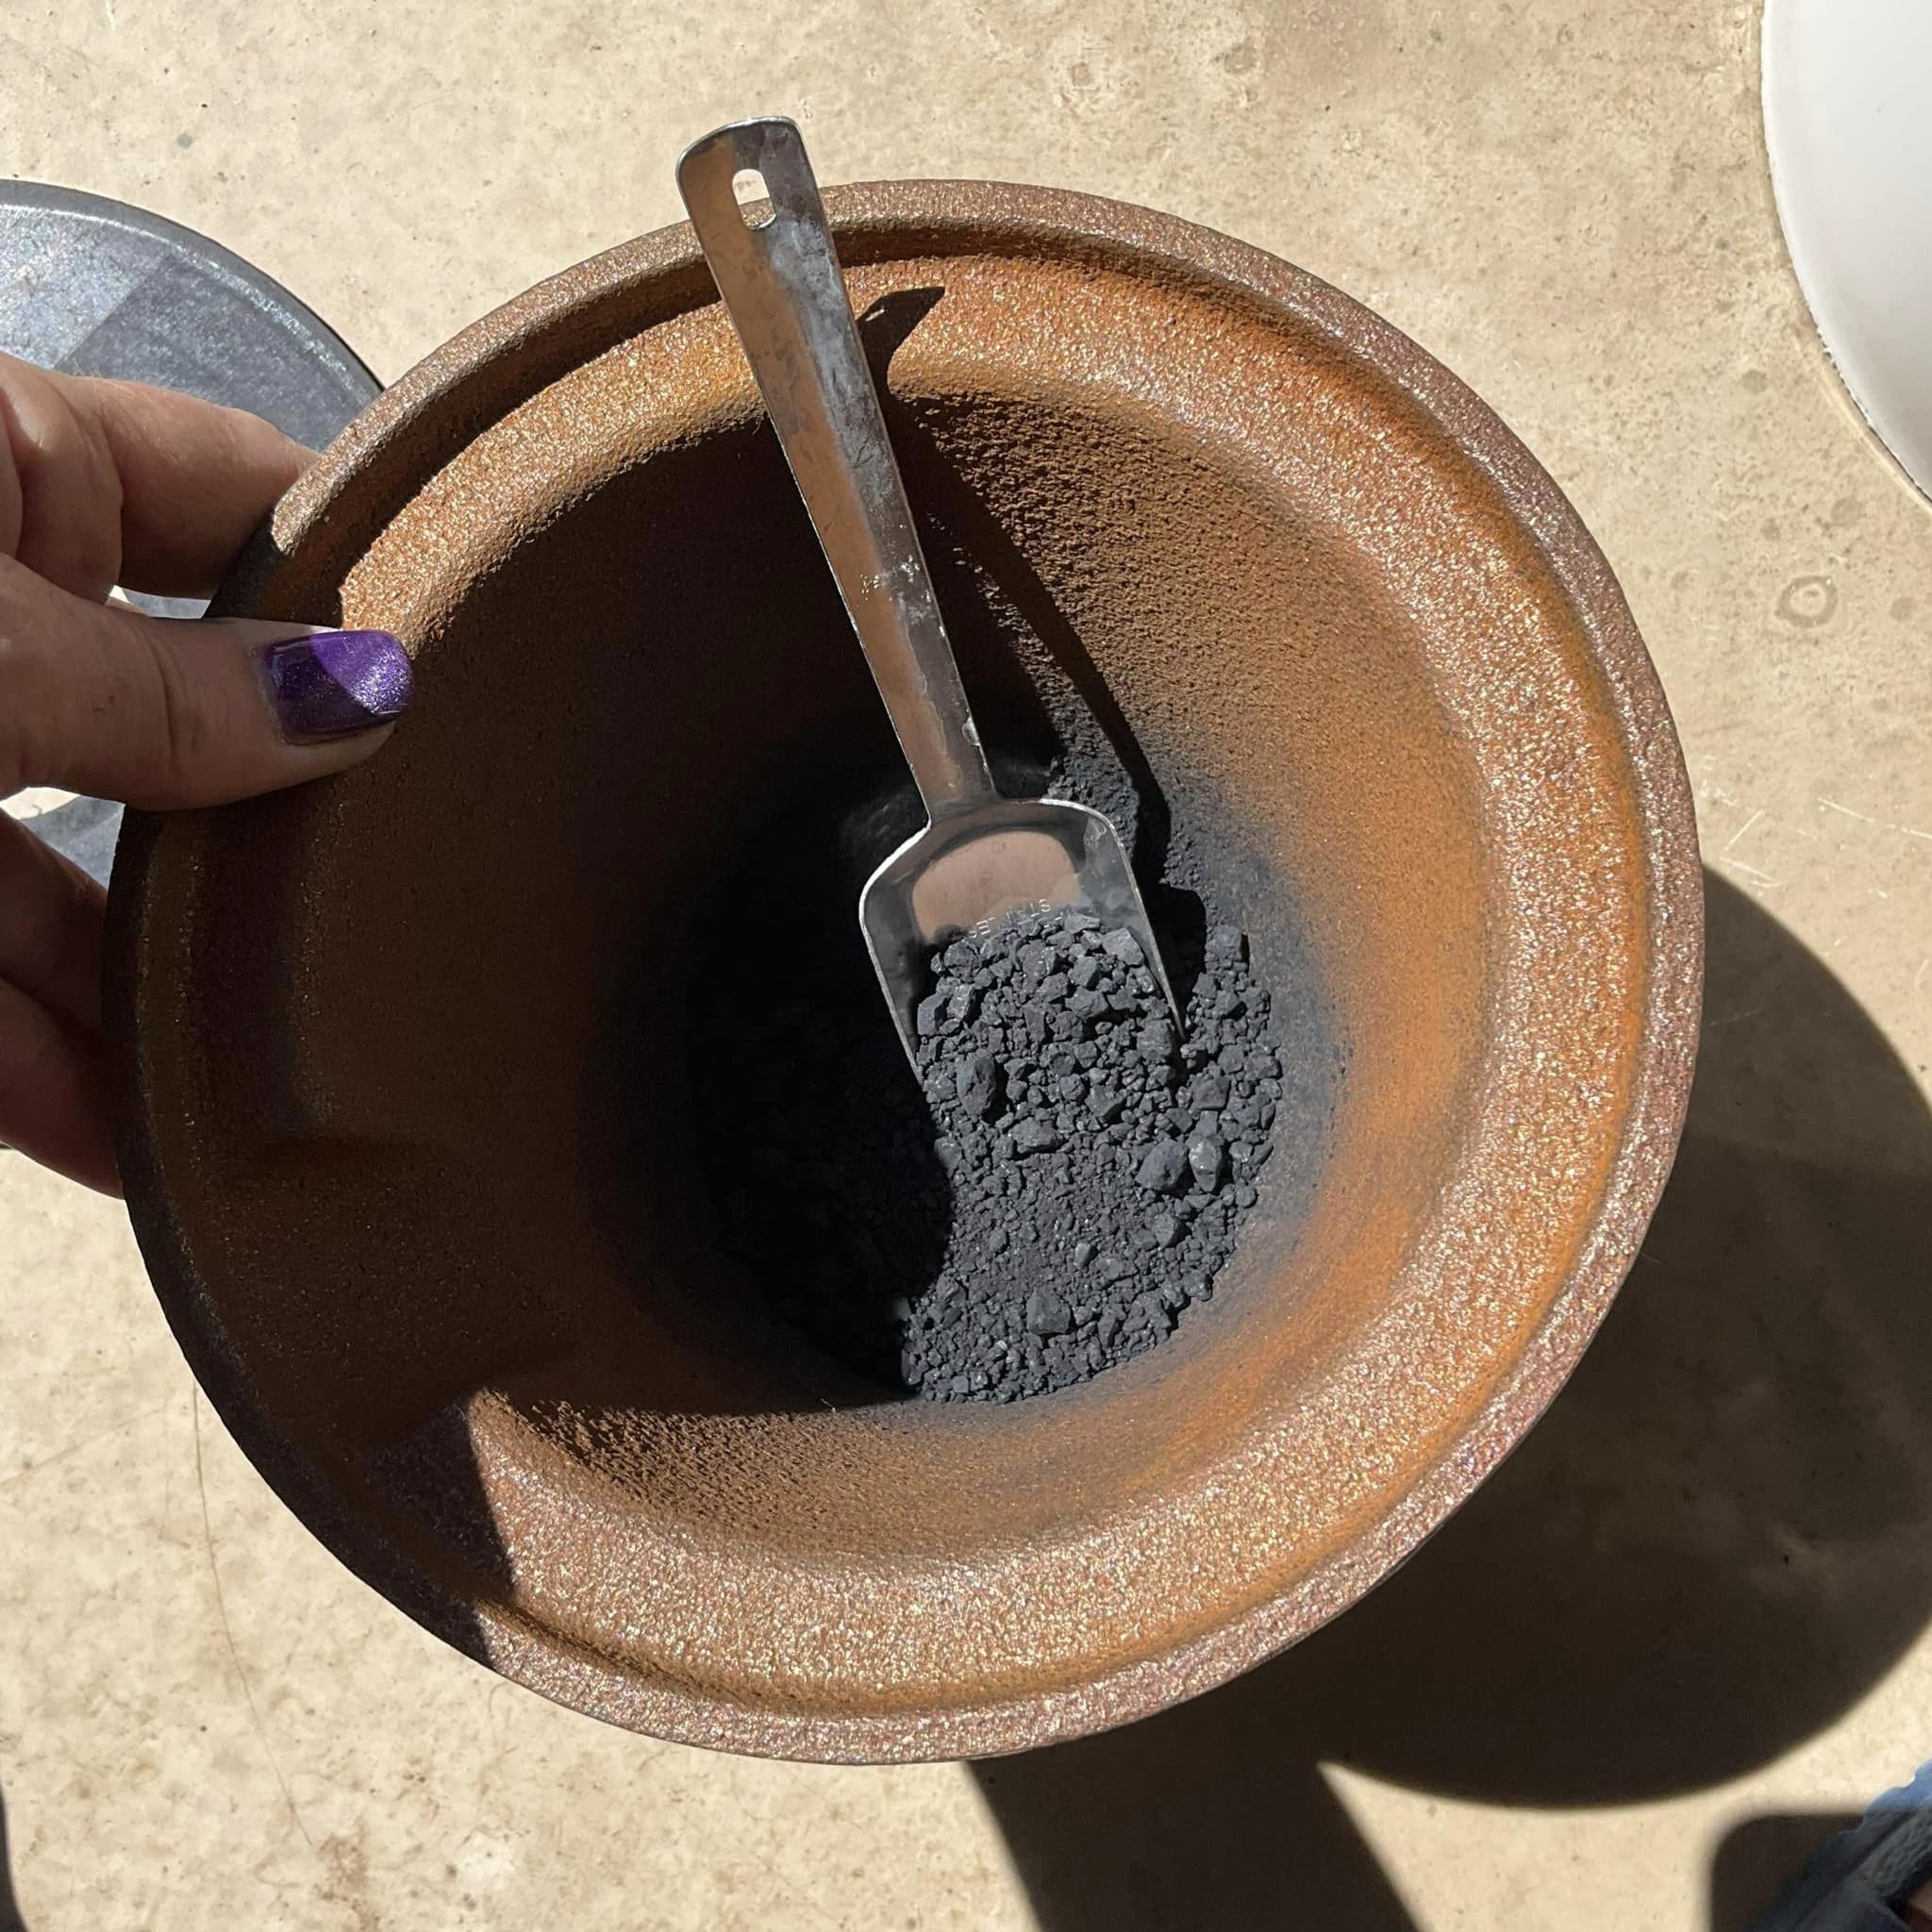
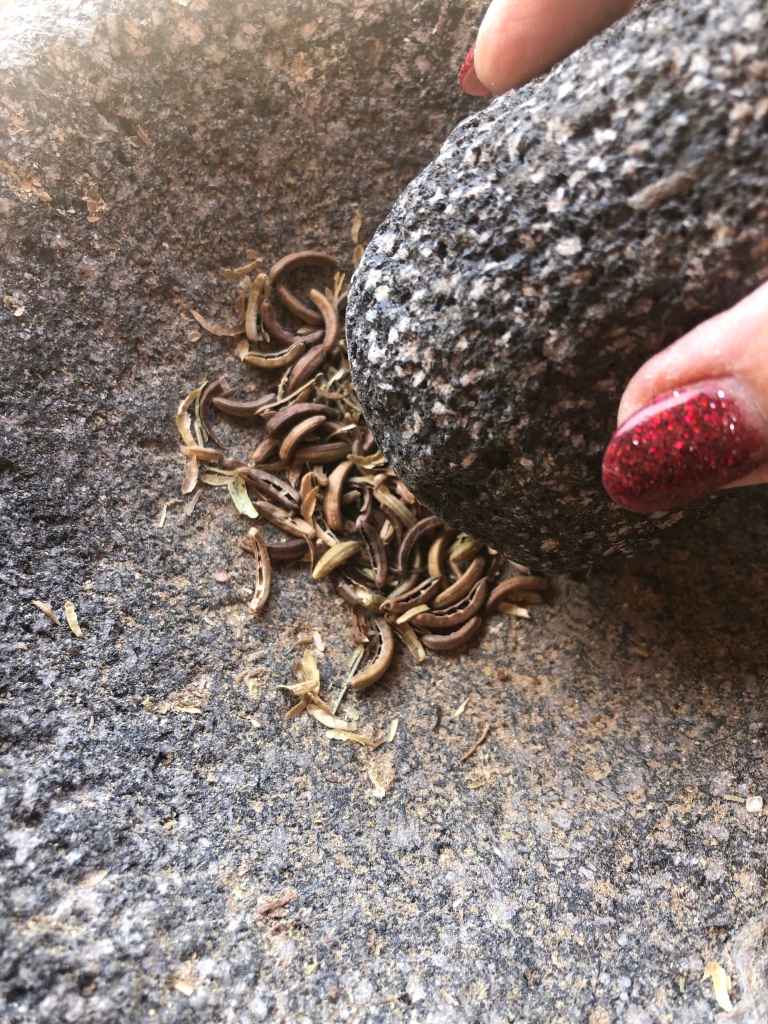
Next I pasted my indigo, a technique taught by Aboubakar Fofar at a master’s class at Botanical Colors. Think pudding consistency, you paste your indigo to the consistency of pudding, smoothly suspending your pigment in water. I had been working on breaking down washed pigment to powder from my large fructose vat. This pigment has hardened over the winter after vinegar washing to remove excess calcium carbonate. I had to spend some quality time with my mortar and pestle grinding the indigo to powder.
Testing vinegar washed pigment from last year’s vat
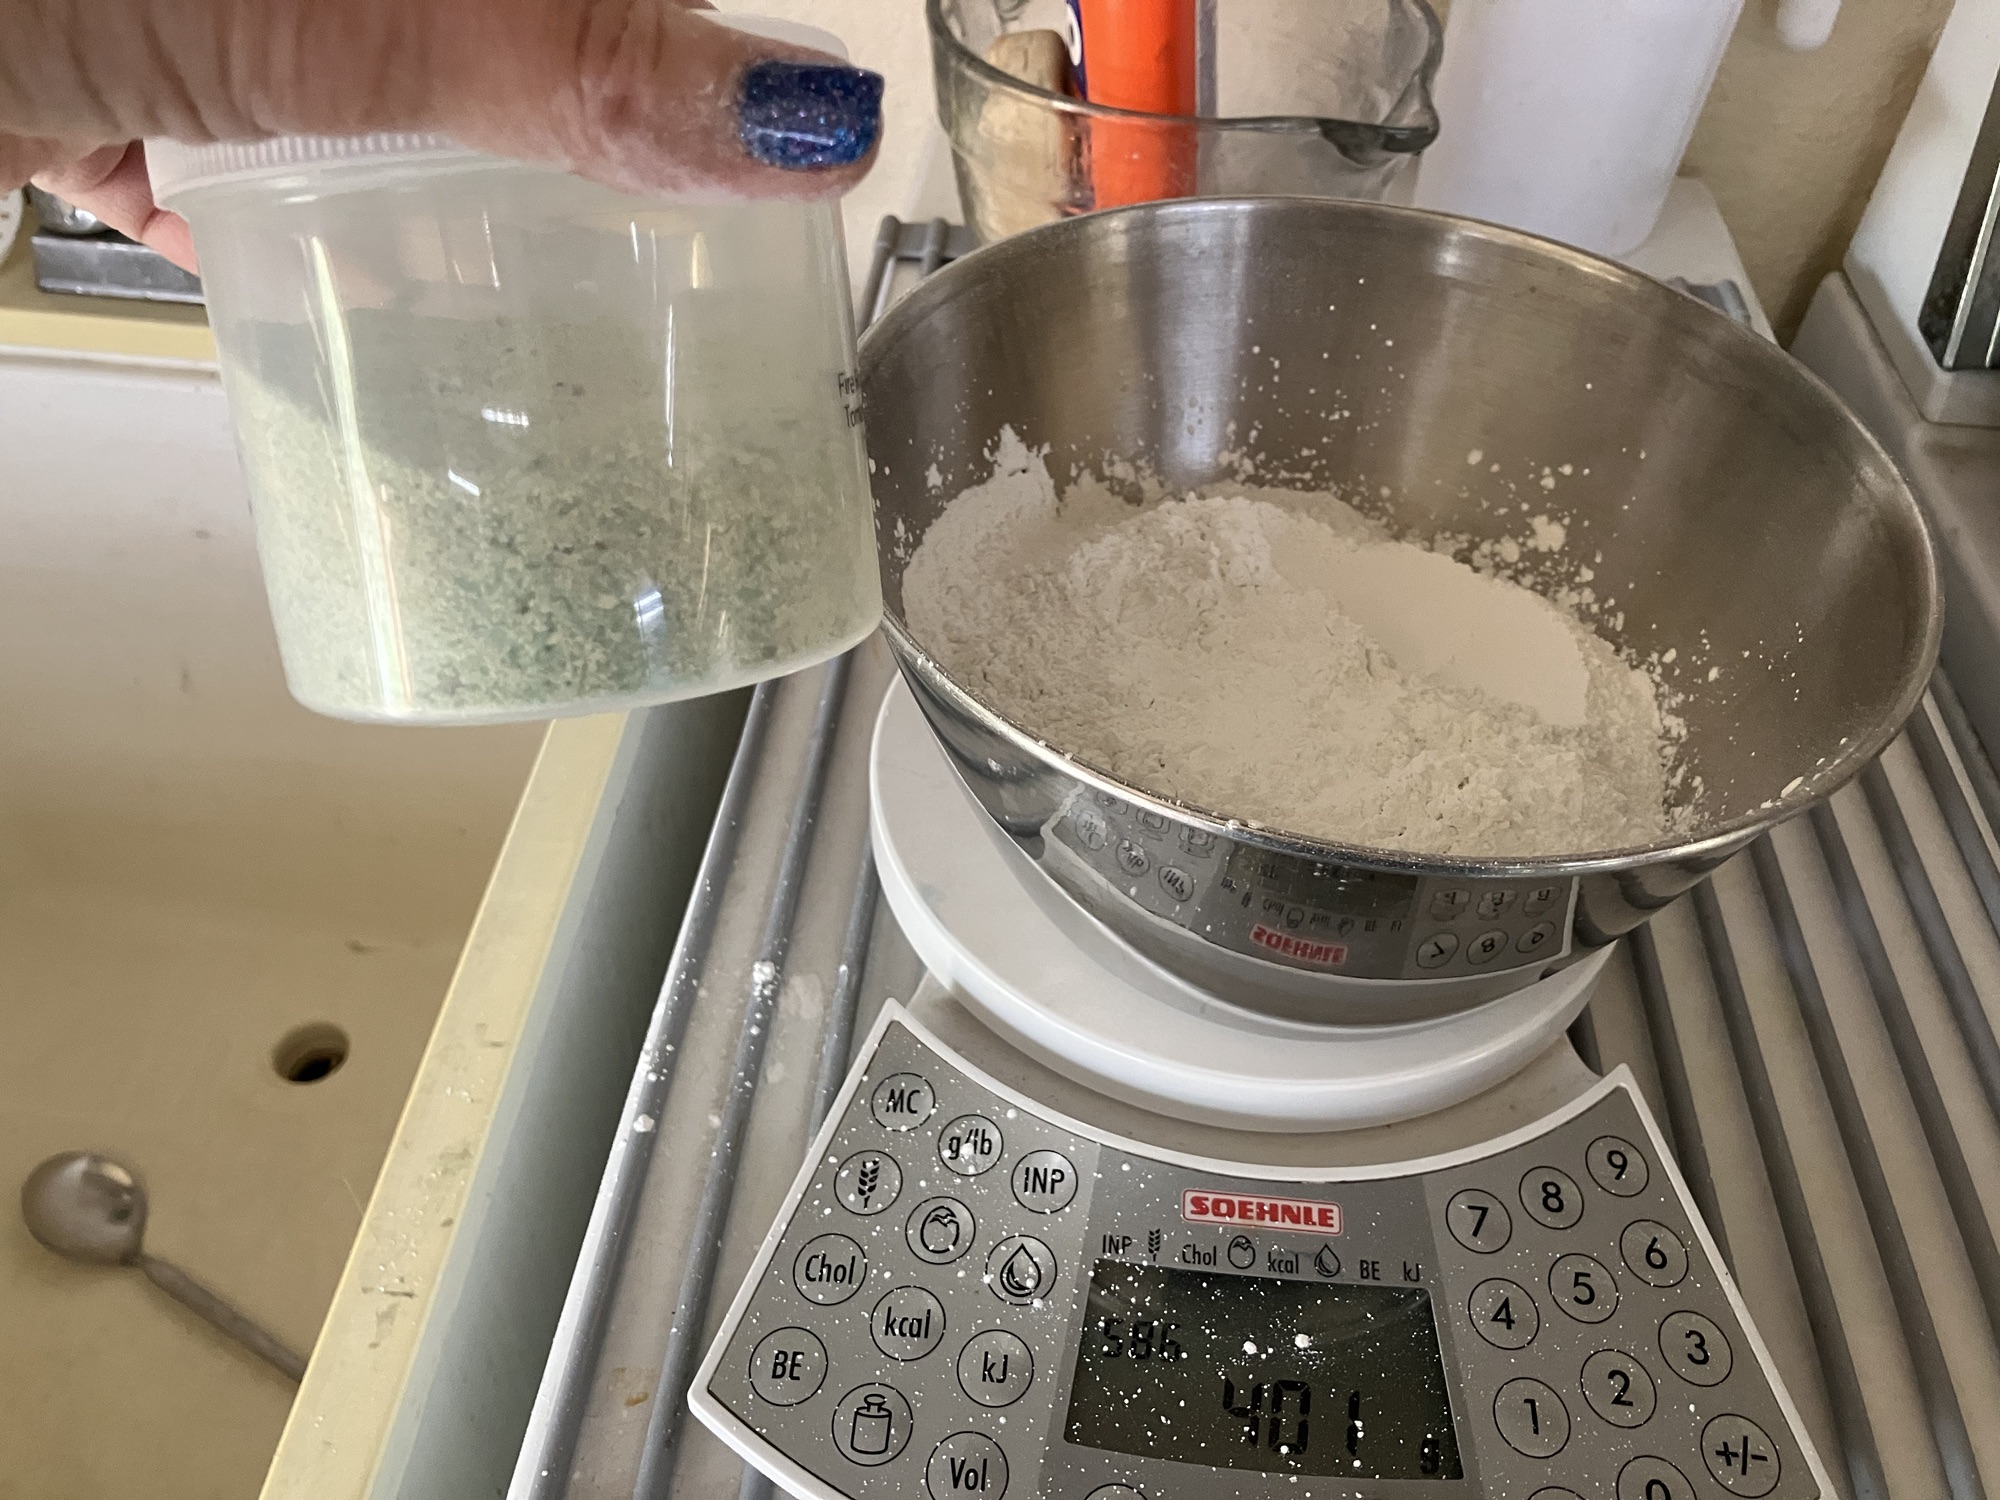
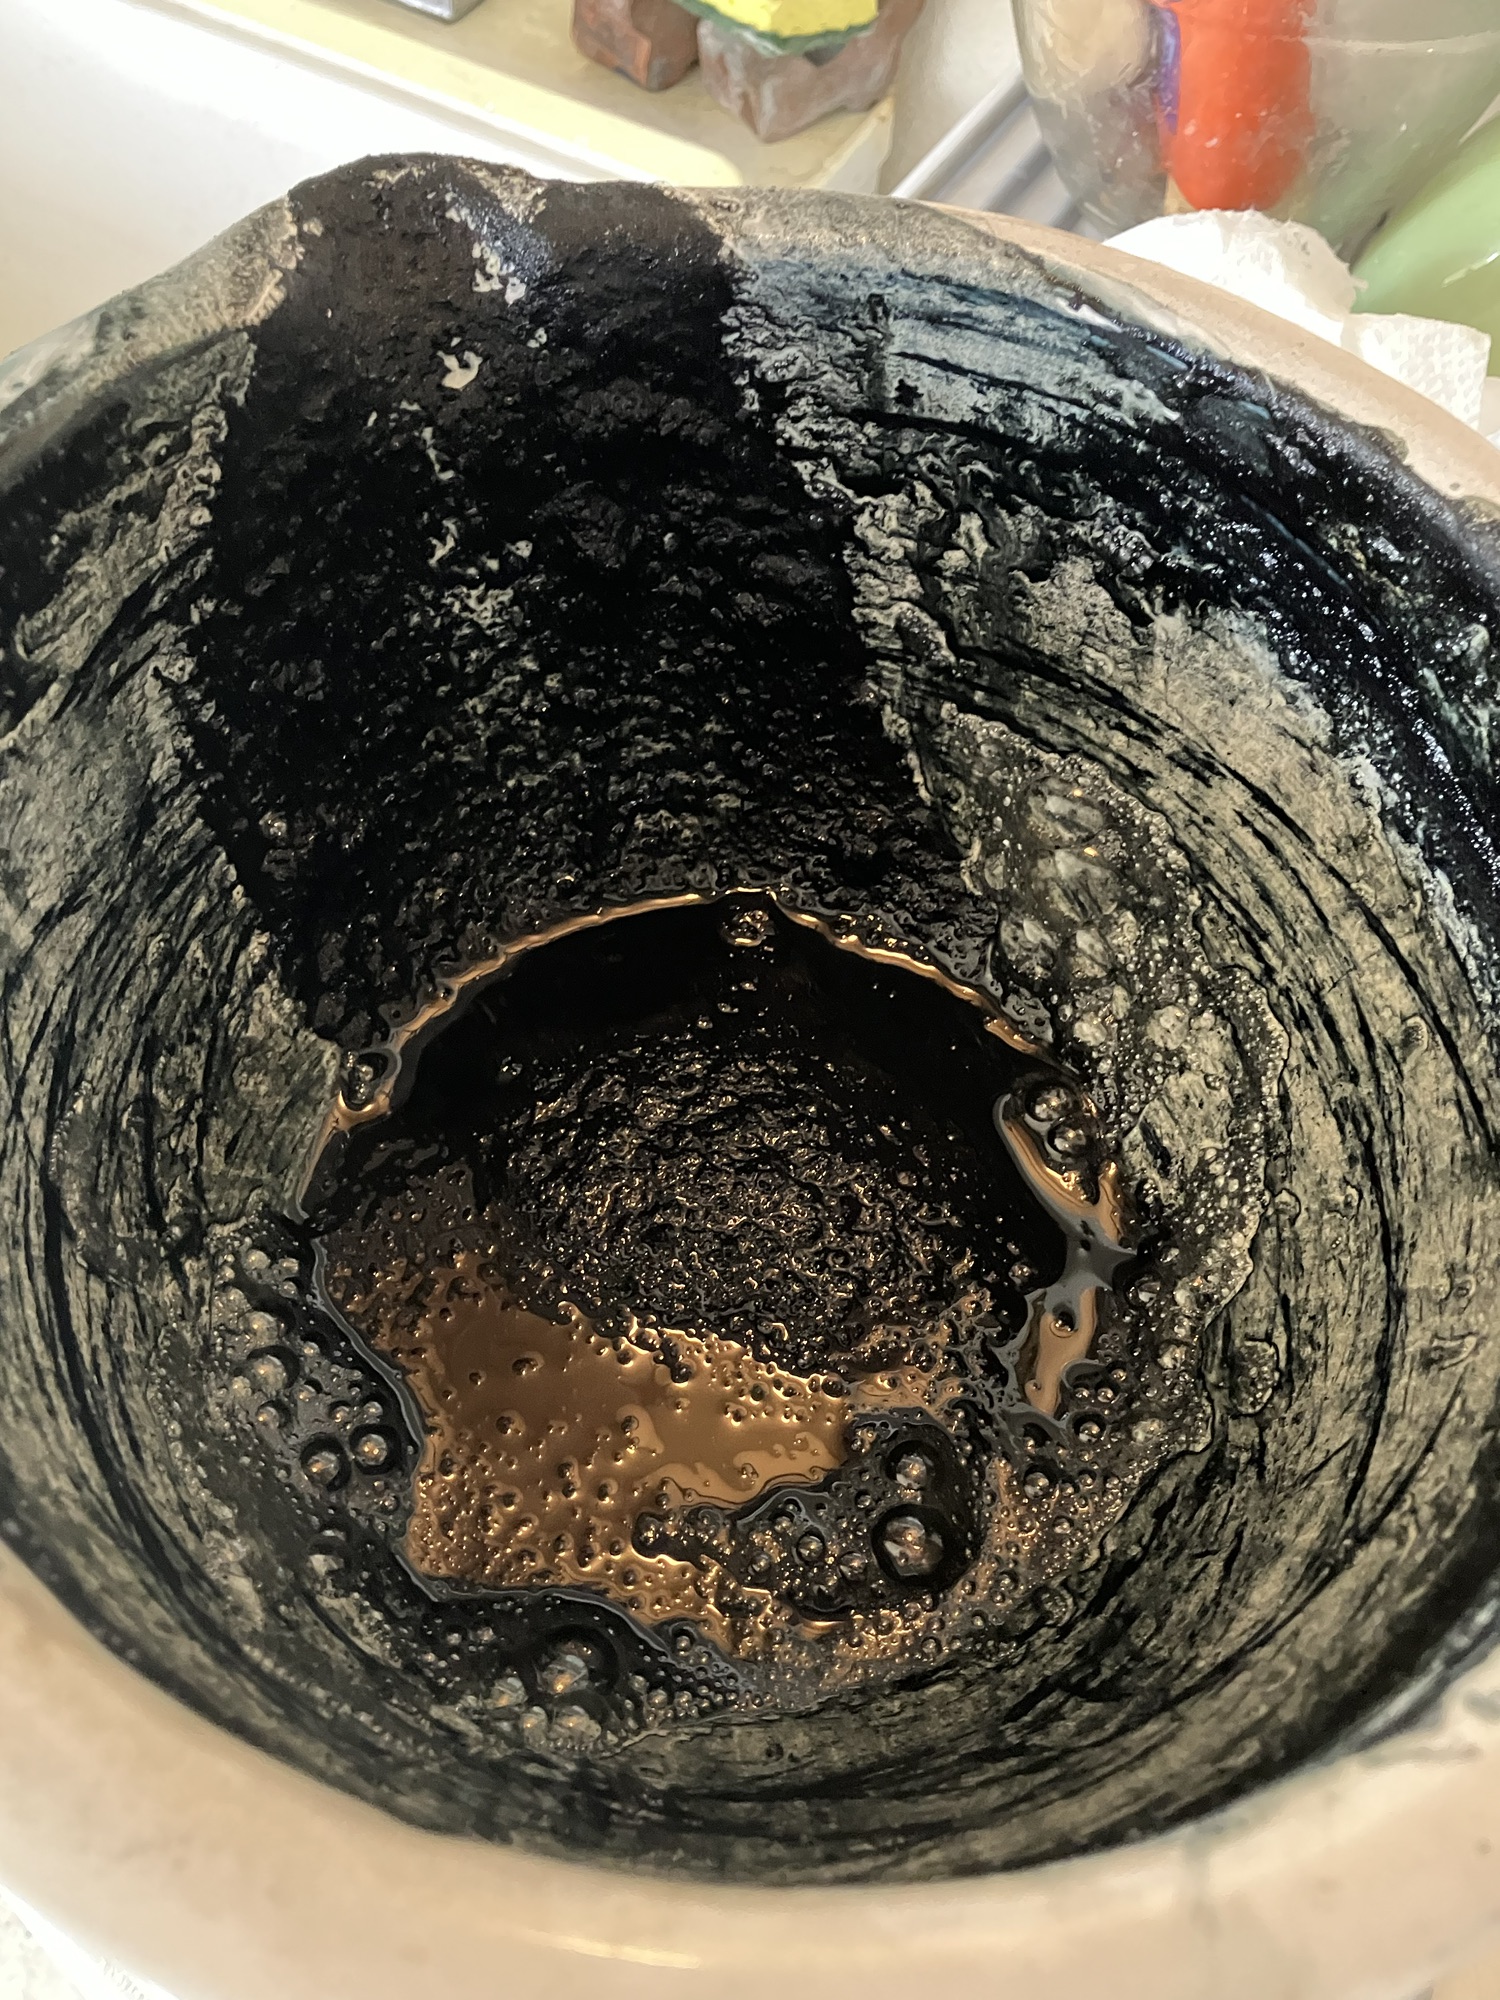
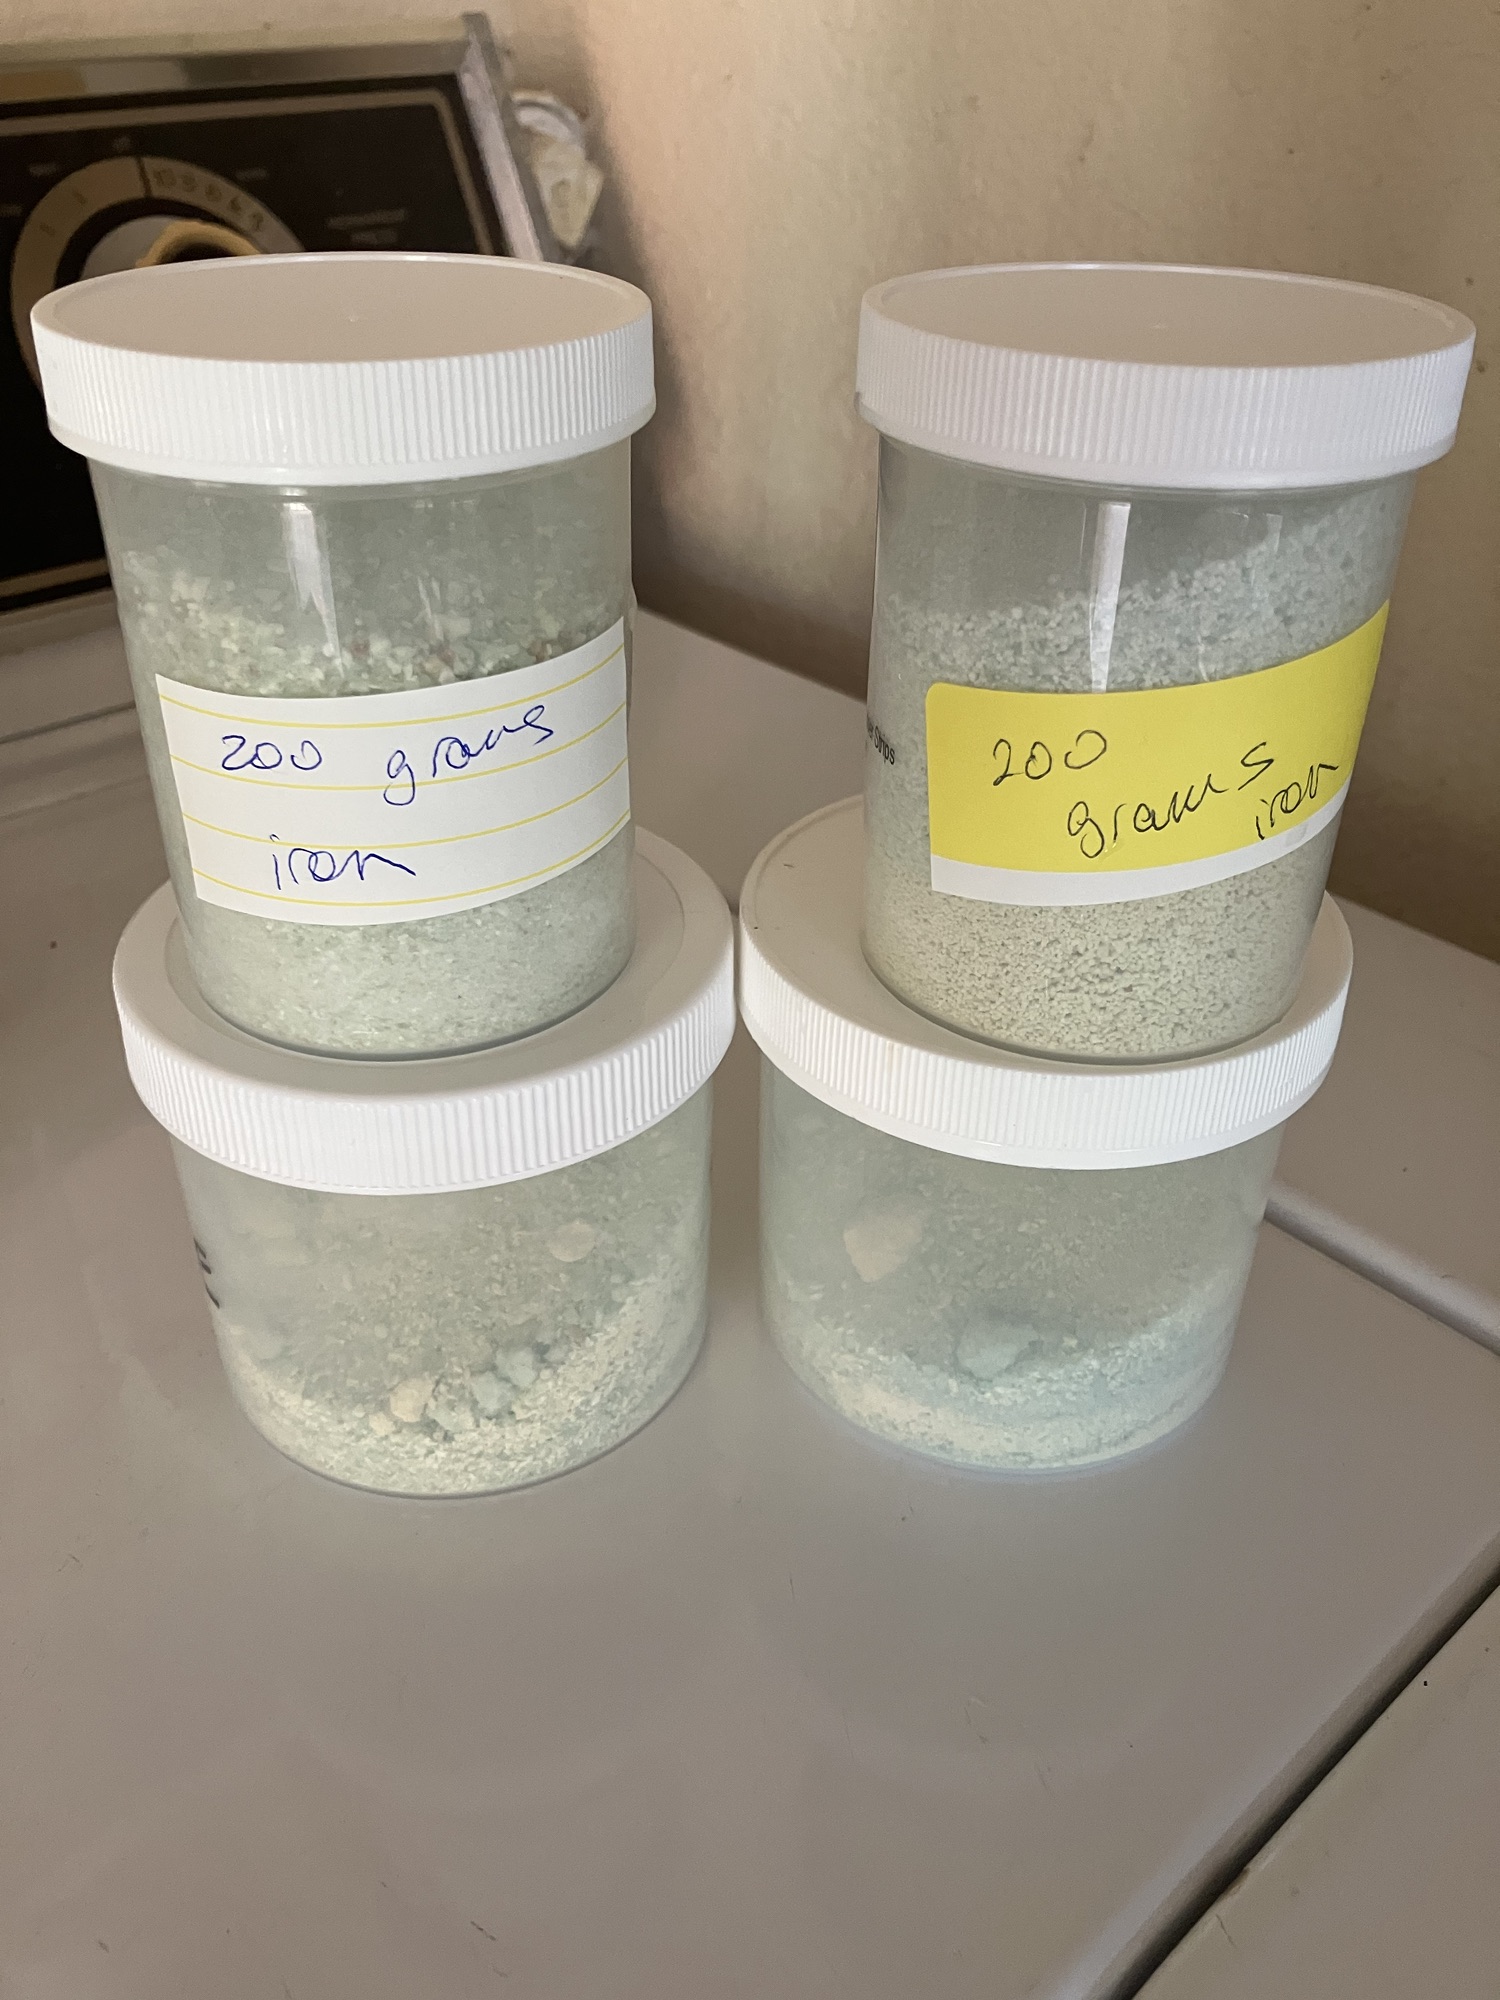
Setting that paste aside I measured out my ferrous sulfate (iron) to see the quantity involved for start up and measured out additional iron for sharpening the vat further down the timeline. I usually don’t use iron in such a large amount so had no sense of the volume. It will be interesting to see how it dissolves.
My calcium hydroxide is in the tidy package of Ms Wages pickling lime and doesn’t need additional processing.
So bearing in mind I am working with a target volume of 100 liters I have my water set aside, the ingredients measured out and am ready to put it all together.
Continuing on lessons learned from Elisabeth Viguie-Culshaw on building an iron vat I am looking for a way to heat my 26 gallon vat. My first try with my current aquarium heater was a bust due to its limiting heat at 80 degrees F. So I went back to researching and found a bucket immersion heater with the proper heat range. The first one arrived with an in box warning of “do not use in iron container”. This was not on the web page when initially ordered. Since this is an iron vat, I decided to return it and reload and try again. The 2nd immersion heater arrived with no such warning. This one heats beautifully.
While I was waiting for the insulation to arrive I kept track of the air and water temps. My past solar fructose vat was only operated at 90 degrees F + so I was unfamiliar with my lower temp and its impact one my vat’s water sitting under shelter. Below are my log sheets for info.
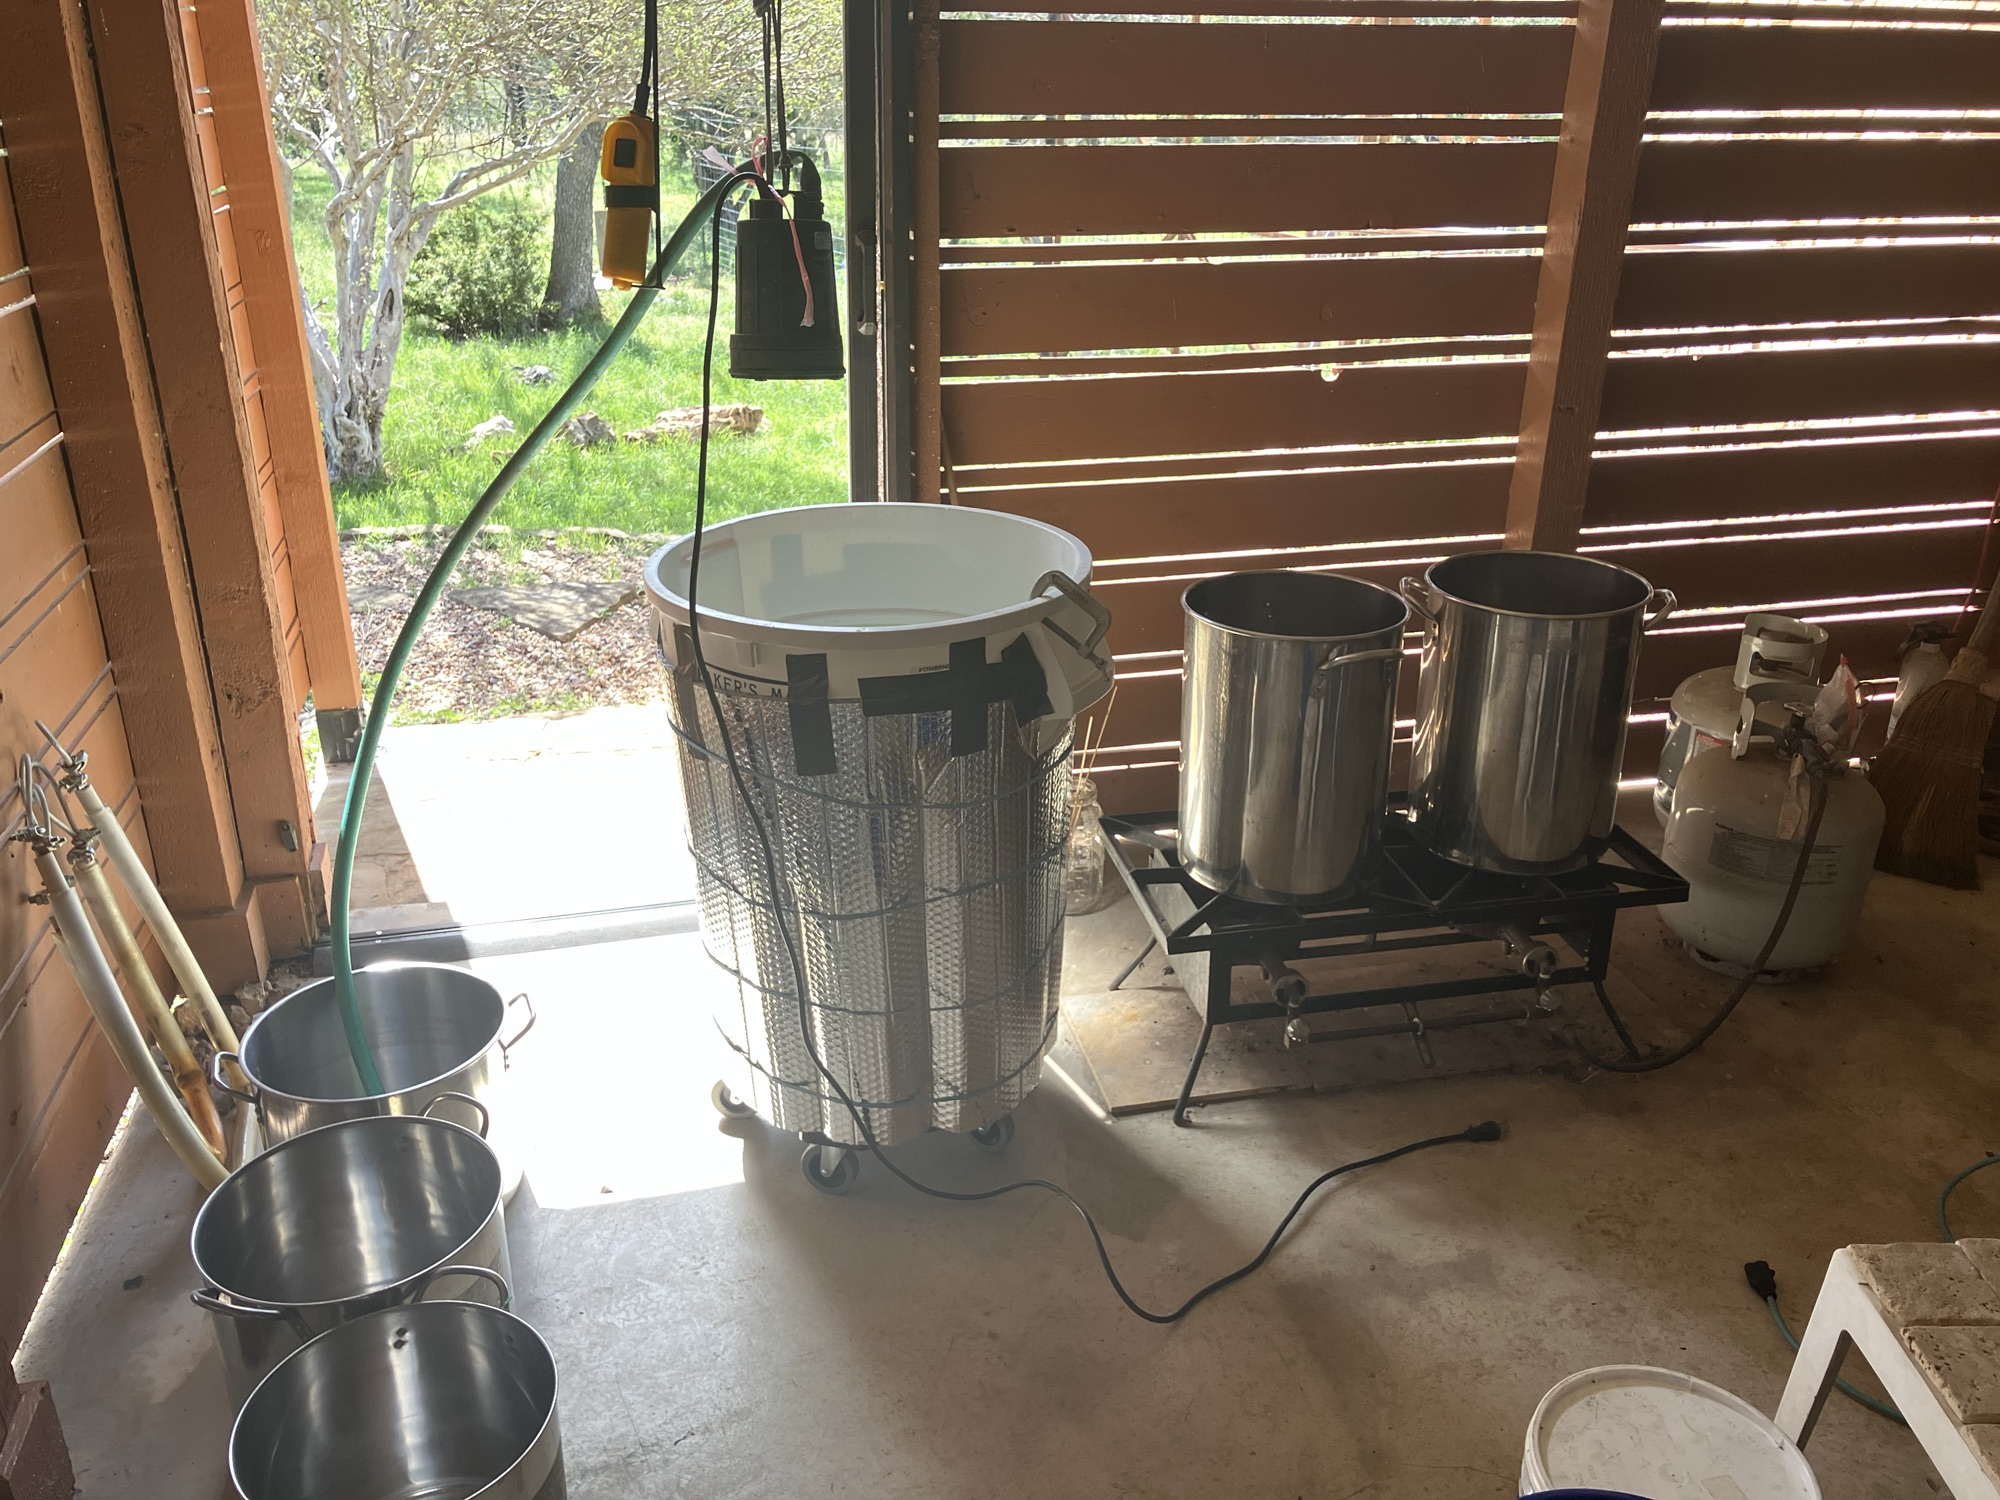
All is in place, now I just need a block of time to pull together the ingredients. I’ve set out my pots to heat water to dissolve everything and will proceed with putting all the good stuff in the vat.
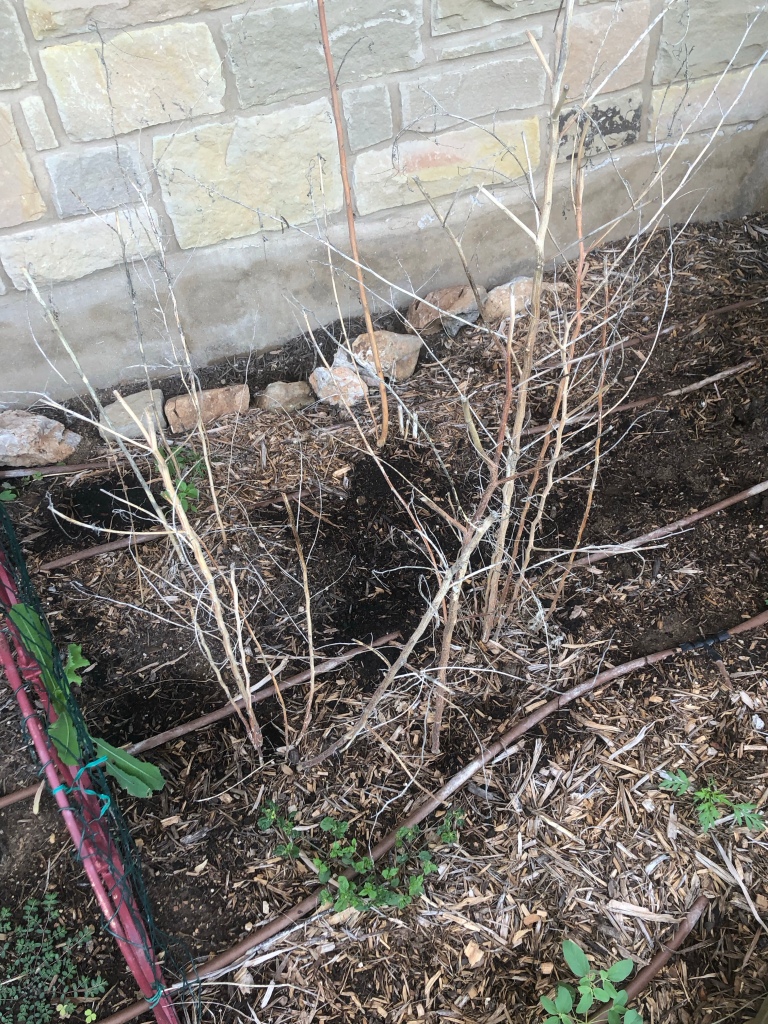
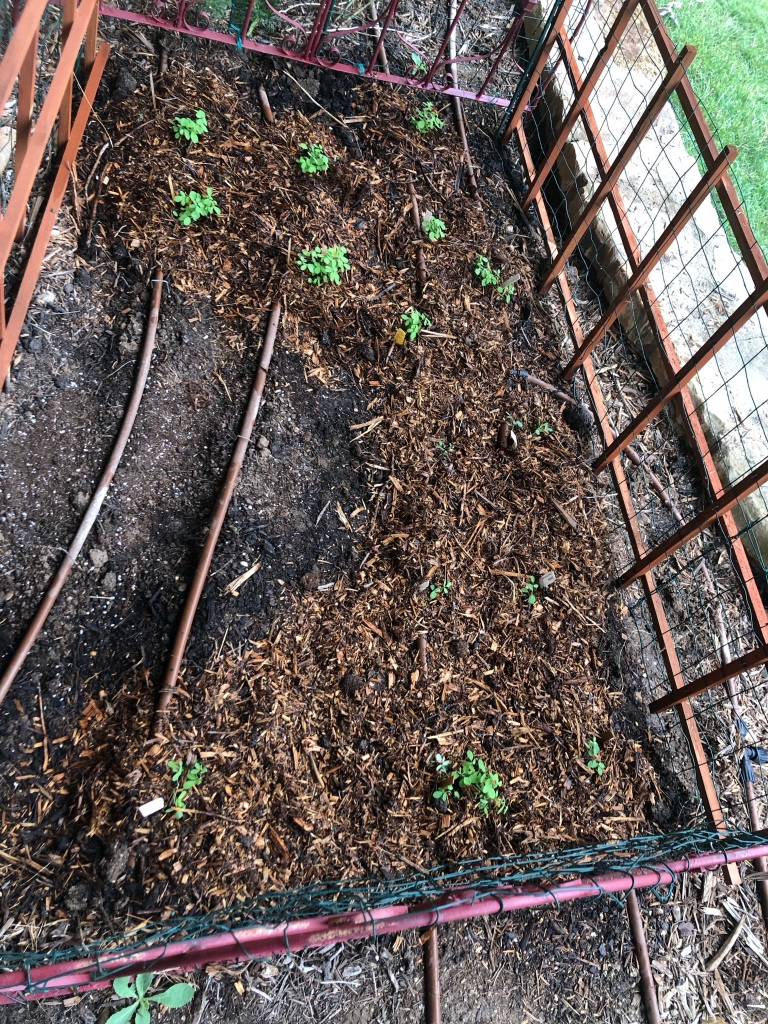
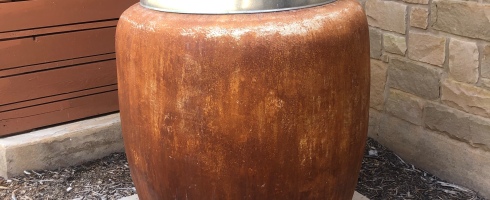
I decided with our drought and 105 degree extended string of days in the Texas Hill country I would try a smaller vat under shelter. Familiar with a fructose vat and its depth of shade I was ready to try an iron vat and explore its use and impact on our surrounding environment. We are on a well and septic system and in the middle of a rural area so I wanted to make sure I understood that type vat and had a way to dispose of waters safely. My current solar vat is 110 gallons. The new iron vat I am trying is 26 gallons, much smaller and hopefully will give better depths of shade faster than the fructose. I use rice paste resist, which does not hold up well to repeated dips in the fructose vats to get a deep shade of blue. Hopefully this iron vat will work better with the rice paste. Elisabeth Viguie-Culshaw opened up a workshop on making and maintaining an iron vat along with soya/lime paste resist instructions. I was traveling during the class but am finally settling down to “a go” on the vat and gathering supplies from what I learned from Elisabeth’s workshop.
Here is how I set out to set up this vat.
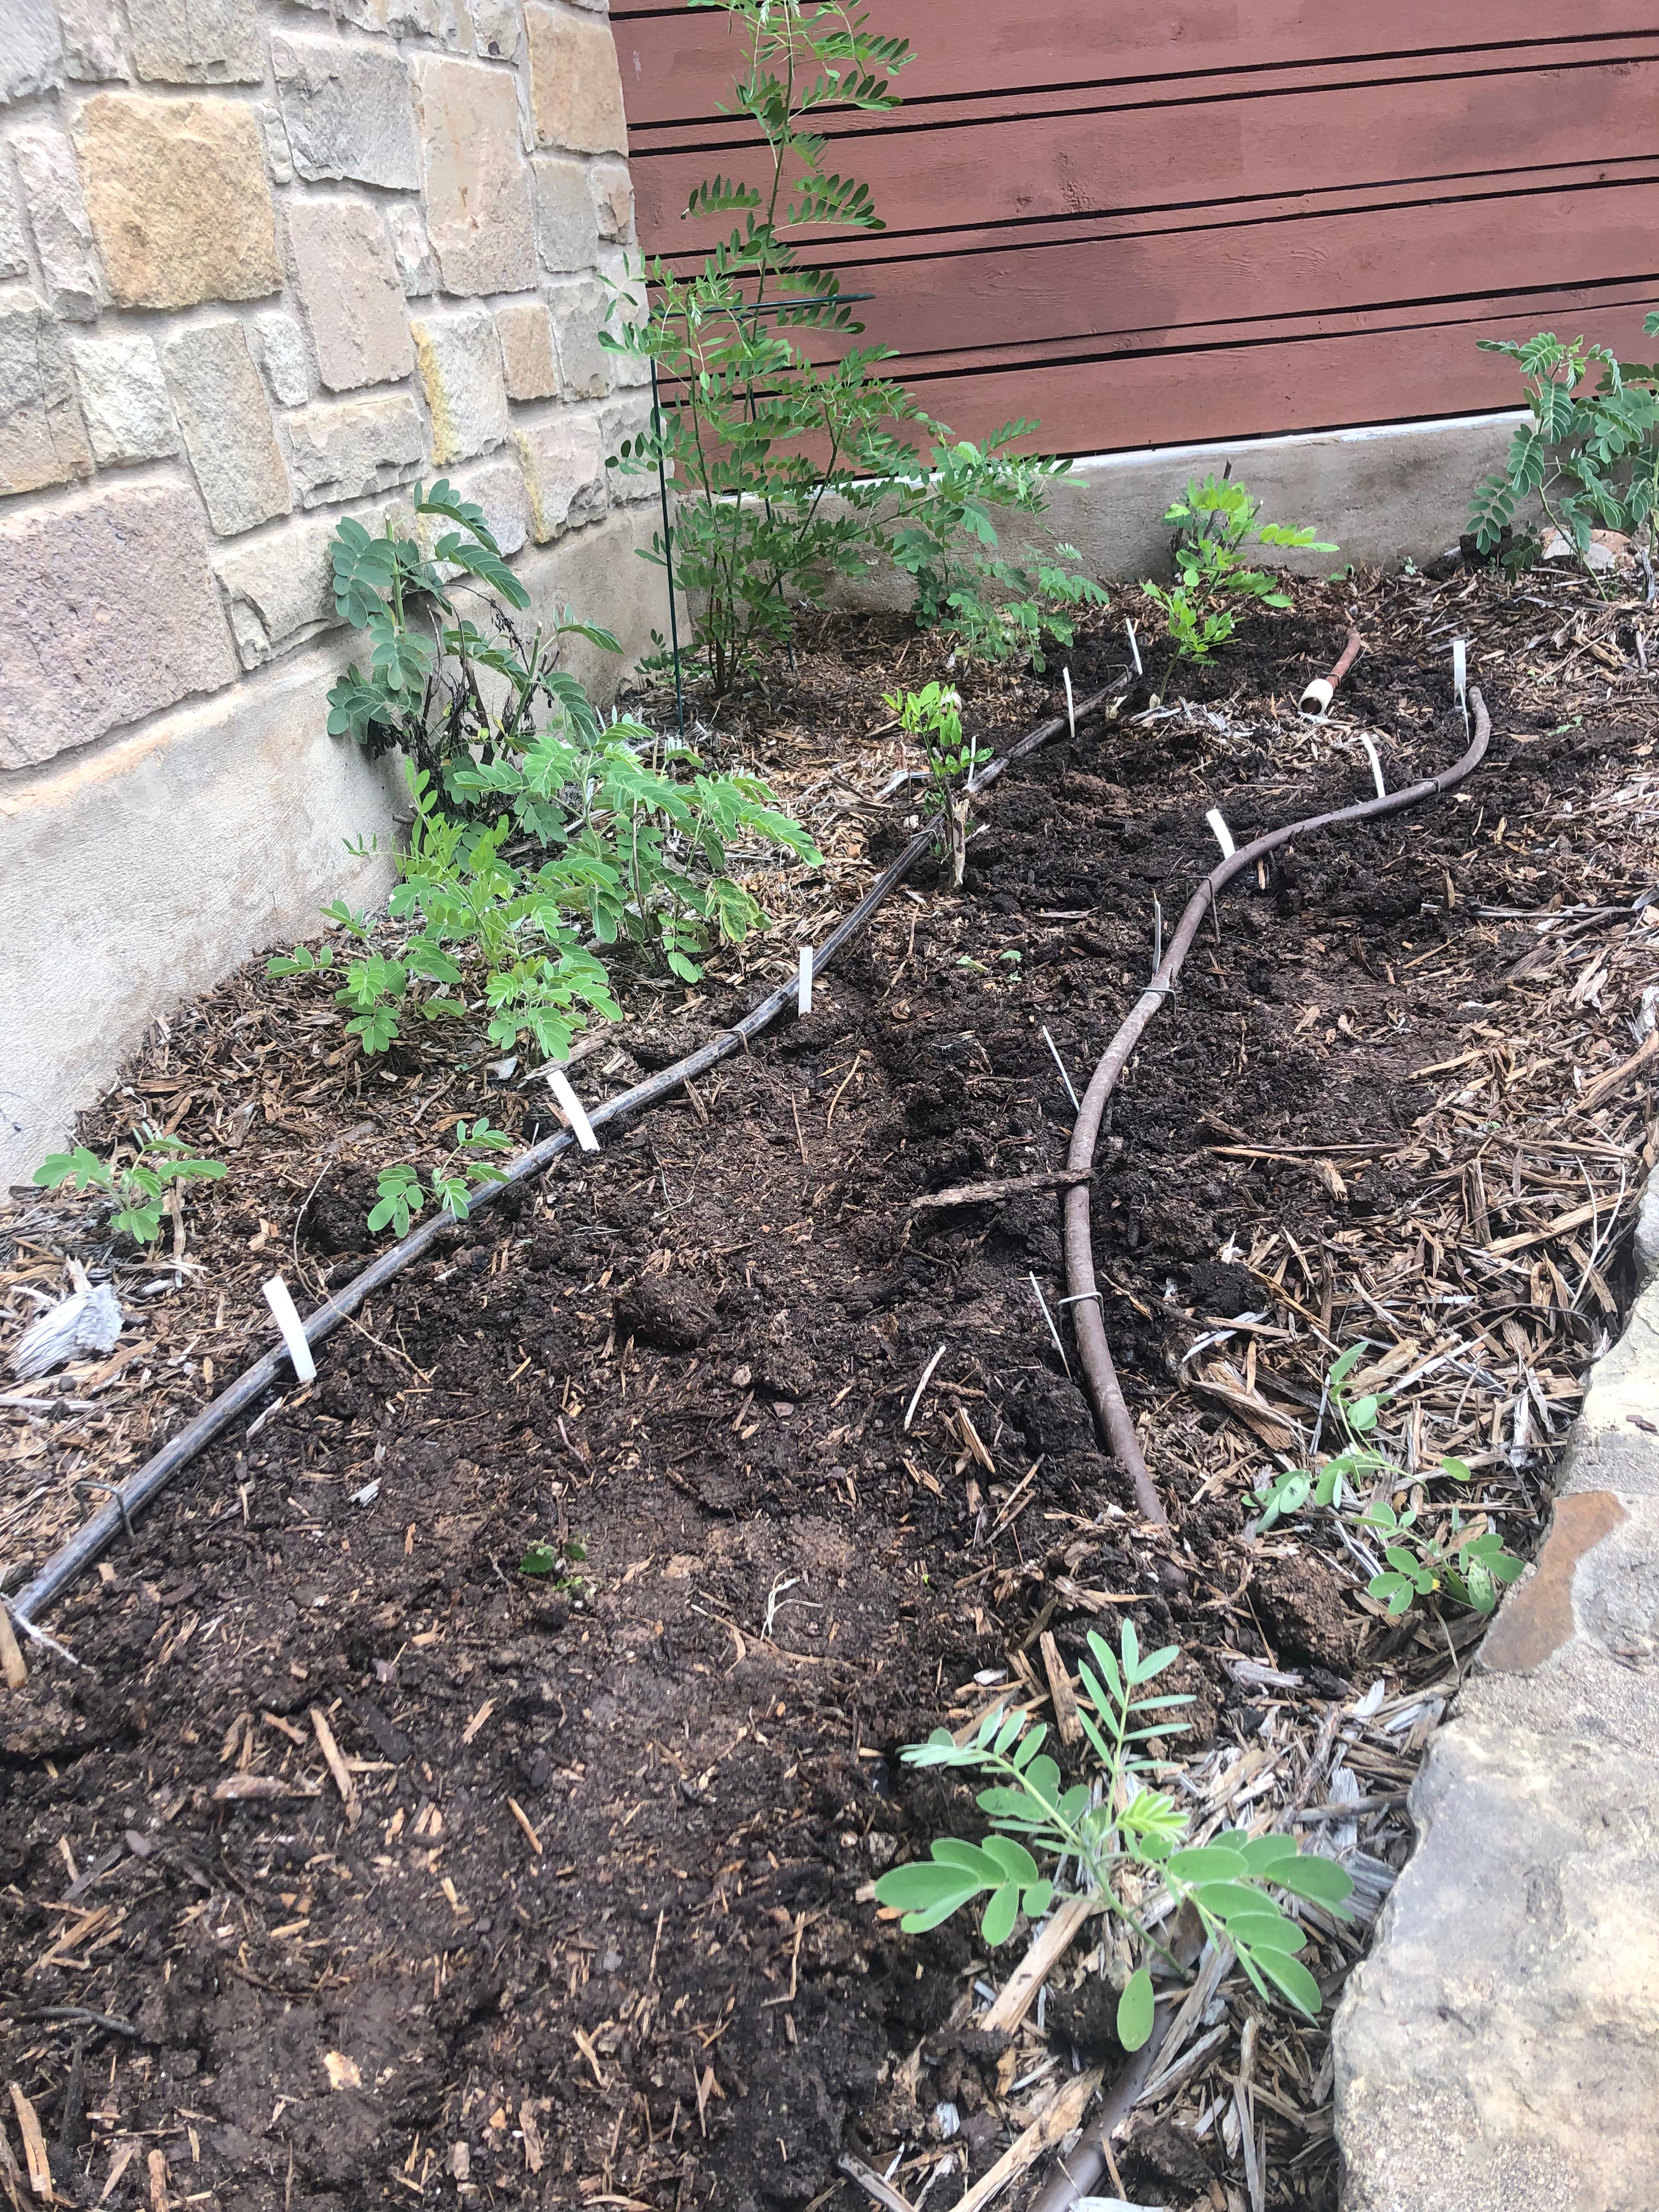
Phase 1, After finding the vat, I am testing for vat leaks & figuring out how to measure 100 liters of water easily. Measuring & marking buckets for easy 5 liter transfer. This vat is 1/4 the size of my 110 gal (416 liter) fructose vat. Due to extreme drought I am going smaller in water usage. It is on wheels so easy to push around. Before I add all the good stuff I’ll be testing my aquarium heater to ensure it will heat the vat to proper temperatures without harming the plastic. The ferrous vat is a cooler vat but still needs start up heat of 90° (30° C) to create a catalyst to kick start the indigo, ferrous (iron) & calcium hydroxide. But, I can work in the shade, not out in 105° F (41° C) heat. This container has an added benefit of wheels so I may move it around.
Phase 2 is grinding my washed indigo from the big vat. I shut it down due to past two years of extreme drought & 105° F (41°) temp and dried my rinsed indigo mud for storage. This means I have some indigo grinding to do. Getting closer to the “Big Mix” in the search for blue.
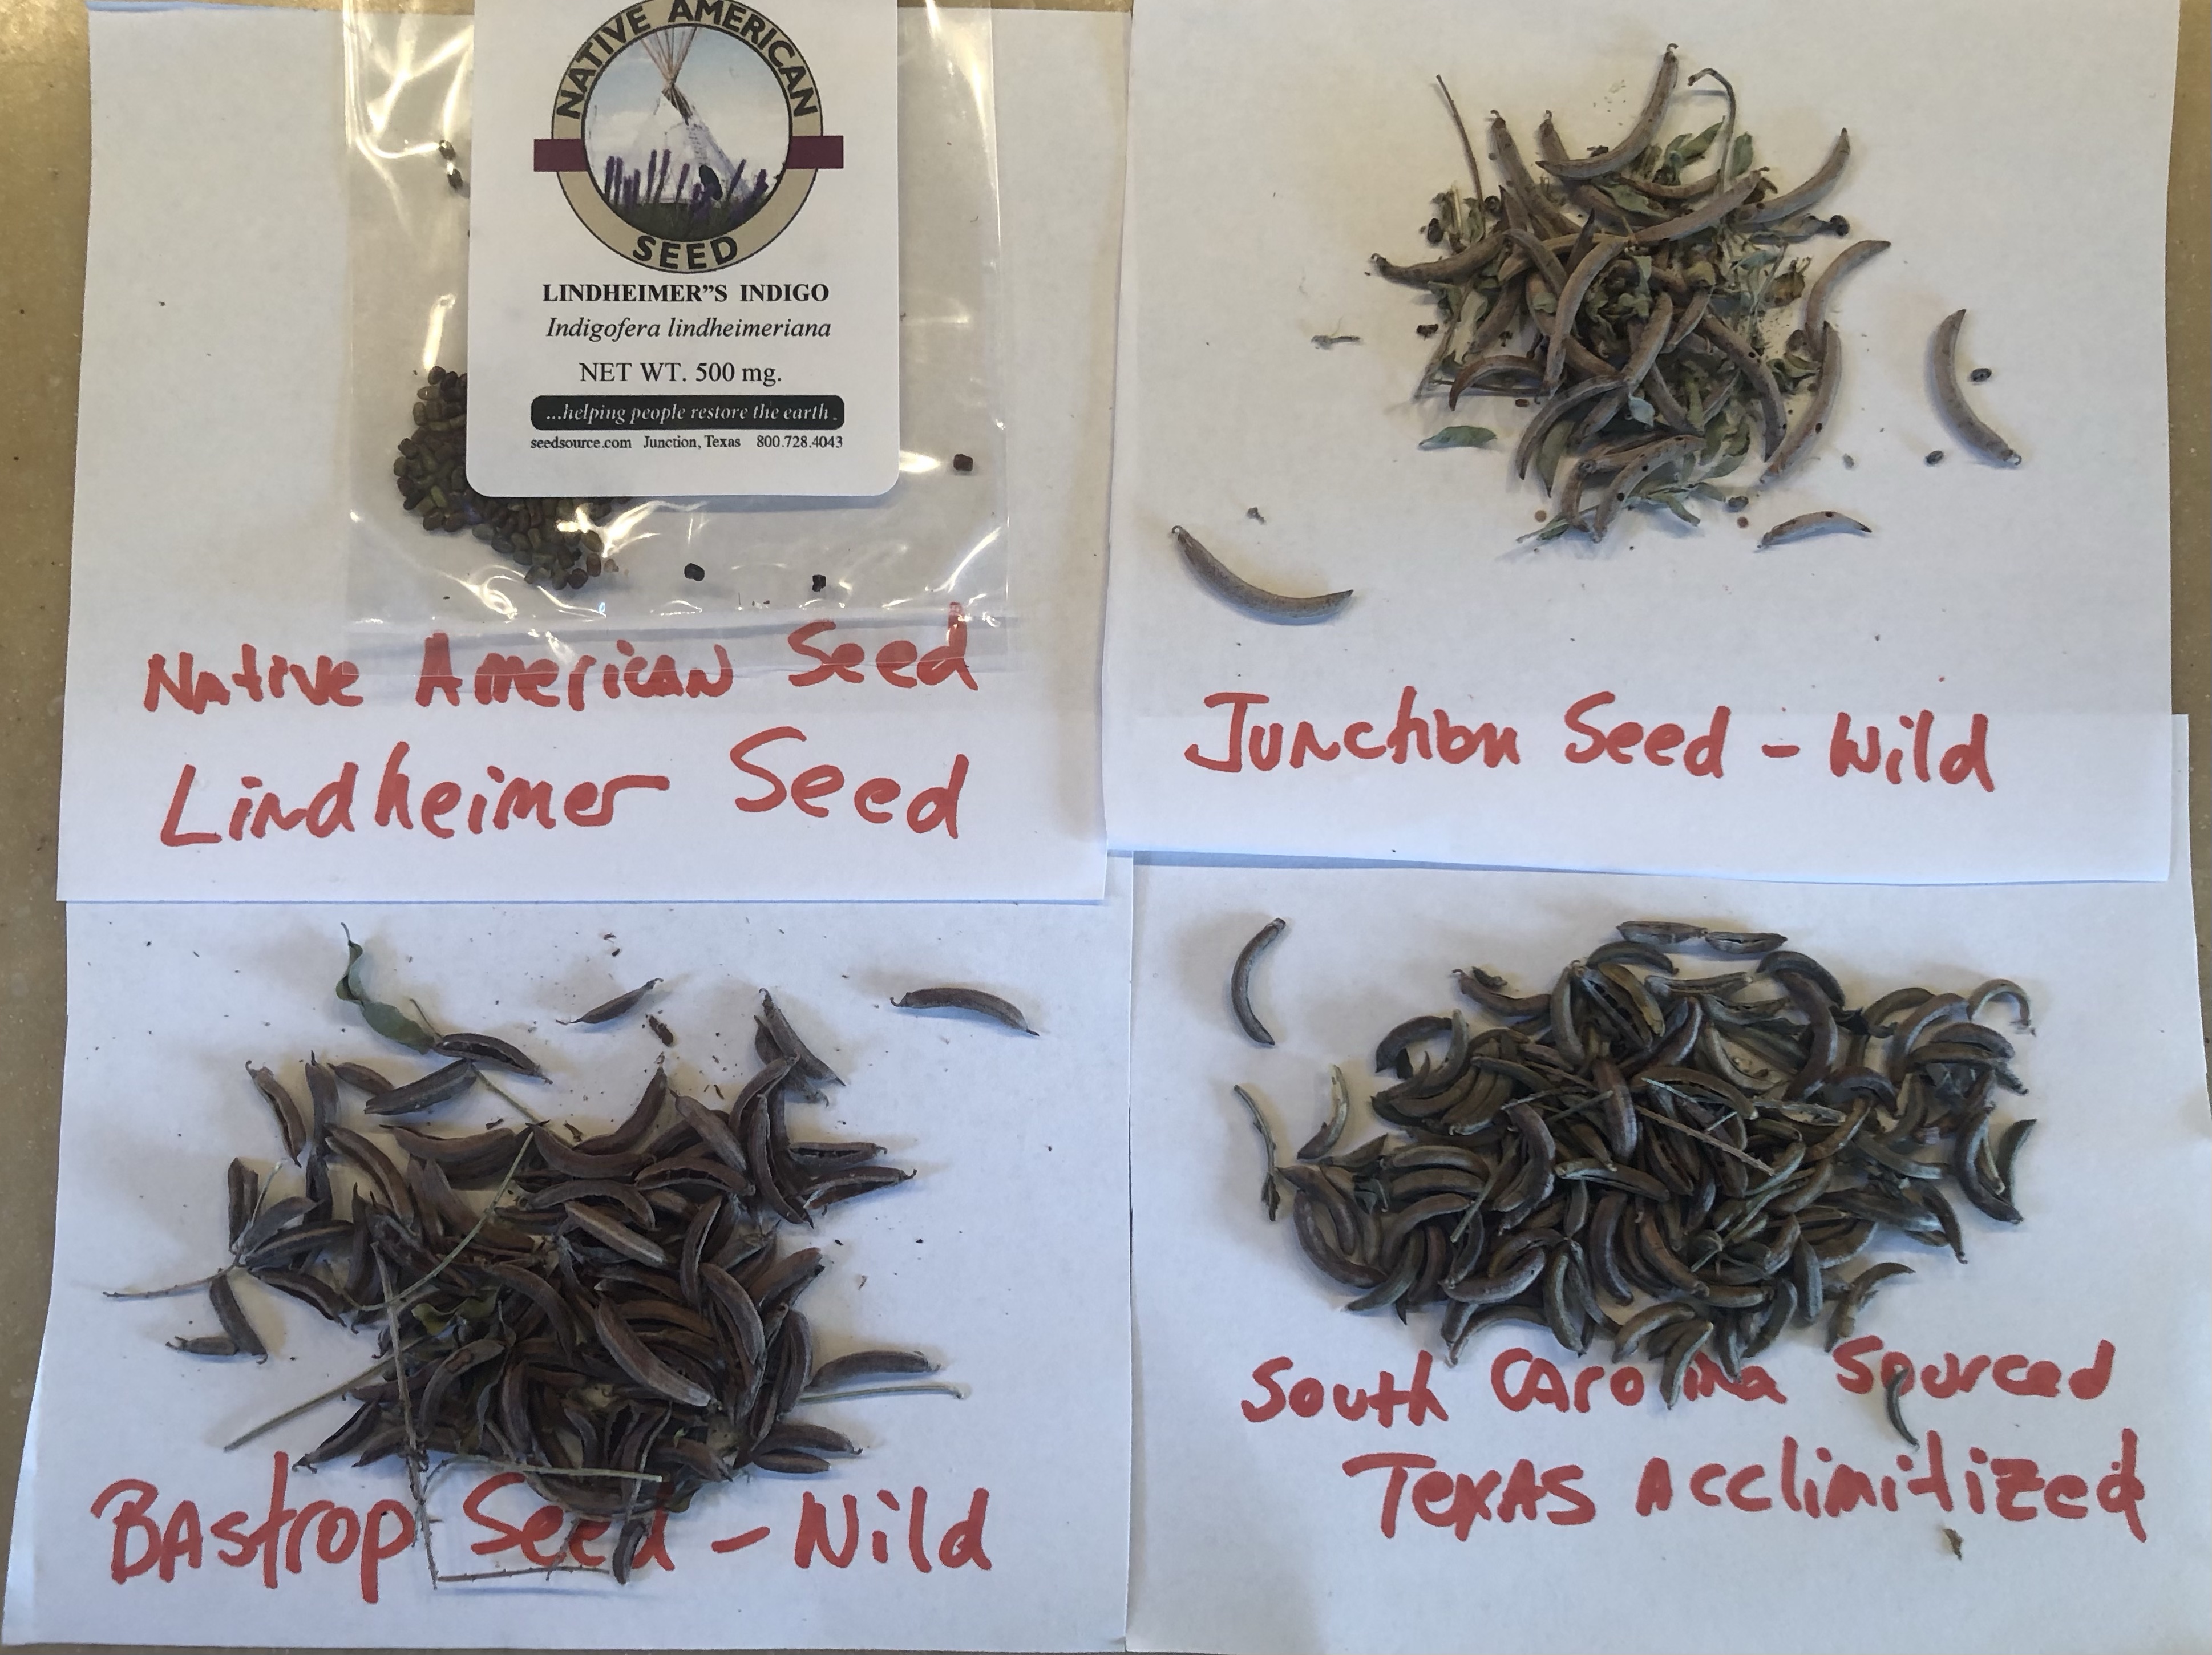
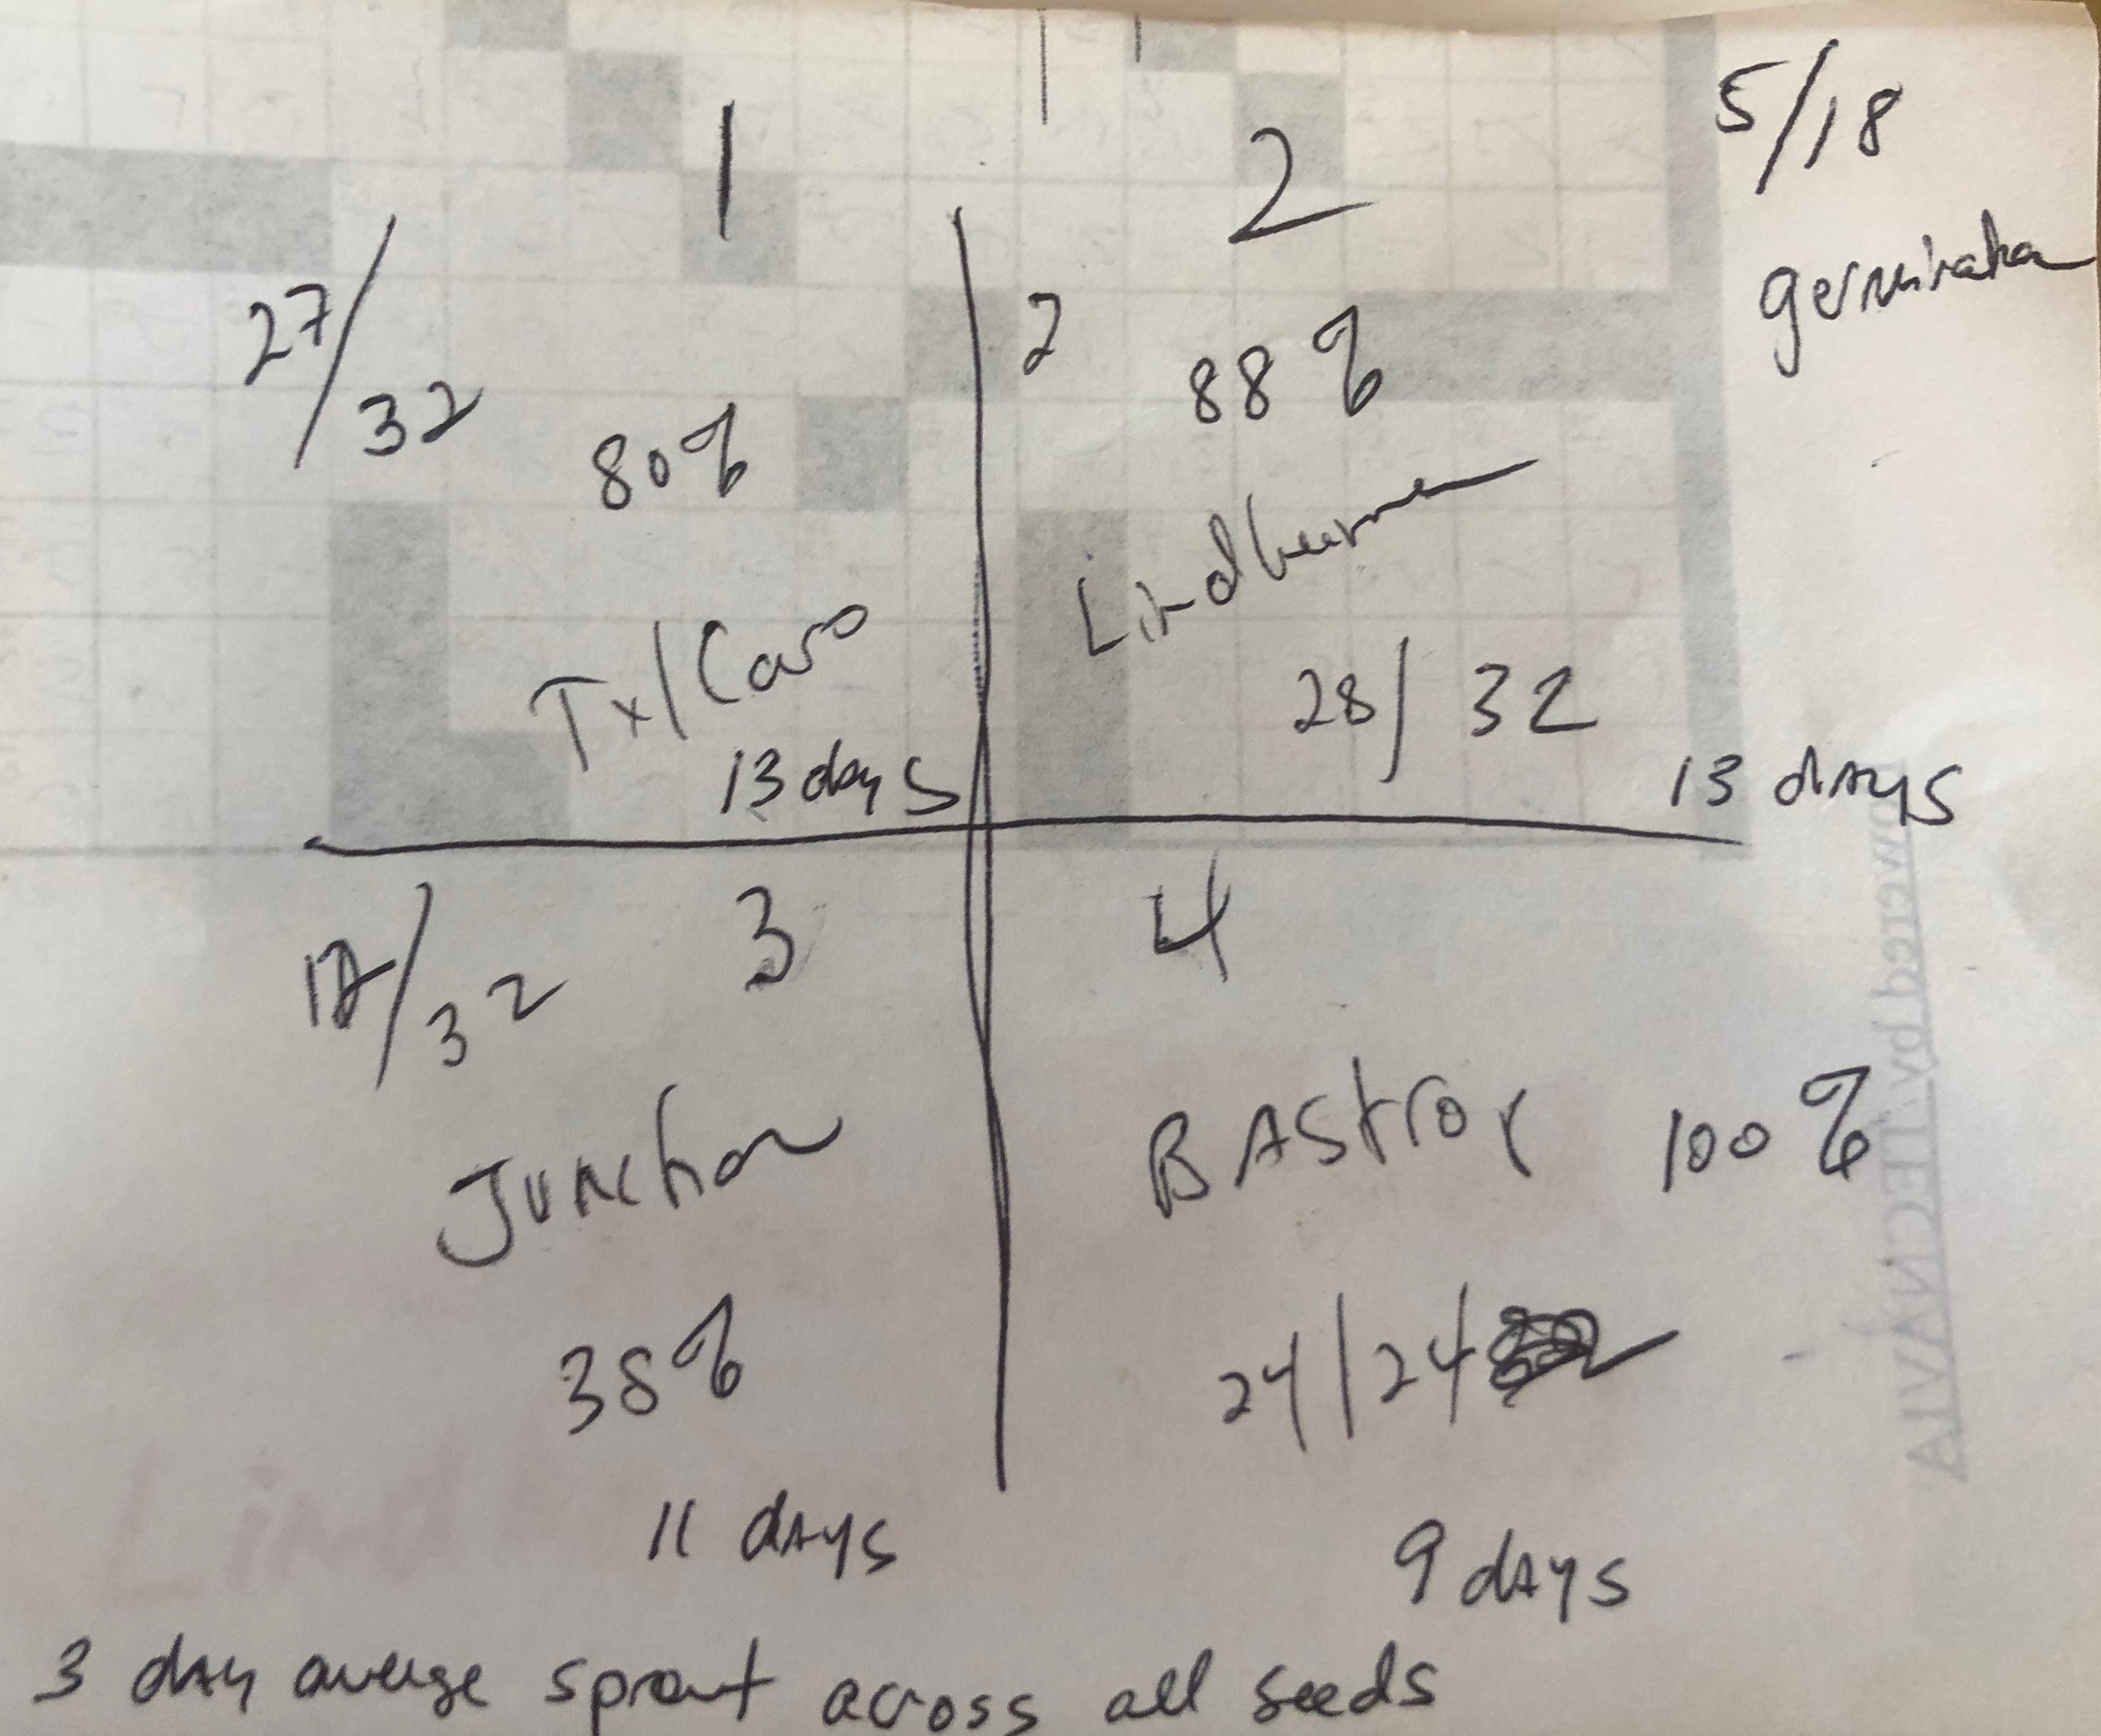
It always starts out wet in the spring, so you have little warning that a drought is in the works. We had a wet and cool spring. As I waited for the ground and weather to warm up I decided to compare four different indigoferas.
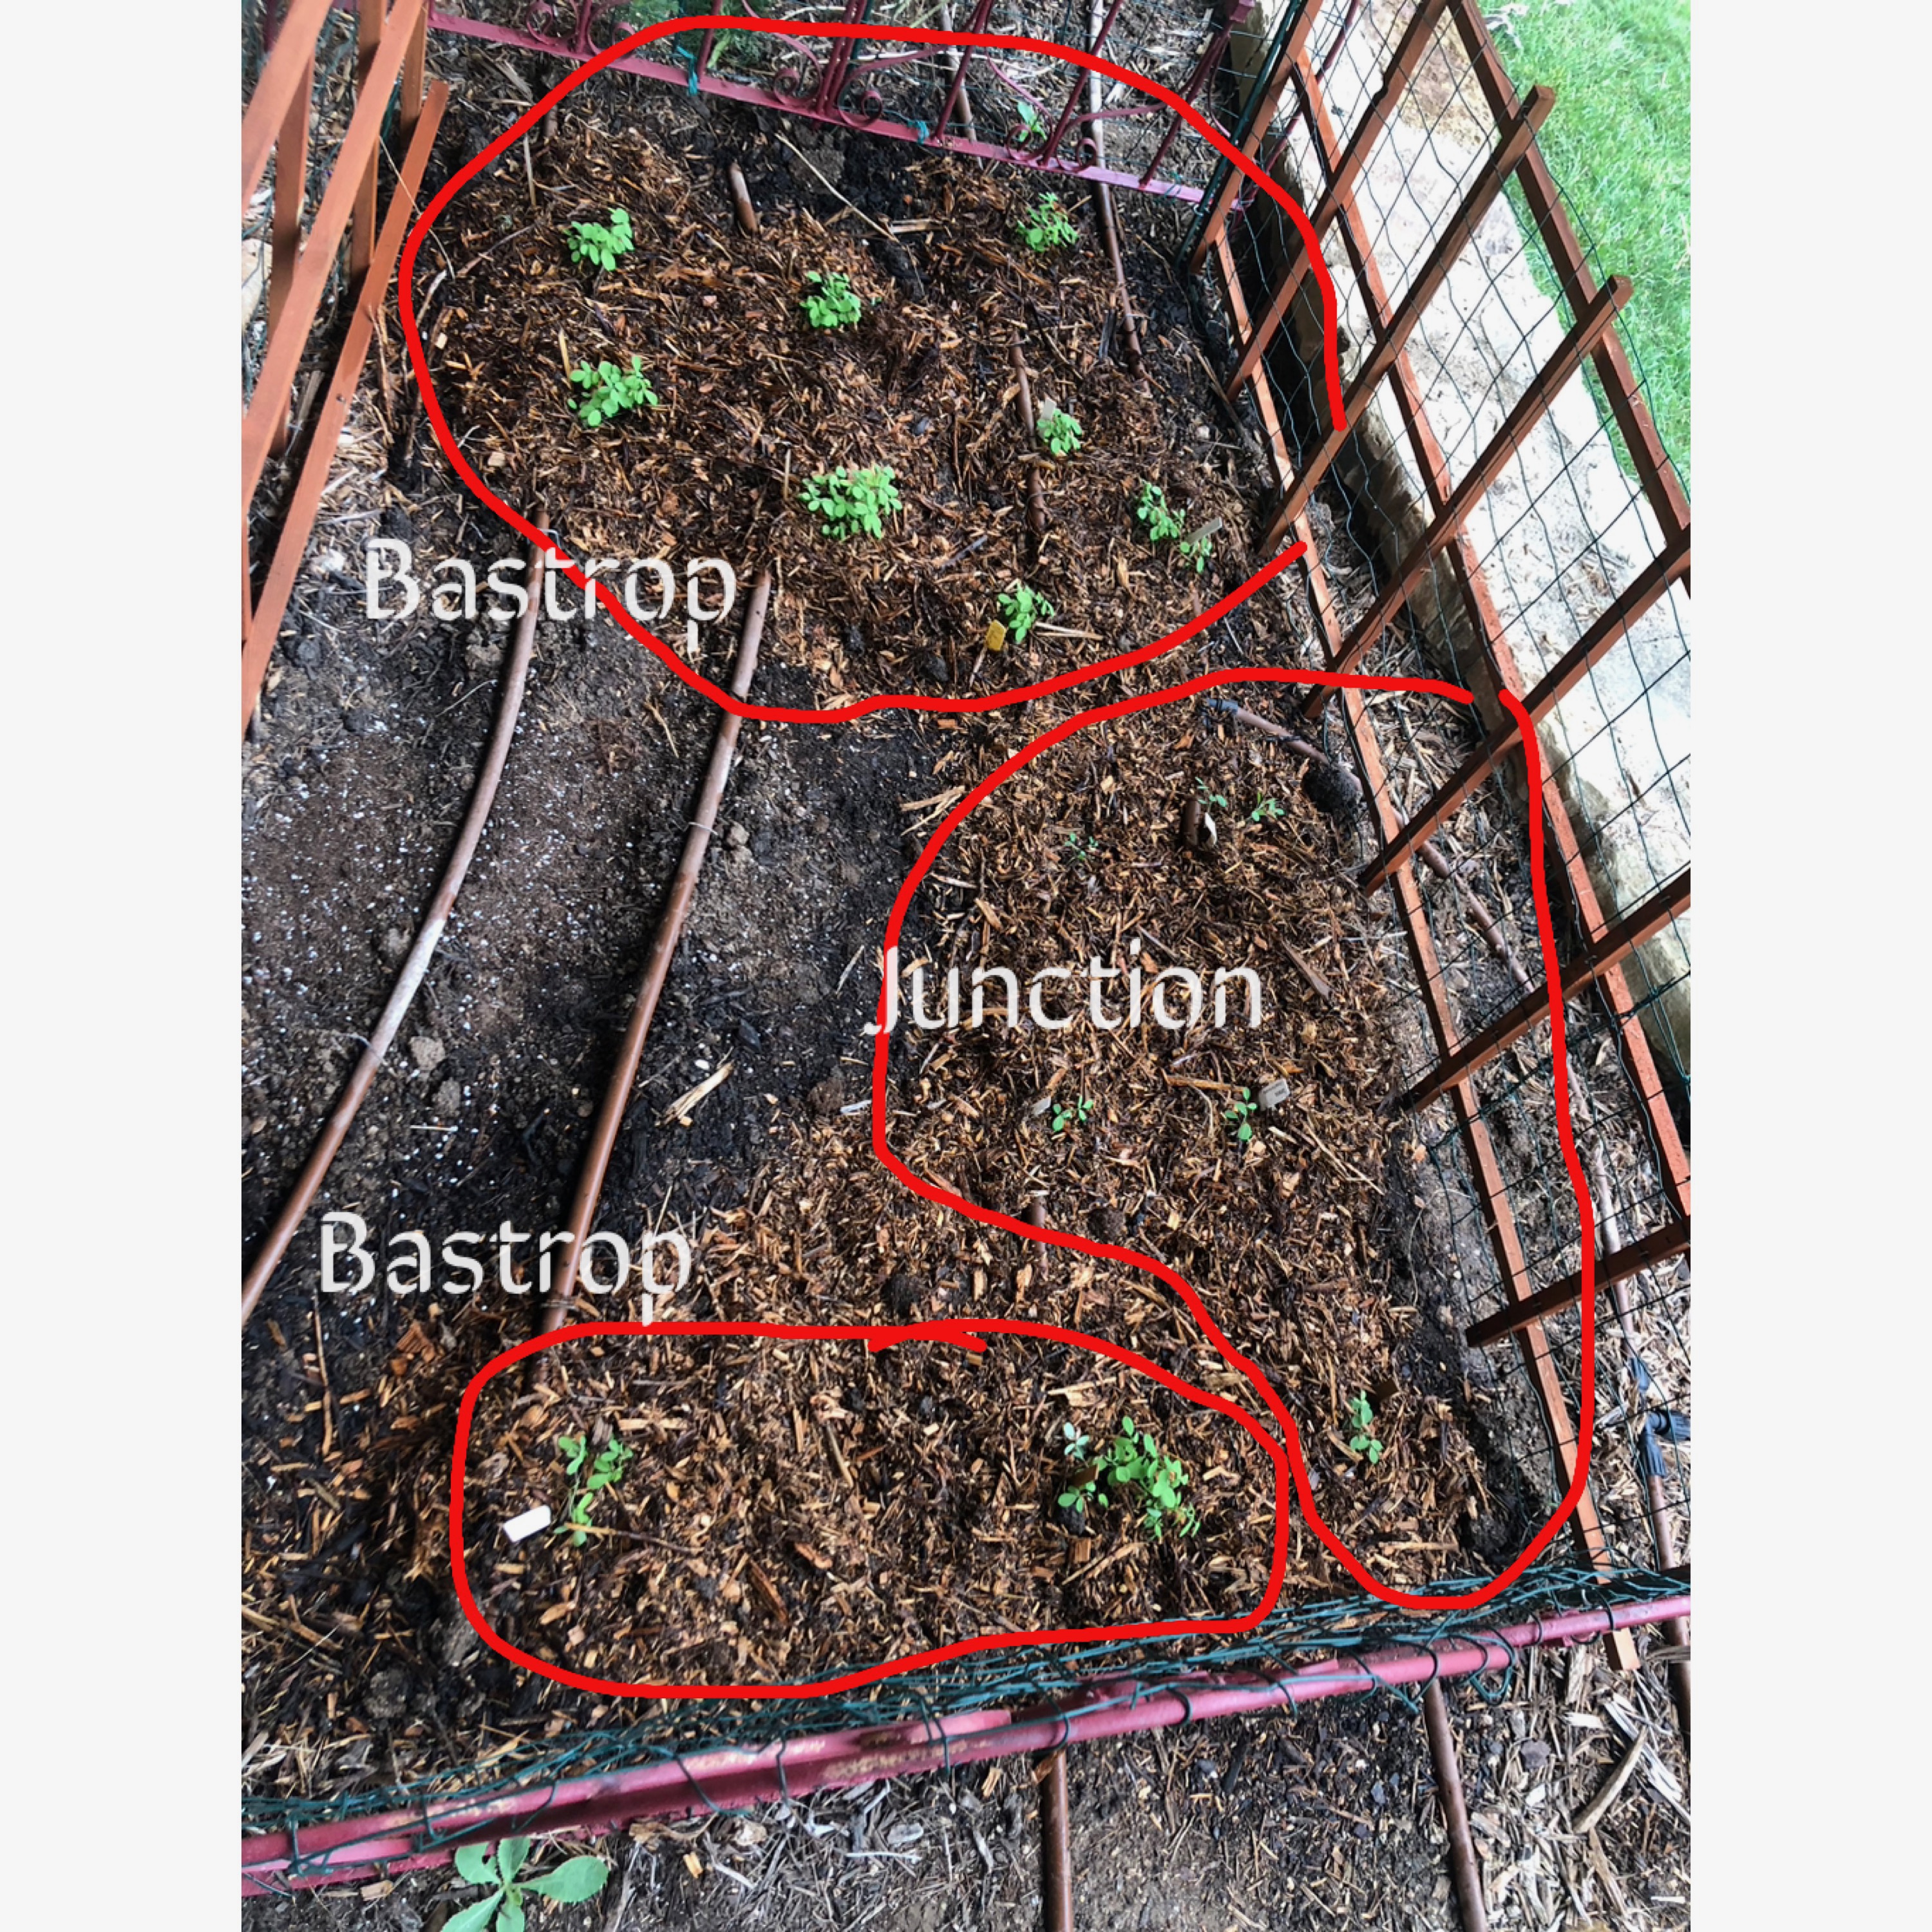
Two were collected from wild areas with no clear identification or knowledge how they came to be in the area. I call them Junction and Bastrop. Both are found in river flood areas in the general area of these cities in Central Texas.
The Junction seed was gifted to me but was older seed, one season past when I would normally plant a seed. Foragers had collected the leaves for paint making and were generous in sharing seed and showing me their gathering buckets. I noted that these plants had very delicate stems and smaller leaves than the South Carolina sourced Indigofera Suffruticosa that I normally grow. The seed itself looks very much like tinctoria, the long string bean type of the Indigofera Tinctoria that is grown in many geographic areas.
The Bastrop seed had definite curved short pods which I collected from plants so I knew I had the optimal planting timing. This species as well had very delicate stems and small leaves compared to the IS that I grow. I did manage to collect a substantial amount of plant and seeds. The plant gave up the pigment easily. The seeds were very easy to germinate and I’ve set aside a portion for a second year try once I see how they fare this year.
The third seed was a Indigofera lindheimeriana I purchased from Native American Seed. I can find little practical information about it as indigo producing. It also came as seed so I had no clue what the seed pod looked like. I will grow it to see how the seed pod looks. In the literature it is presented more as a landscaping plant. It will be a good control plant to grow alongside the two wild indigos. Perhaps it will resemble one of them and confirm if they were a native species to the Hill Country Edwards Plateau. And at the end of season I could always ferment it to see if it holds the blue or indeed is just a pretty landscape plant.
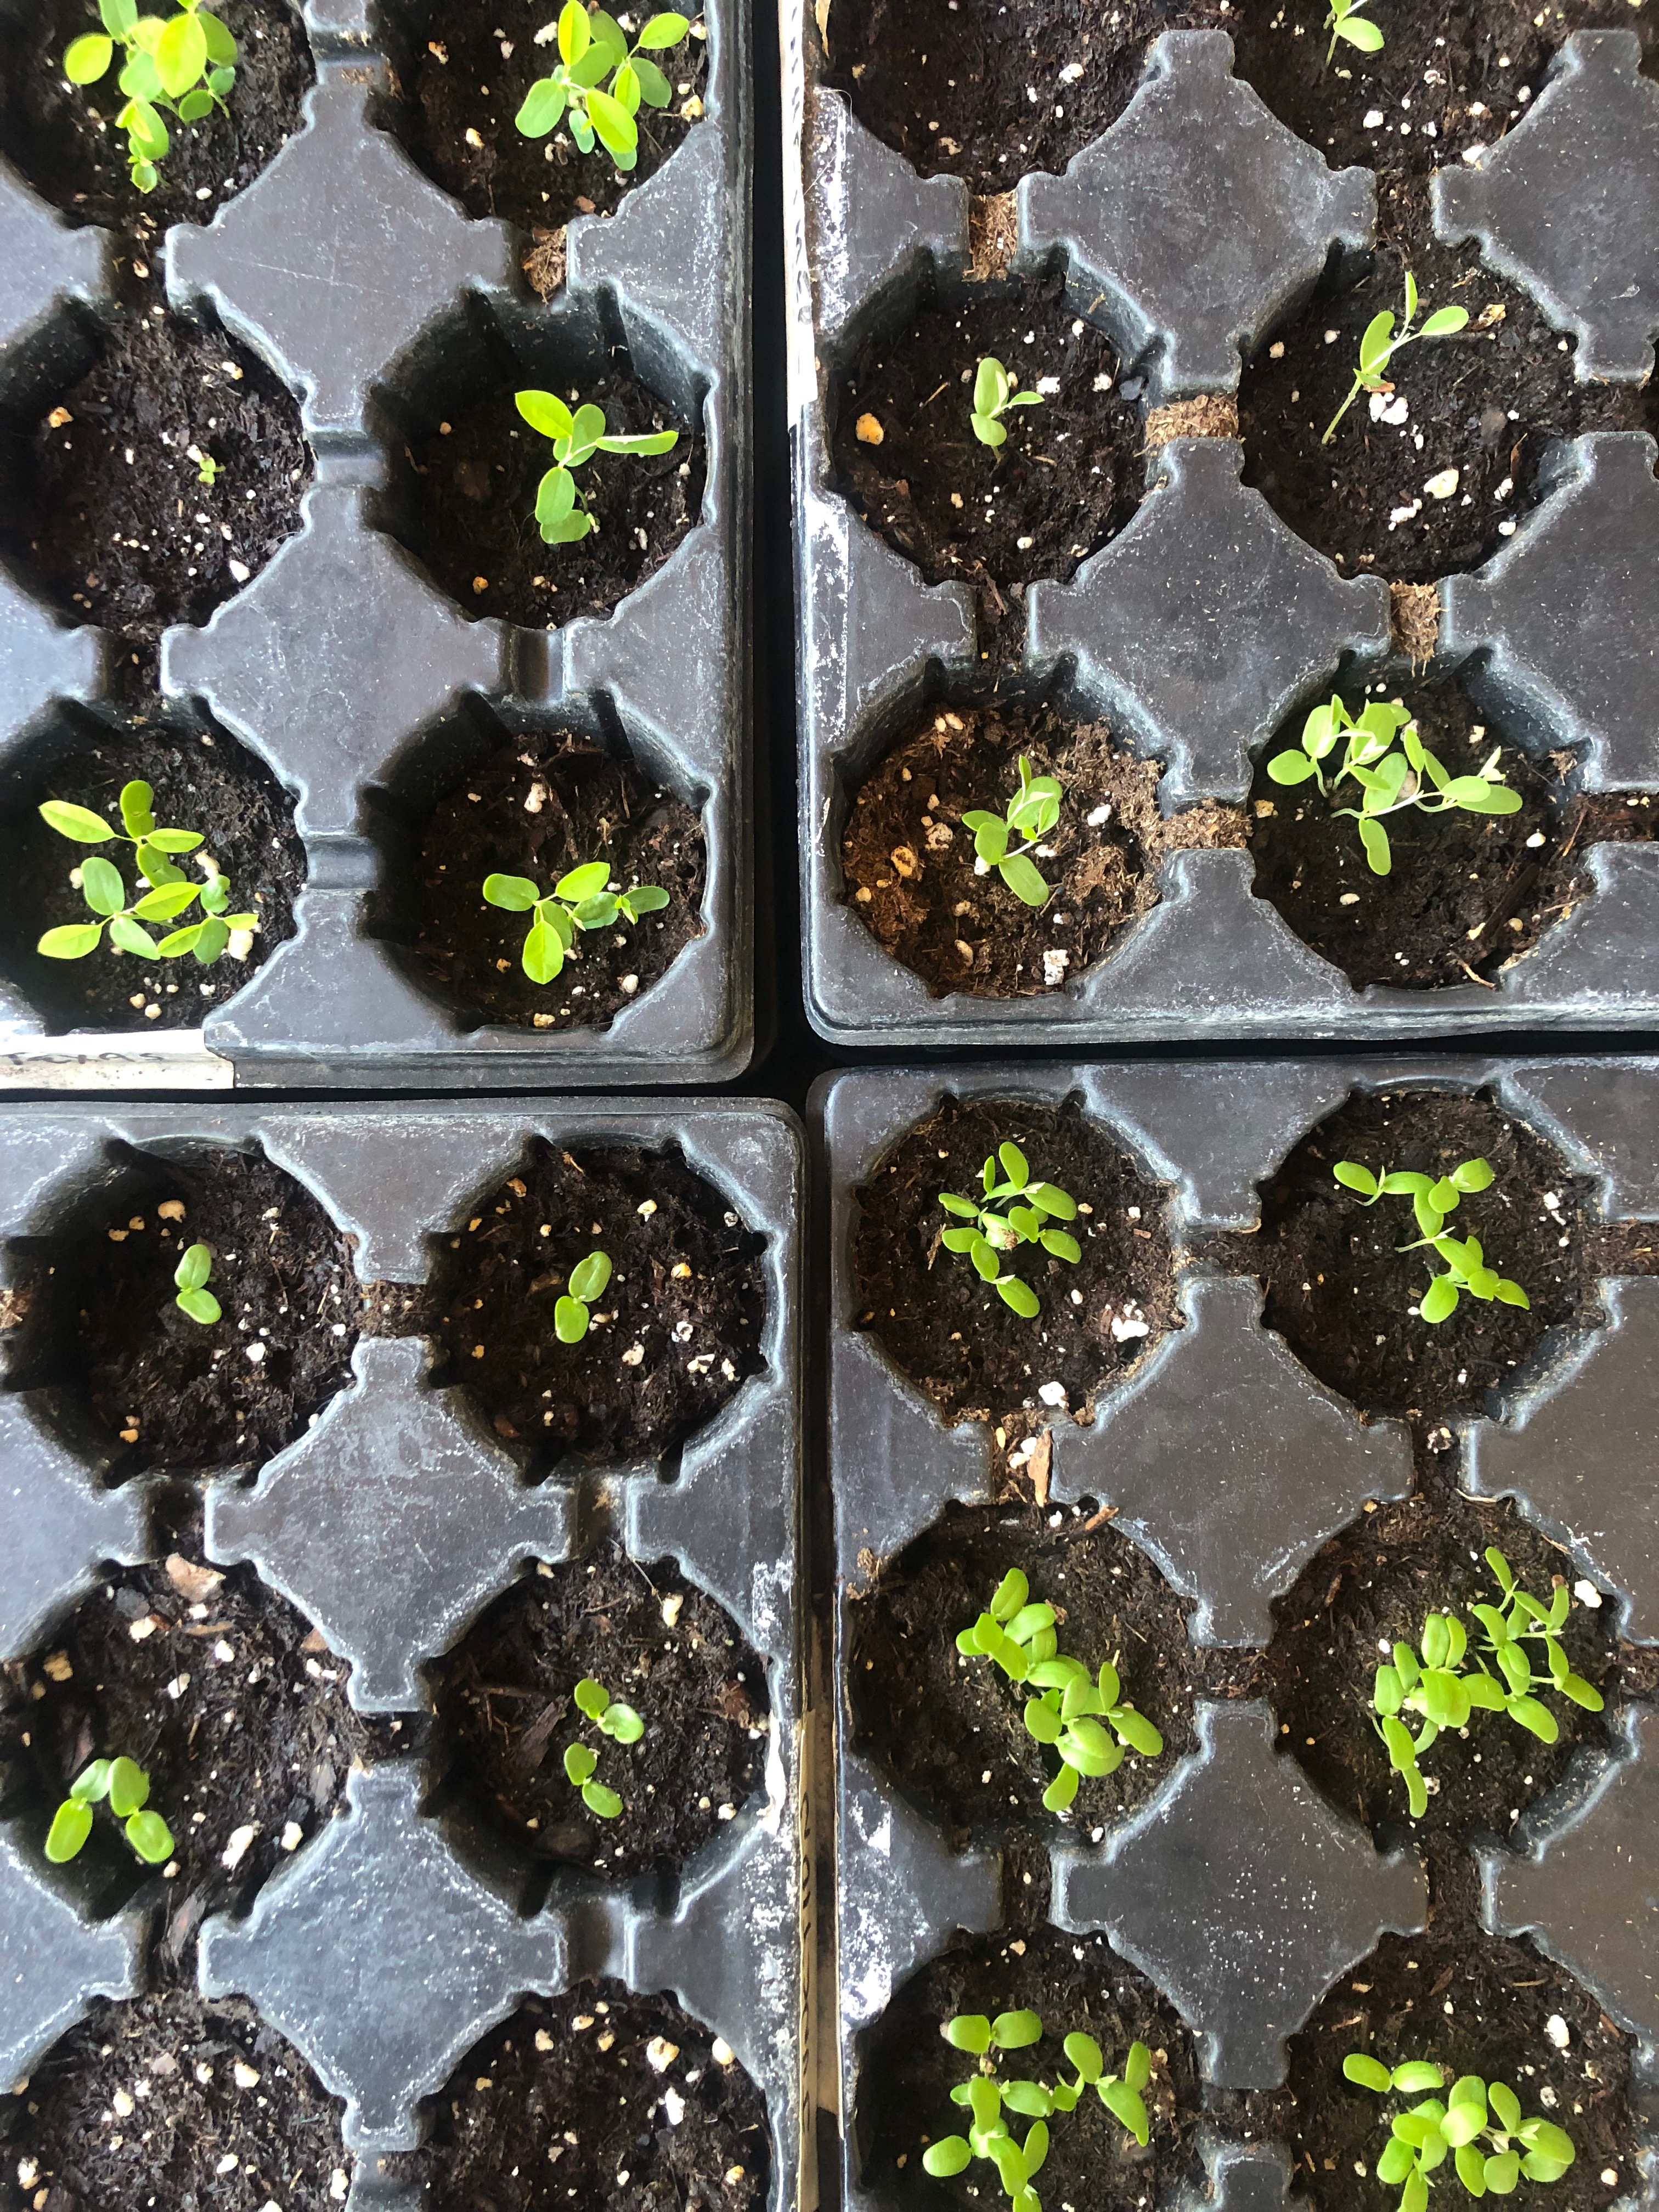
And as usually I germinated my seeds from my South Carolina Indigofera Suffruticosa for replacement plants of the cruel freeze we had in Jan/Feb 2023. Below are my seedlings as of May 18th and their germination notes.
I typically cover my plants and use heat lamps but we were out of town when an unforecasted deep freeze hit and took out about half my seed plants. Yes, I know, cover the plants before you leave town. But I can assure you 20 degrees and ice was NOT in the 10 day forecast. I probably will add hoops to support frost free cloth this year to avoid this type of travel mishap.
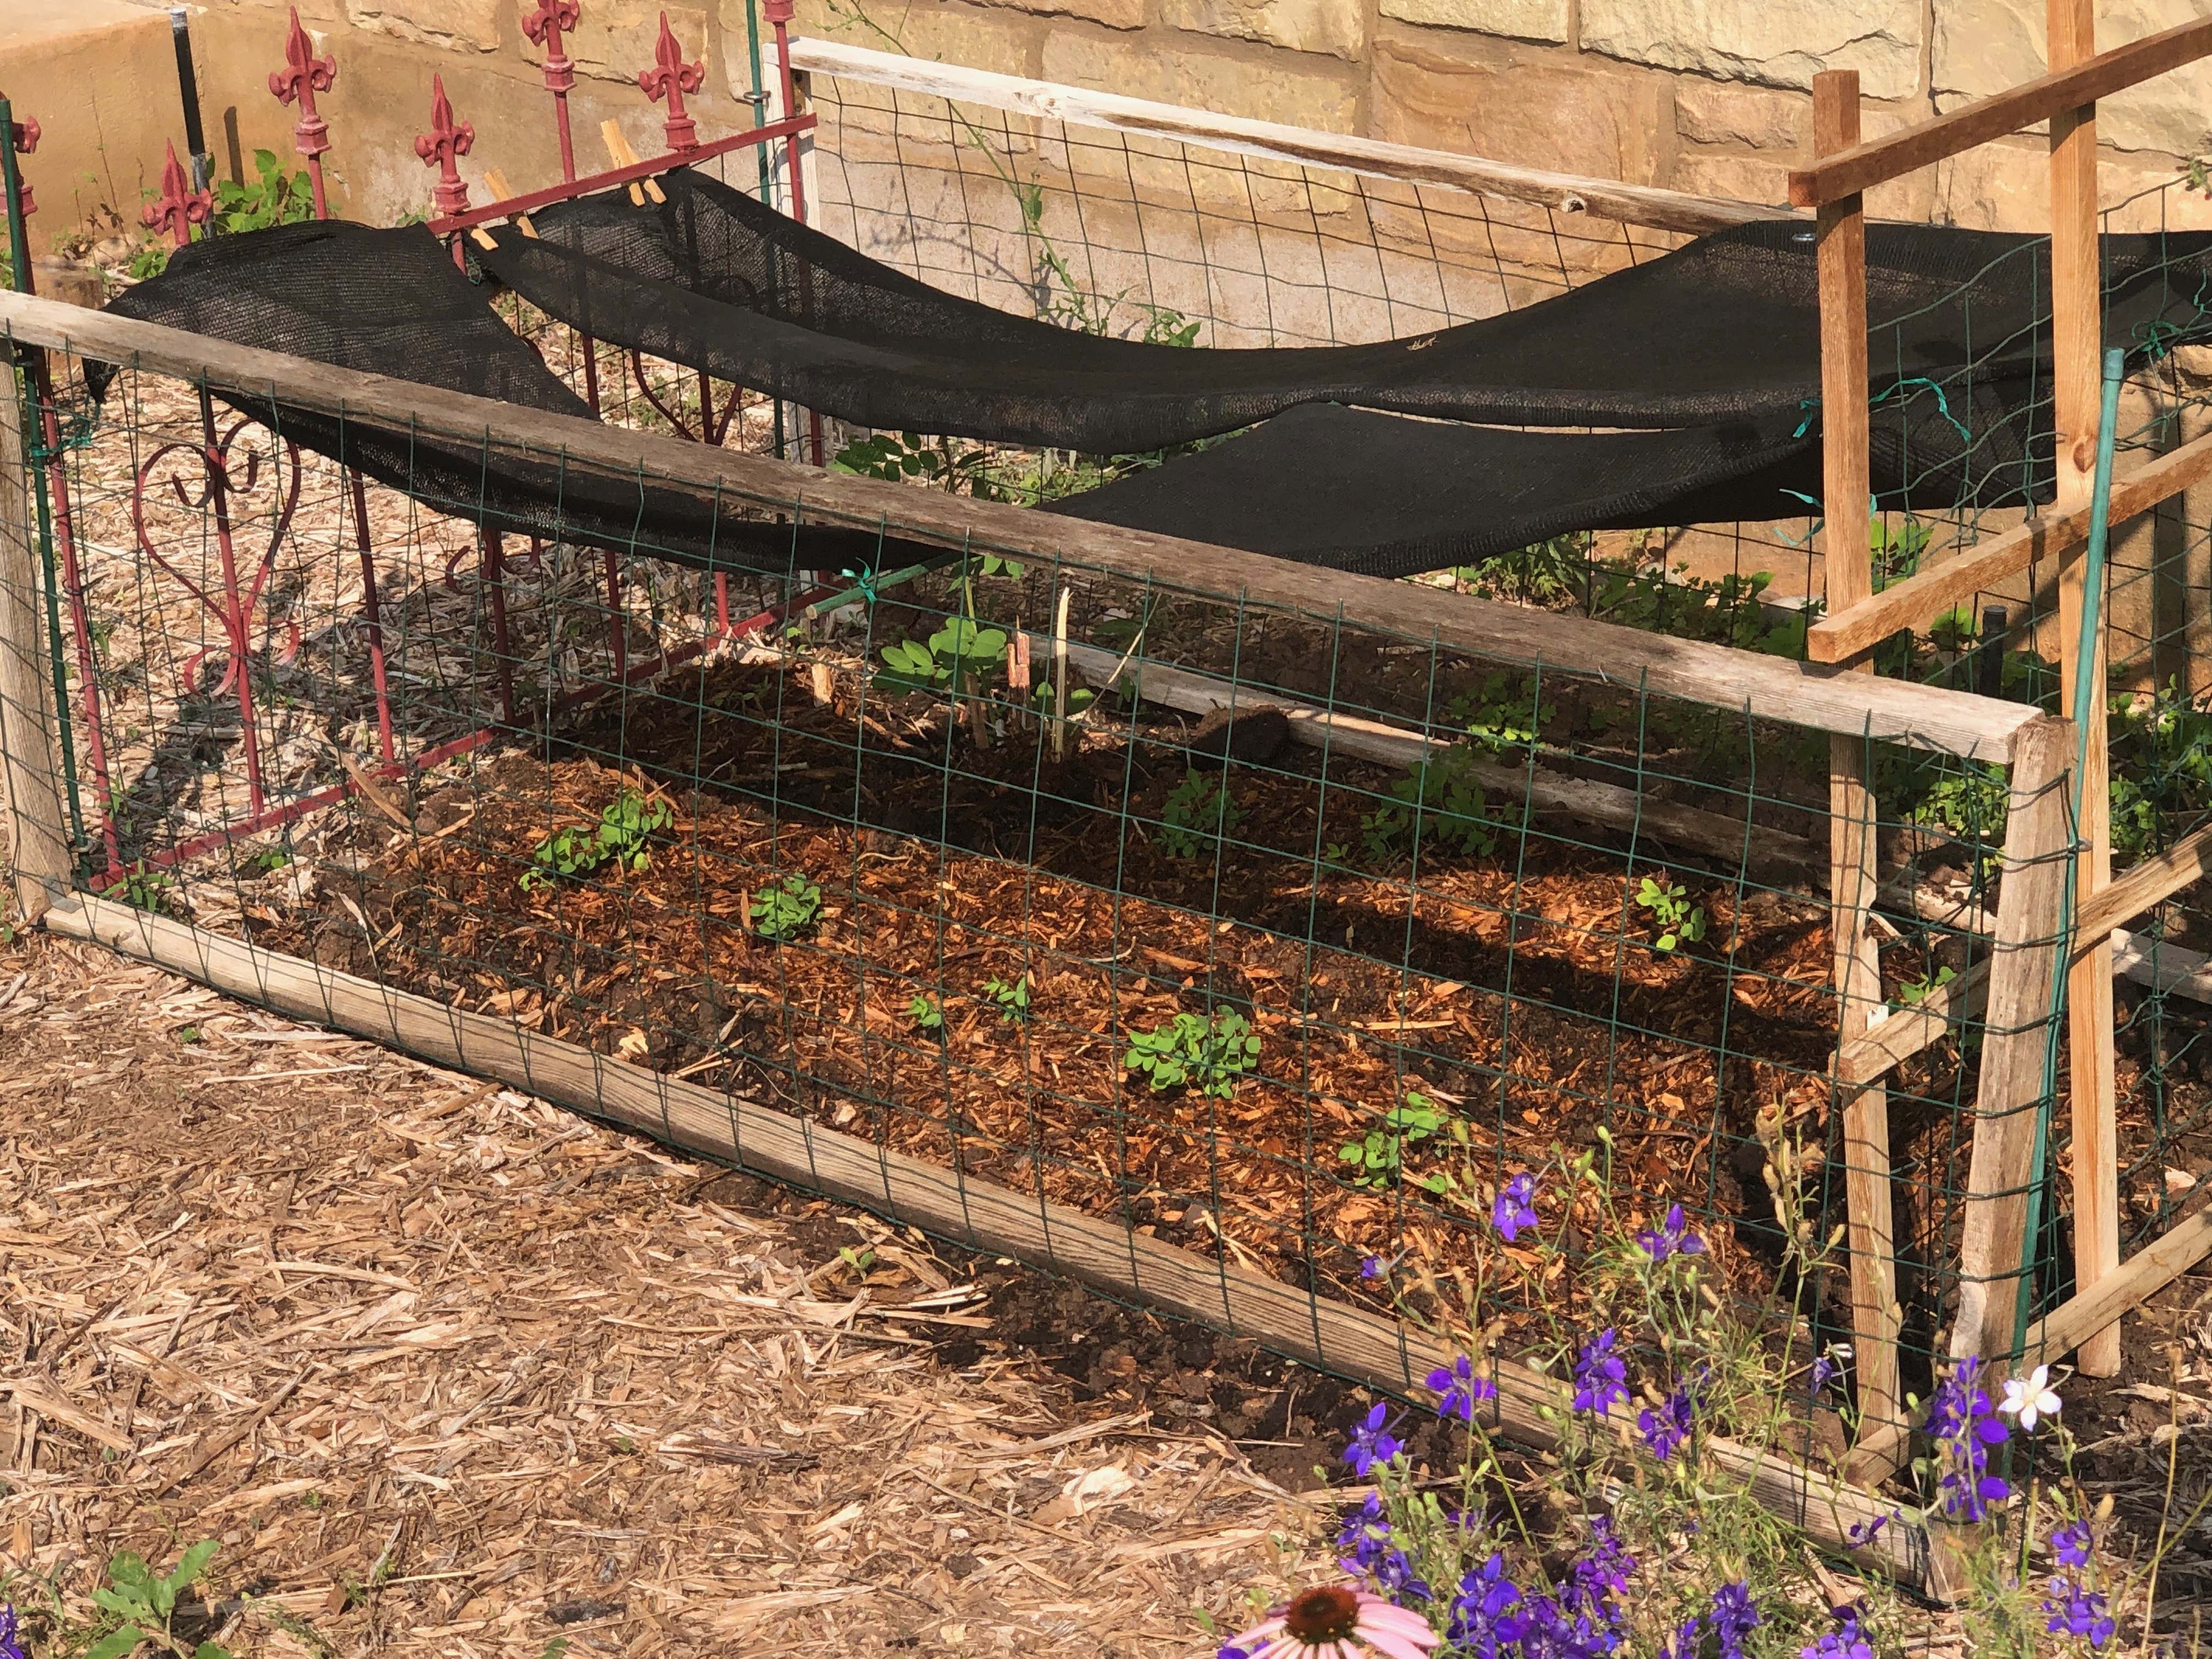
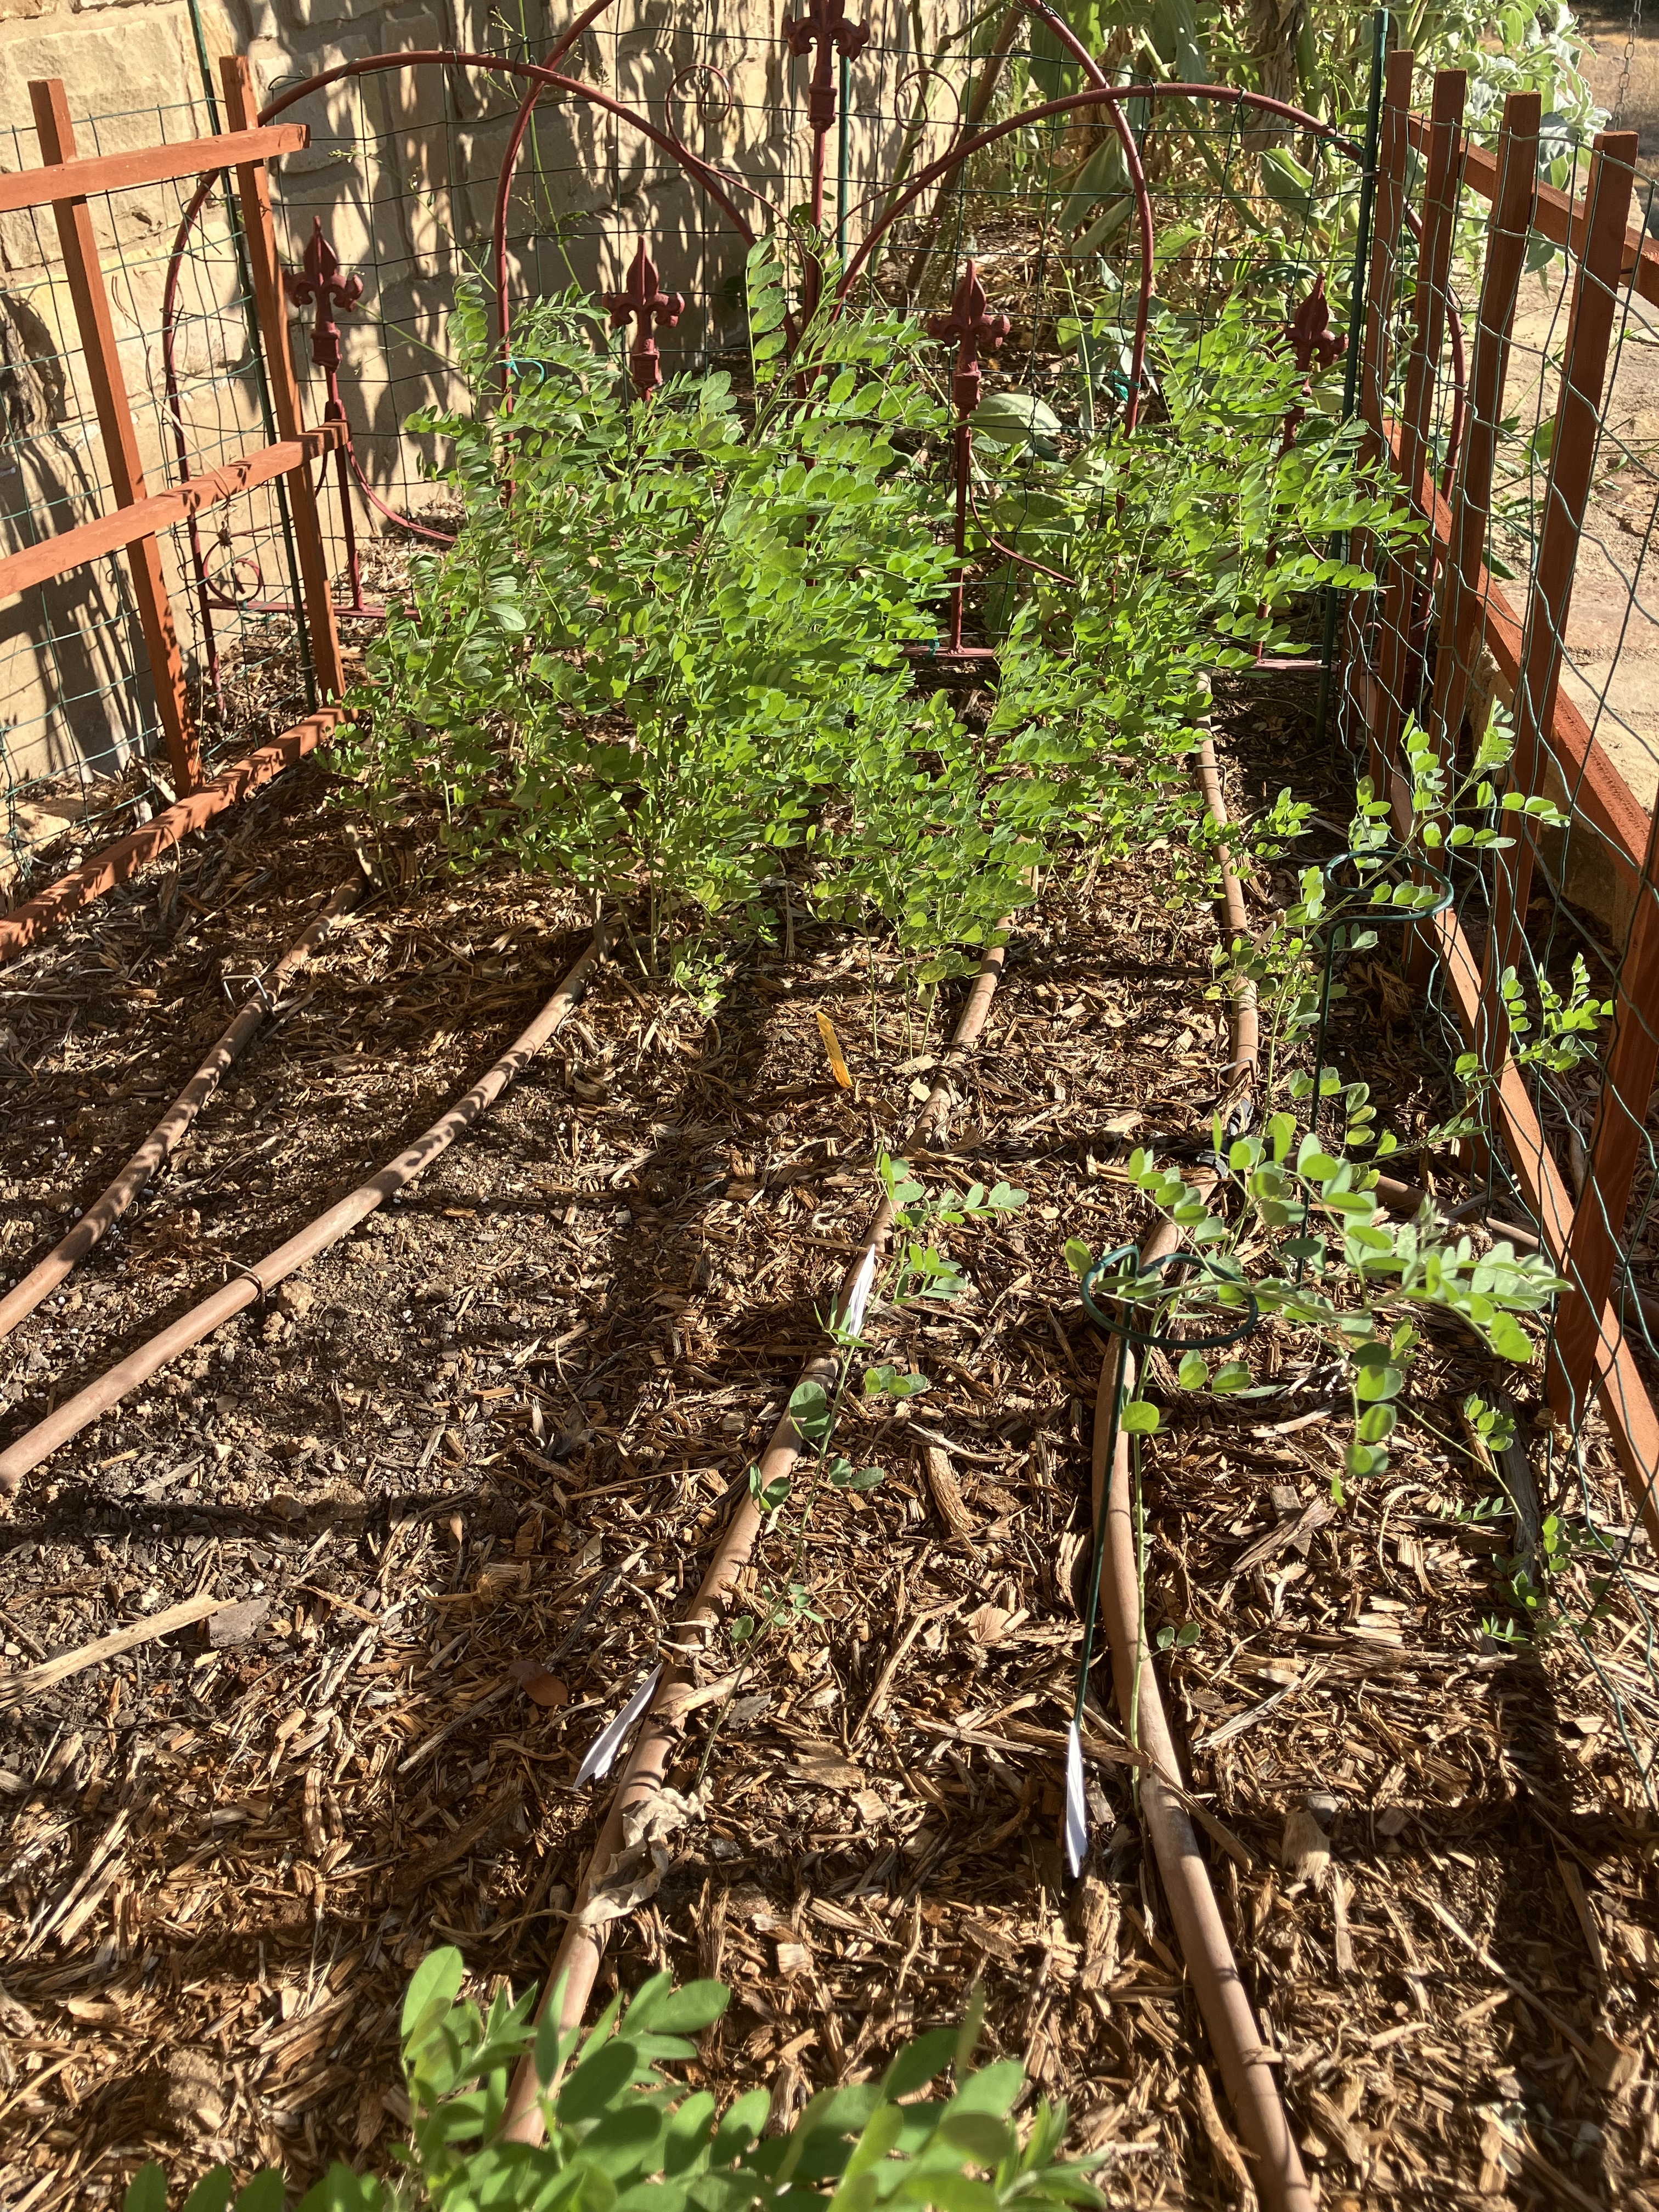
I put off planting my seedlings as tiny crickets love baby indigofera plants when it is cool and wet. I used that time to clear the dead IS , dig & fertilize the beds for plant prep and prepare the irrigation and armadillo fencing. Racoons and armadillos love seedling plantings. They dig up the seedling to look for grubs. I always dig a decoy hole away from my plants and water it generously to attract the diggers. So far it has worked plus a small fence around my plant area. My seedlings were all ready to roll in mid-May but it was still coolish and buggy outside. So I held them inside a screen area to protect them from spring rains and hail and rotated them to keep them from getting leggy.
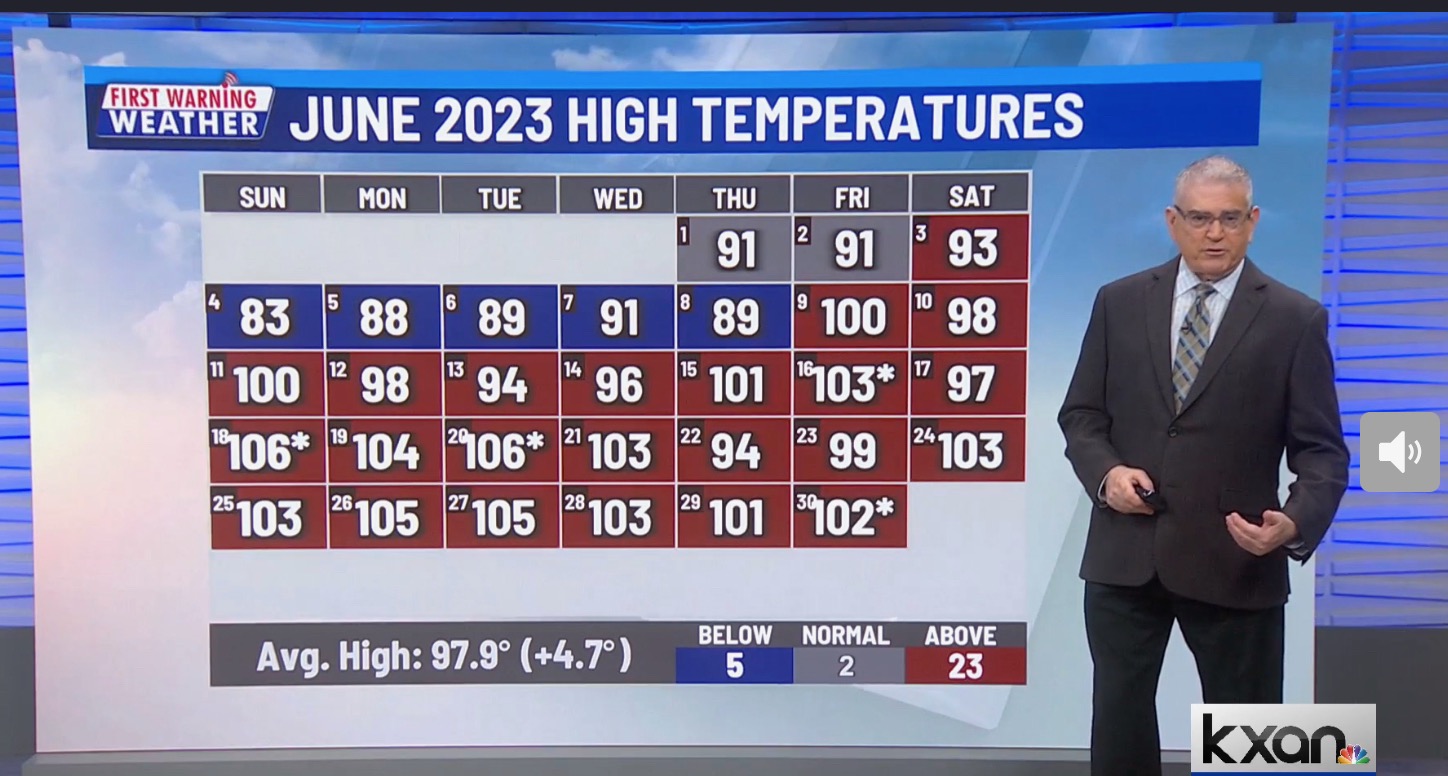
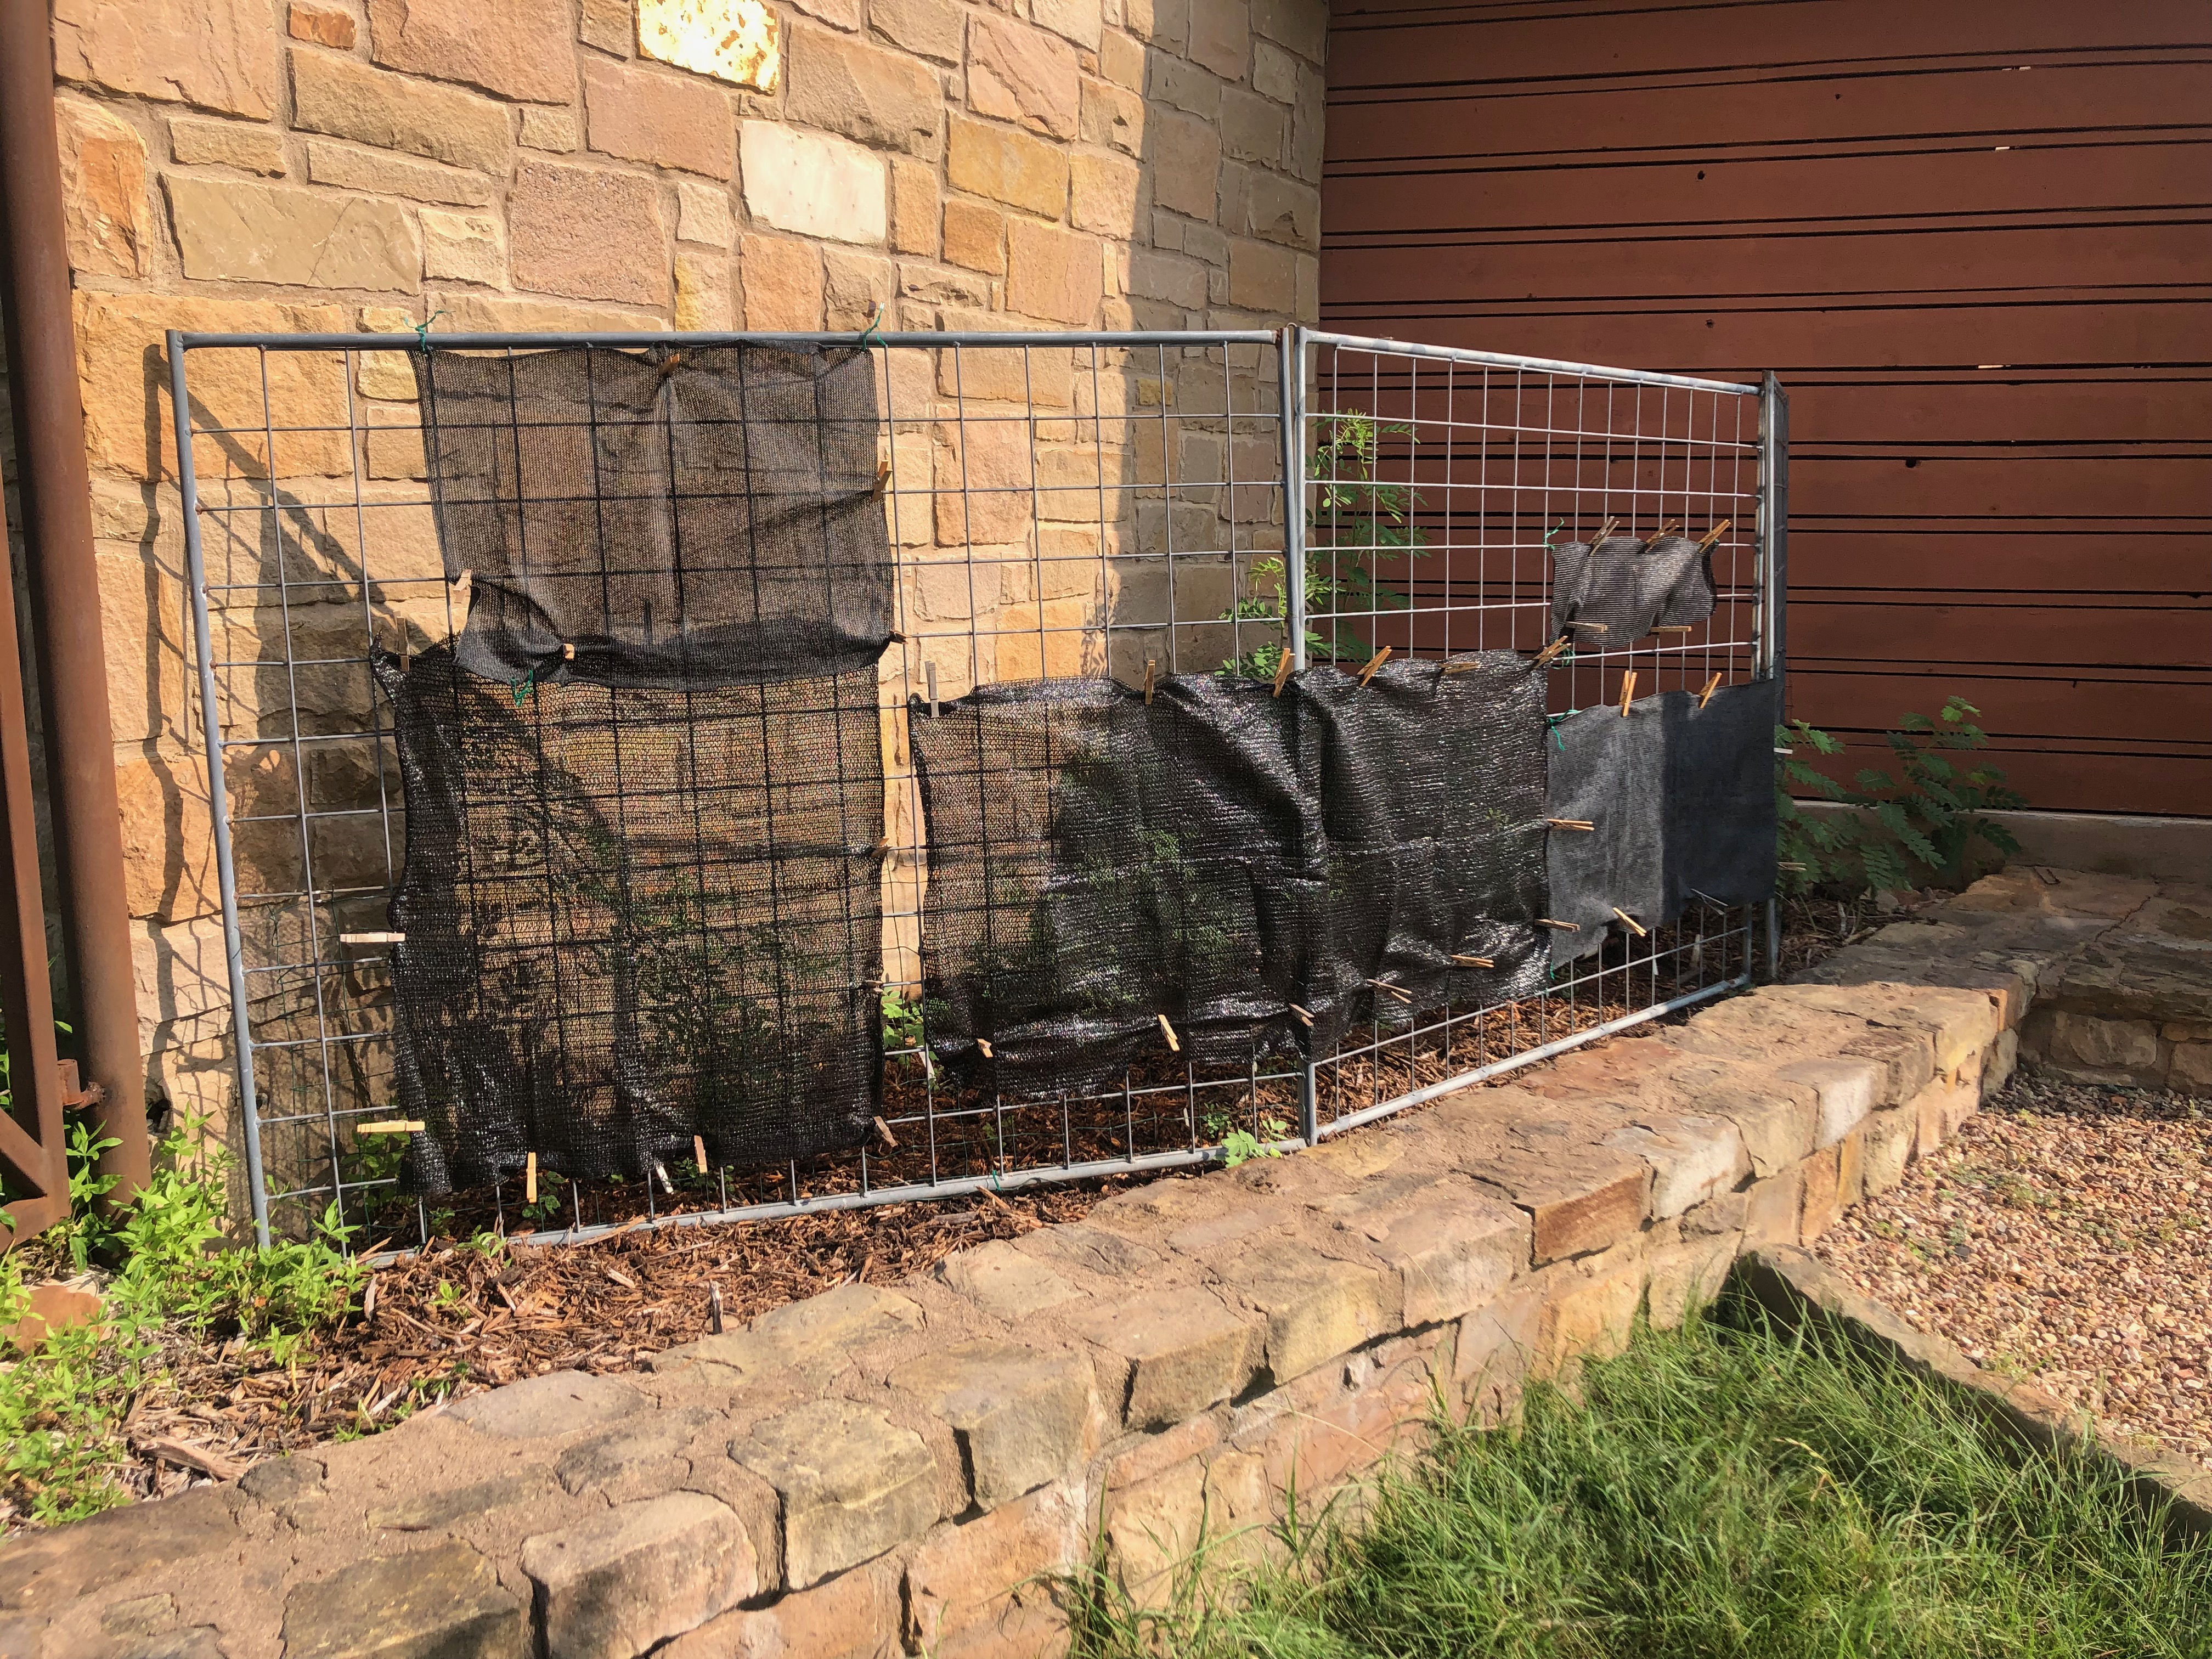
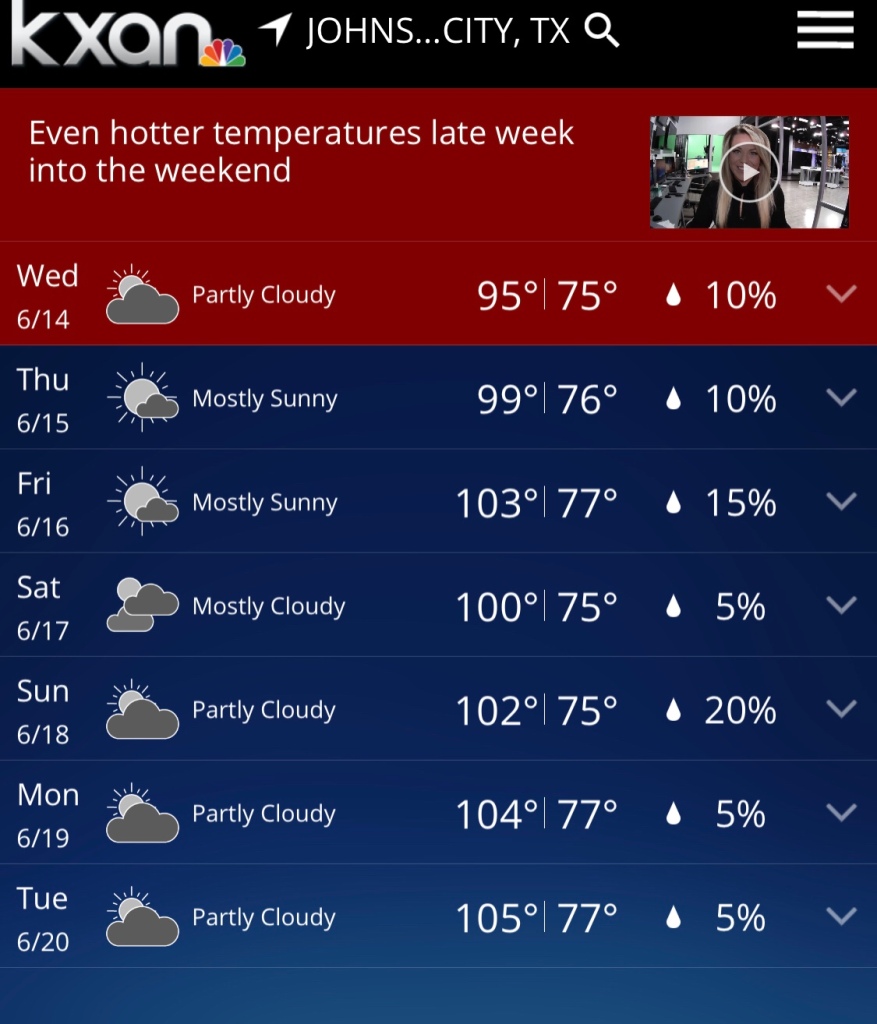
About mid-June we took a massive temperature jump from 80’s to 106. Yikes, summer is here very early. Not ideal weather for seedlings. I put the plants in carefully around the drip irrigation and for the first time ever put up some shade cloth so the new plants could get acclimated to the heat. That shade cloth has stayed up in June, July and part of August. I decided they need to sink or swim in the heat and as temperatures “lowered” to the mid 90’s. I need to see their adaptability to our Hill Country climate so I pulled the shade cloth in late August when temperatures “lowered” to 100 degrees, a “normal” temperature for that time of year.
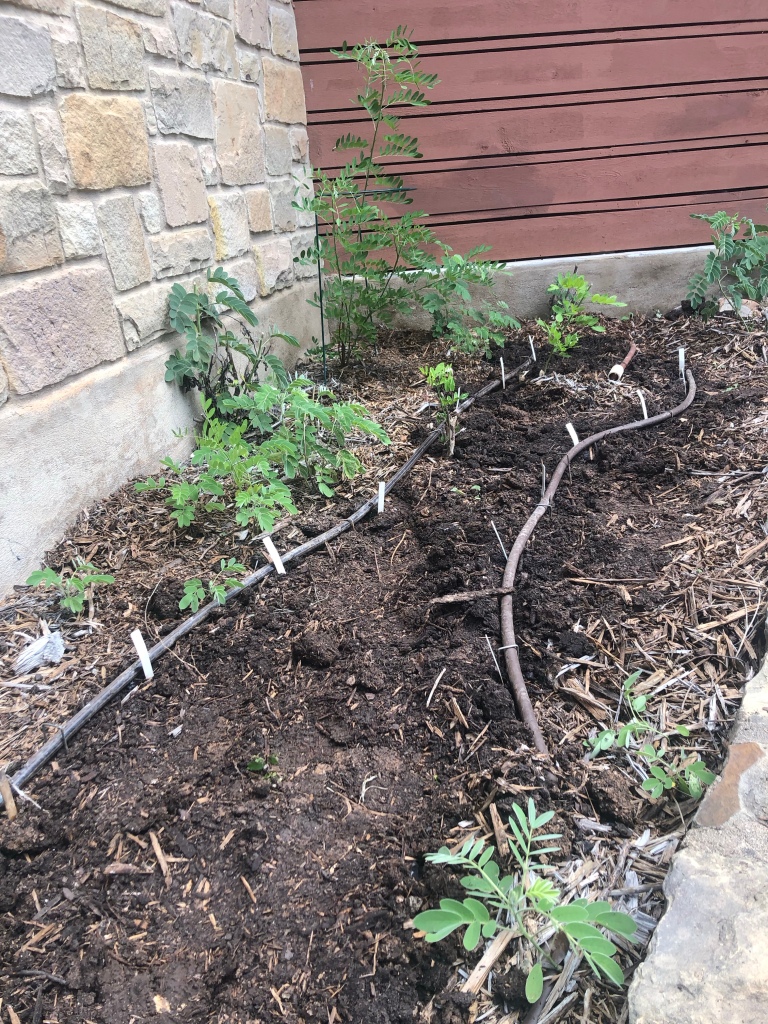
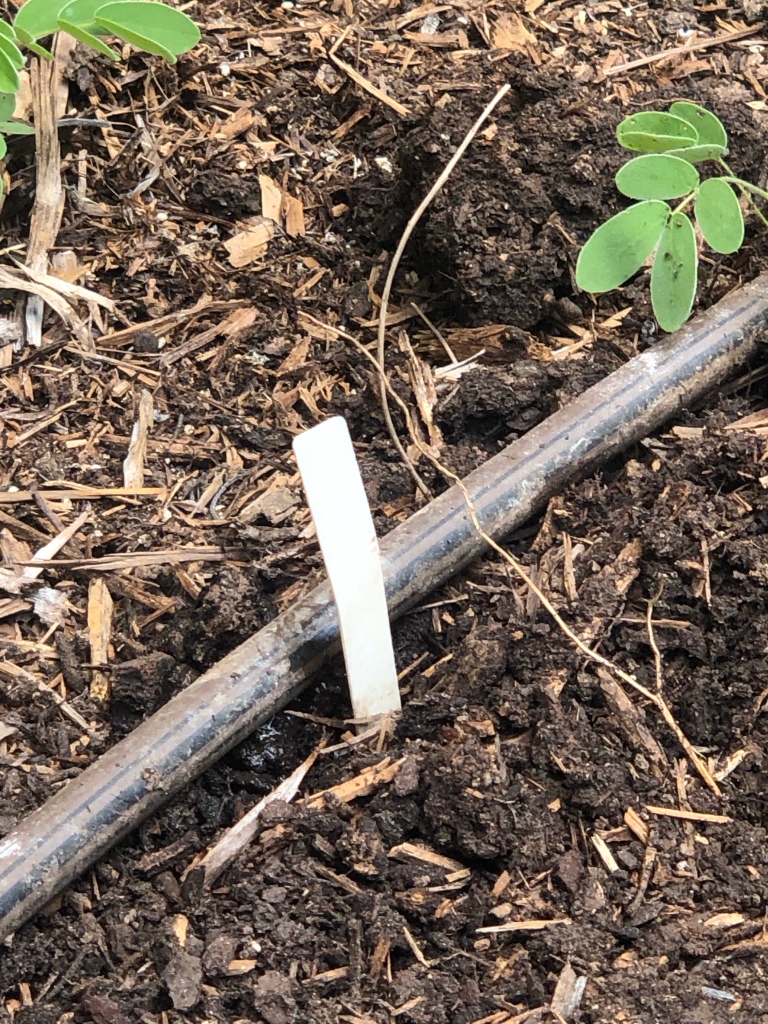
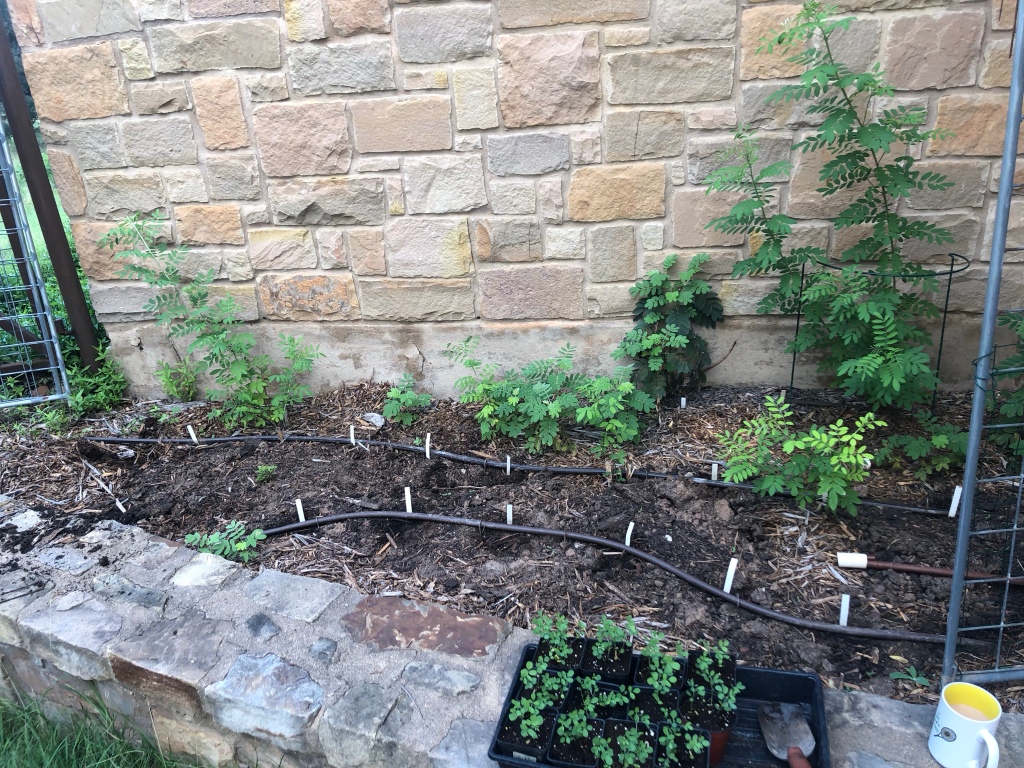
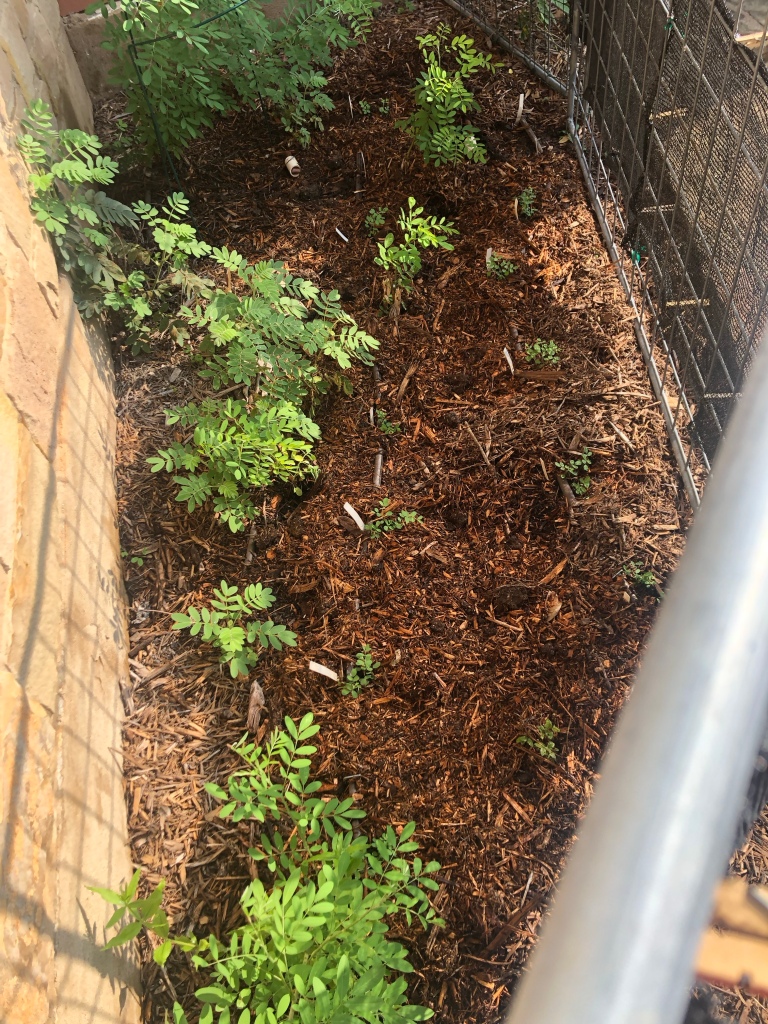
One & two year old indigofera suffruticosa and lindheimer senna (guardian plant) to the left along the wall.Marking the all important dripEast facing bed sunshadeWest facing bed sunshade
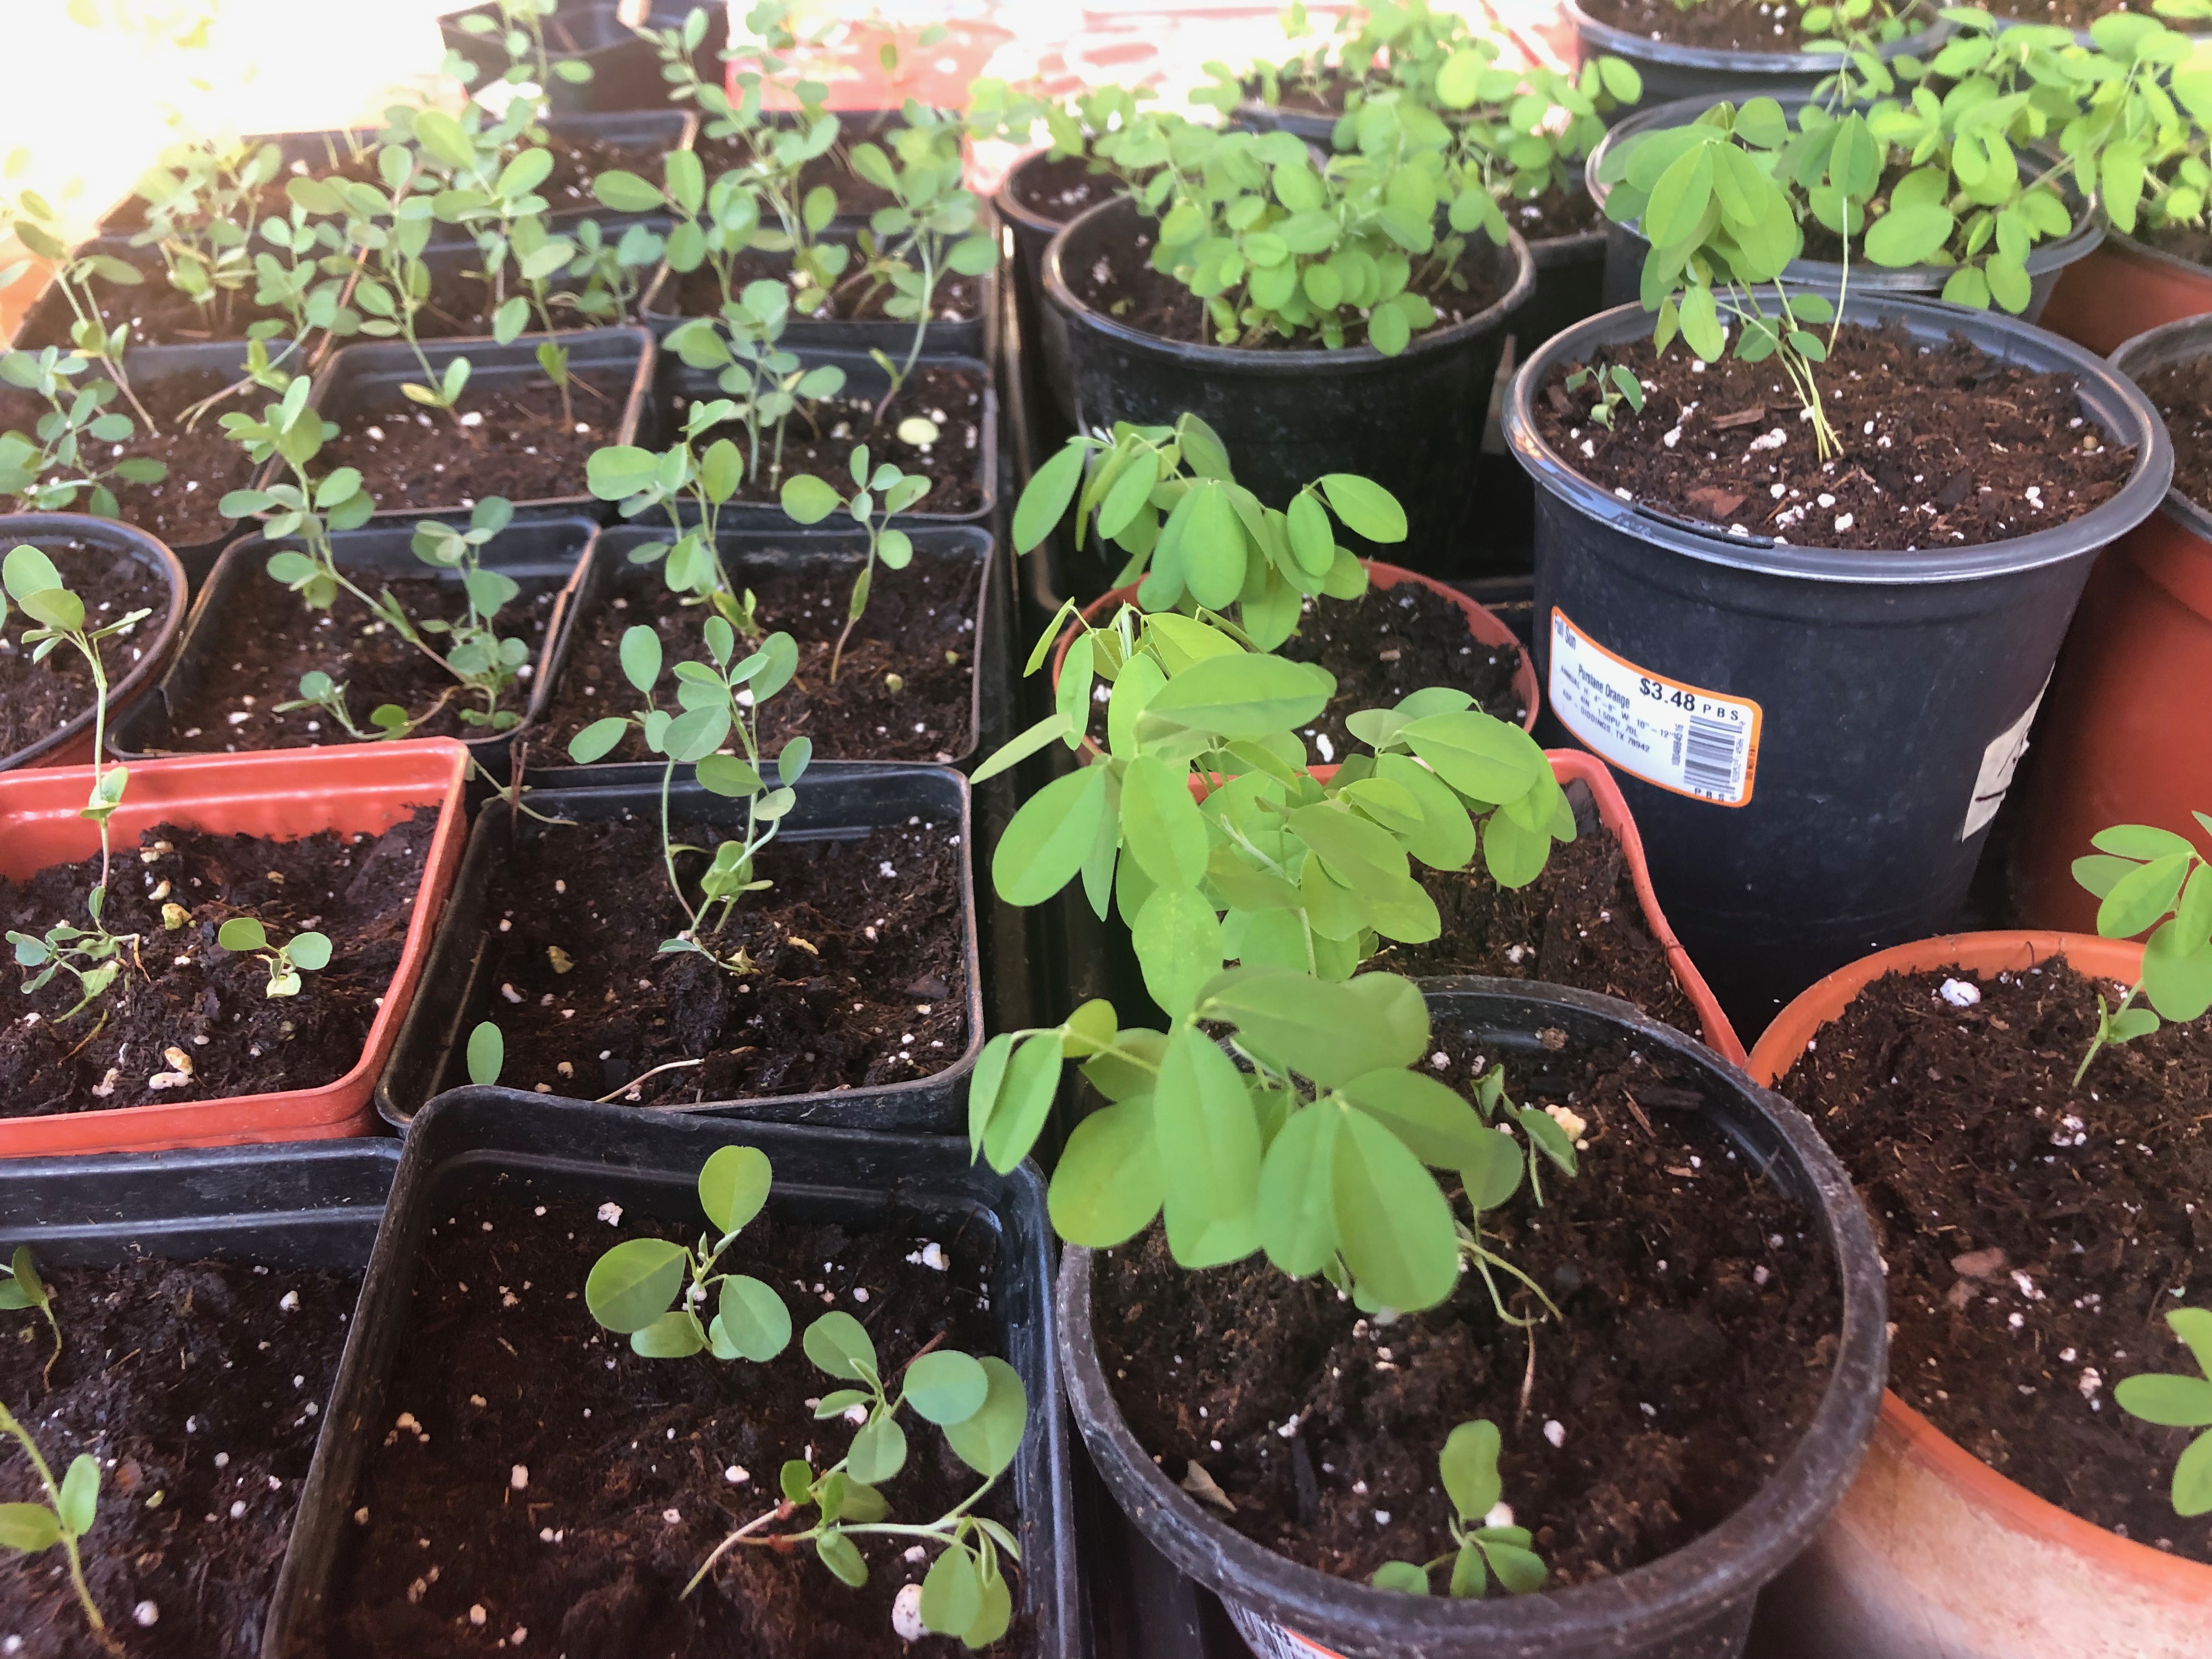
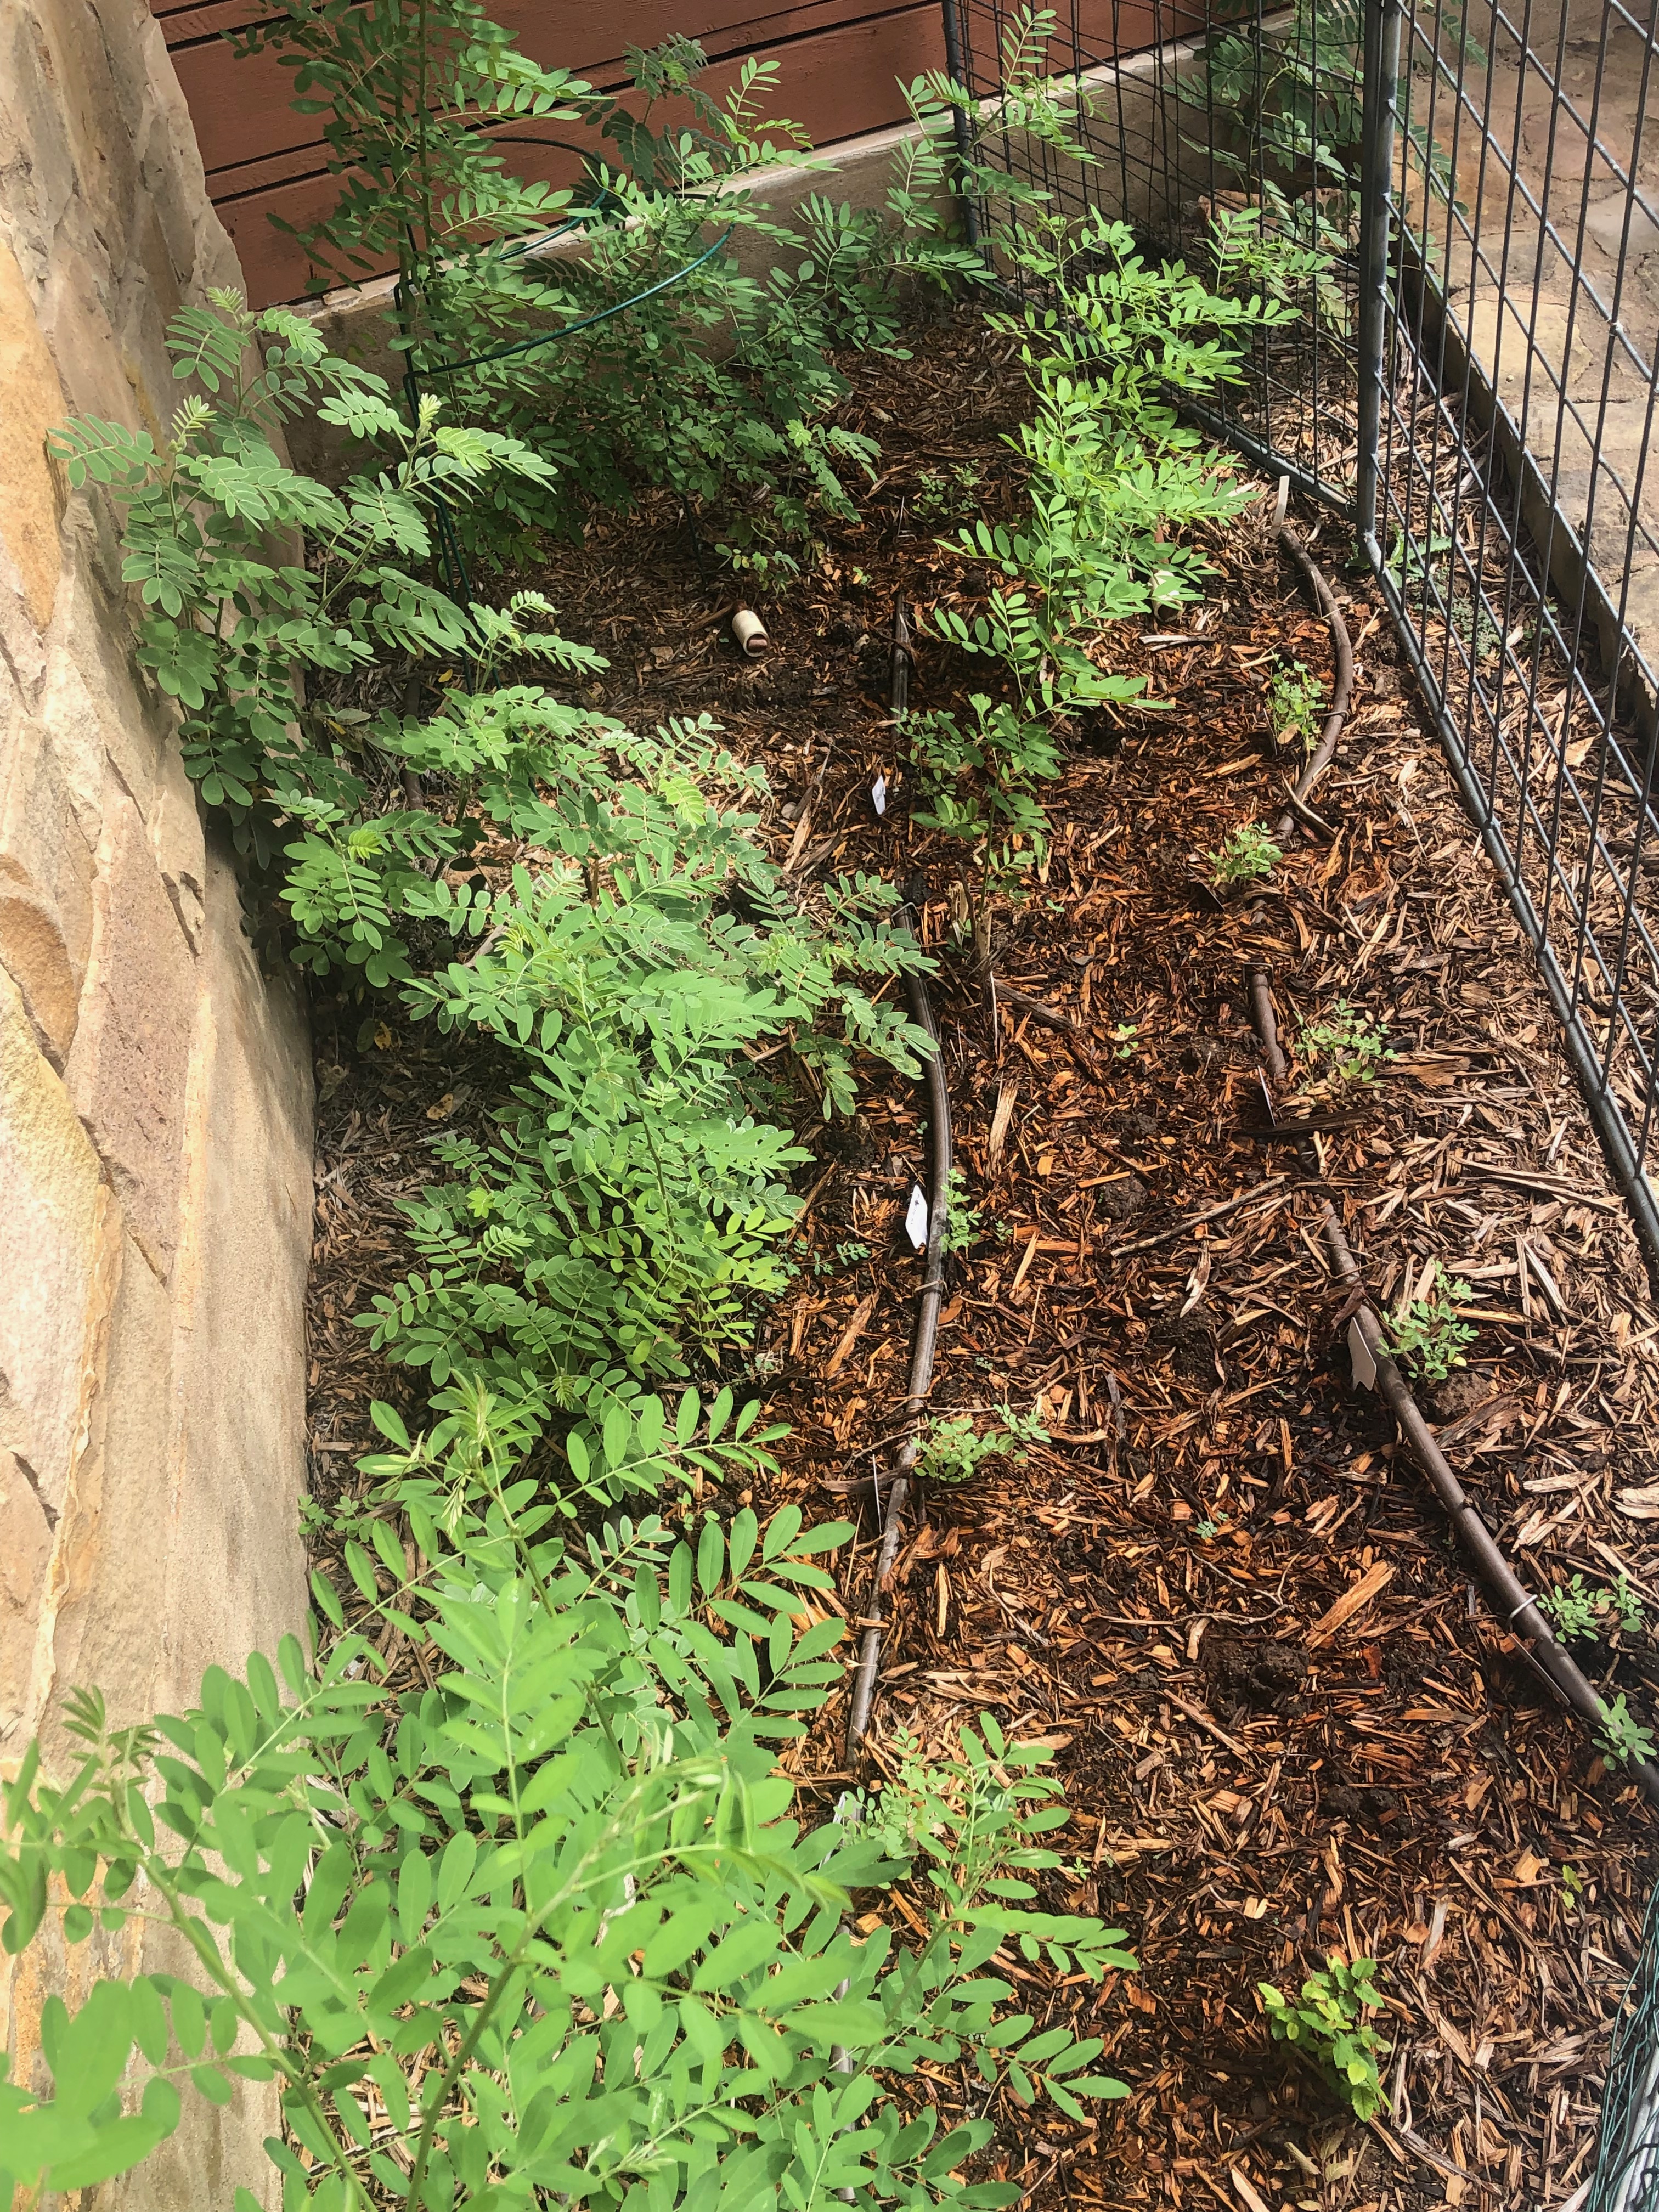
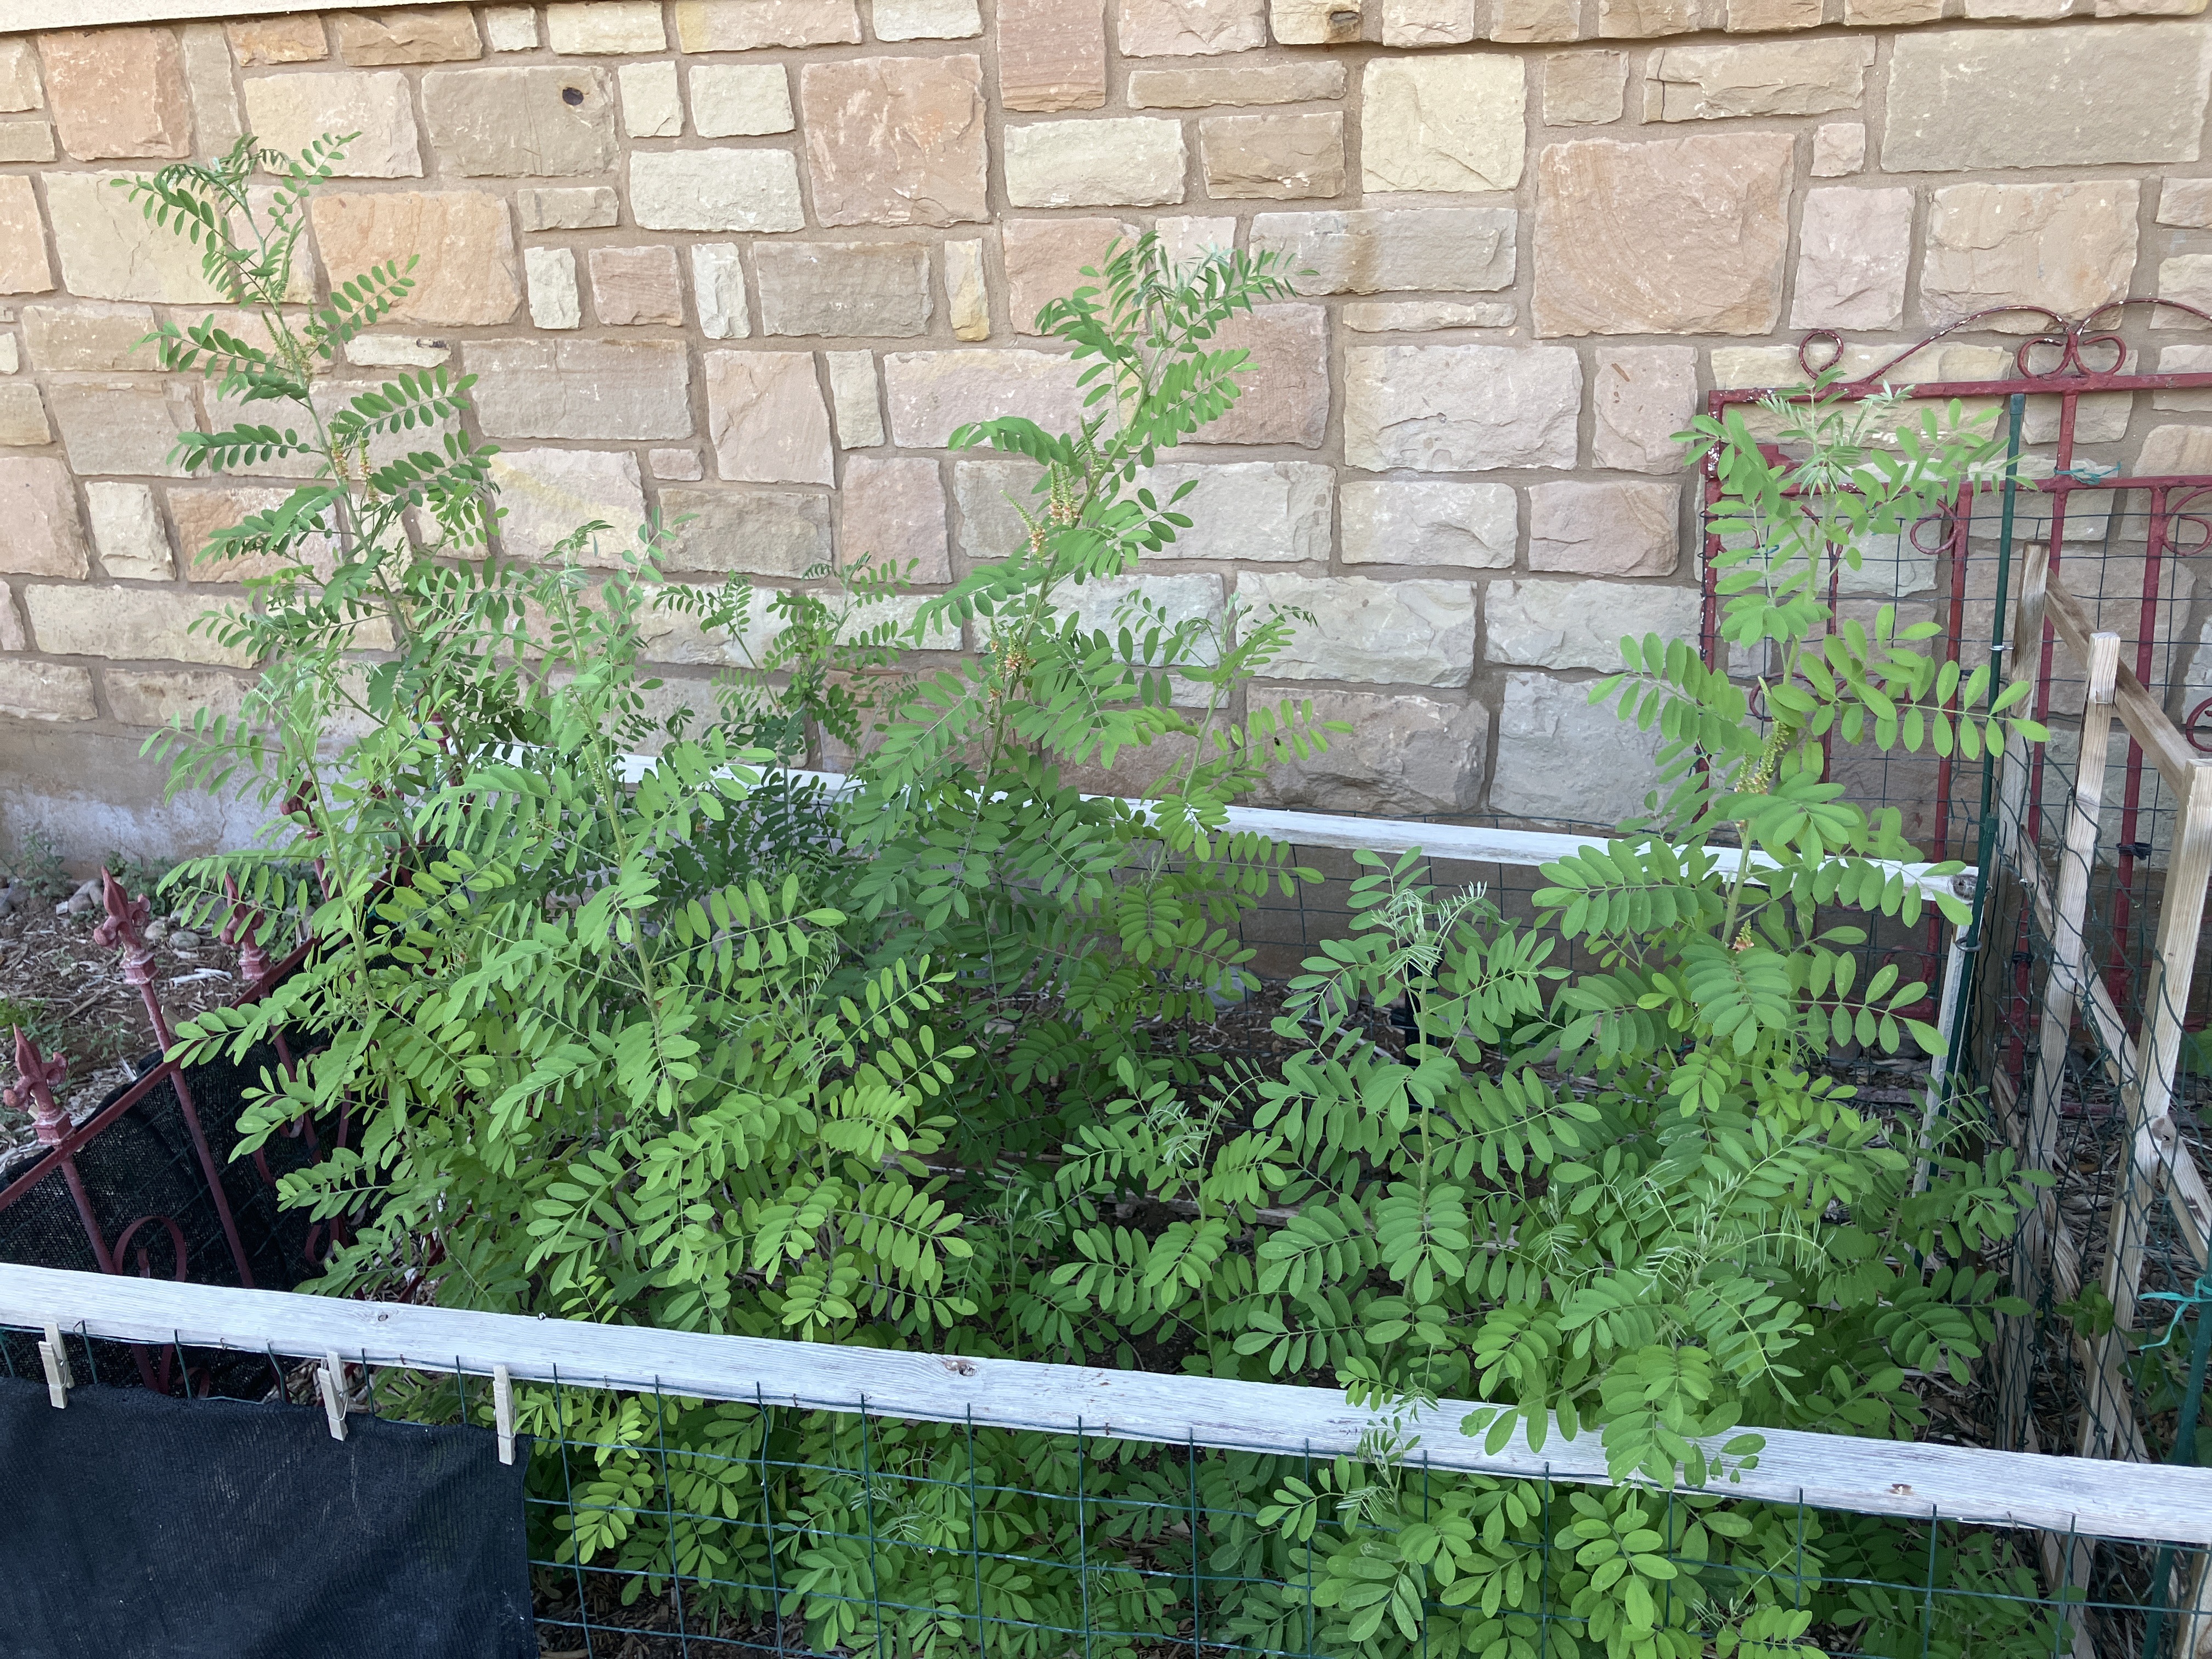
The plants have lived but all 4 species were very reluctant to grow. They stabilized, took hold of the dirt and filled out but height was not an option during our 100 degree plus days which went 45 days in a row. Usually by August I have happy 5-6 foot Indigofera Suffriticosa plants and have harvested pigment at least one or two times. Not this year, we are in survival mode for seeds and pigment is looking doubtful at this time. Unless more leaves make an appearance in late September.
As of August the Junction seeds are showing their seed age and were very scraggly. The Lindeheimer has daintily filled out and has a beautiful shade of green. The Bastrop took the heat in stride and along with my SC Indigoferat Suffruticosa filled out and looked “comfortable”.
Choosing the working drips for the seedlingsLindheimer to the right, Senna and IS to the left
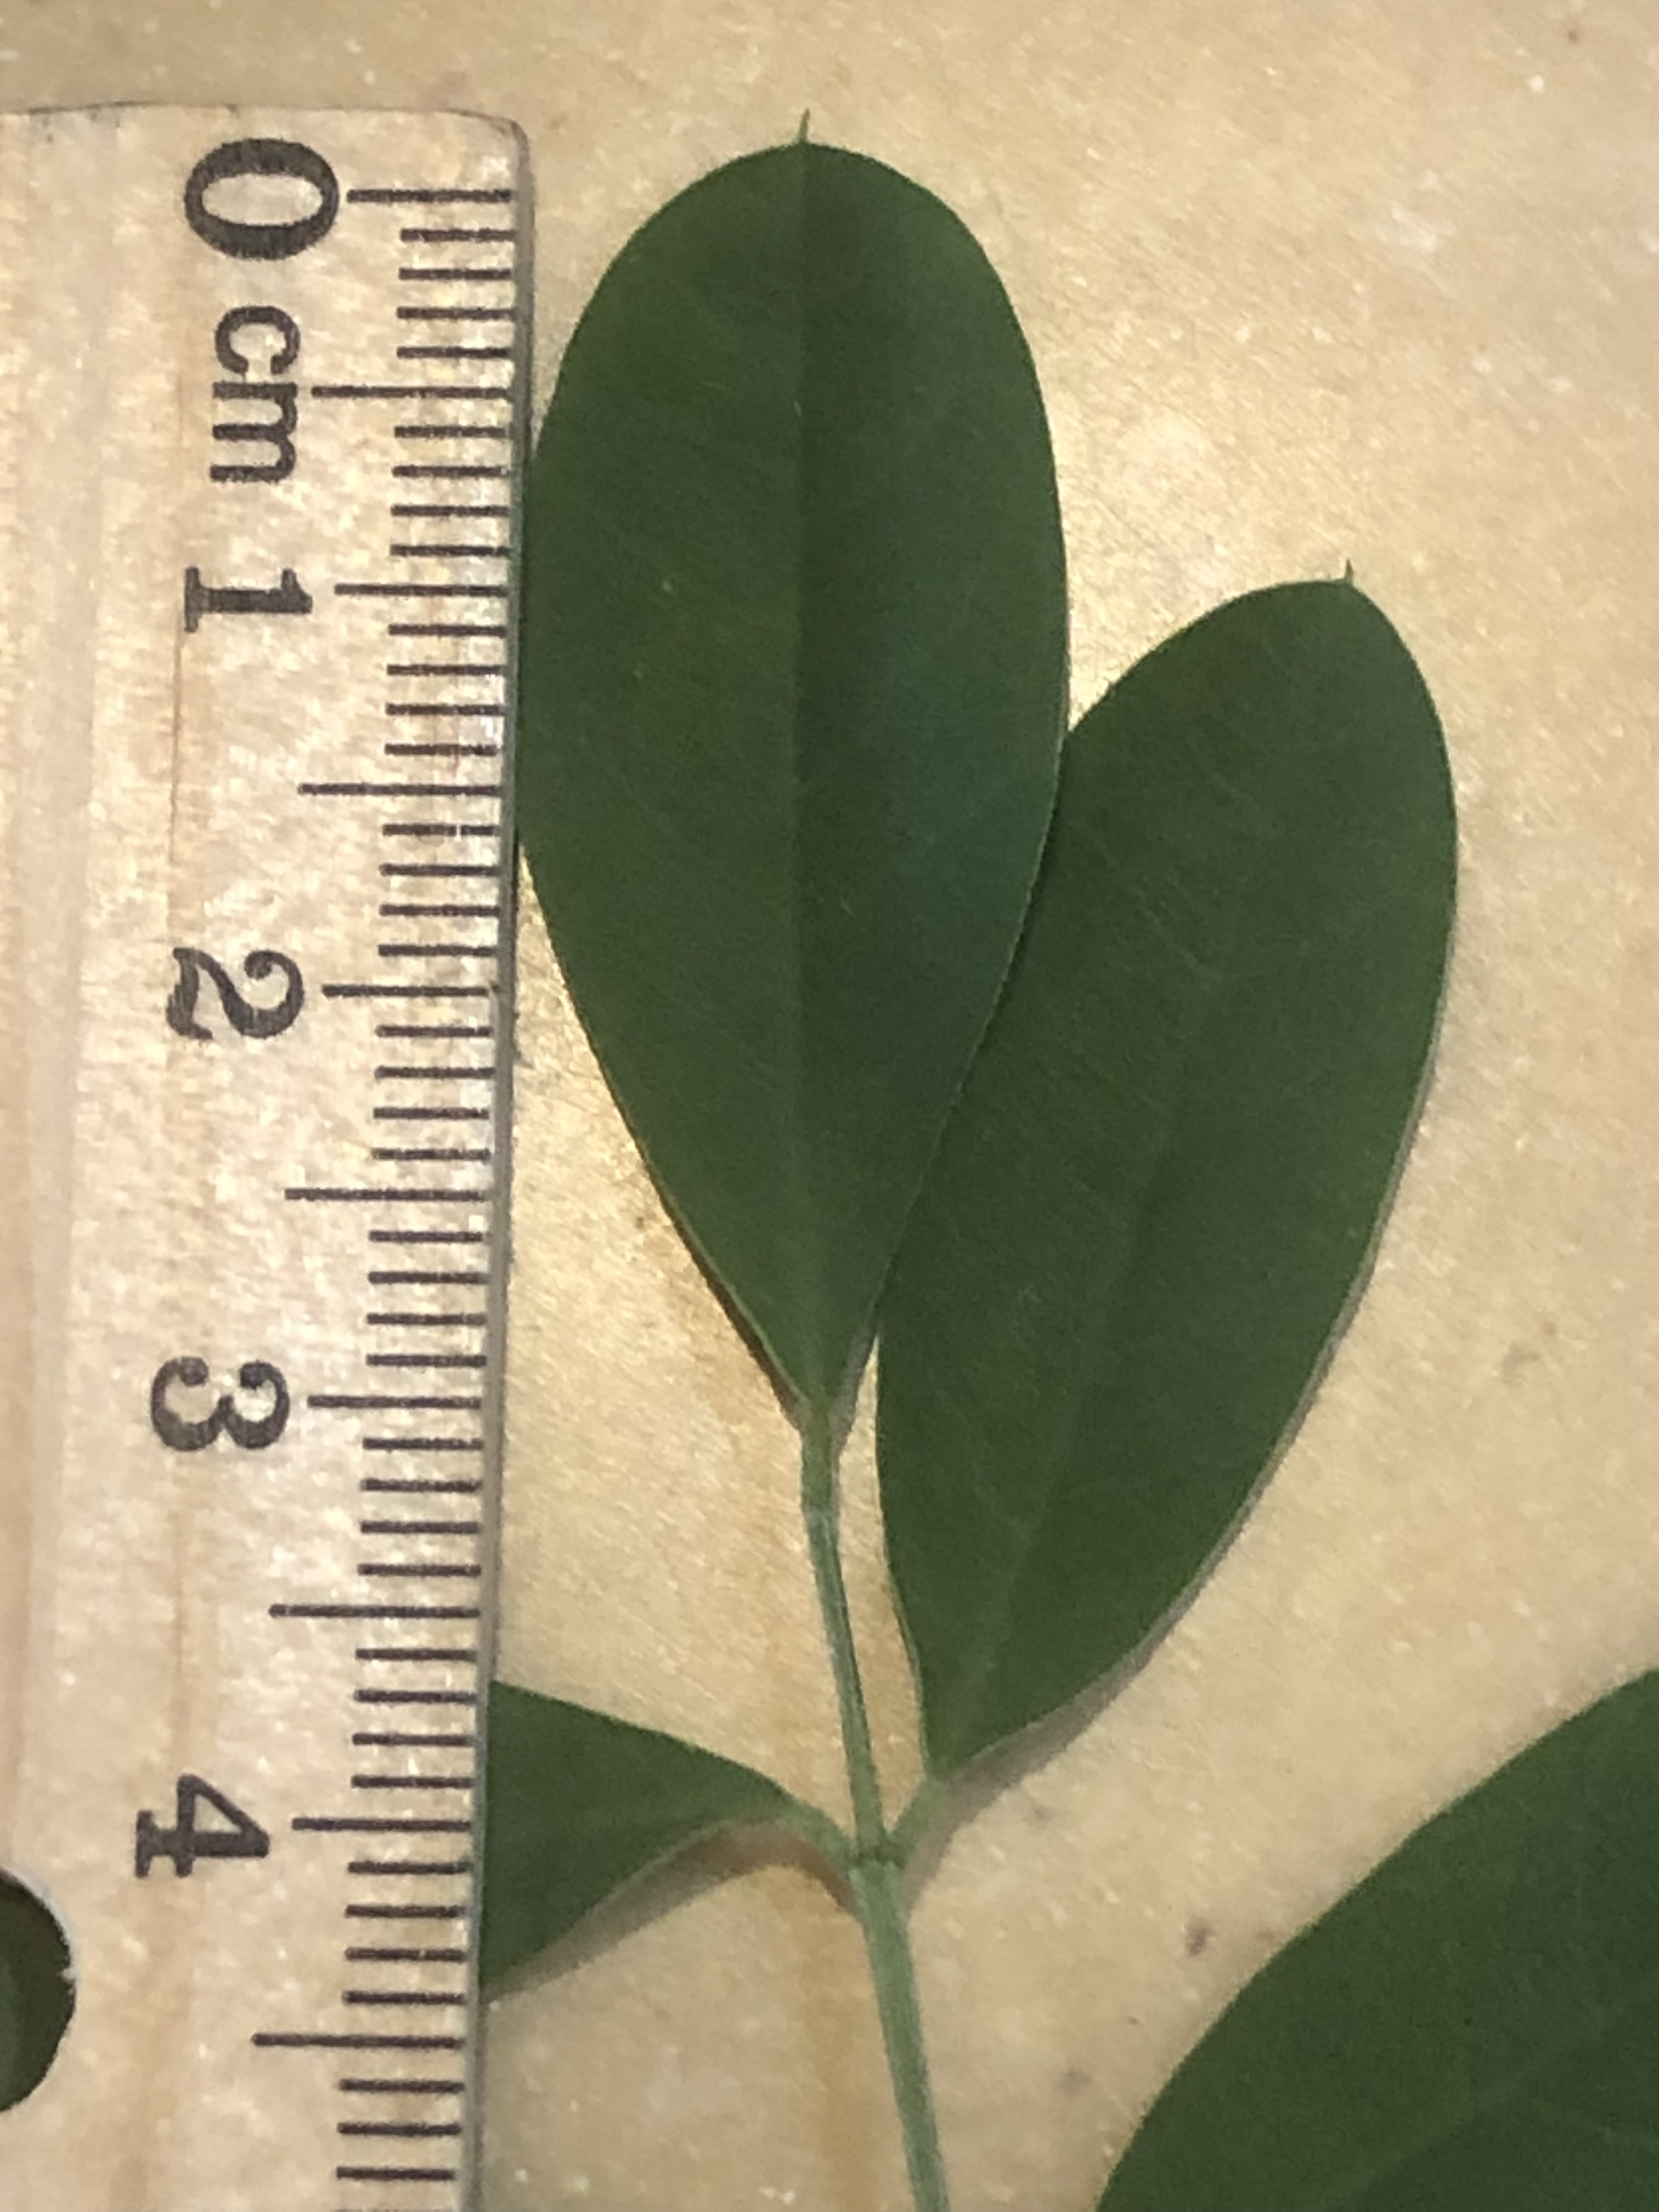
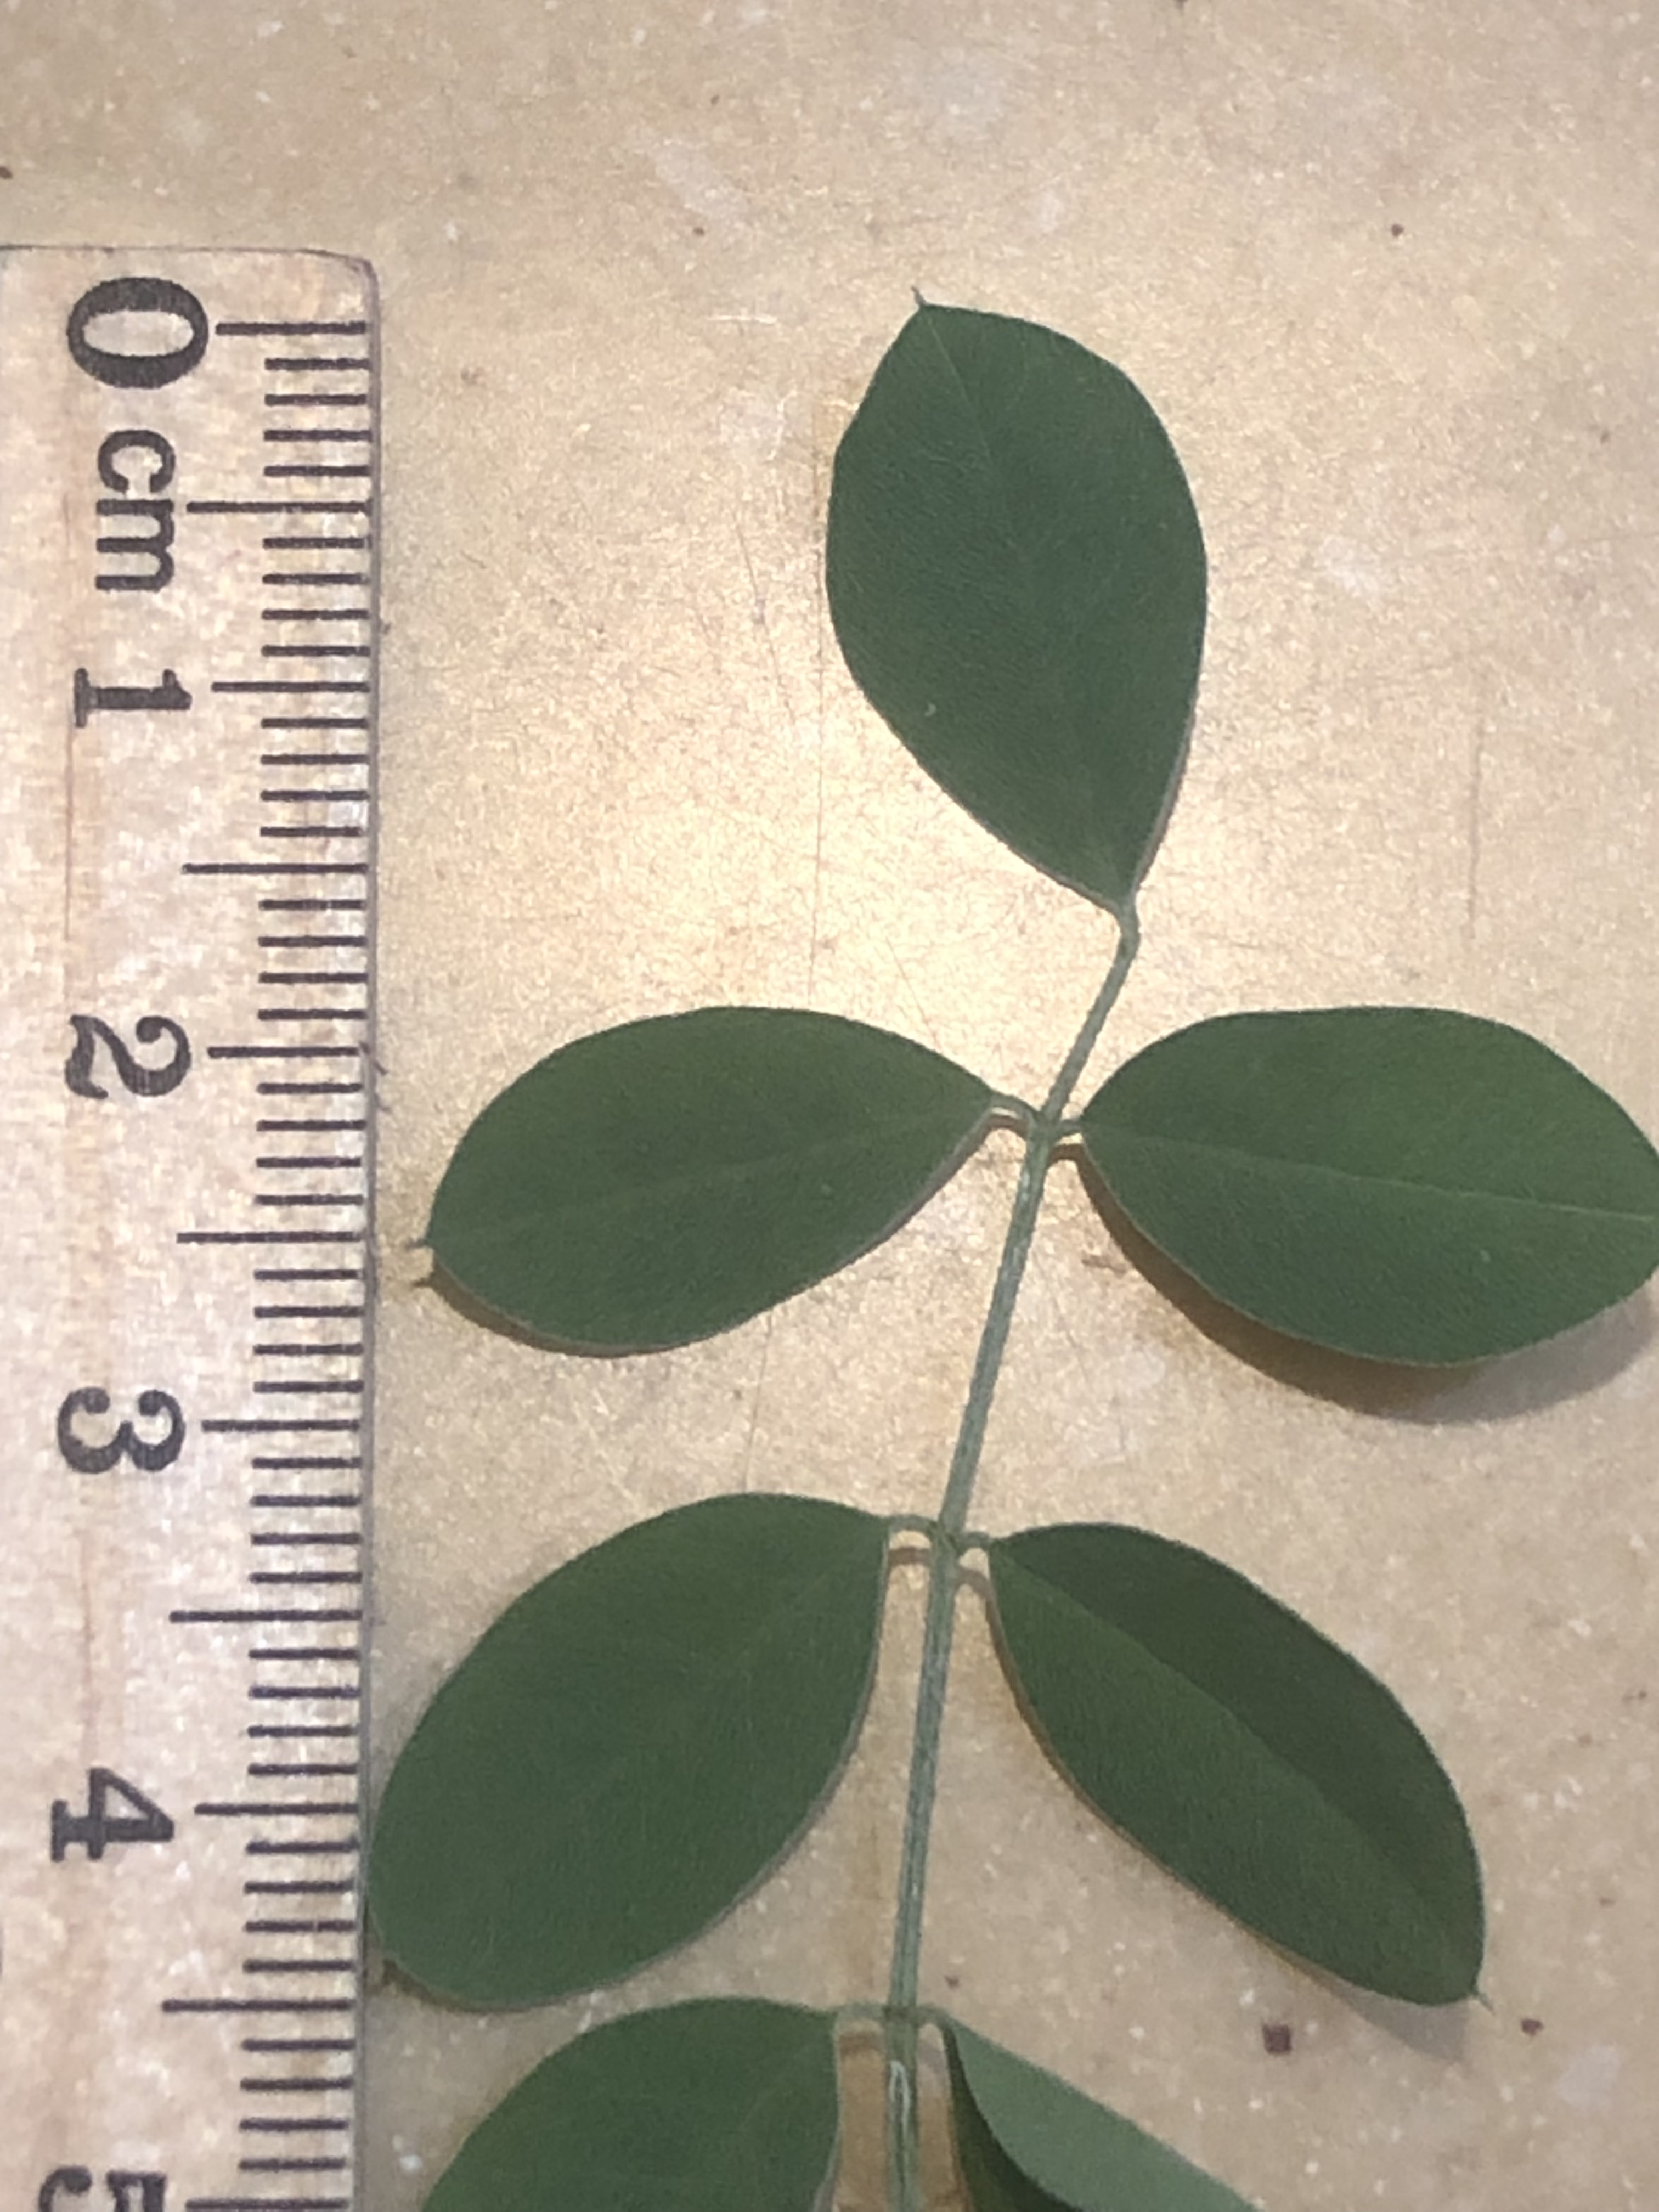
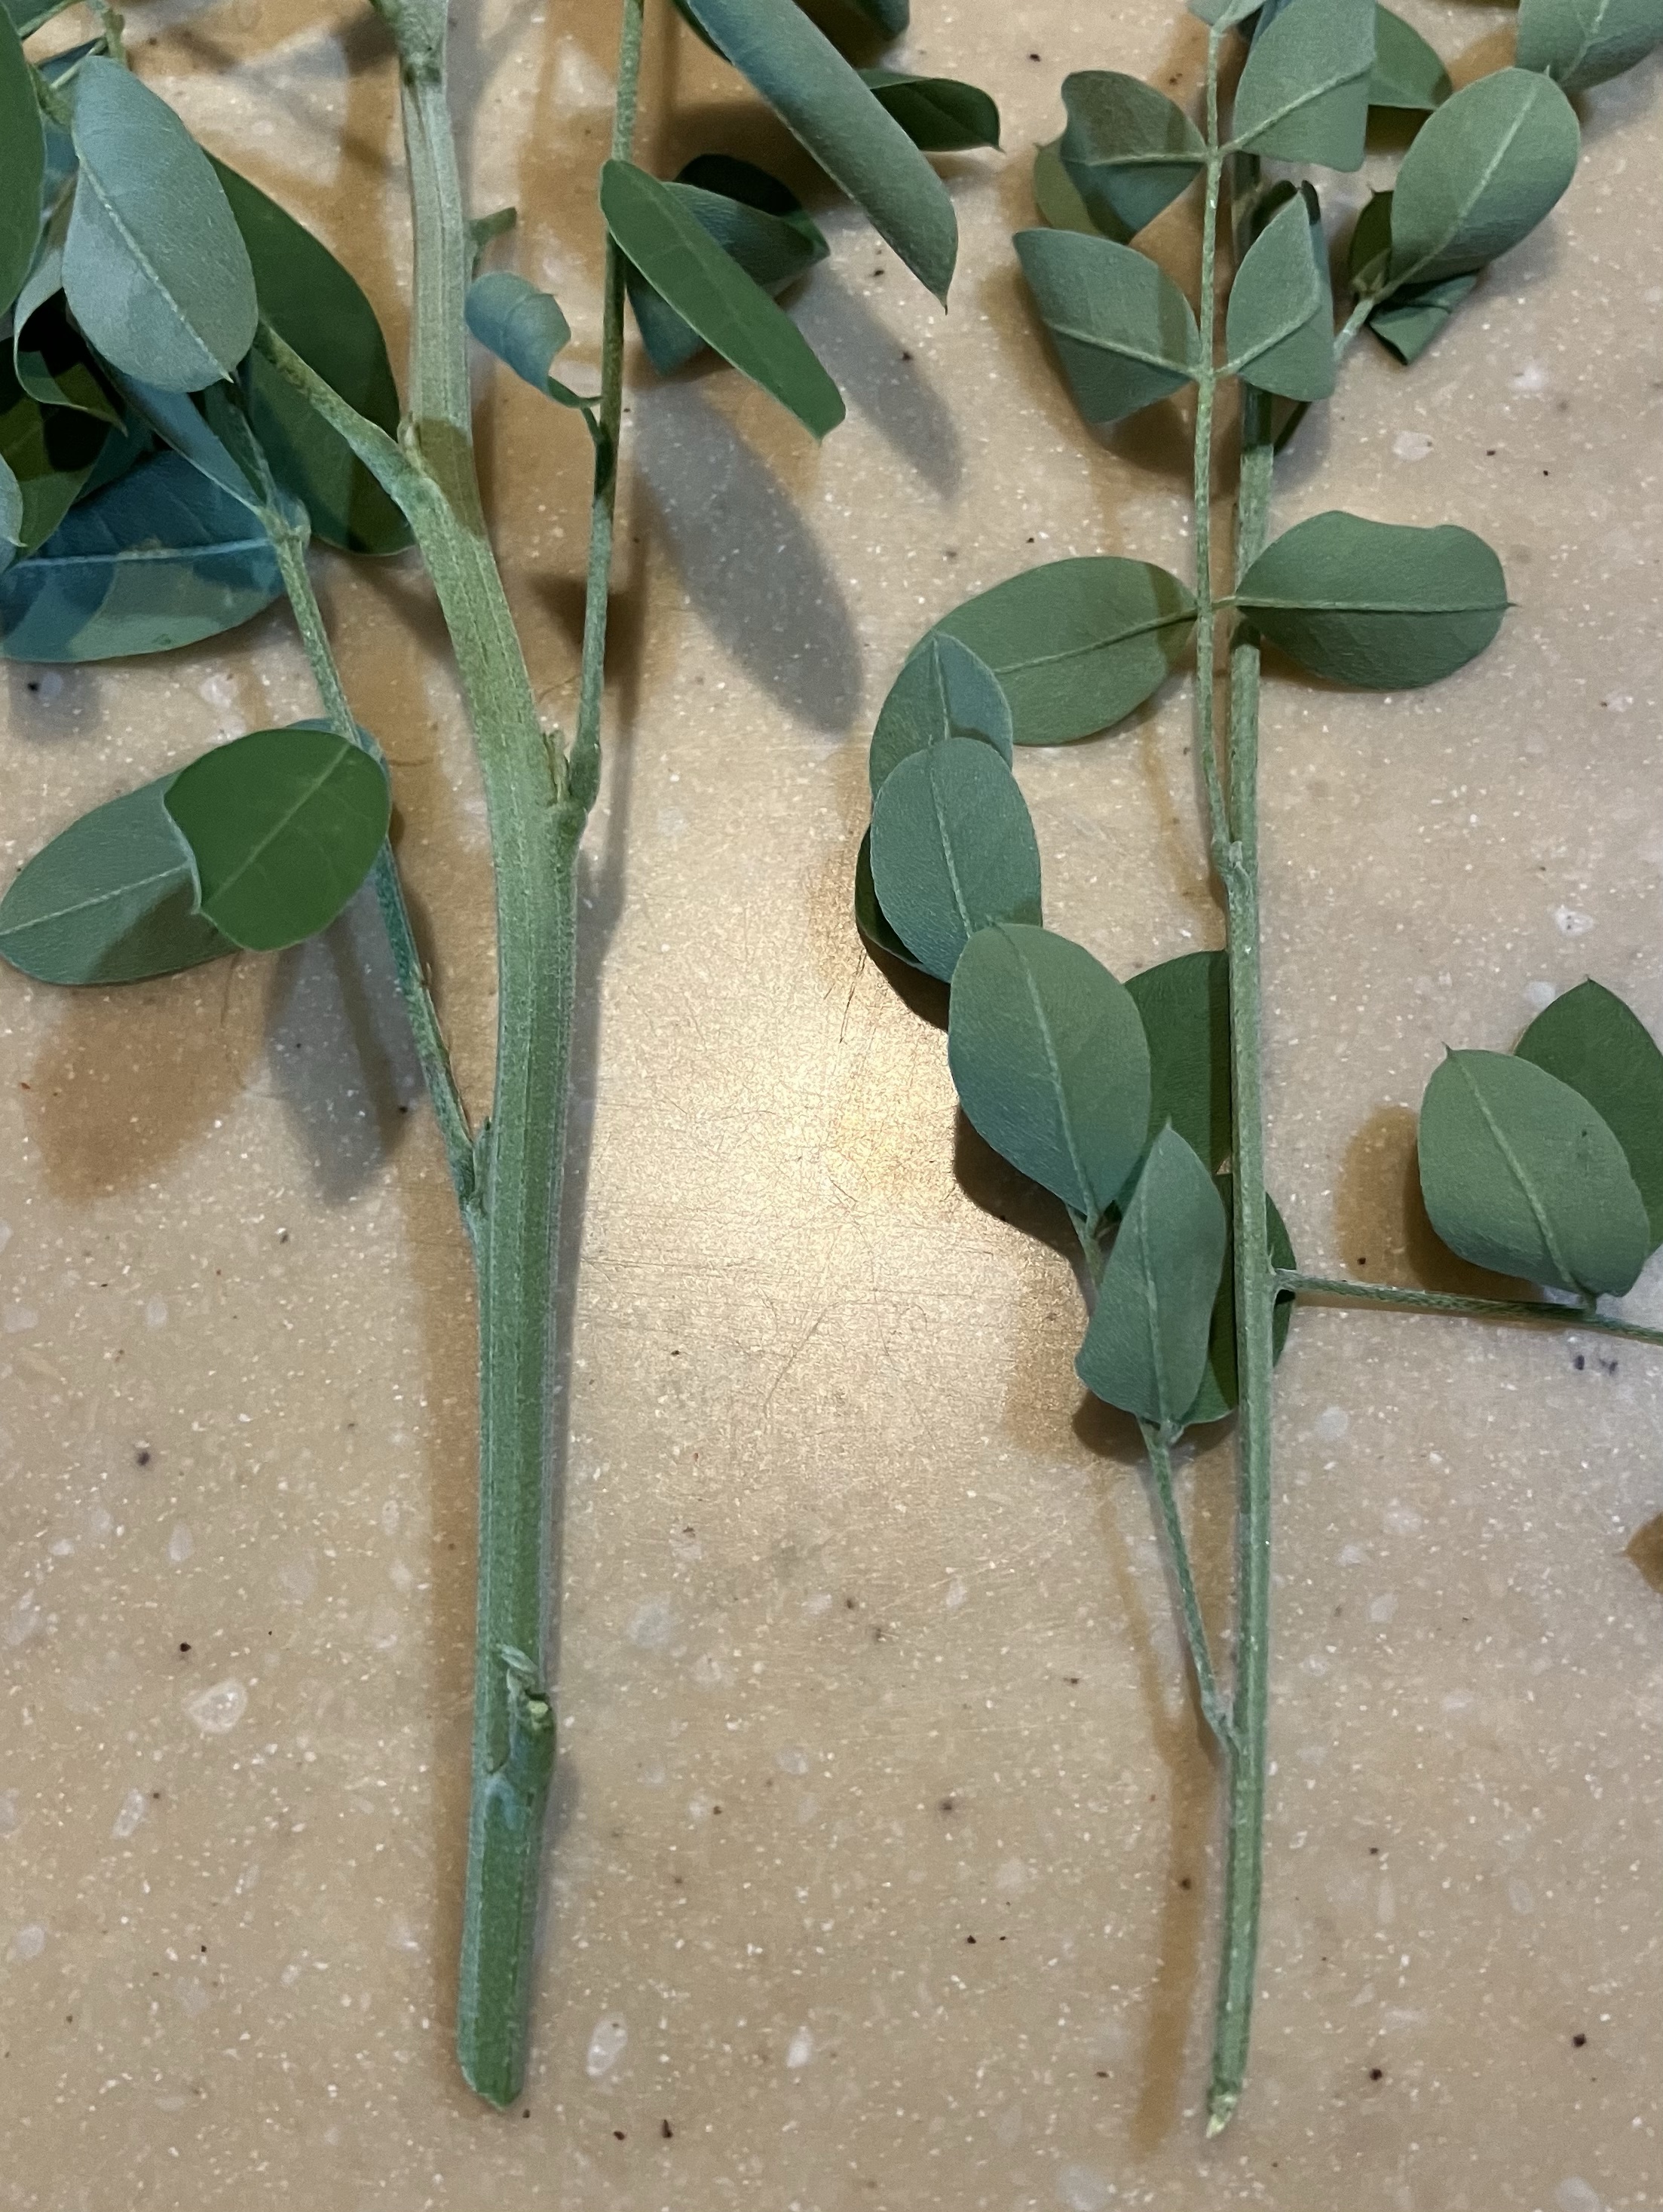
None developed height until the temps dropped to the mid-90’s in very late August and early September. My two year old Indigofera Suffruticosa got a better grow attitude and are now at 3-4 feet. The Bastrop is a bushy 18″ and happy. The Lindheimer is still dainty at less than 1 foot but is still leafing well. The Junction seed is flagging, drooping, not filling out and is just not happy. I think Junction is deciding to leave the building unless we get more cloud cover, which with this drought, does not appear to be in the books soon. Looking at the leaves the SC IS and the Bastrop leaves are very similar. The Lindhiemer and Junction have small and daintier foliage. All plants are more columnar shaped and have few branches and leaves compared to a normal “wetter” summer.
South Carolina Indigofera Suffruticosa looking happy but missing two feet in heightBastrop in 2nd place for happy, Junction to the right is strugglingTo the left the IS is happy, the Lindheimer stays dainty and 6″ tall
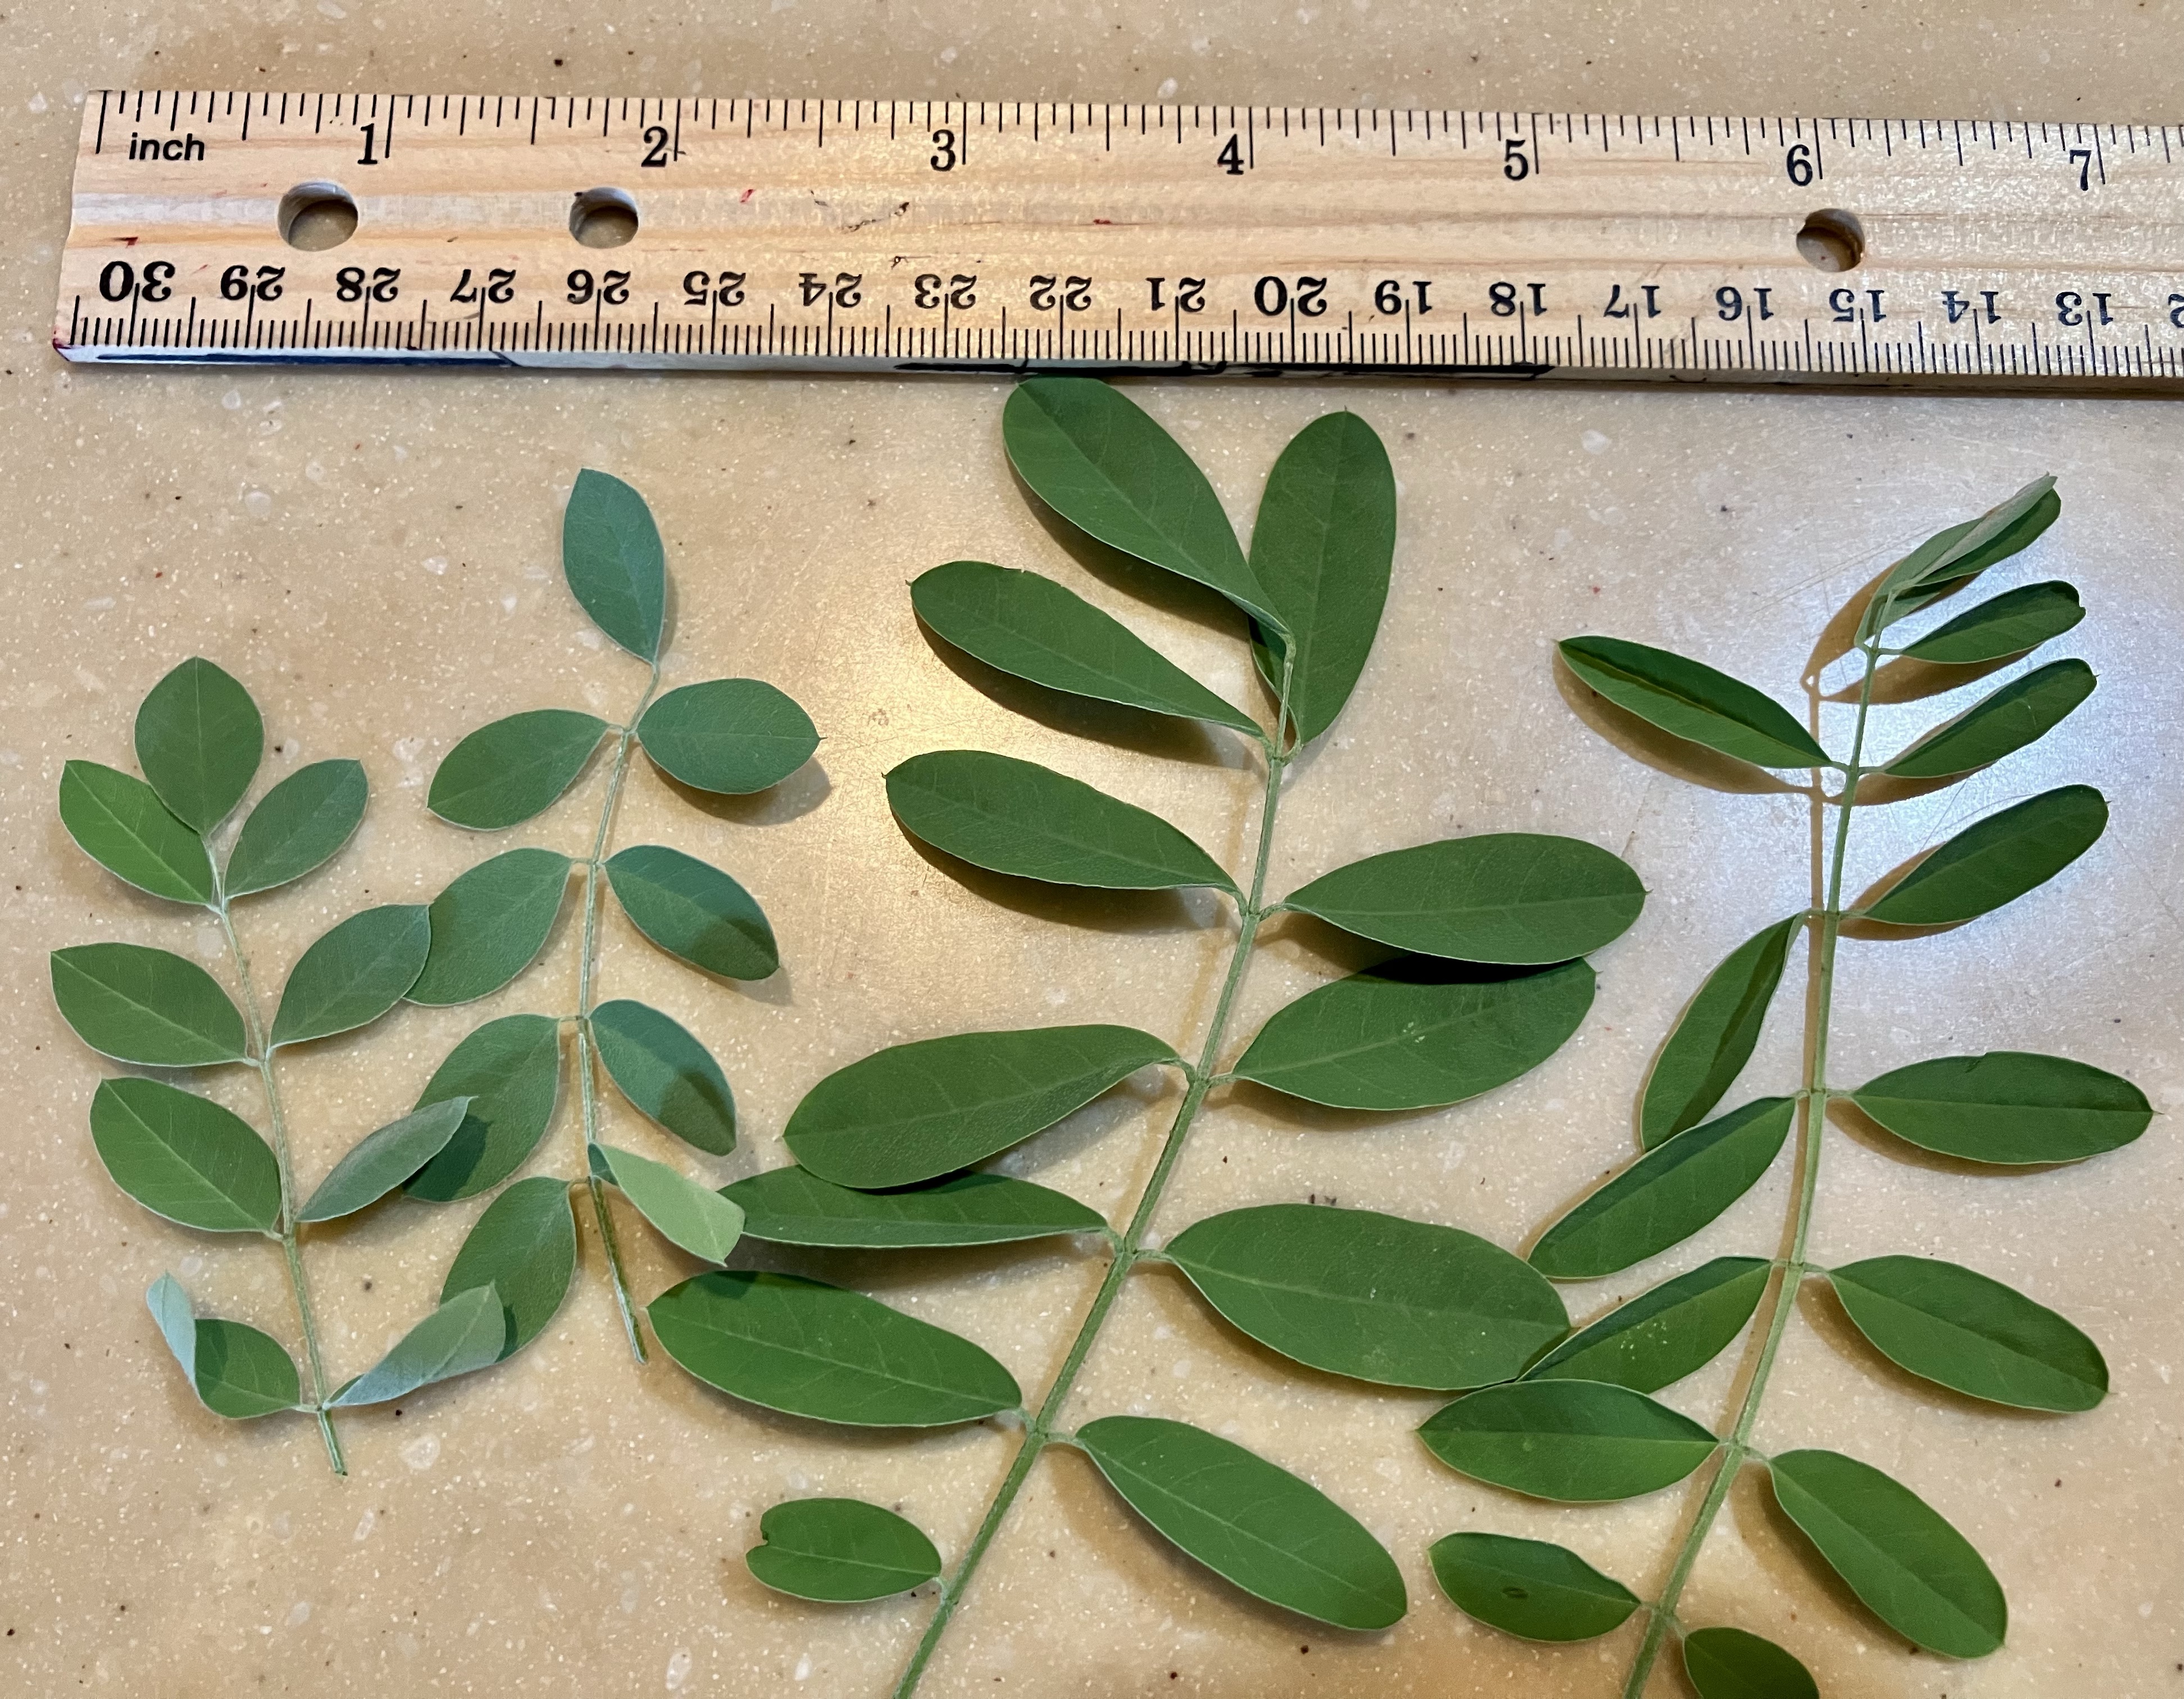
I will clip some stems and do a visual comparison for you on my next blog entry. But I’ll leave you with this comparison of two of the plants.
First, 2022 seeds are ready for purchase in my Etsy Shop! If it shows sold out, someone beat you to them. I am still cracking seed and will be restocking.
Earlier this month in Texas we had an extended spring which gave me time to clean out the February ice damage.
1/2 inch ice damage
Wouldn’t you know, we went out of town for a week and an unforecasted ice storm hit. I had not covered my plants as usual. Lesson learned. A few survived, but very few, this is why I warn folks who are north of the zone it might just be seasonal.
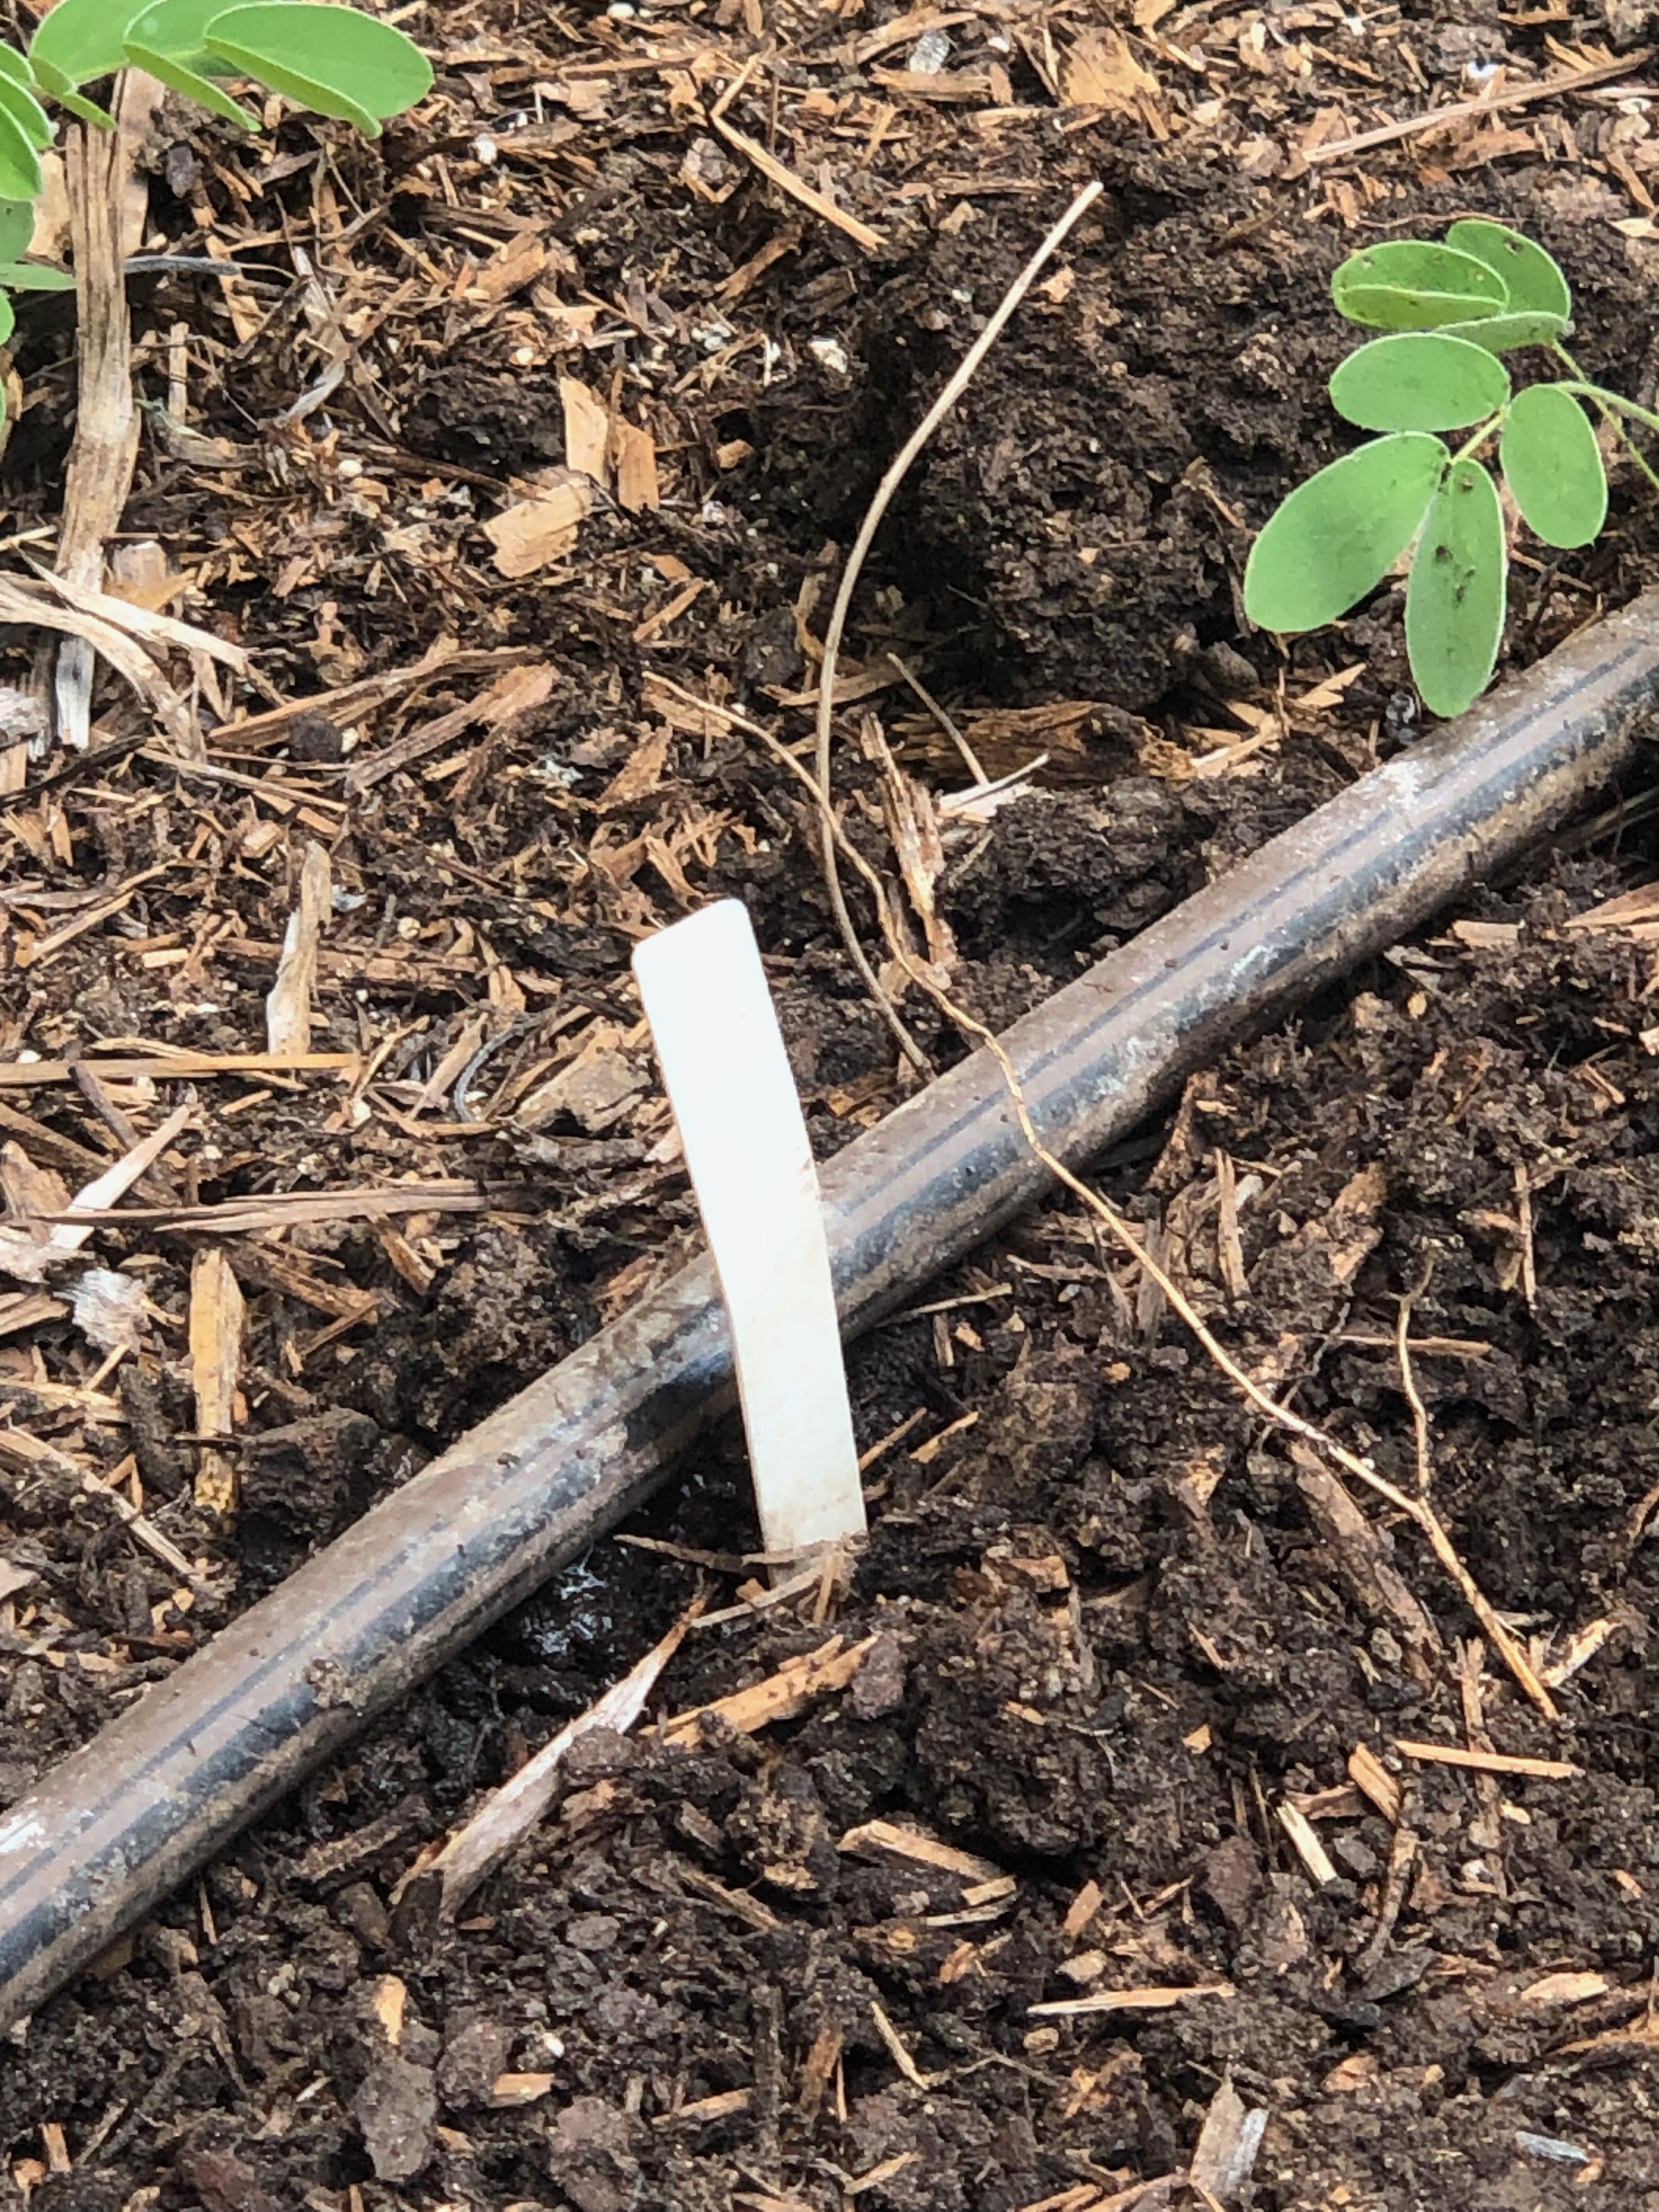
Now, I am planting out my potted seedlings and the Texas pre-heat just jumped to August temps. Needless to say the alarm has been set to “too damn early” and I’ve been setting out plants and mulching. With our drought prone area careful marking of drip irrigation and mulching is critical.
Marking the dripMixing in the soil to loosen for rootsLaying out the mulchTrusting in prep
Now, with this temperature spike I also added some sun shade until the plants get acclimatized or the temps “drop” to the 90’s.
August tempsI’m gonna need more sun shade material.
The spring temps are cranking up for Indigofera Suffruticosa planting. I just put a limited amount of seeds up in my Etsy Shop. If it shows as sold out it means folks beat you to it but I am still cracking seed and will reannounce!
We have major heat and drought here in Central Texas. I cannot justify running my Big Indigo Jar this year due to the looming water restraints. Although the 110 gallons lasts all summer there is also the rinsing with water. That’s water that is needed elsewhere. We are on well & rainwater, both are limited resources this year. I am sad to not be using this 100° heat this summer but it has been relentless, starting in early May and cranking up to 104°+ in June. Major heat that high usually does not start till July. Prep was physically uncomfortable without a rainy break to cool things down. Did I mention we are in an exceptional drought as opposed to an extreme drought? I can’t even remember how many days we’ve broken 100° but it has been at least more than 20, with no rain, Stupid Hot.
Drained & DriedWaiting for next summer
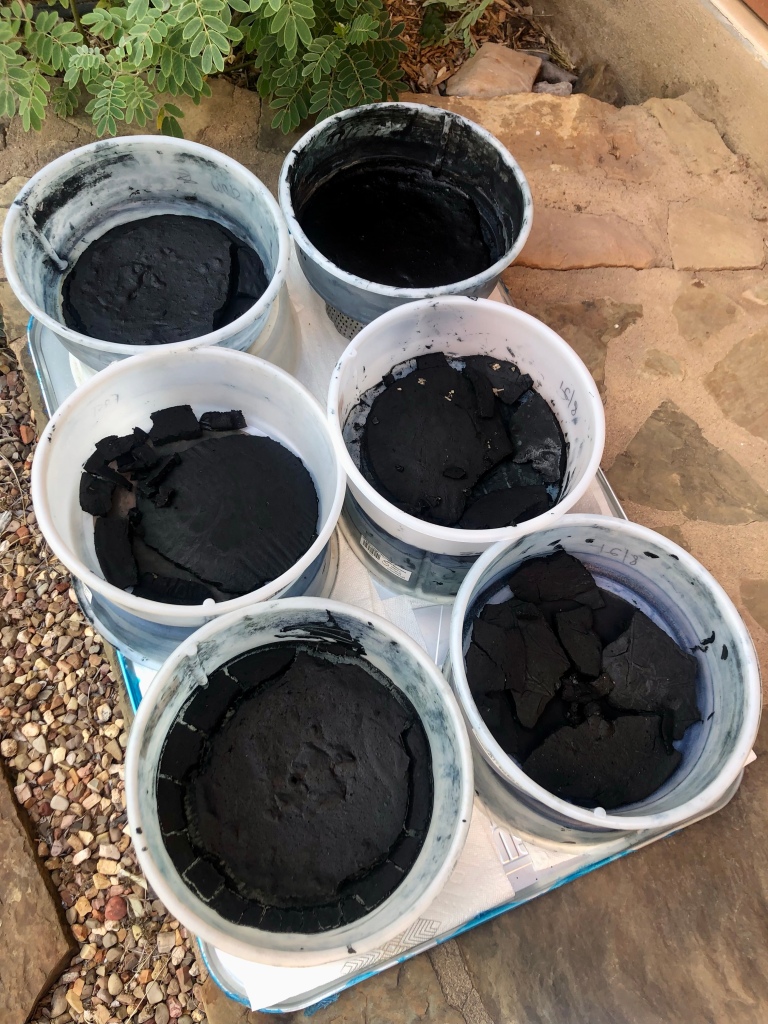
So, I have spent spring pulling my indigo mud out of my jar and vinegar washing it to clear the calcium carbonate. To add insult to injury we only had 3 days of 100+ temp last year. Last year’s clean mud was ready to mix with fresh indigo from Stony Creek Colors and Botanical colors. Fructose and Calcium Hydroxide were at the ready as well but will hold till next year. So, I am setting aside the store bought indigo and drying my mud for storage for next year. My Dudas filters work well for mud drying as well as washing with vinegar.
Washed indigo mud drying in the heat.
My alternative this year is to turn to wax batik and silk painting with pigments and dye. It will definitely be cooler and another skill to practice. I have different tools to use for wax application. I need the practice. And it will be indoors, with AC!
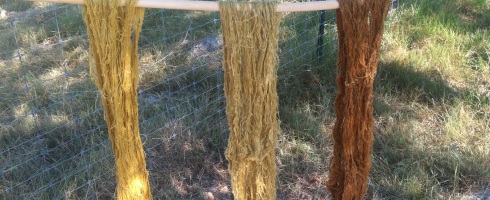
Enough folks have asked me about dyeing with our Texas persimmon that I gather up my random blog process posts from over the years and give you the steps first and then put in web links to my blog entries to give a bit of visual detail. The persimmons are green right now, get out there before the sun cranks up and pick them. You can hold them in the fridge until you gather enough for your holding vessel. About a pound of fruit gives you enough to experiment with. I don’t bother with pulling the leaves on the top of the fruit, they are along for the ride until you strain. Enjoy! Deb Mc
Pick when green, green gives you the best yellow, if you want gold you can leave it in the sun. Personally, to get gold I prefer to let the brew age (more below on that)
Place unripe fruit to soak in a closed jar, be sure and release the lid to release the gas formed by fermenting. If you don’t you will get bent lids or spewing when you open it.
I usually soften for about a month. I then squash and use 1st squeeze for yellow. You will find out how good your sense of smell is.
I do filter and just dye with the liquid, just submerge yard or fabric in and circulate. You will see color strike. It is like an indigo or walnut bath, a substantive bath so no prep necessary. You can experiment with overdyeing, mordant or afterbaths for other color variation. At this point I discard the fruit.
Once you squash and expose to a lot of air the oxidation kicks in and the brew starts to go gold rather than yellow. I also explored working with ripe persimmons but the results were underwhelming for me.
I set aside jars of filtered brew with year vintage marked. As you go thru the years you will get browner colors. I have yet to get to black.
Place unripe fruit to soak in a closed jar, be sure and release the lid to release the gas formed by fermenting. If you don’t you will get bent lids or spewing when you open it. https://debmcclintock.me/2012/07/09/persimmon-size-vintage/
Short and sweet, I just updated my Etsy shop with seeds for your 2022 growing pleasure. Reminder, all seeds have been harvested from the pod. I included a seed pod for you to see what they look like. Enjoy! Deb Mc PS, if I see you have an address out of the growing range I will message you to alert you before I ship to make sure you know IS is unhappy in cold climates.


You must be logged in to post a comment.