If you are around San Antonio on Nov 12th I’d love to meet fellow dyers… I am speaking about natural dyes I use from my valley & garden!
Meeting location:

If you are around San Antonio on Nov 12th I’d love to meet fellow dyers… I am speaking about natural dyes I use from my valley & garden!
Meeting location:

In Texas we have finally gotten back to sane fall temps of 80 degrees. The garden is settling down and going to seed. We have some heavy rains forecasted so I harvested some indigo seed, gathered oak galls & acorns and took advantage of delayed rains to scour some wool for a November natural dye class.
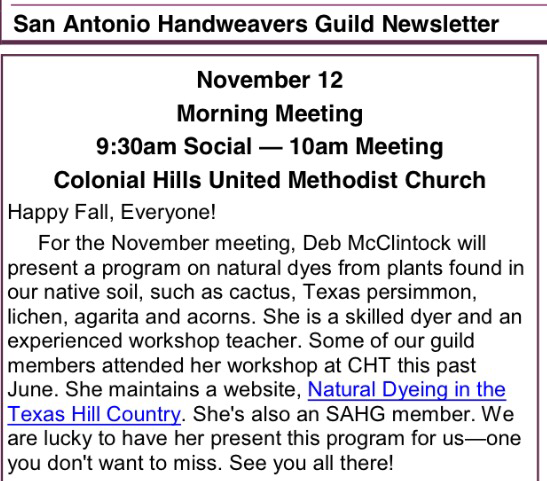
The Japanese Indigo yielded its small flea like seeds. When the winter winds blow in I’ll winnow the chaff out. 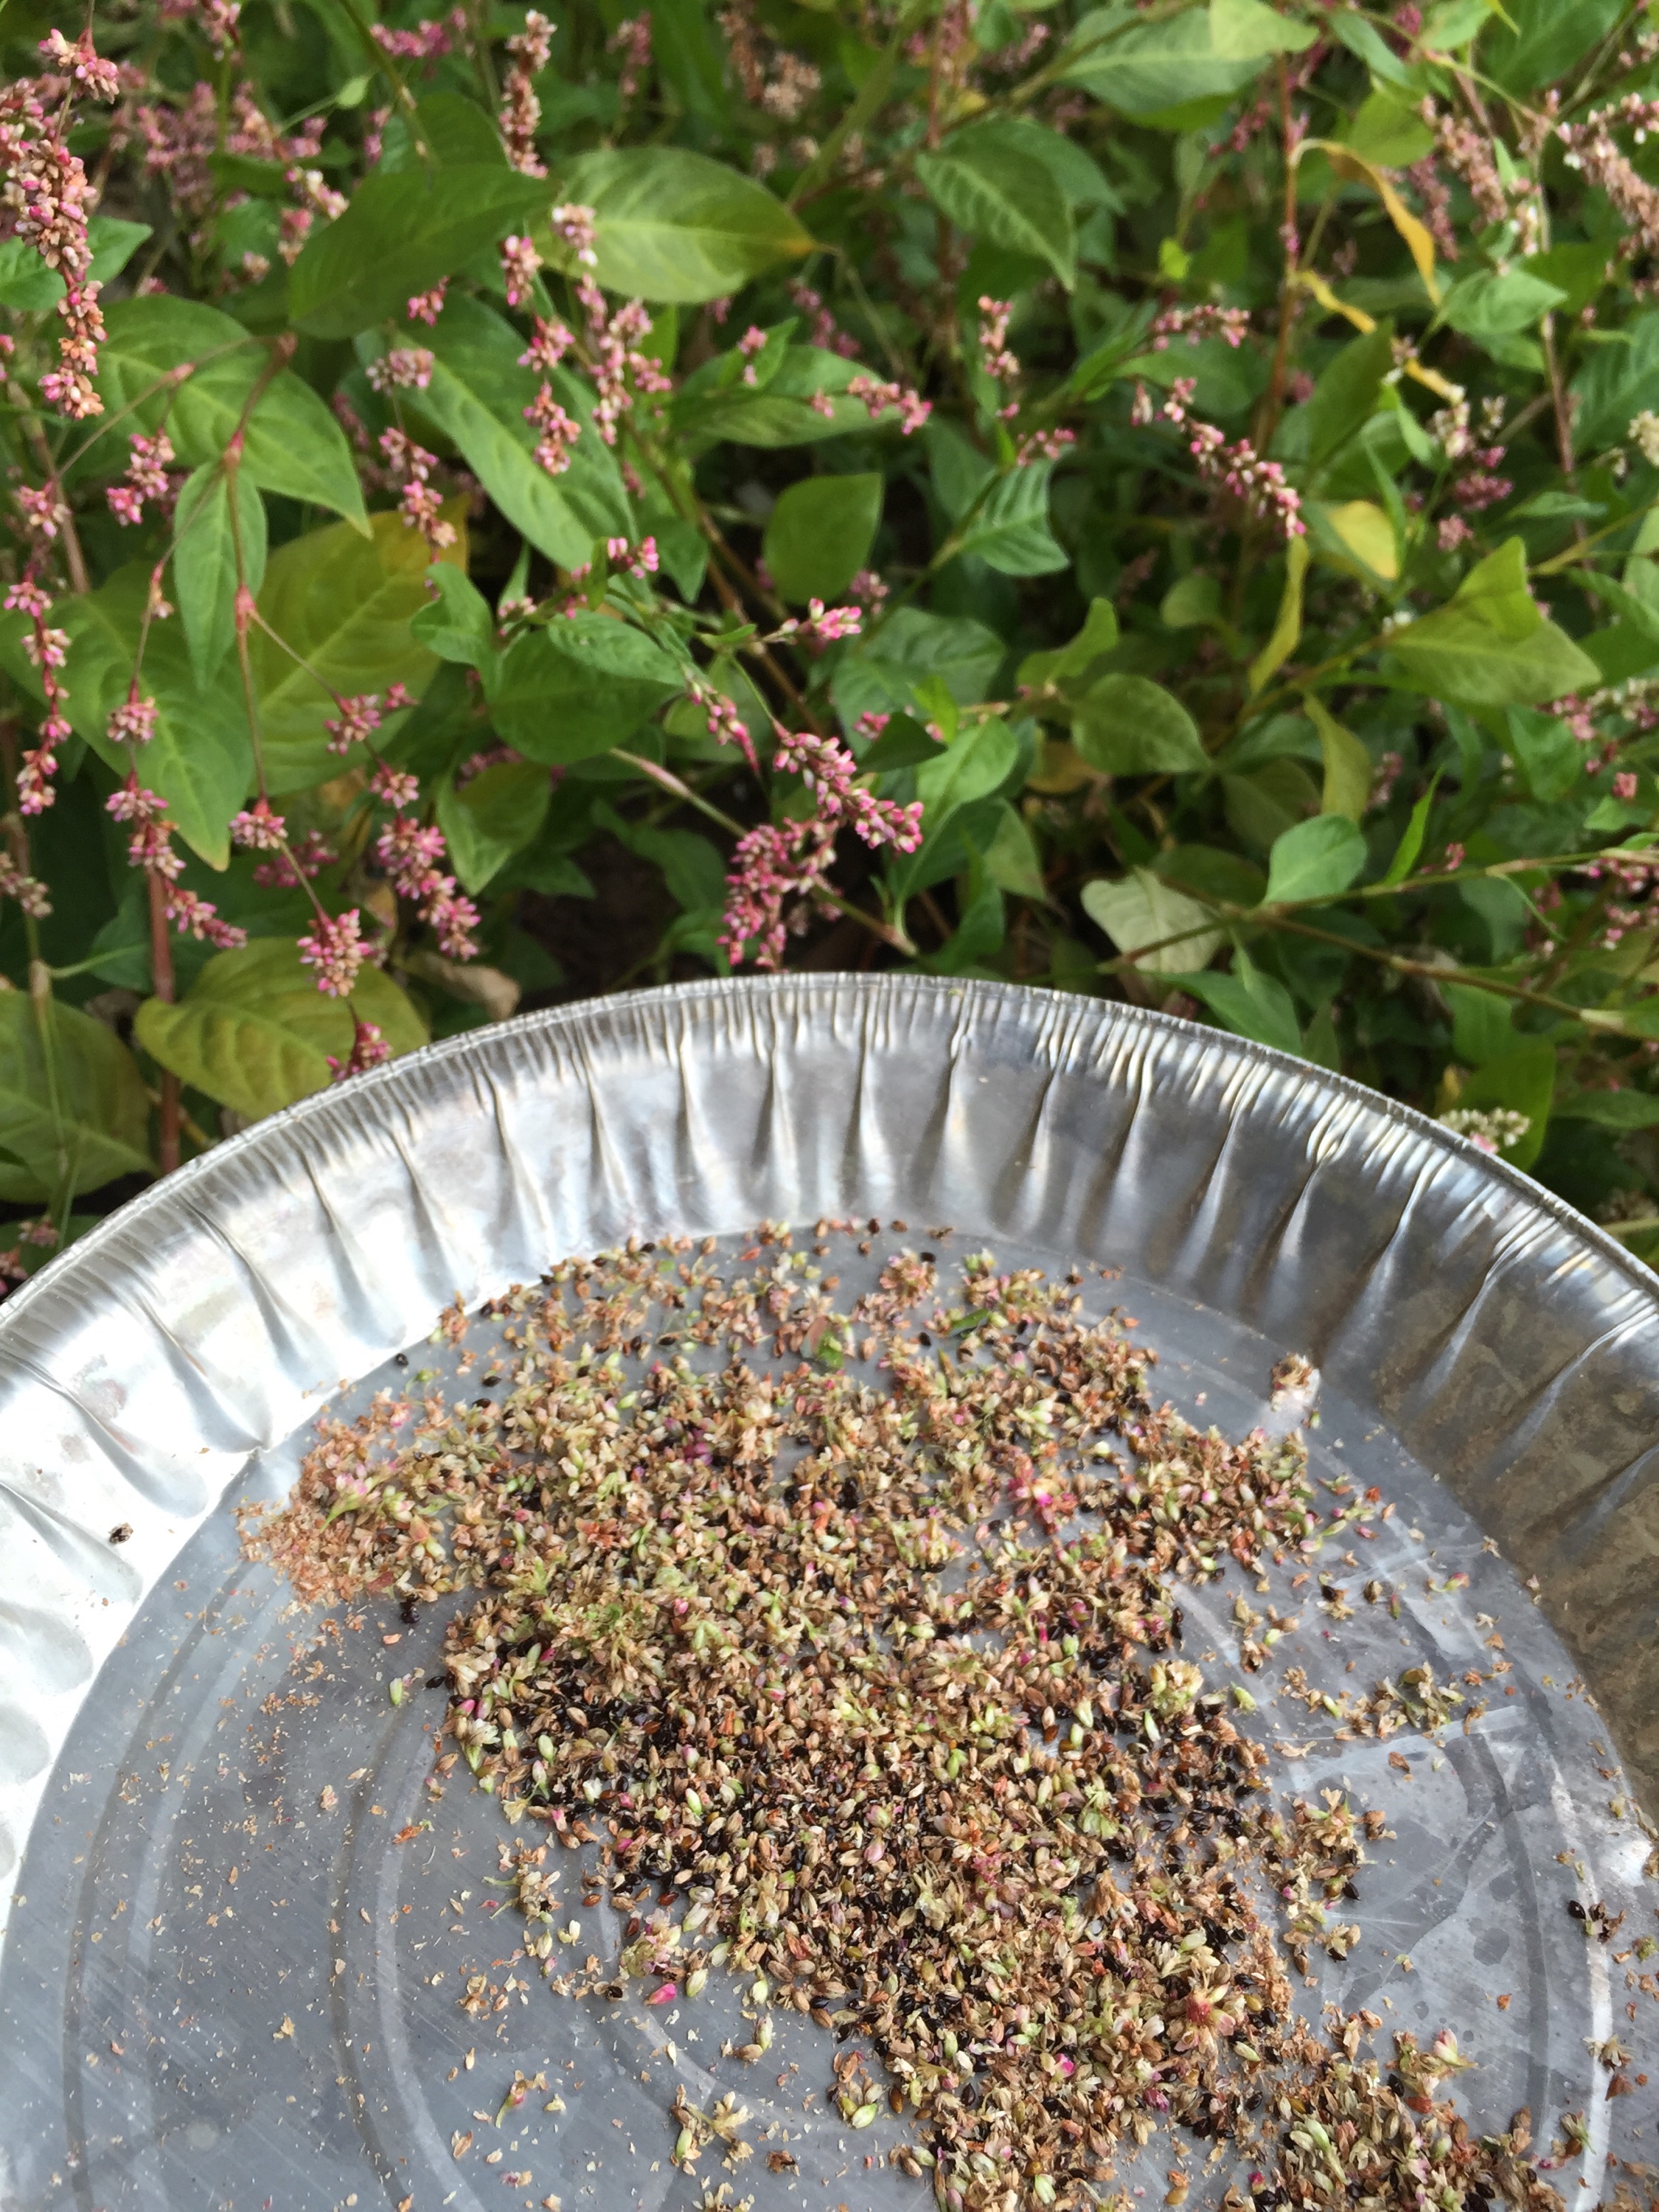 The Indigo Suffruticosa is still teaching me how to harvest it. The bean like seeds ripen to brown black and split open.
  When you pull a seed bunch a branchlet usually comes with it. Determined not to waste an opportunity I’ve put these branchlets plus some wind trimming into a white bucket and put it aside to see if my indigo makes a natural appearance. Look at this after just one day!
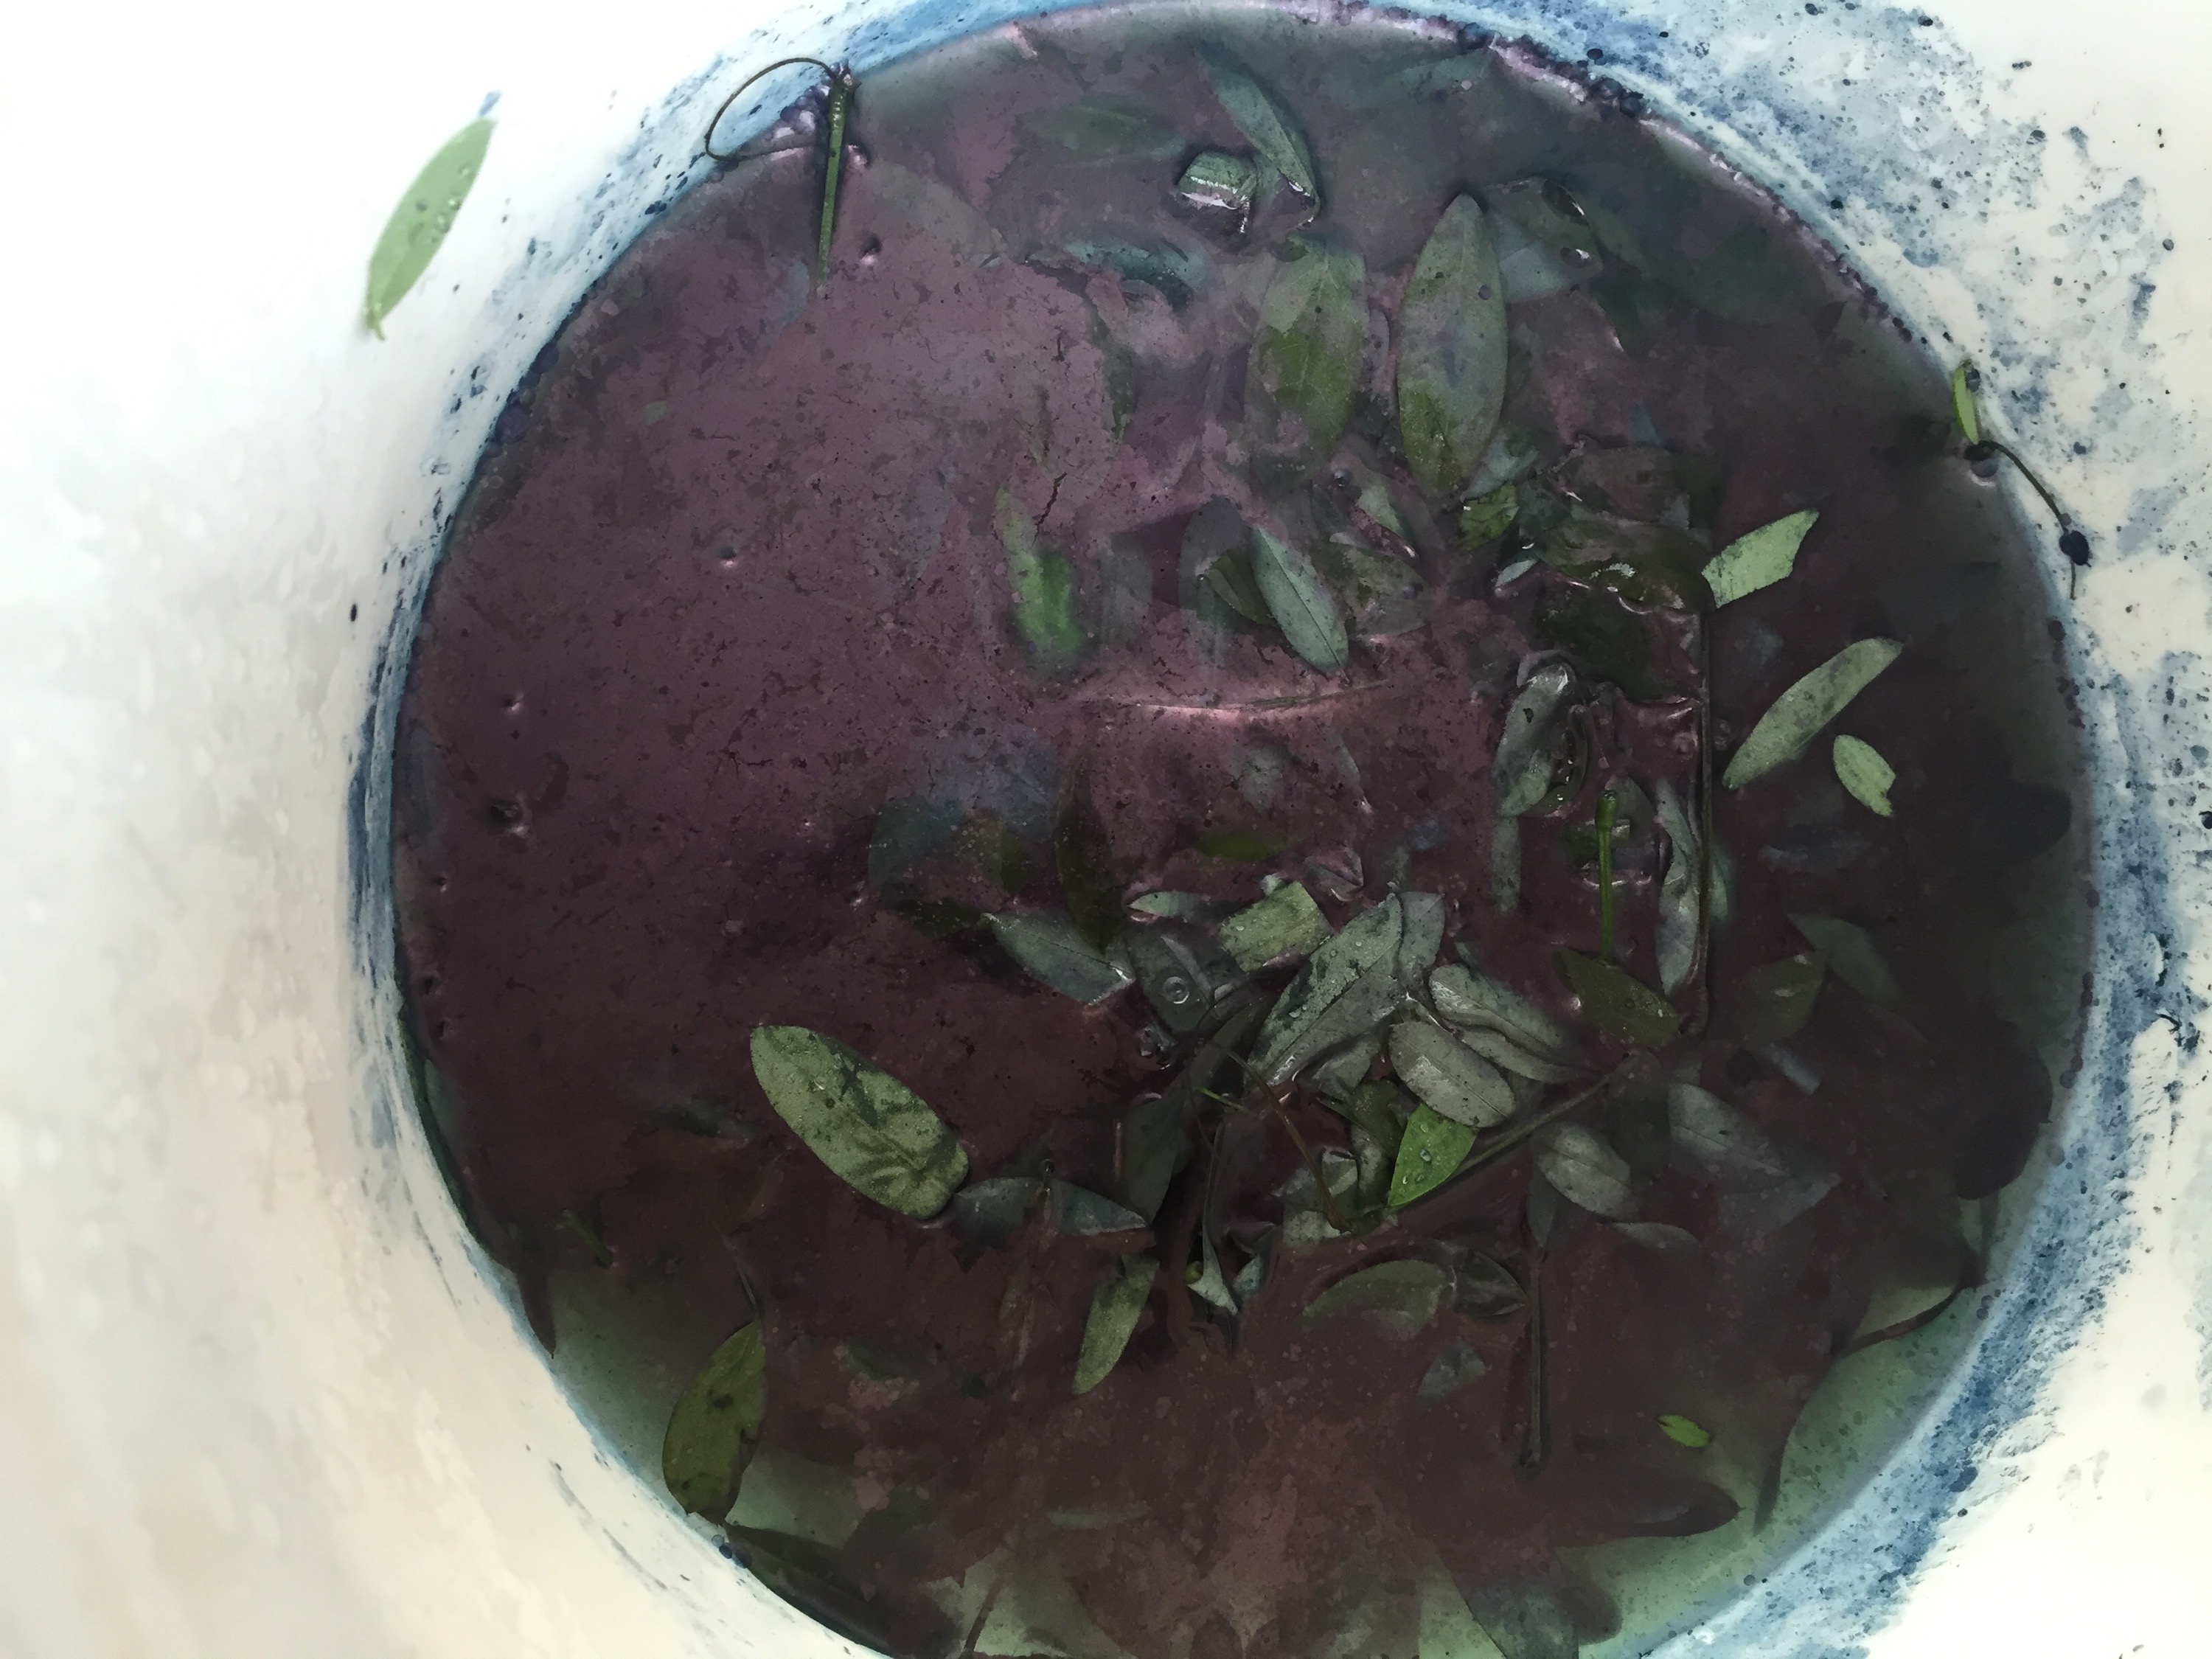 So I plan to use the yeast recipe for woad in Jenny Dean’s newest book, A Heritage of Colour. Stay tuned for those results.
And the acorns and oak galls are making an appearance so I gathered some up to put aside to pull for tannin. “Some” is the key word as the squirrels and deer have been very busy dining on fallen acorns. 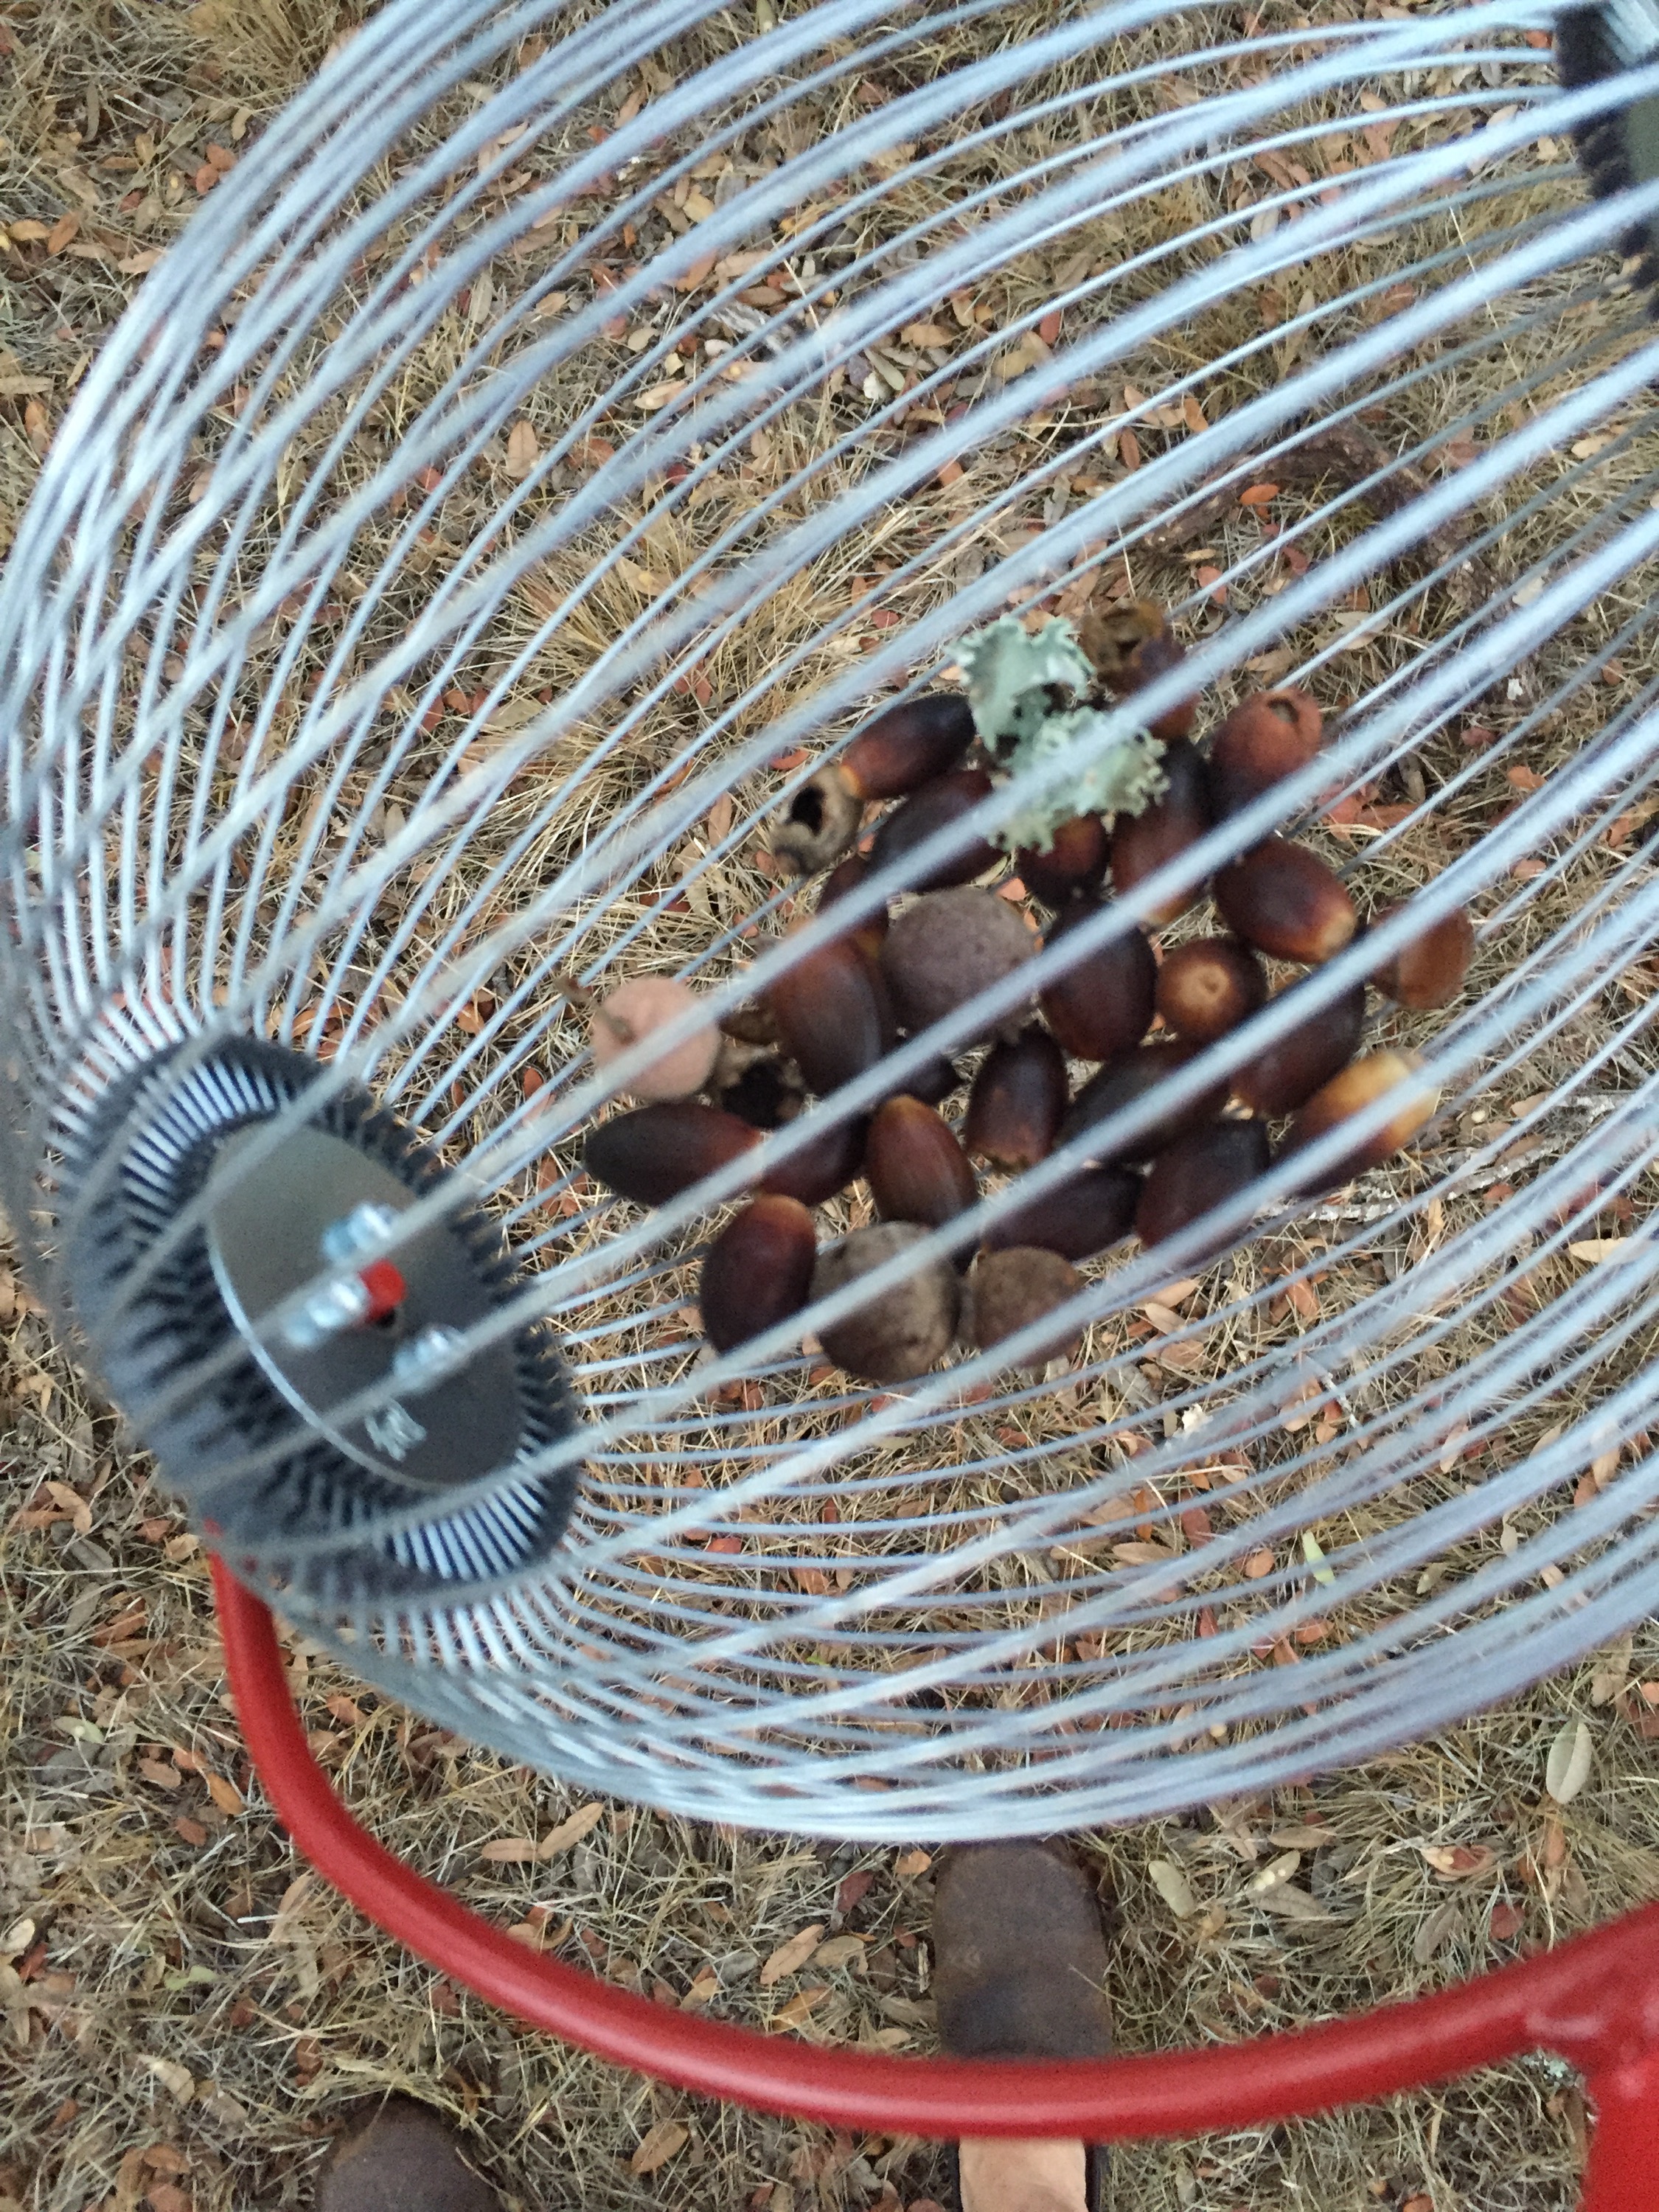 And finally I am prepping some beautiful wool, silk and cotton for a November workshop I am giving. Scouring the Australian wool was today and winds permitting I will mordant tomorrow. Here’s my source link.

Actually, the term is more correctly frost bitten Japanese Indigo! I admire it so much I must share Riihivila’s efforts in Finland on more exploring with different variations of dried indigo based on John Marshall’s Dried Japanese Indigo recipe in his latest publication.
Riihivila takes advantage of a late freeze to explore here…
http://riihivilla.blogspot.fi/2015/10/dyeing-with-frost-bitten-japanese.html
So, if you live somewhere early frosts are threatening your late season JI, consider this exploration.
No photos in my blog today but jump over to Riihivilla’s blog and enjoy her photos.
There is good news & bad new….
The indigos are going to seed in the irrigated garden, more indigo for next year….

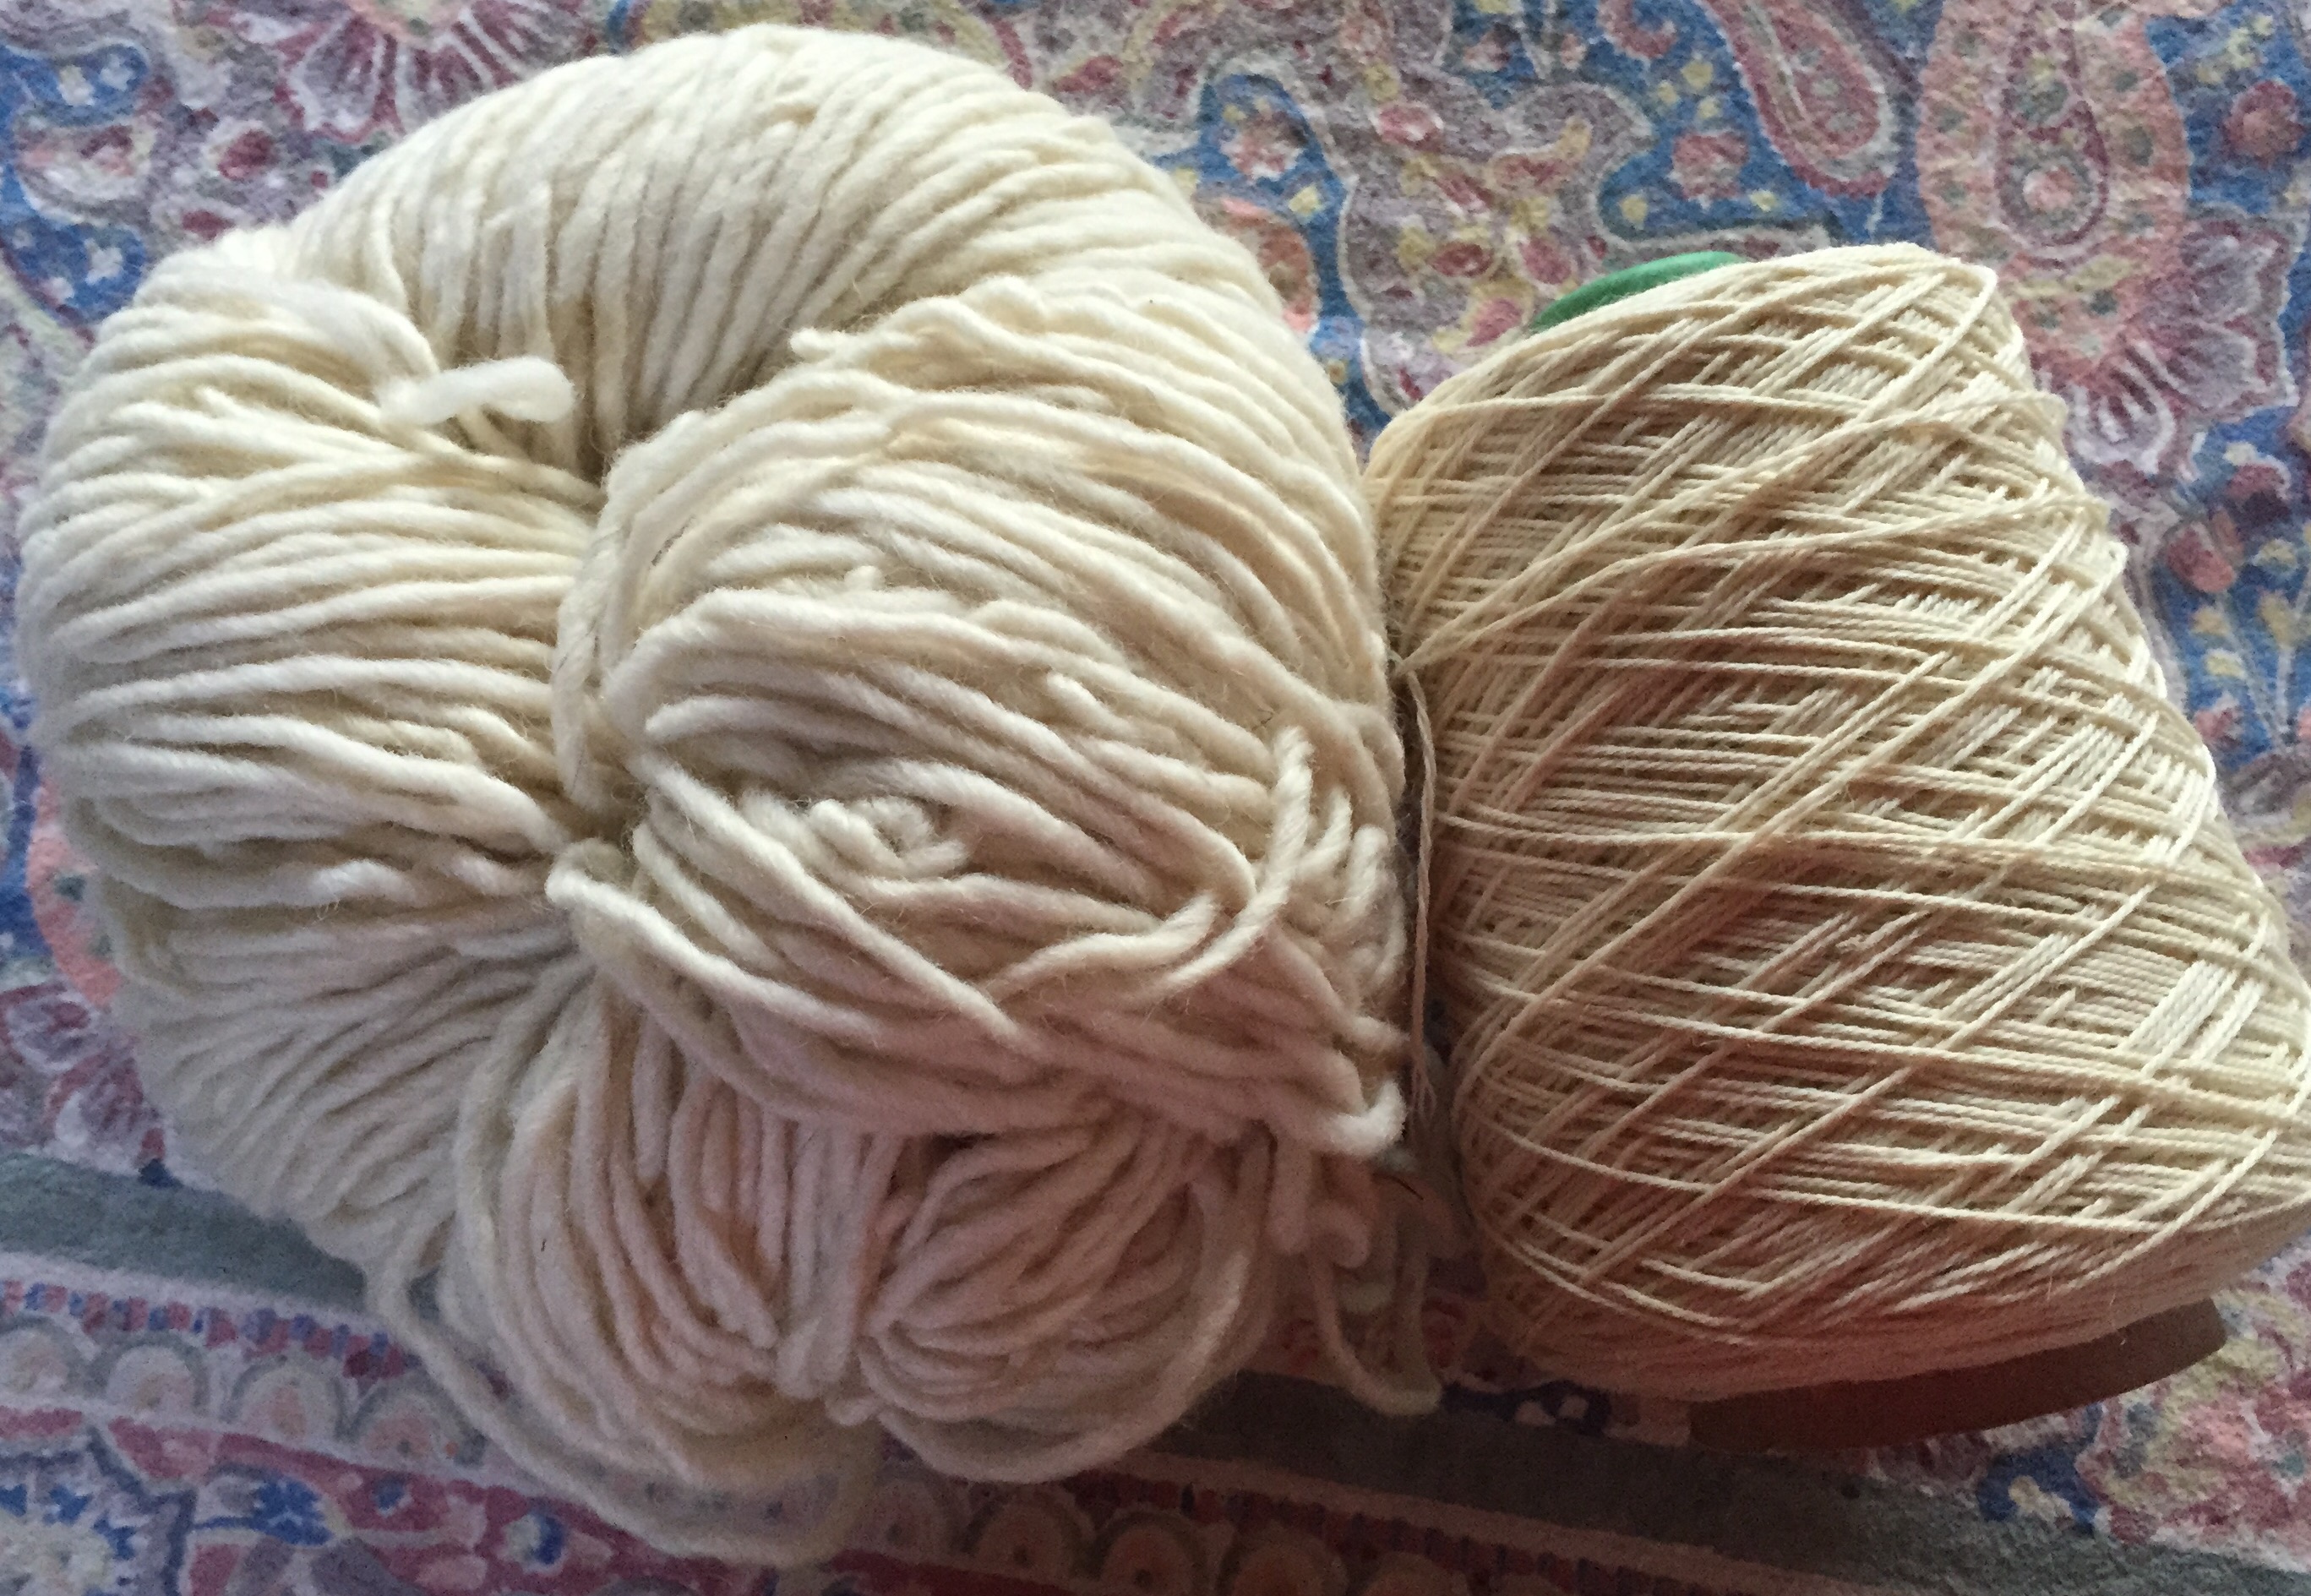
 My yarns from Georgia Yarn Company are here to prep for my November guild natural dye class. Silk, wool & cotton! http://www.handweaver.us/georgia_yarn_company.htm

I must be the only weaver to buy white wool from Southwest Weaving
Look at all her colors!
http://www.weavingsouthwest.com/shop/view_cat/76
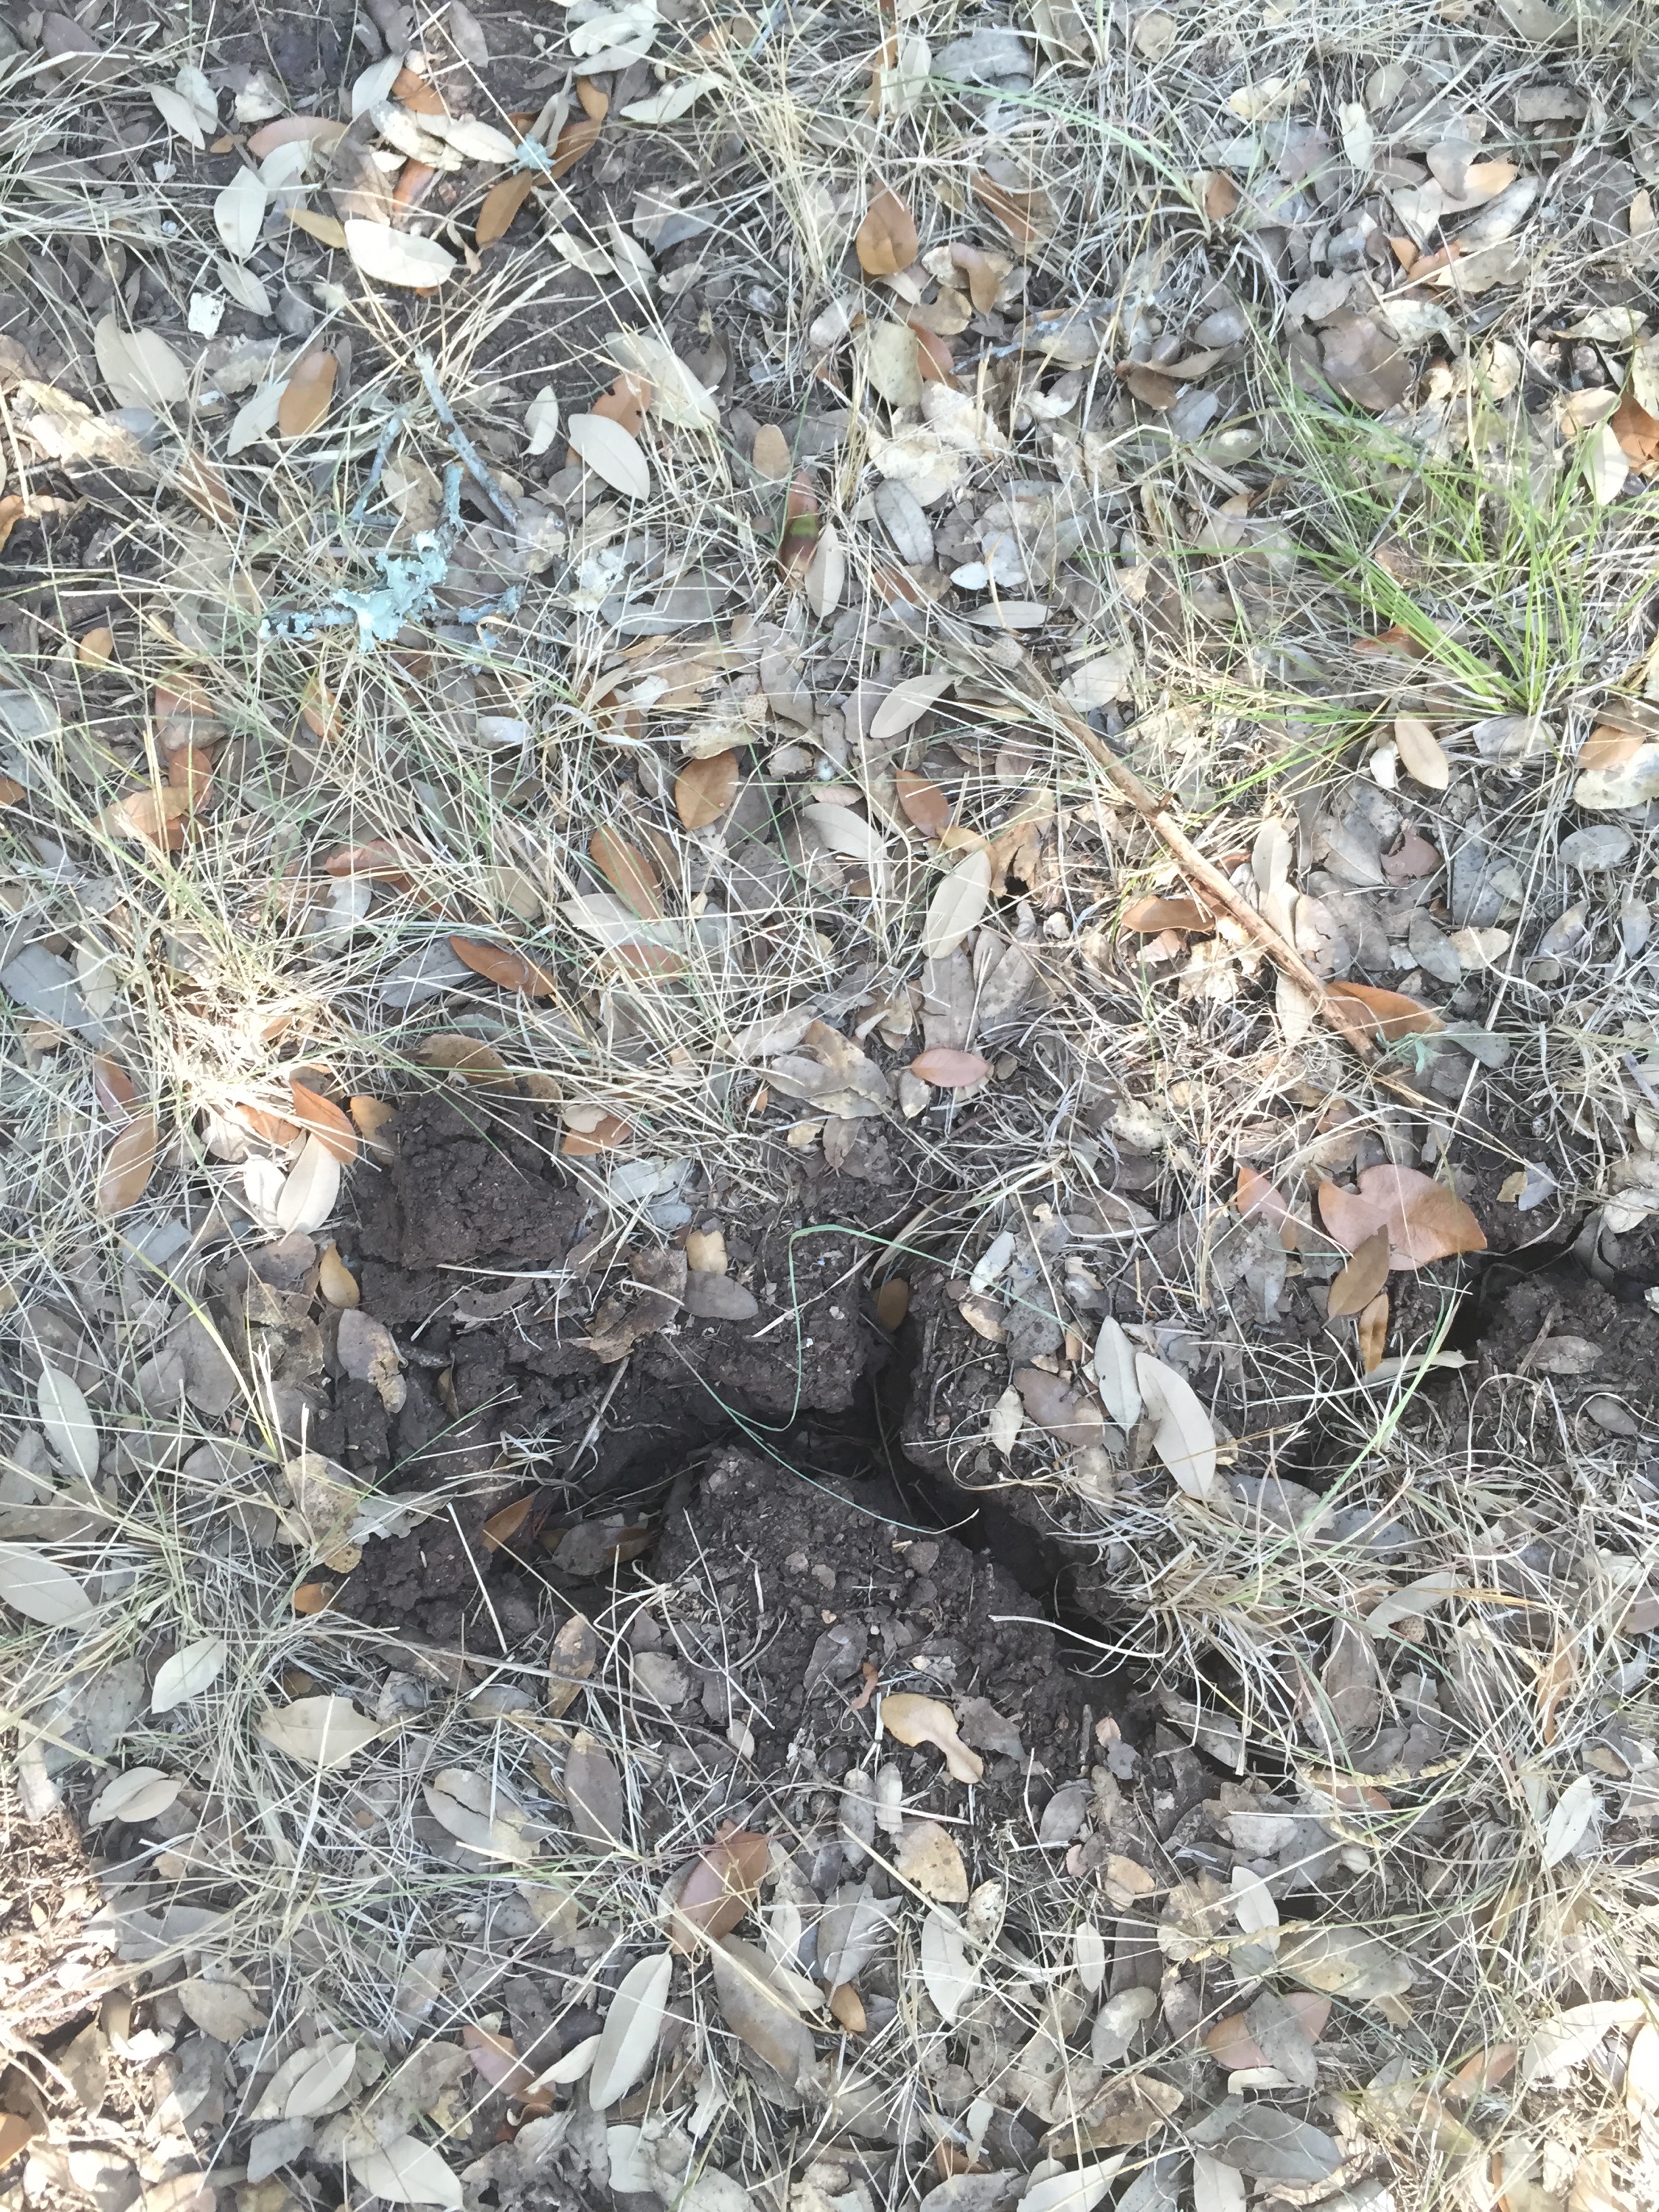
We’ve cut over to well water as our cistern is down significantly. We usually just need a brief rain to refill but there had been none since the May floods. Walking around you can see the summer drought impact on our land.
Minimum acorn crop this year, last year one could see an abundance, this year only singles on the branches. 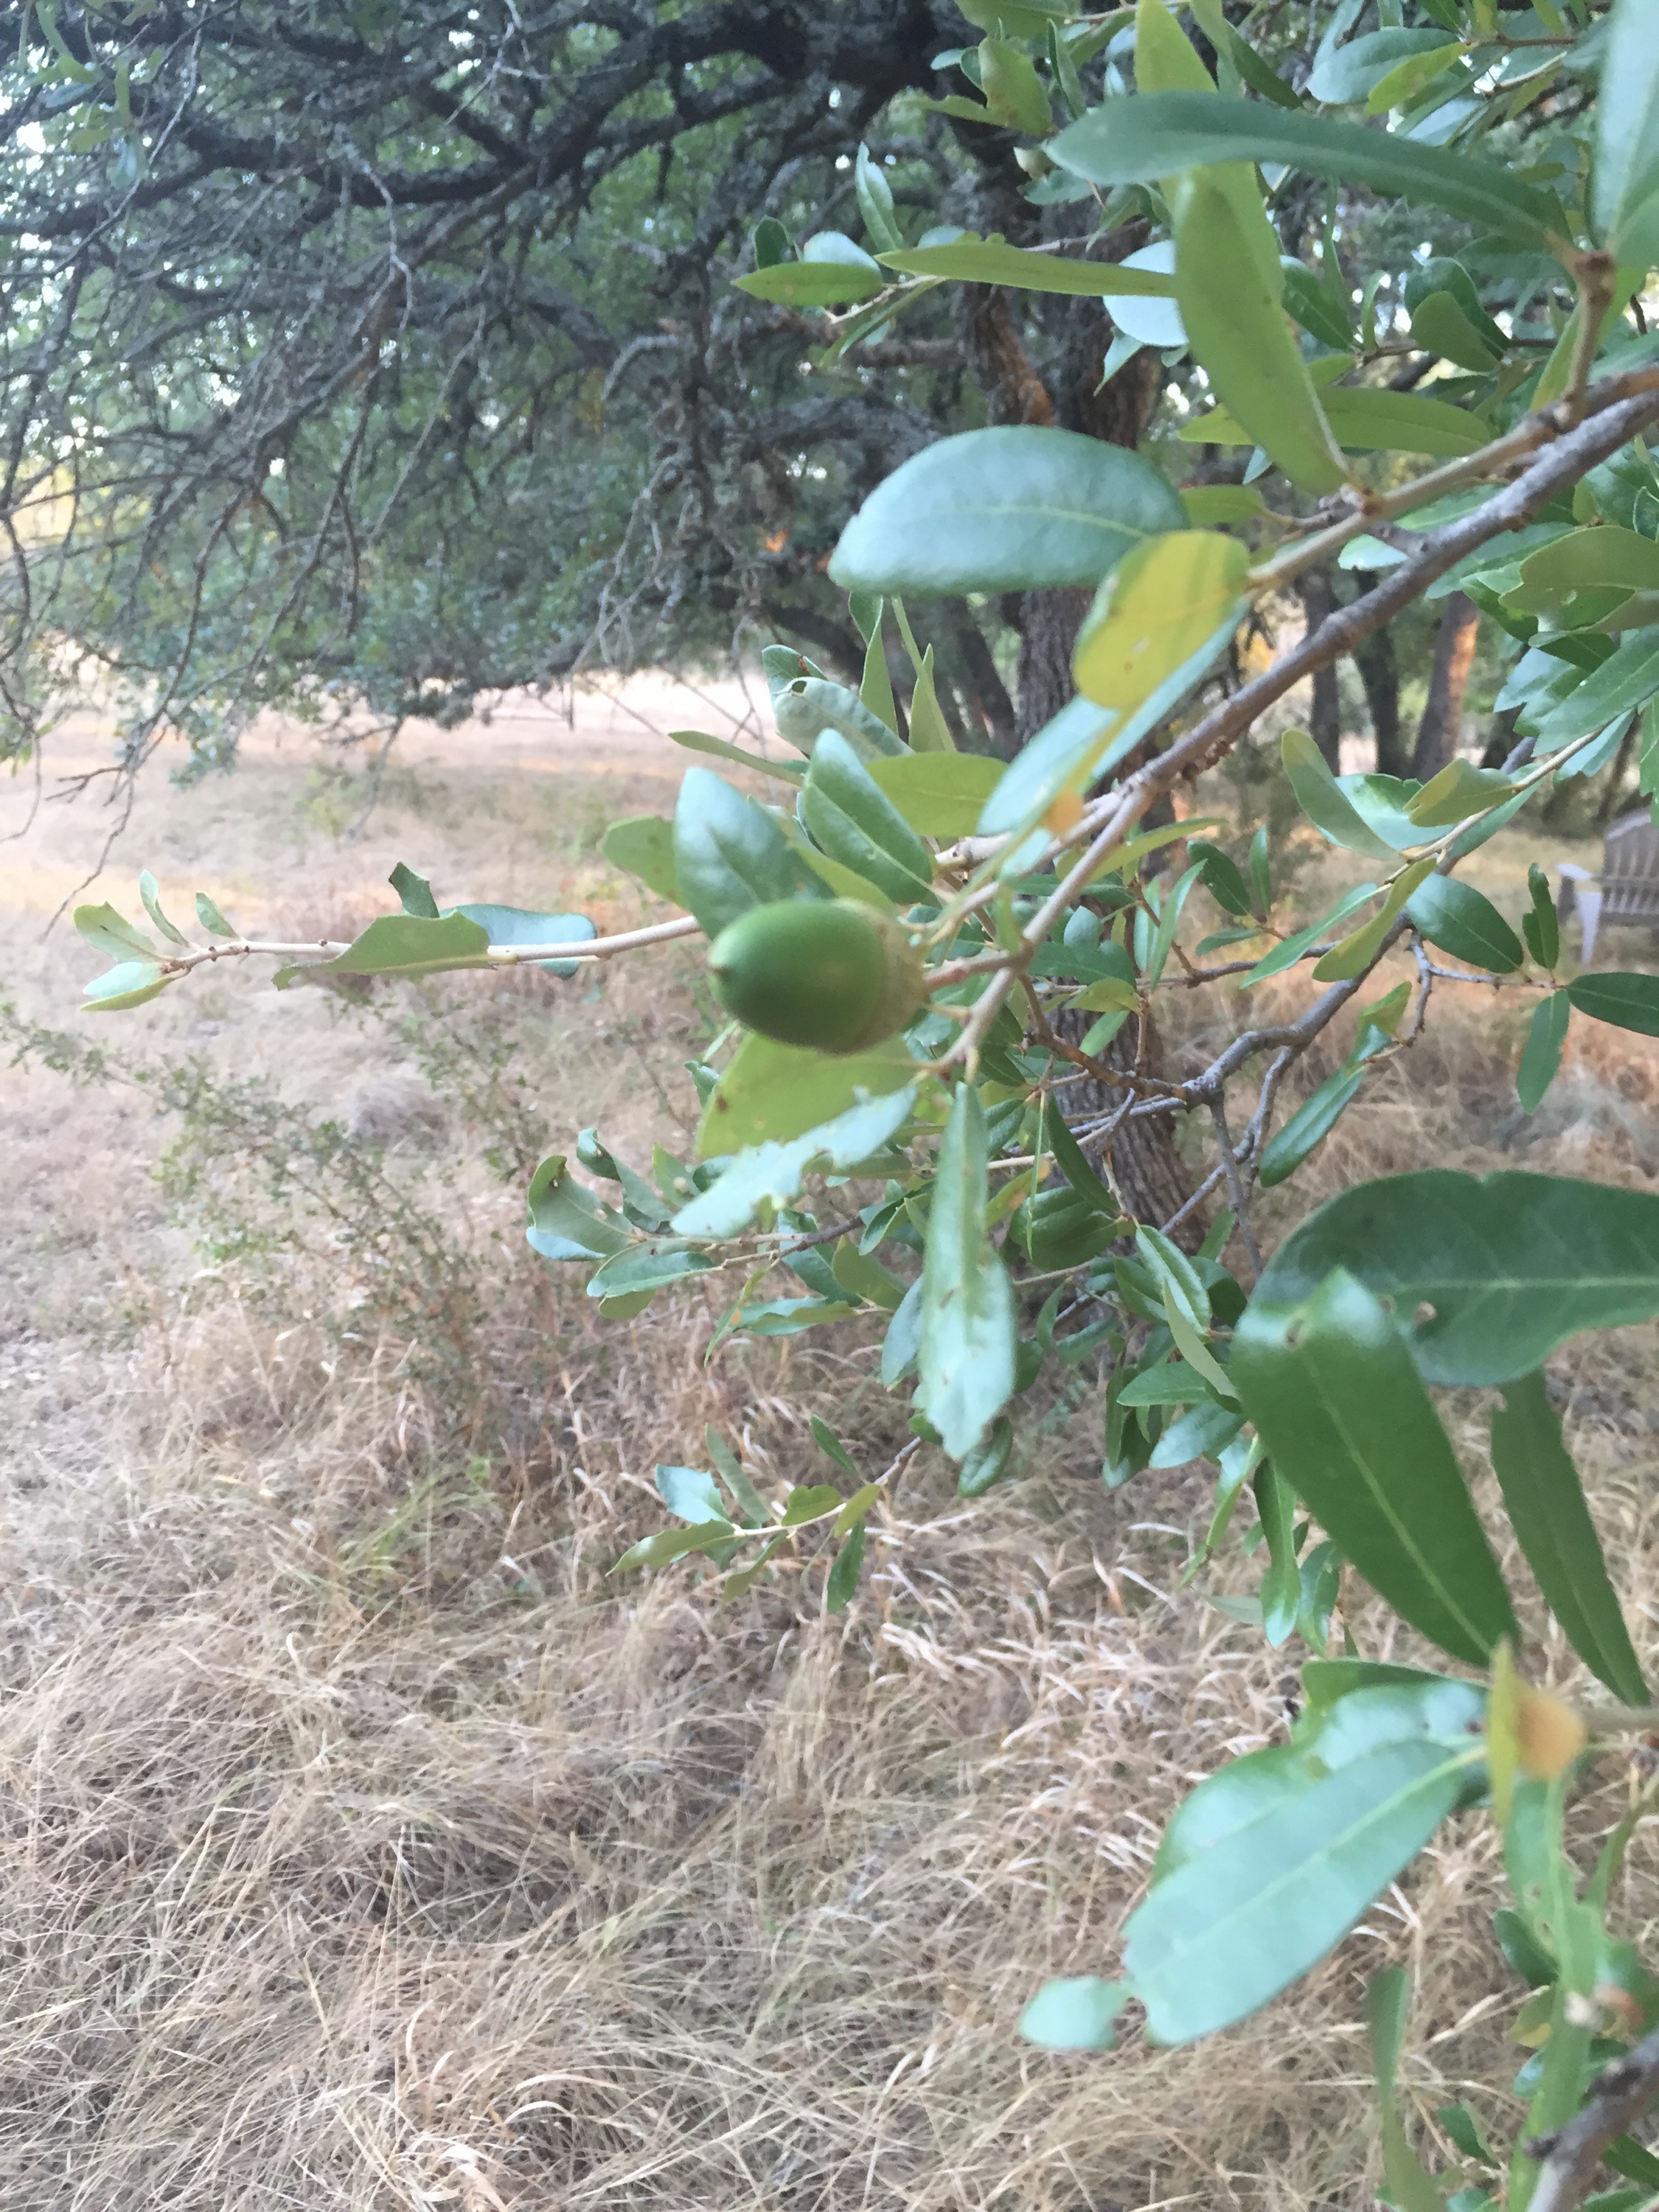
And you can see the lack of moisture around the trees… Only .42 of rain since early June…

So…we are hopeful the El Nino will bring some rains in November and repenish the ground AND our cistern!

Please note that this blog post is not to be used with any commercial ventures. If you sell dried indigo, please experiment and write your own instructions. Venders referring to this post have not asked permission to link to this post. This blog is not for their commercial use except for John Marshall’s great book, details below.
July 2018 Newsflash! JOHN Marshall has come out with a new release covering a variety of ways to use your Japanese Indigo. The process described below in my blog is covered in his book, here is a link to my review & where you order his book. Enjoy!
Original post…One of the frustrations of a small producer of indigo is the limited amount available to dye things blue at one time. Of course, one can buy dried indigo powder from India or South America, but when one has stepped firmly over the edge into growing your own Japanese Indigo you look beyond the obvious and want to work within your own garden boundaries. 
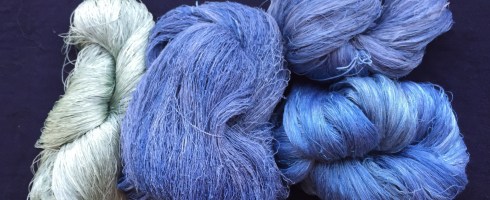
Drying my Japanese Indigo appears to be the solution for me. Below is a photo of my first experiment with 100 grams of dried indigo leaves after neutralizing with vinegar and washing with Orvis. Three articles (1 cotton and 2 silk) were dipped twice each for 5 minutes. The extra skein on the lower left is a blender fresh Japanese Indigo skein left overnight in a fresh batch and is provided just as an example of the different color way you get with another method using your Japanese Indigo.  Consider the fact that I can and will run another batch of dried indigo and continue to dip these items to continue to darken their color. This first test batch I stuck close to John Marshall’s recipe (c-Background below) and kept track of measurements. For those who like #’s, here you go:
So the ratio is 100:223 or 1 part dried indigo to about 2 parts substrate. Impressed with the color obtain at that ratio? I am.
This means I can harvest and dry my indigo over the growing season and have my indigo on hand when I have time to enjoy the dye pot process. With the violent weather and winds that we can have in the Texas Hill country it is very attractive to be able to harvest and dry part of your harvest and protect it from unpredictable climate.
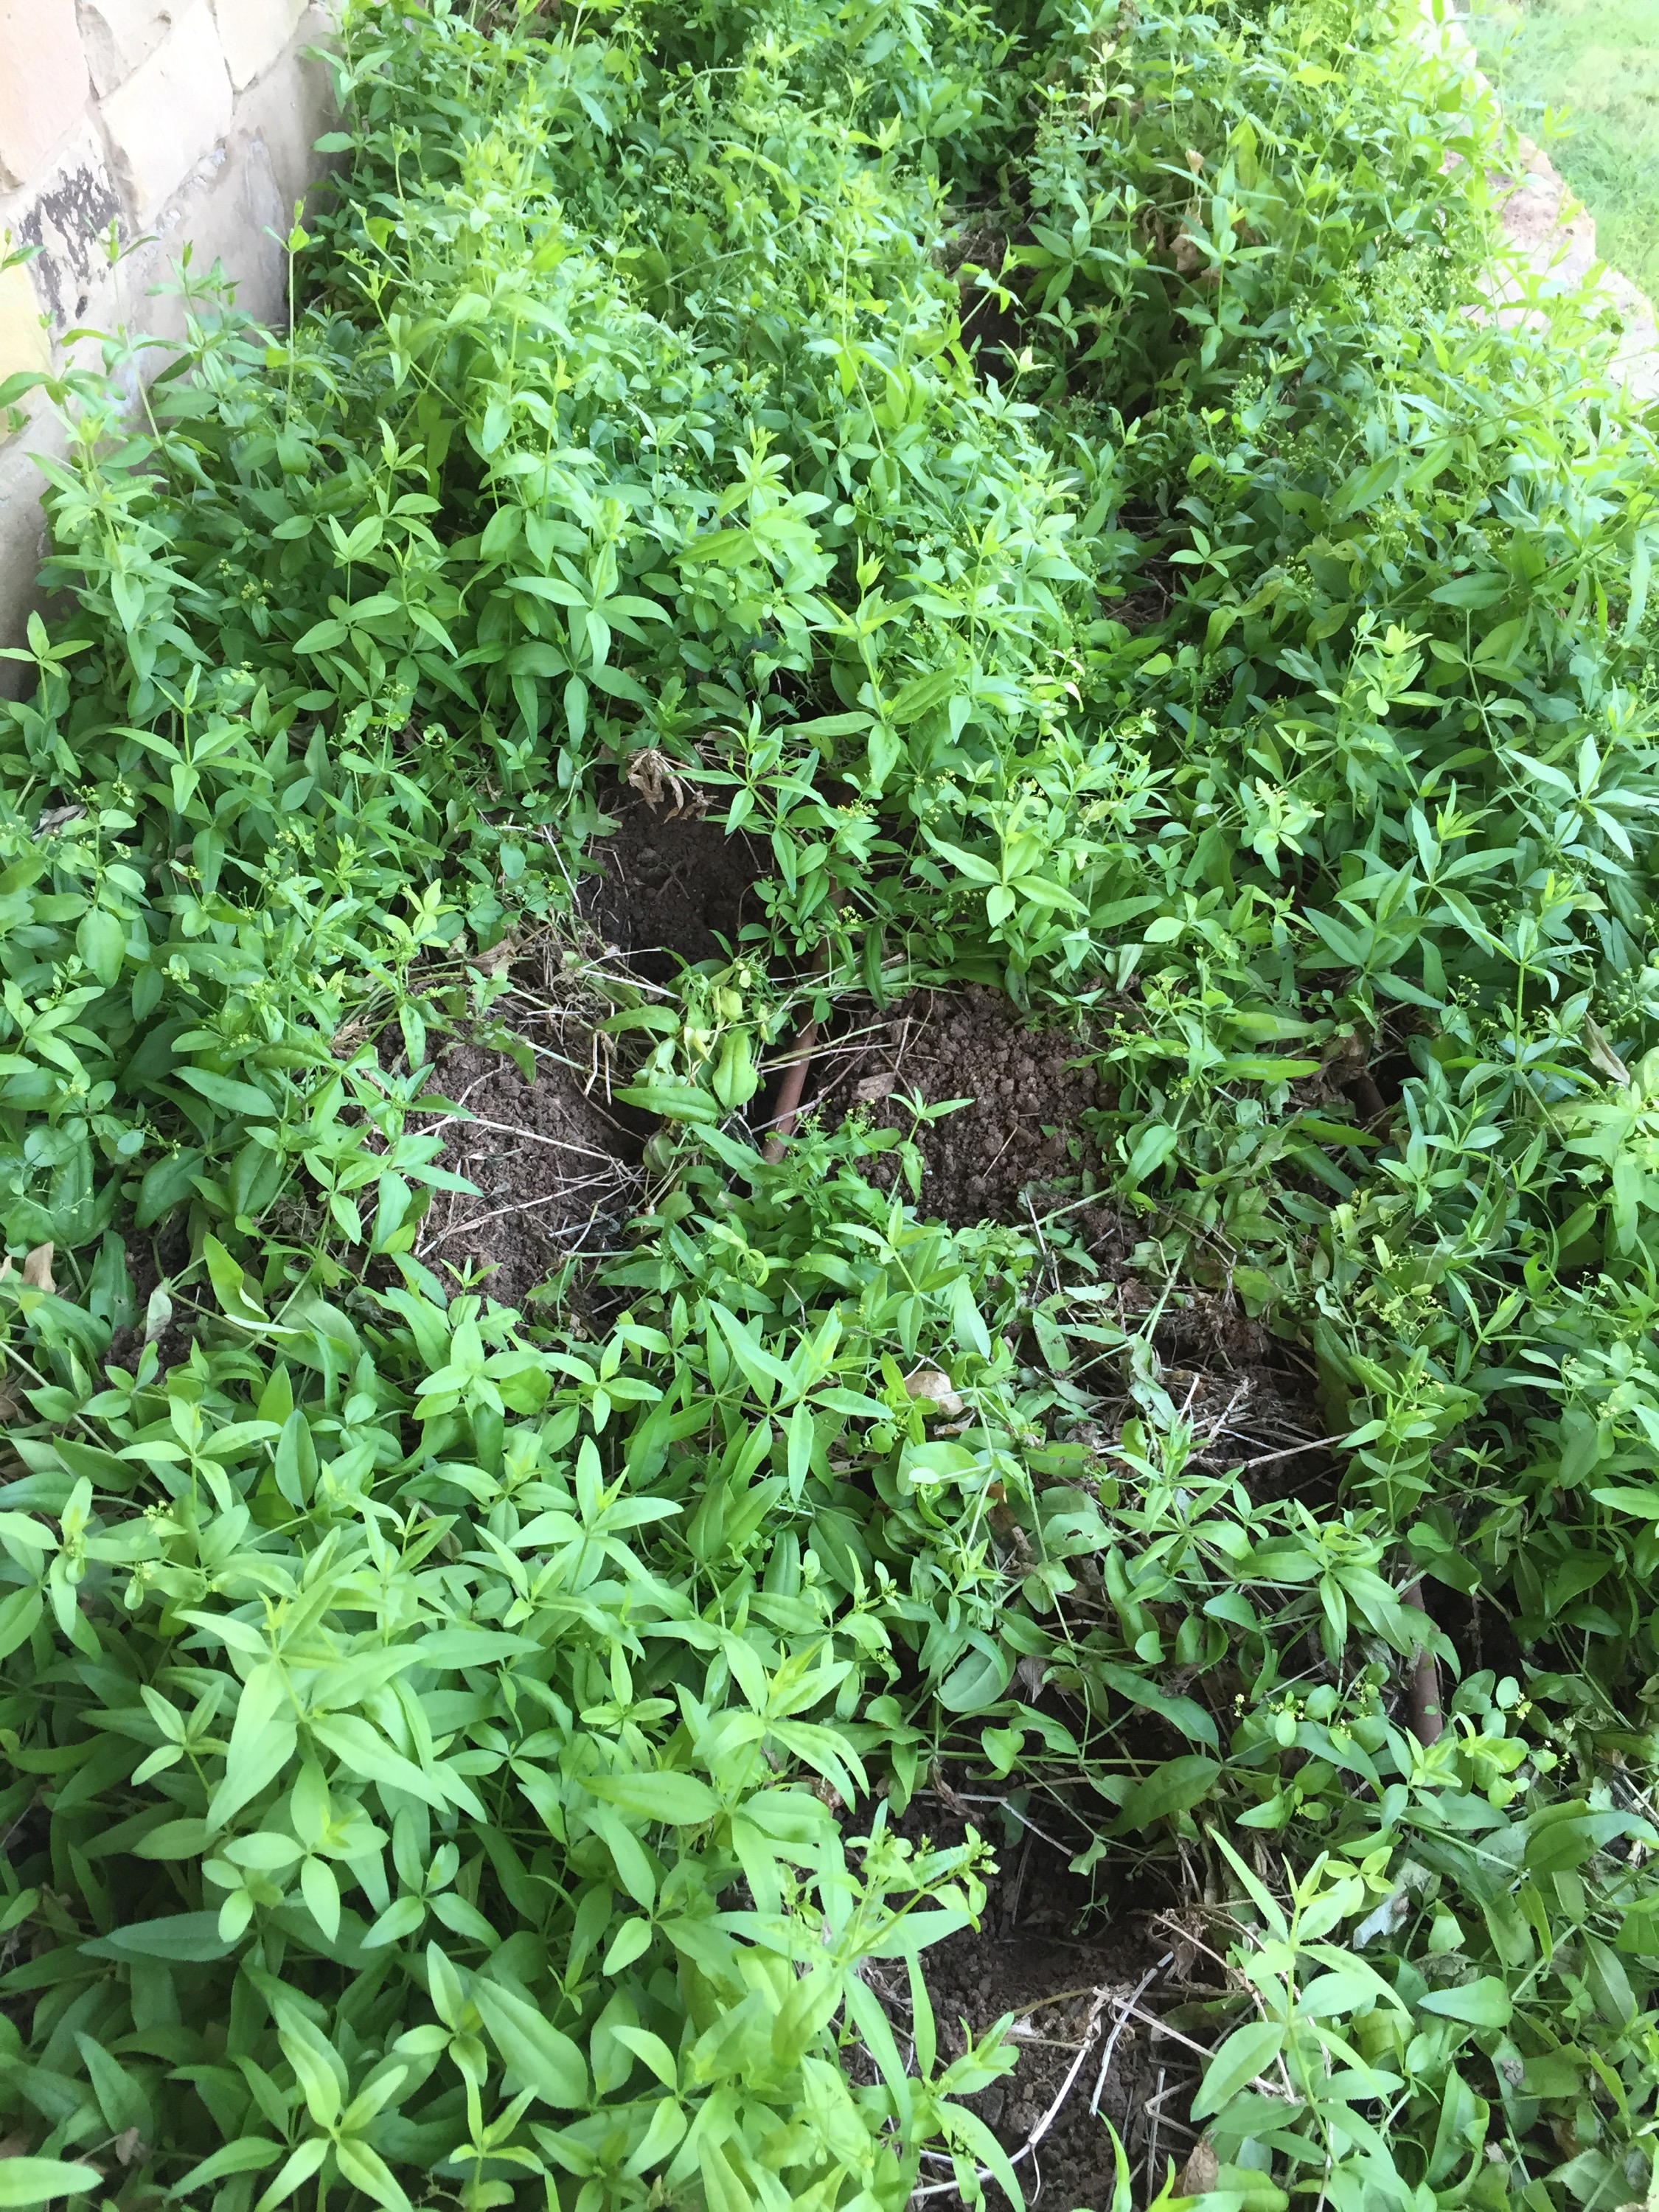
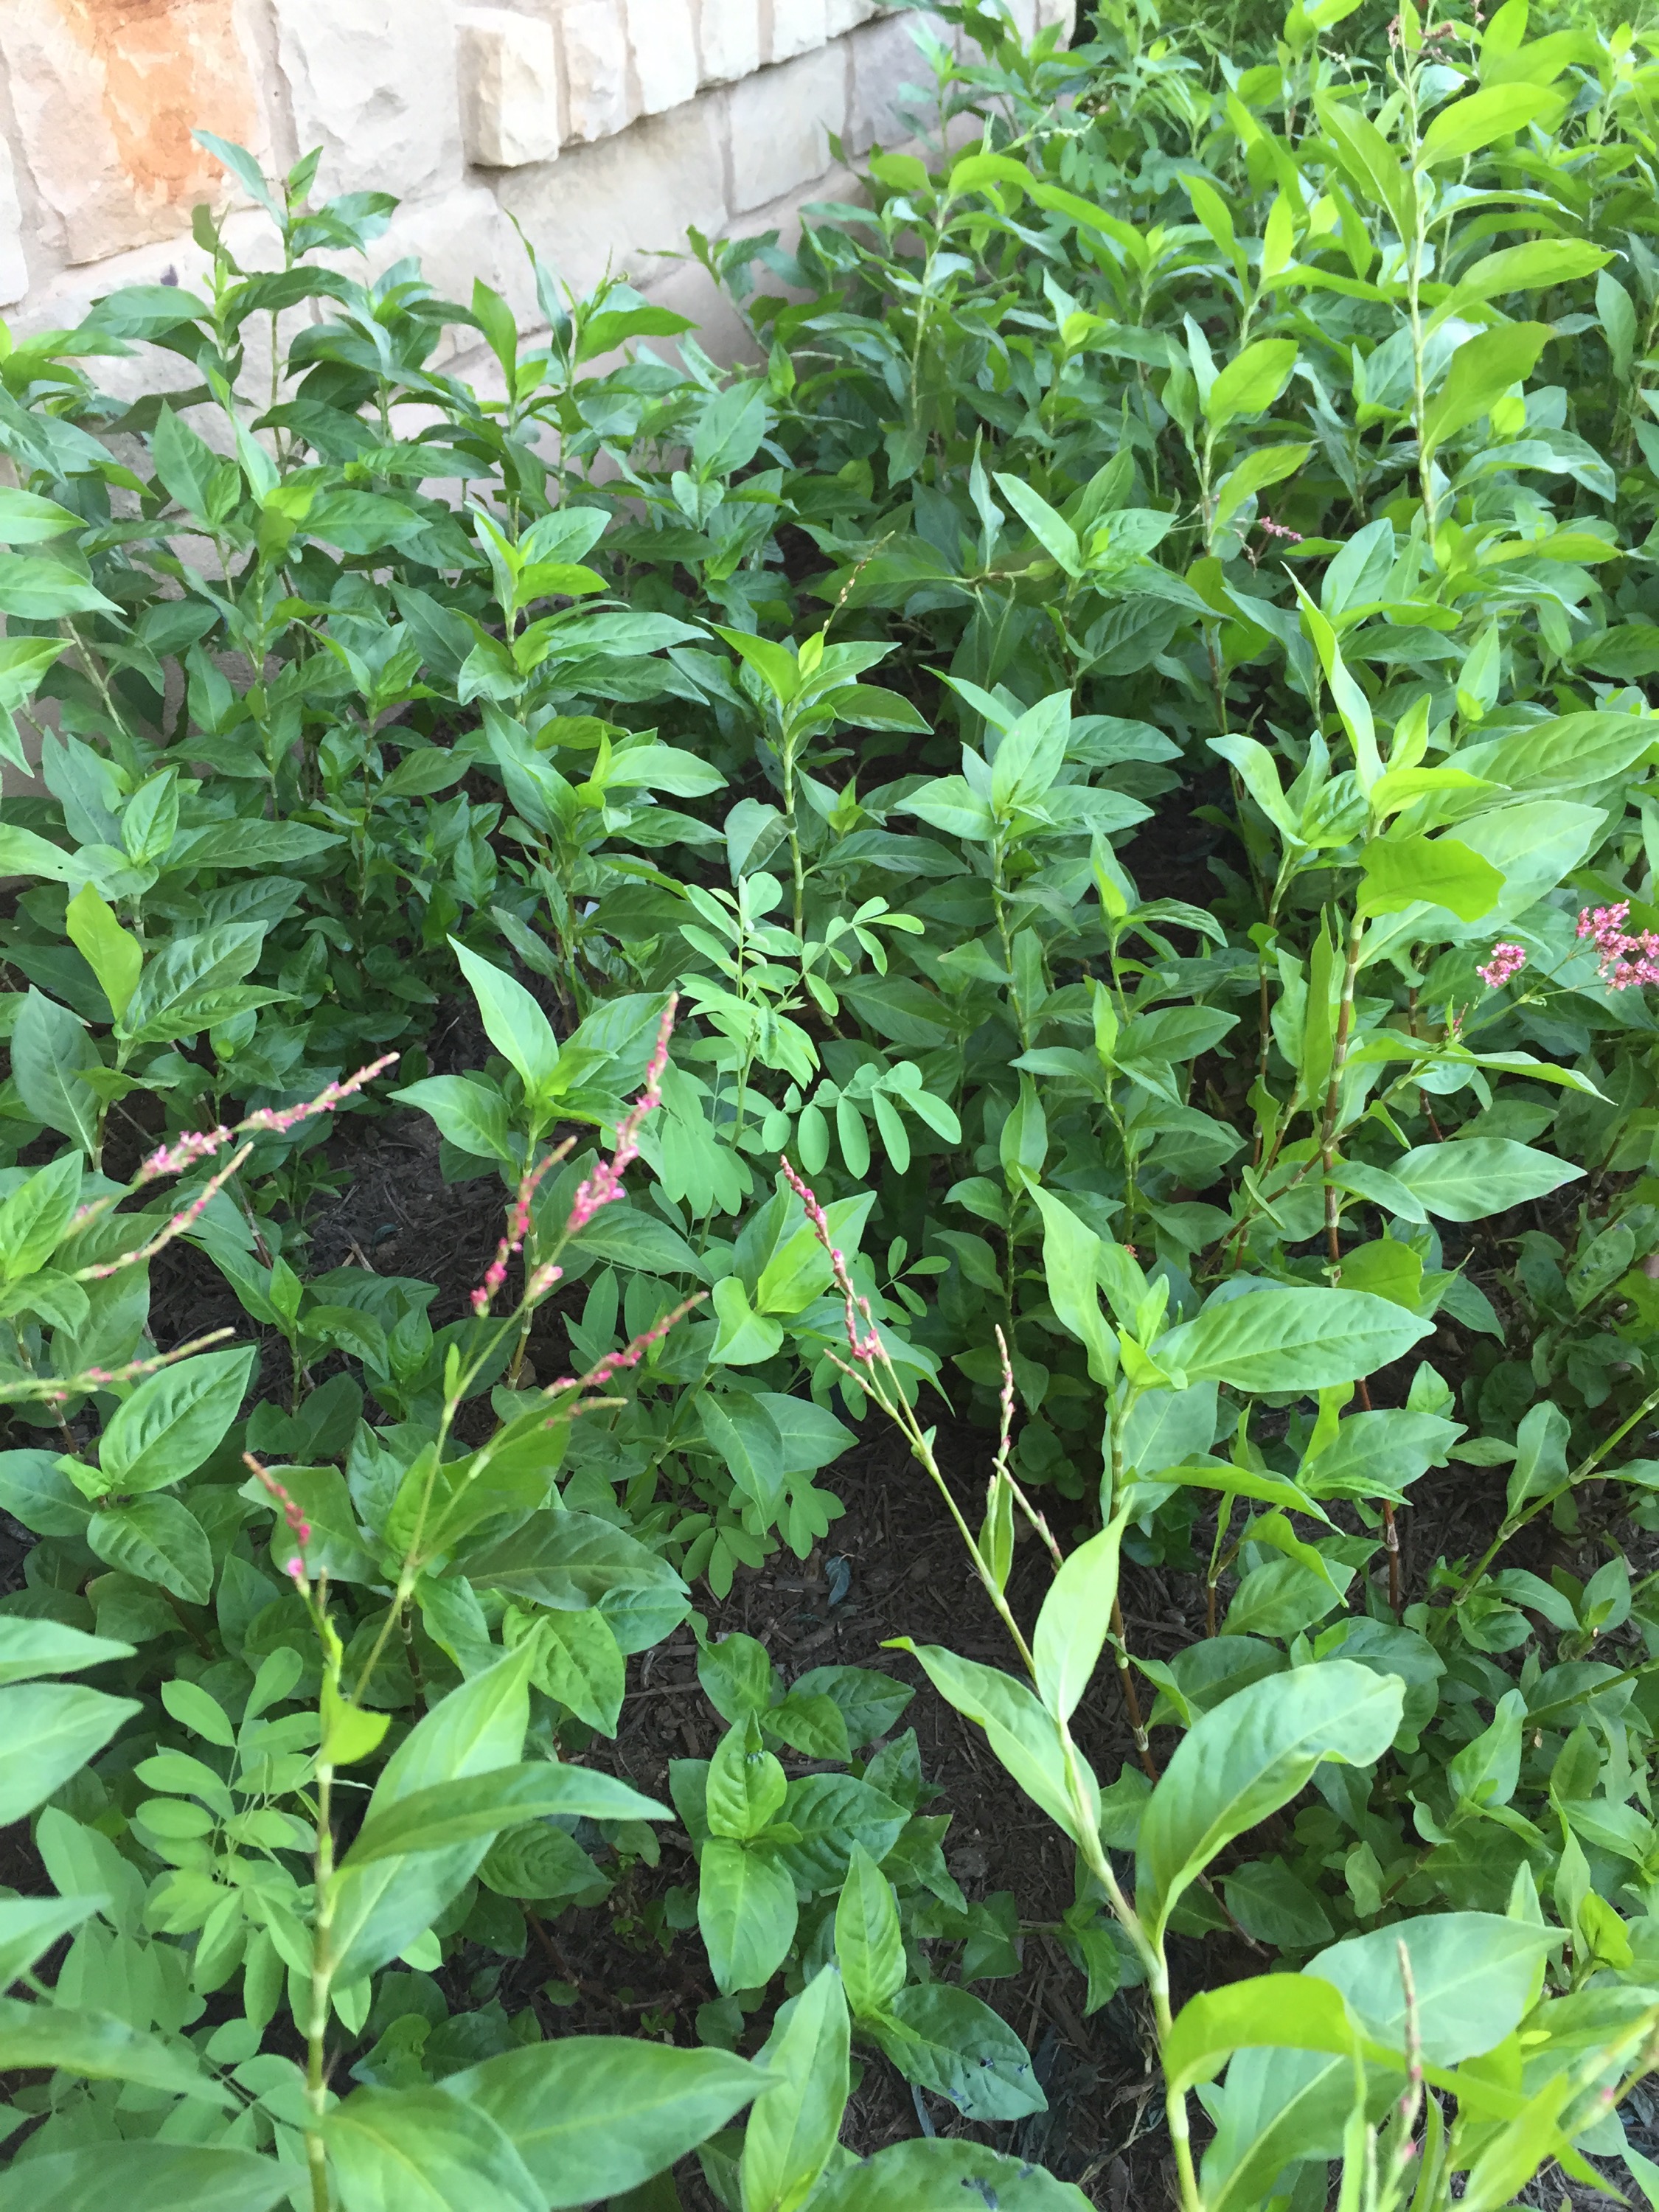
Some additional #’s for you, each of my indigo plants have at the beginning of their peak and thru their main growing season 10-12 stalks ready for cutting with an undergrowth of new plants coming up. Remember I am located in Central Texas and irrigate my plants with well water heavy in calcium. Other geographical locations will have different growing conditions. Go ahead, run out and count your plant stalks. I’ll wait! Put in the comments where you are located and what # of stalks your plant is putting out. 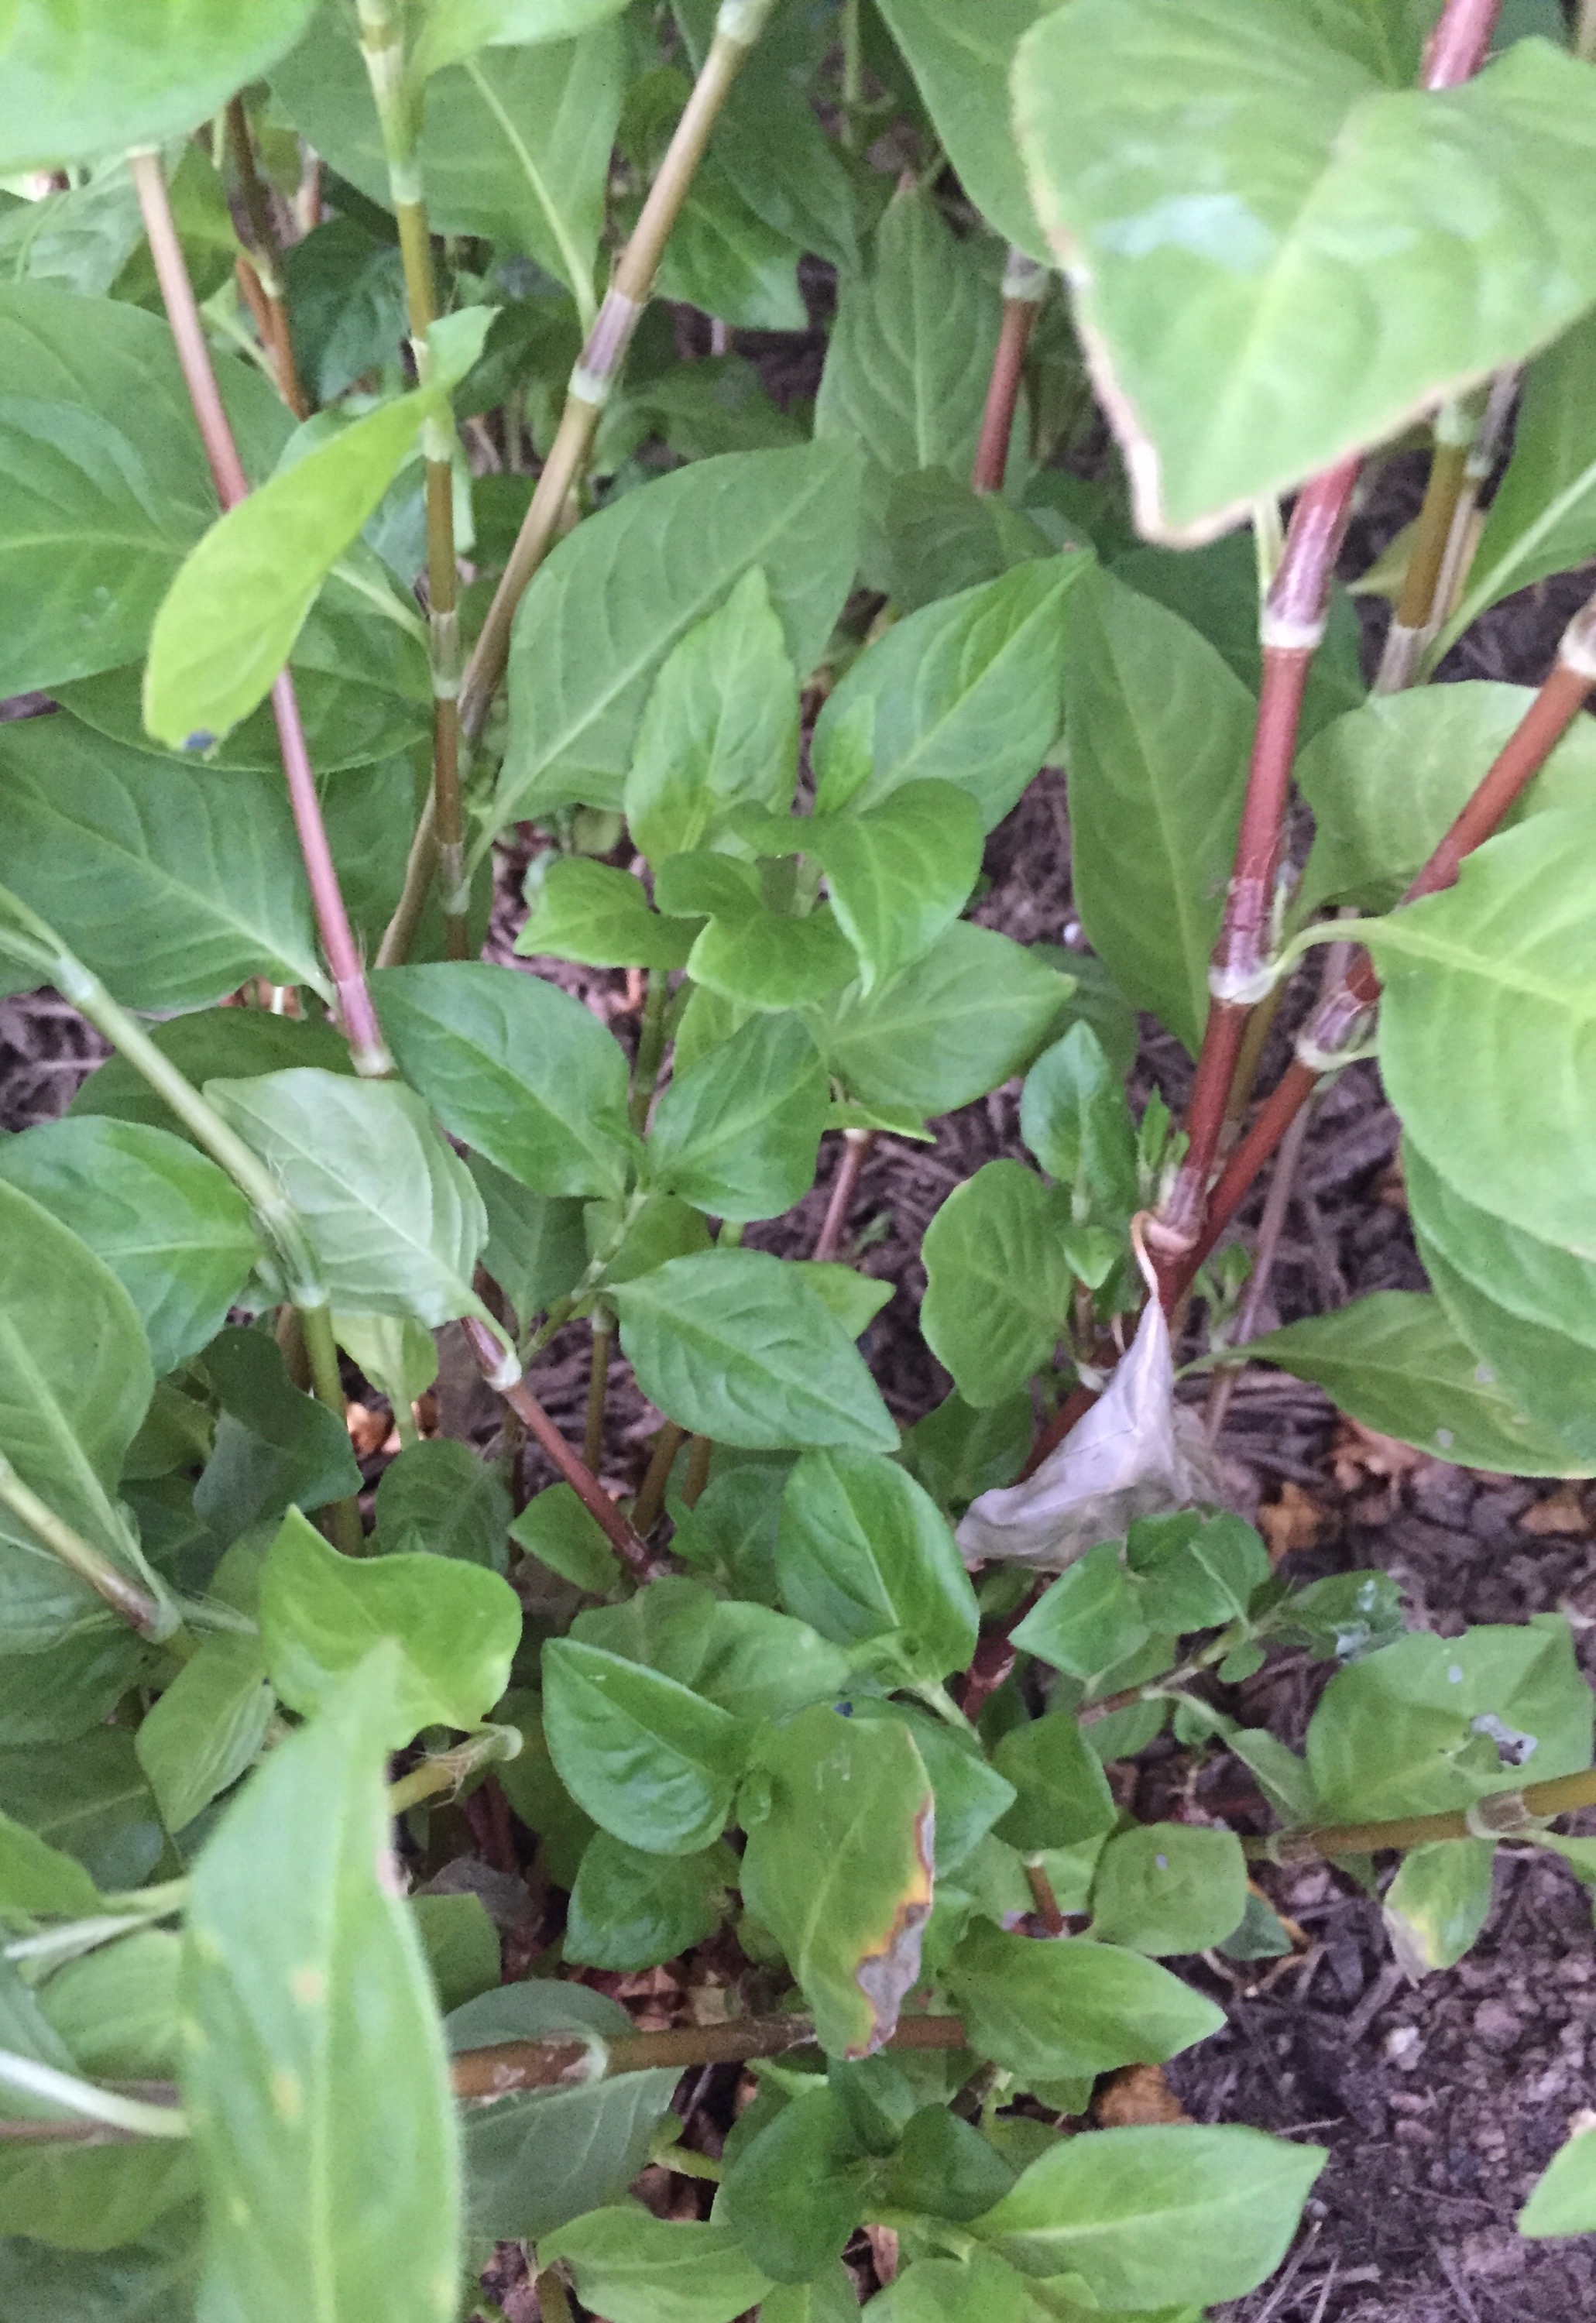 I go thru my Japanese Indigo bed and pick the plant stalks without blossoms for my drying bundles. My bundles usually hold 20-24 stalks for drying. Below are photos of my drying method. I secure my bundles to protect them from the birds and bugs AND the wind. I don’t want an unexpected gust to send my leaves somewhere I cannot retrieve them.
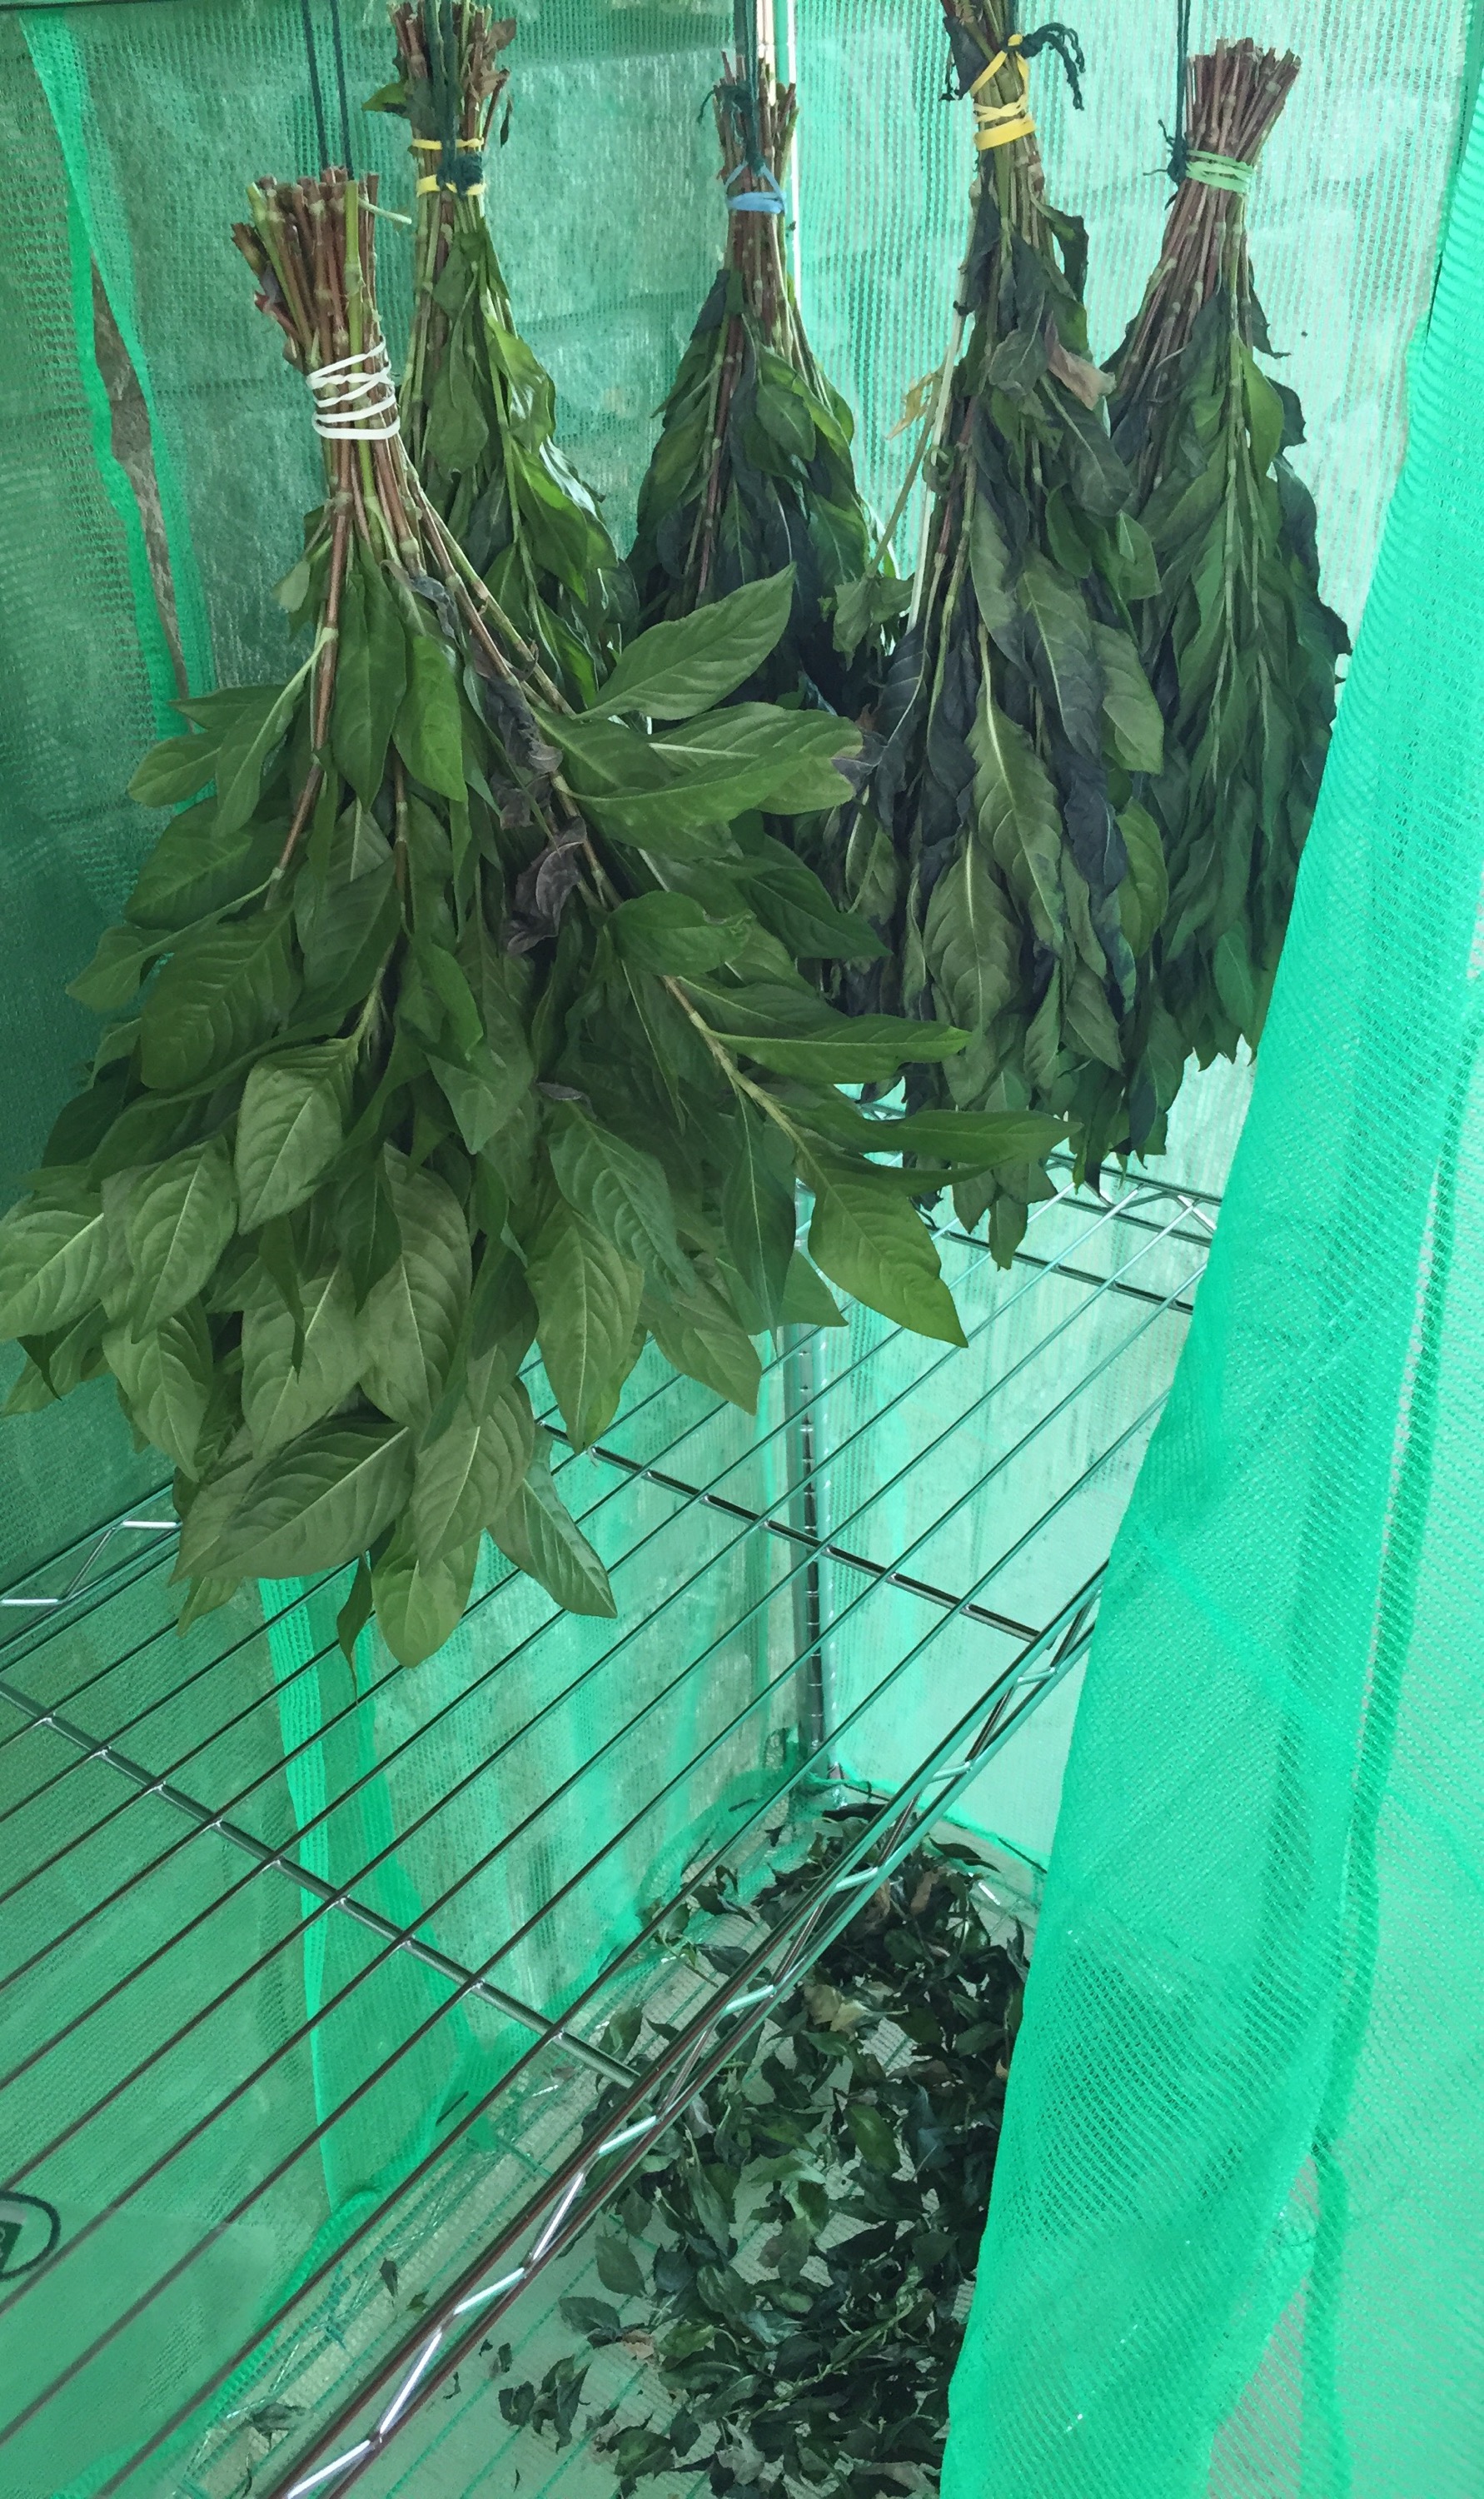 After about three days in my Texas heat the stalks have dried down enough for me to strip them off the stalks and let them continue to dry.
In the interest of providing more #’s for those who want some guidelines here is more data:
As I type 5 more bunches are drying and now that our humidity has dropped after some much needed rain I will go out and continue to create more bunches for drying. 
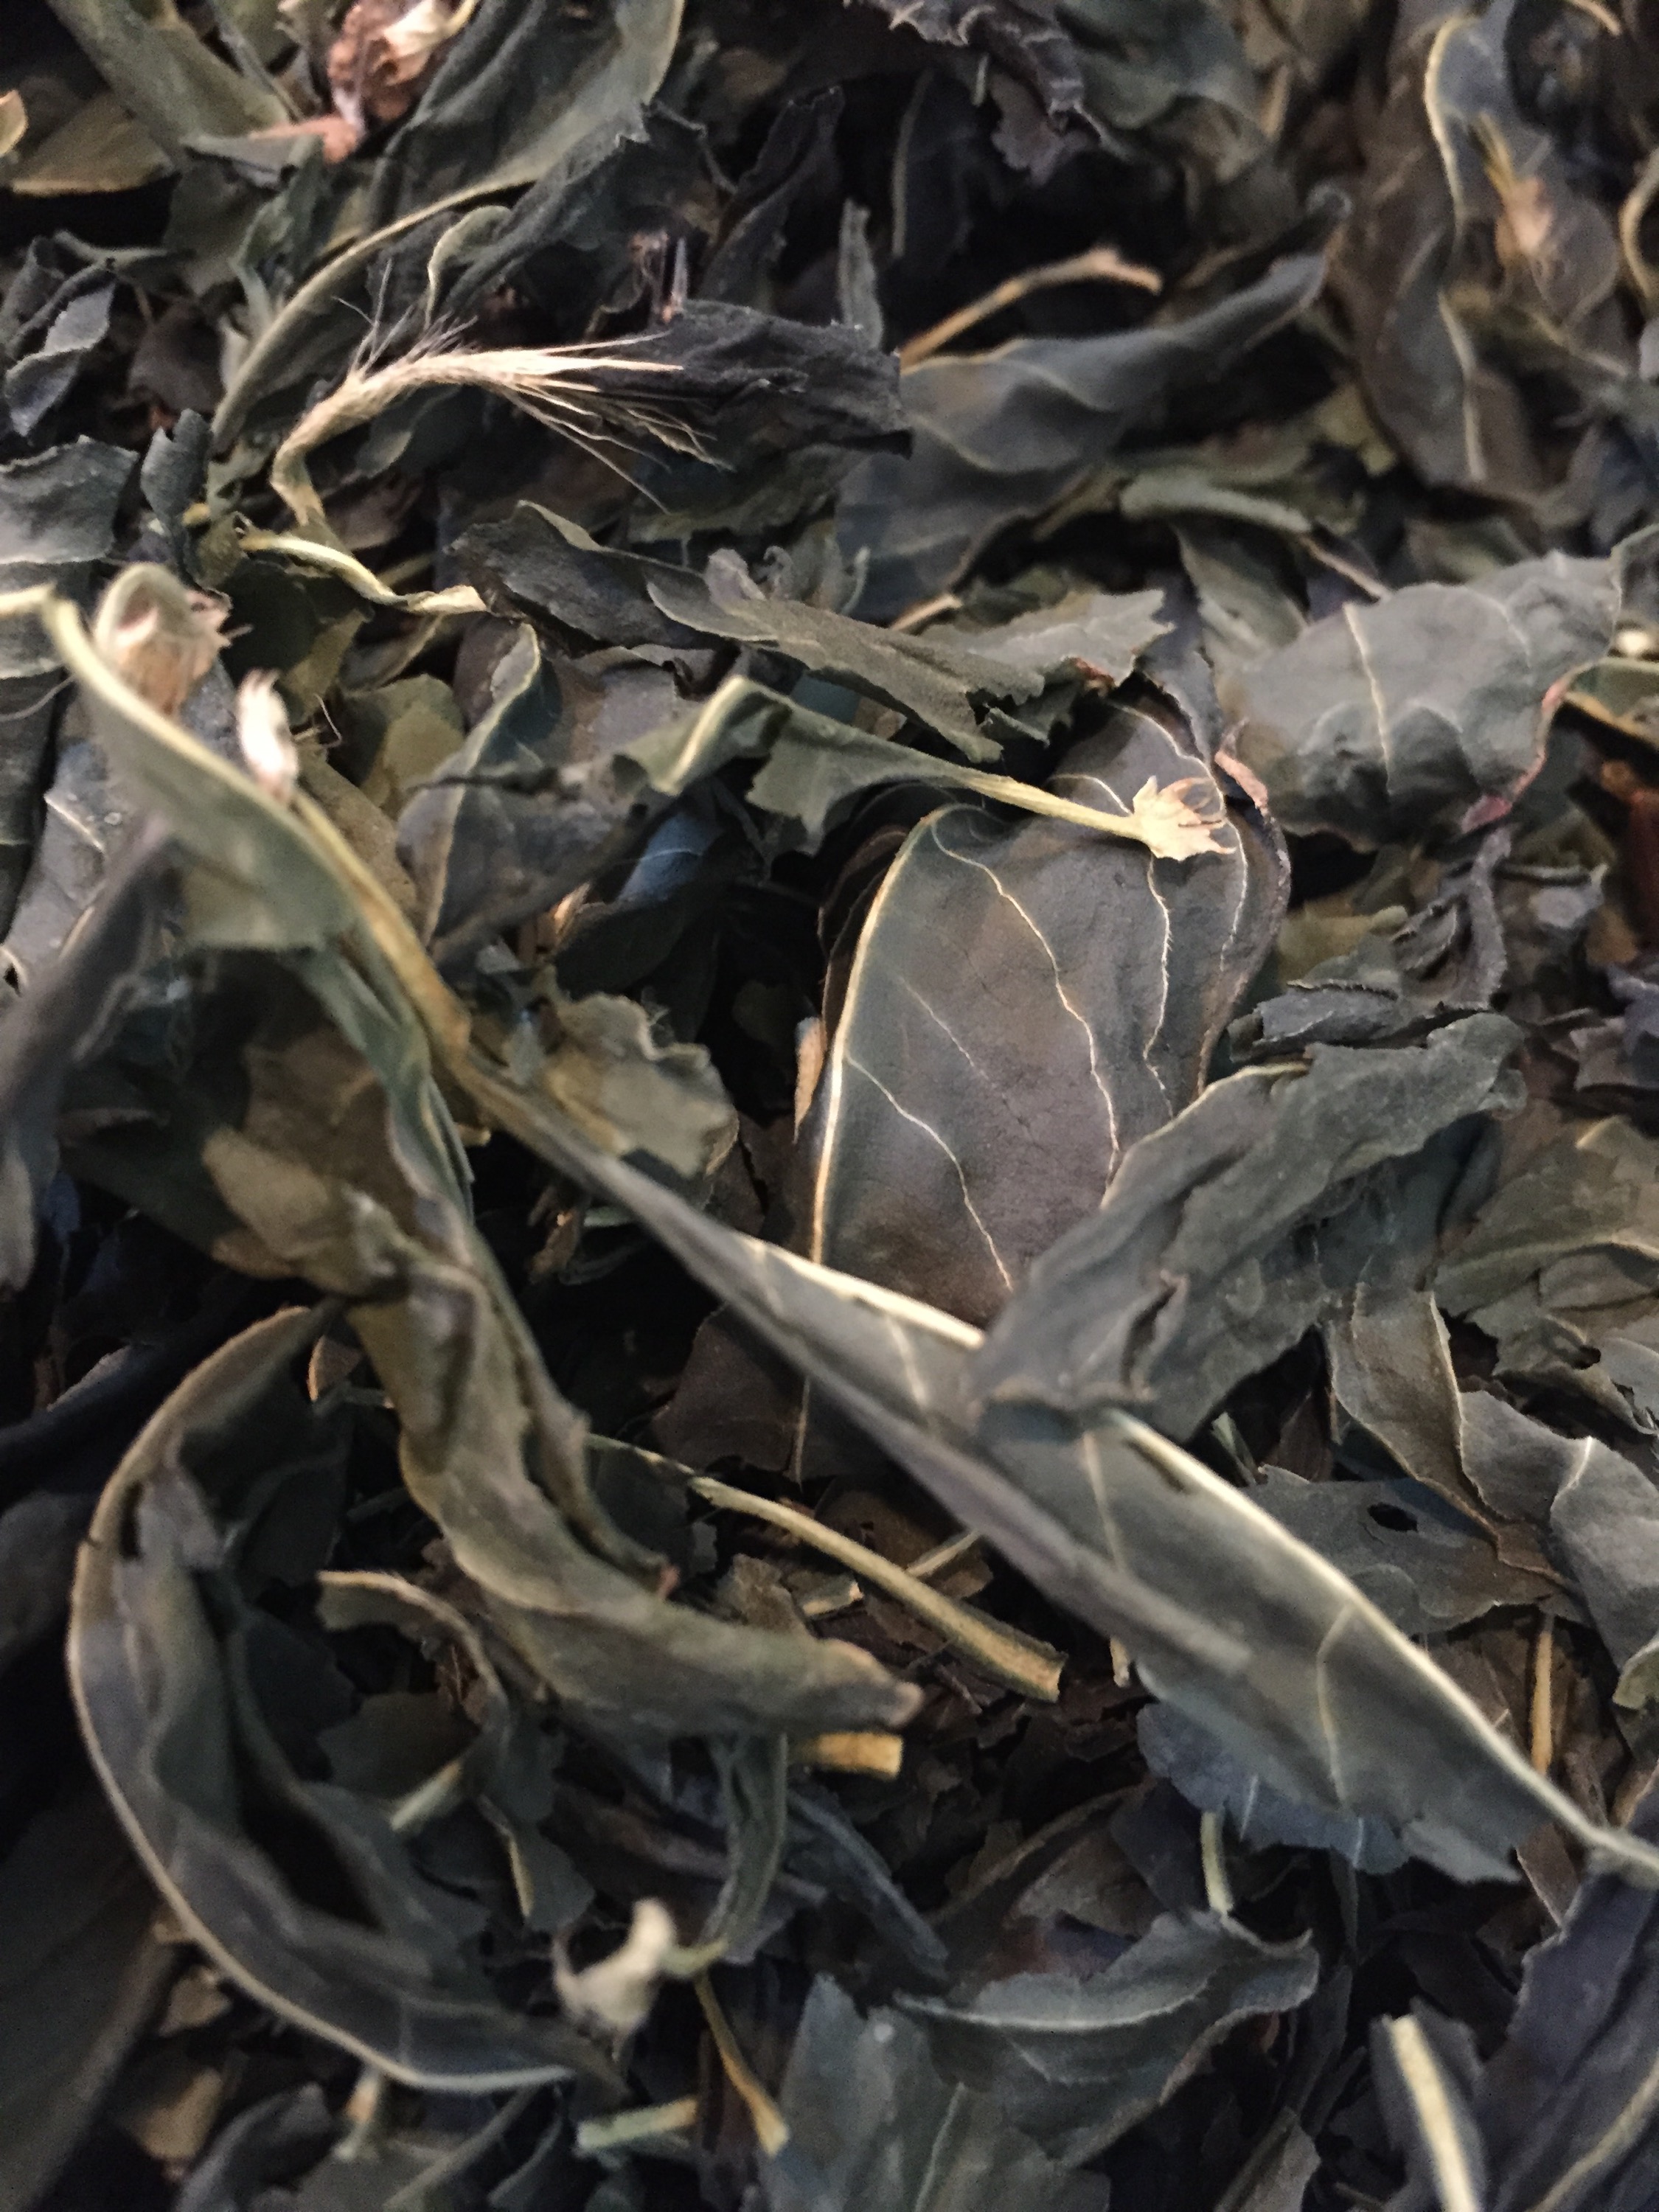 I know if you have read this far you are looking for the dried leaf recipe. My source is John Marshall’s limited edition Dyeing with Fresh-Leaf Japanese Indigo (link below in Background). Below is John’s recipe that I modified to use Soda Ash I had on hand rather than the Washing Soda called for in John’s recipe on page 16 of his book. I used the basic assumption that it takes 3 parts washing soda to equal 1 part Soda Ash. I am very grateful that John took the time to put his experience and the translation of different masters into a usable document for indigo dyers.
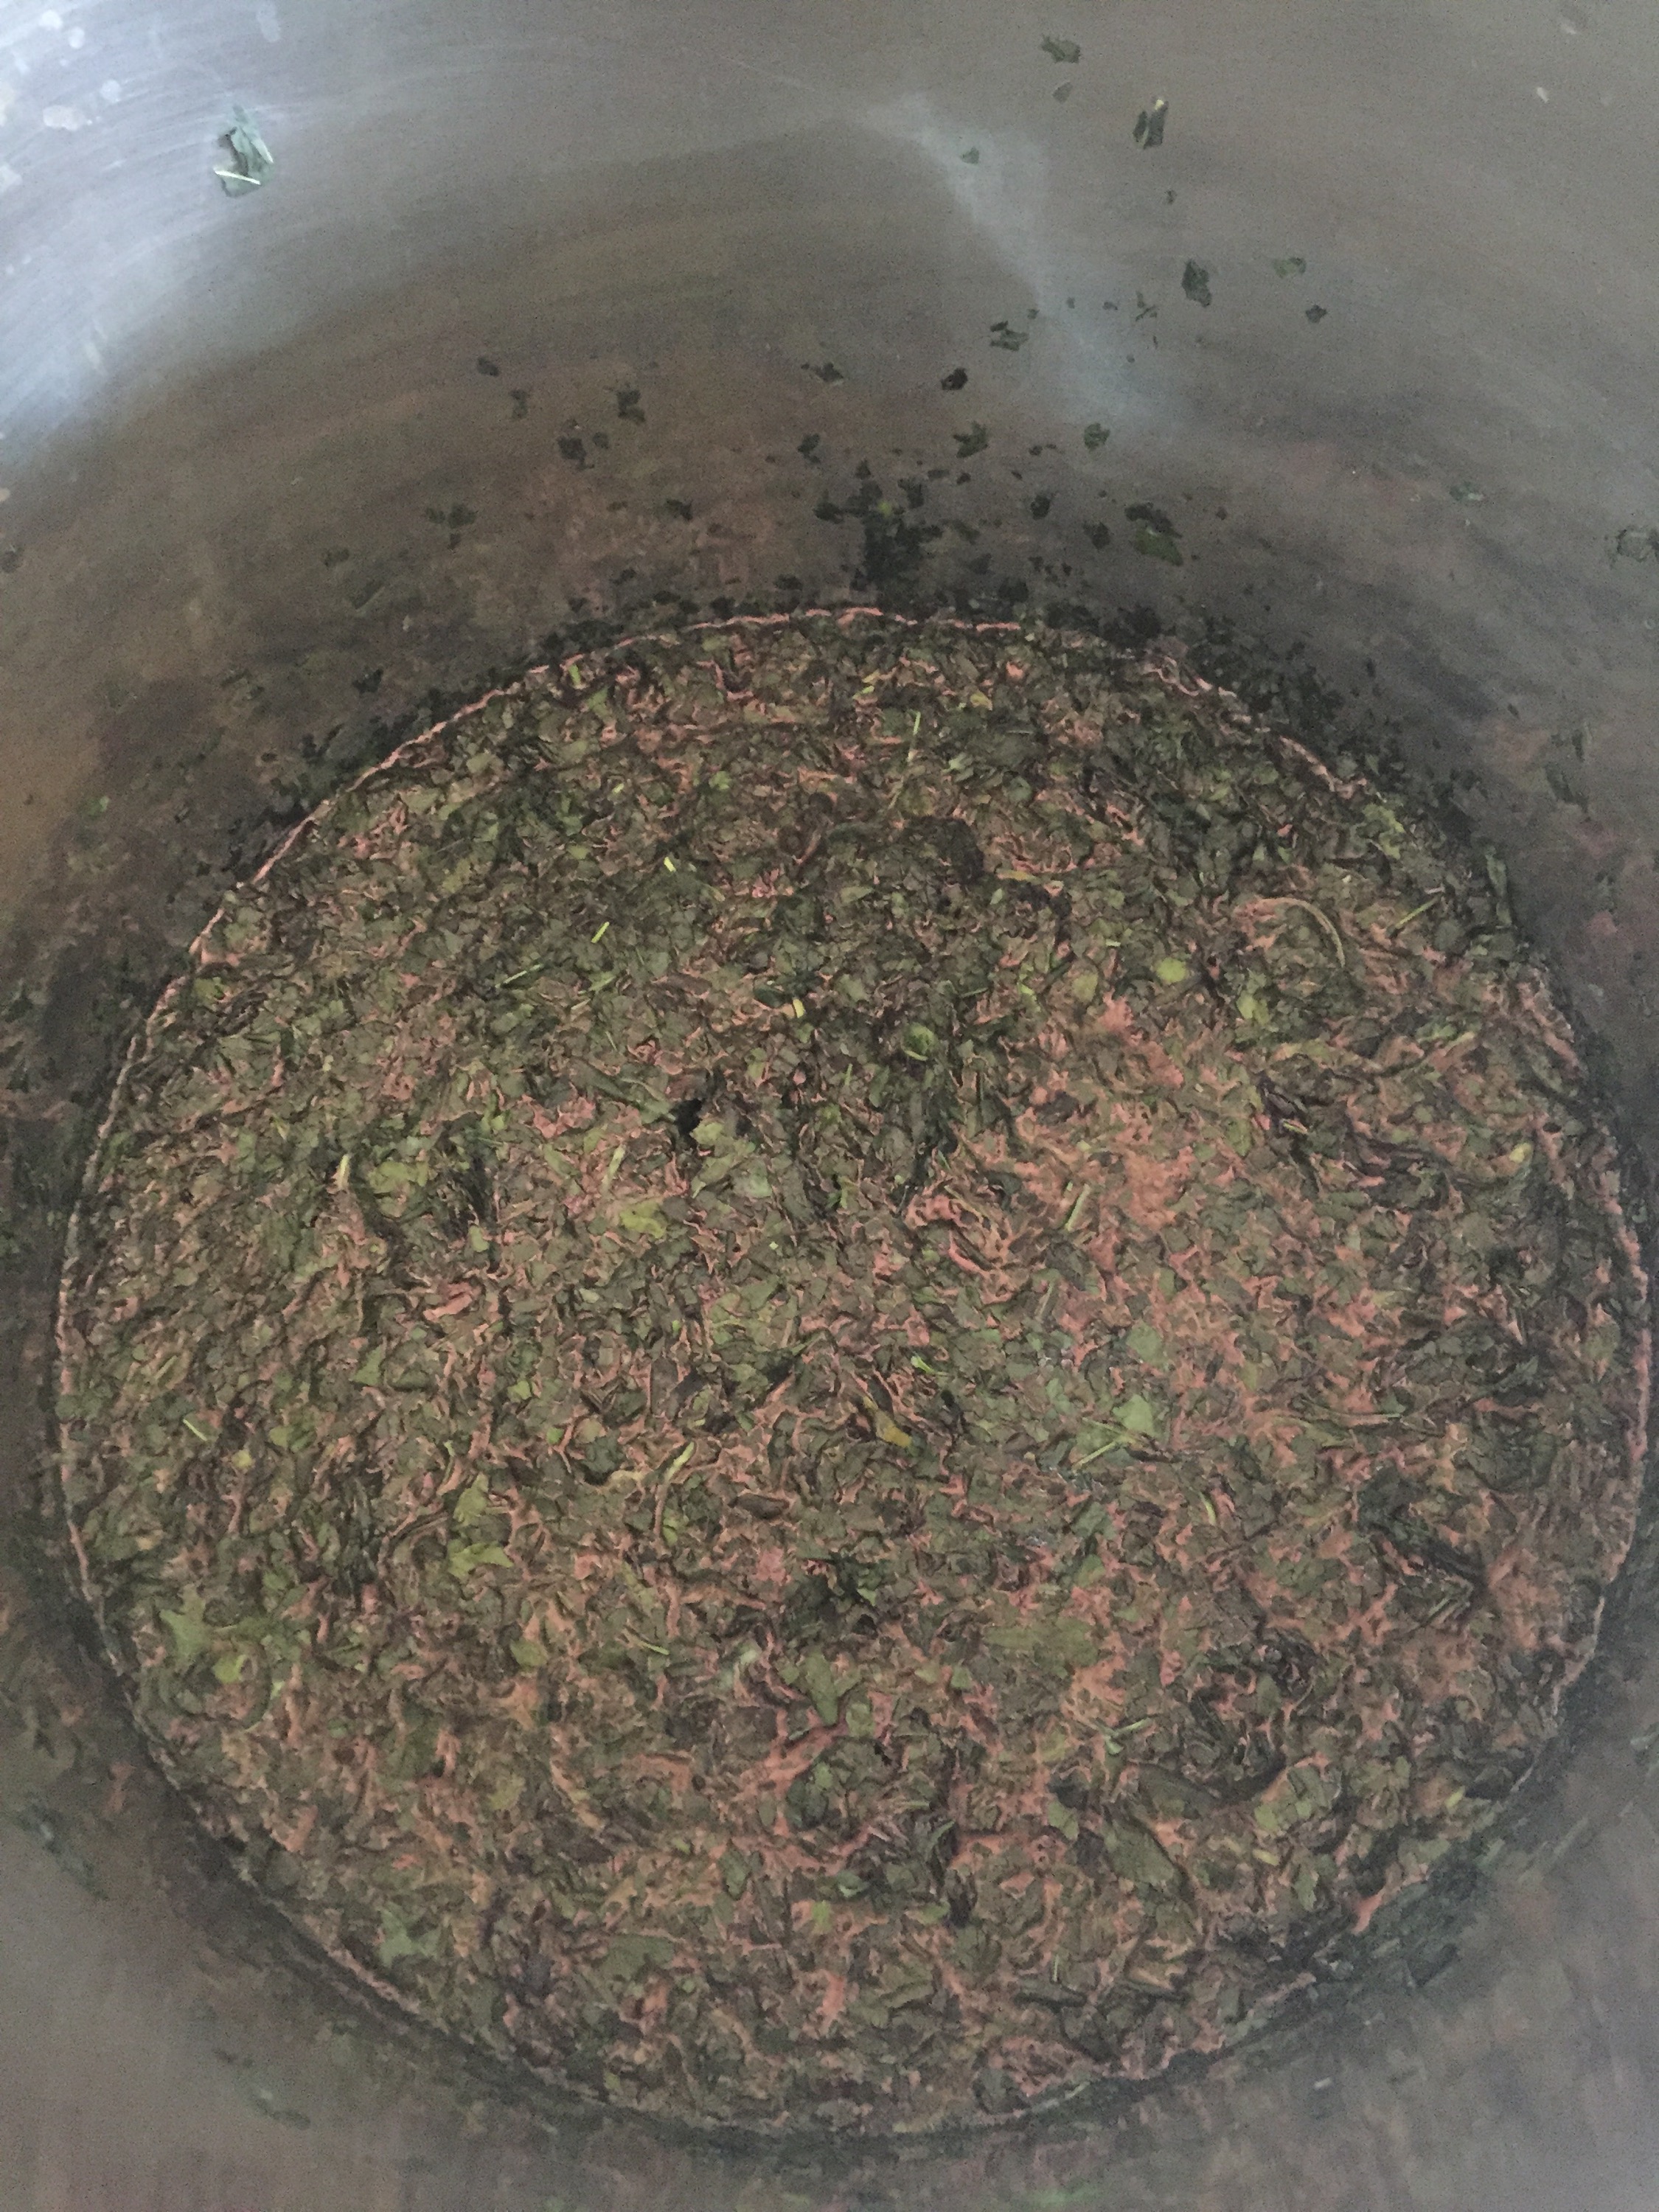
• You simmer the dried leaves for 20 minutes at a slow boil (honestly, I used an active simmer) and pour off the water. The water has a yellow tinge to it. That is the wash of components that will throw off your blue indigo. If you have ever used leftover blender JI leaves for a yellow dye, the water color is similar to that color. Discard the water. 
• After washing the leaves, I added 4 grams of soda ash and 6 grams of thiorea dioxide to 100 grams of dried indigo leaves in about 2 liters of water. I simmer almost to a boil and stirred as it heated. I did not boil. John says to boil. I could not bring myself to do so. I did not have my thermometer handy, the pot sang but I did not allow it to boil. It took about 20 minutes for first indigo glow to show on leaf and water surface.
• Strained the leaves and put the indigo solution into a separate pot.

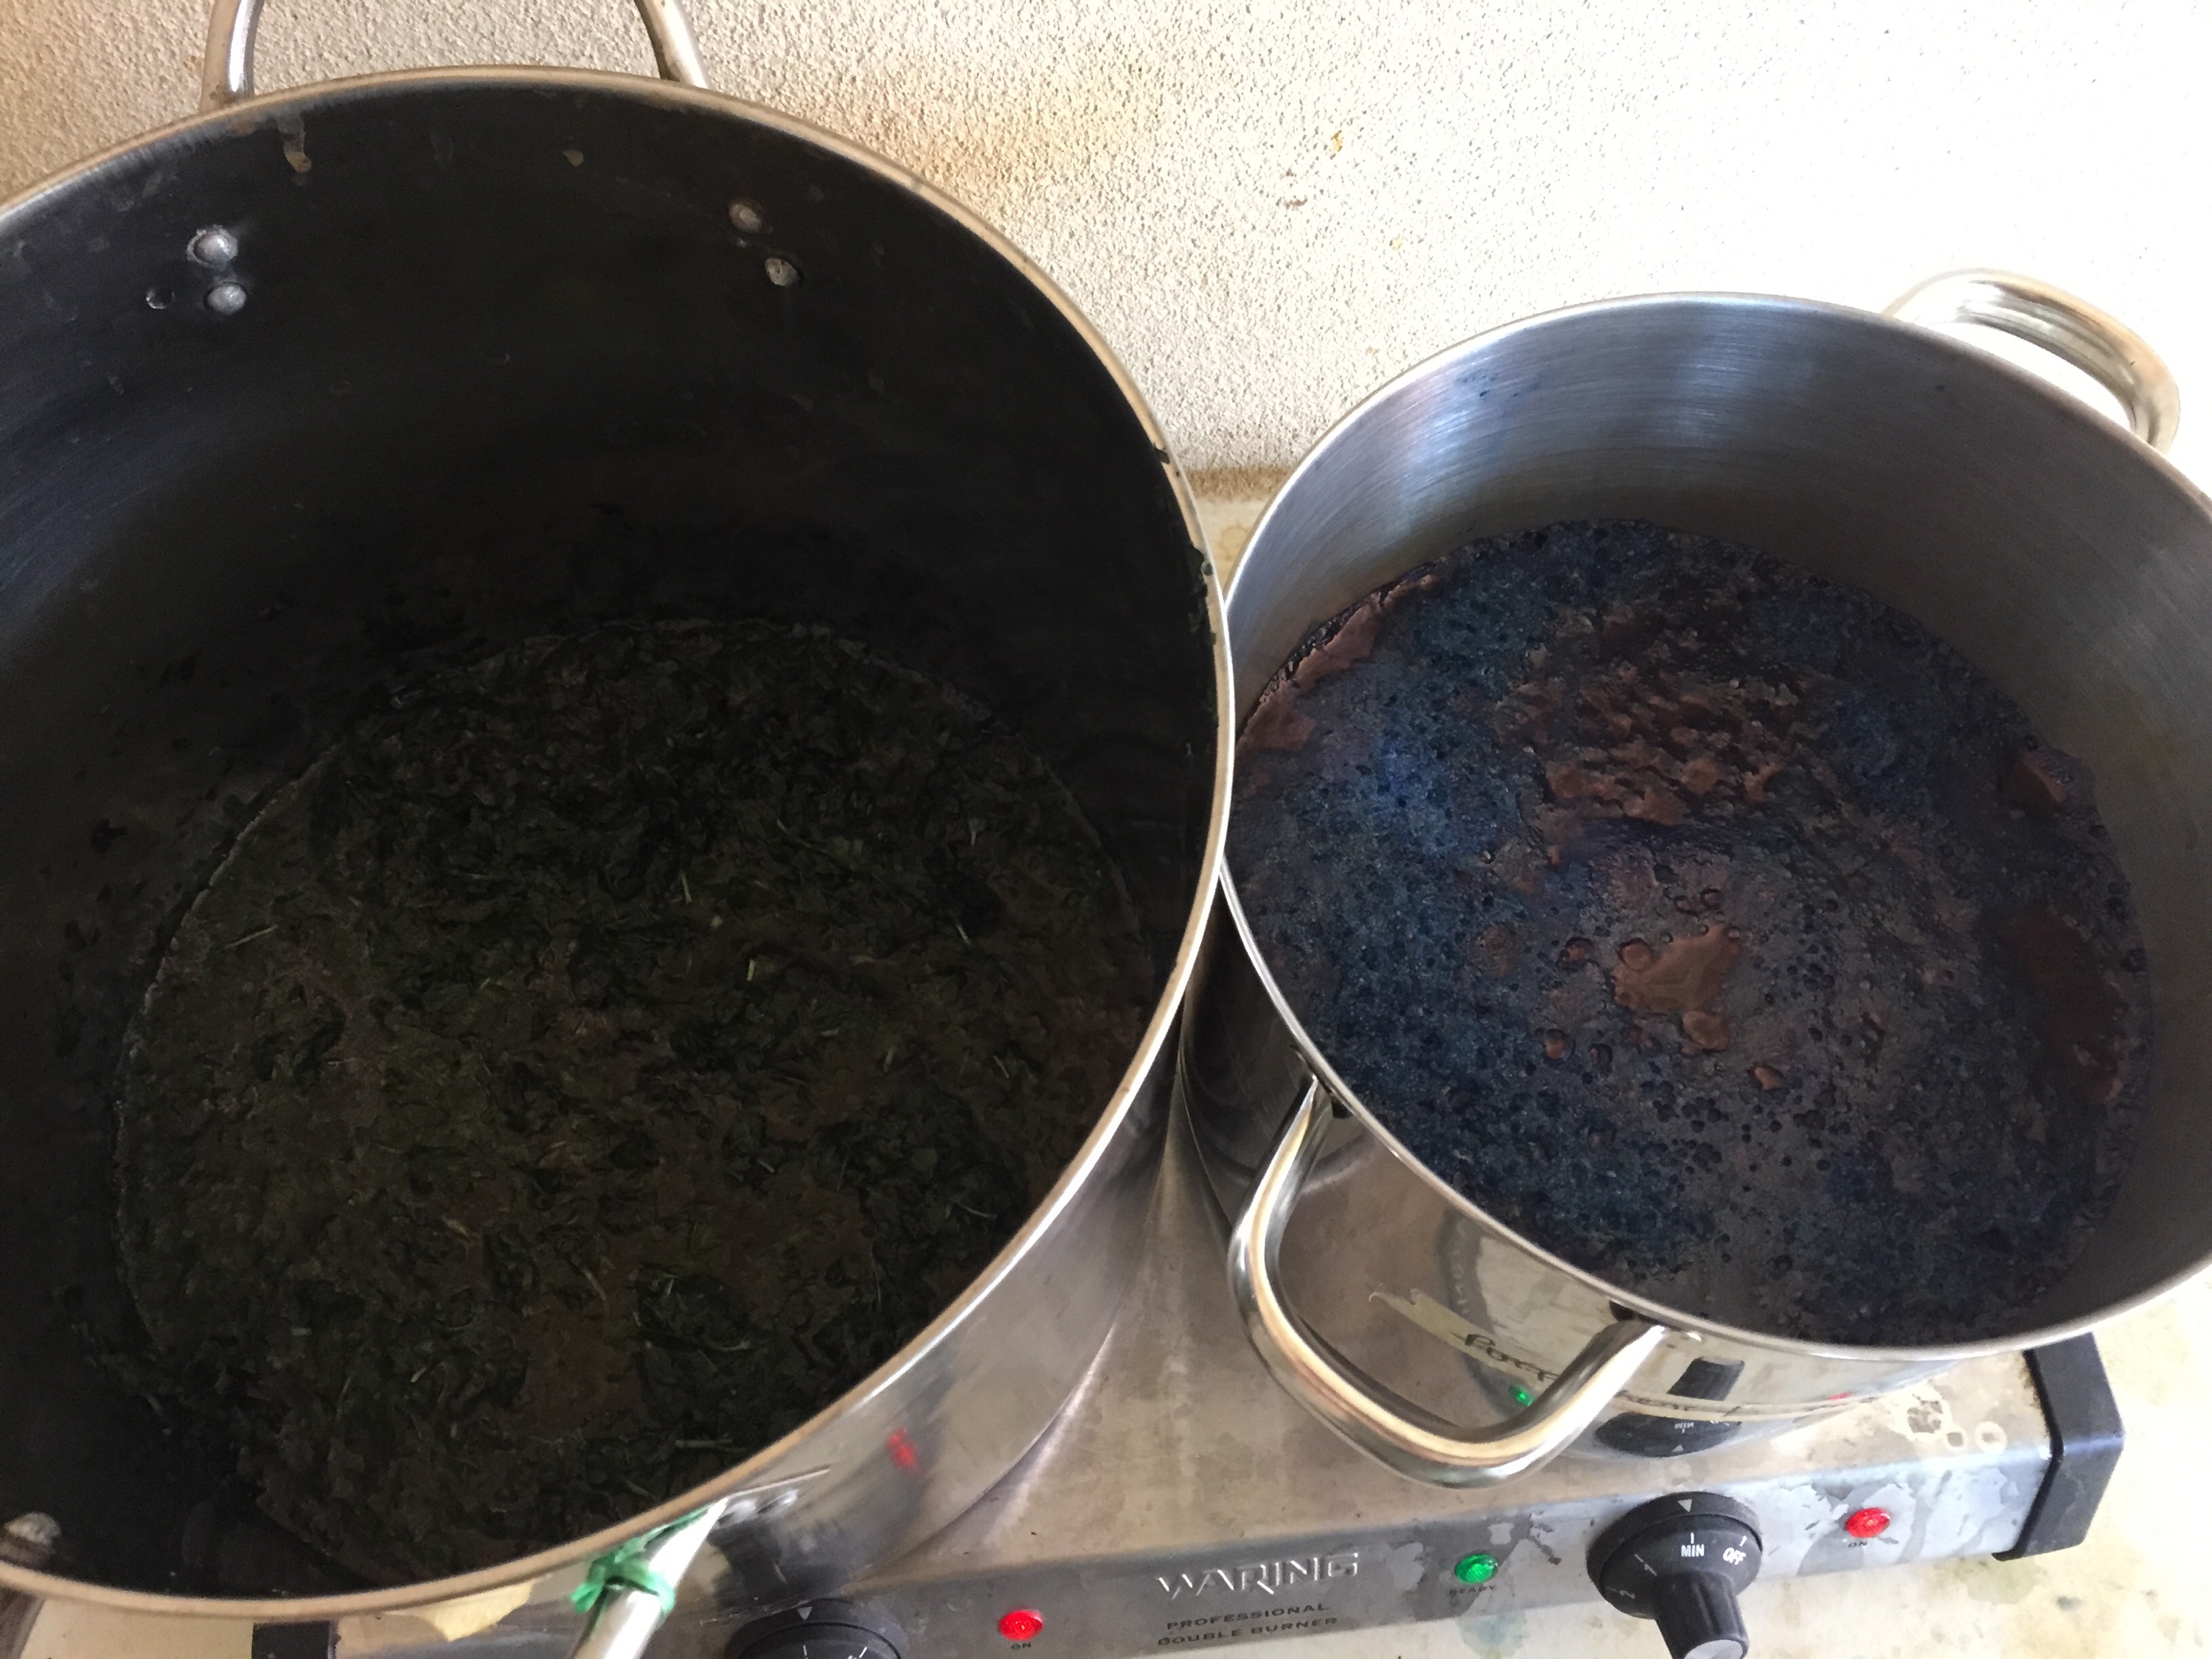

I tested the PH of this mixture before adding my substrate and was found it registered at only 9. I was using the paper strips, not a meter. I did expect the PH to be much higher due to the Soda Ash and was not expecting the cotton t-shirt to take the indigo due to the low PH. I was surprised.
My items were submerged at 5 minutes each and allowed to oxidize twice. I kept the pot in the sun and the temp ranged from 100 to 120 degrees as I did my dipping and oxidizing.
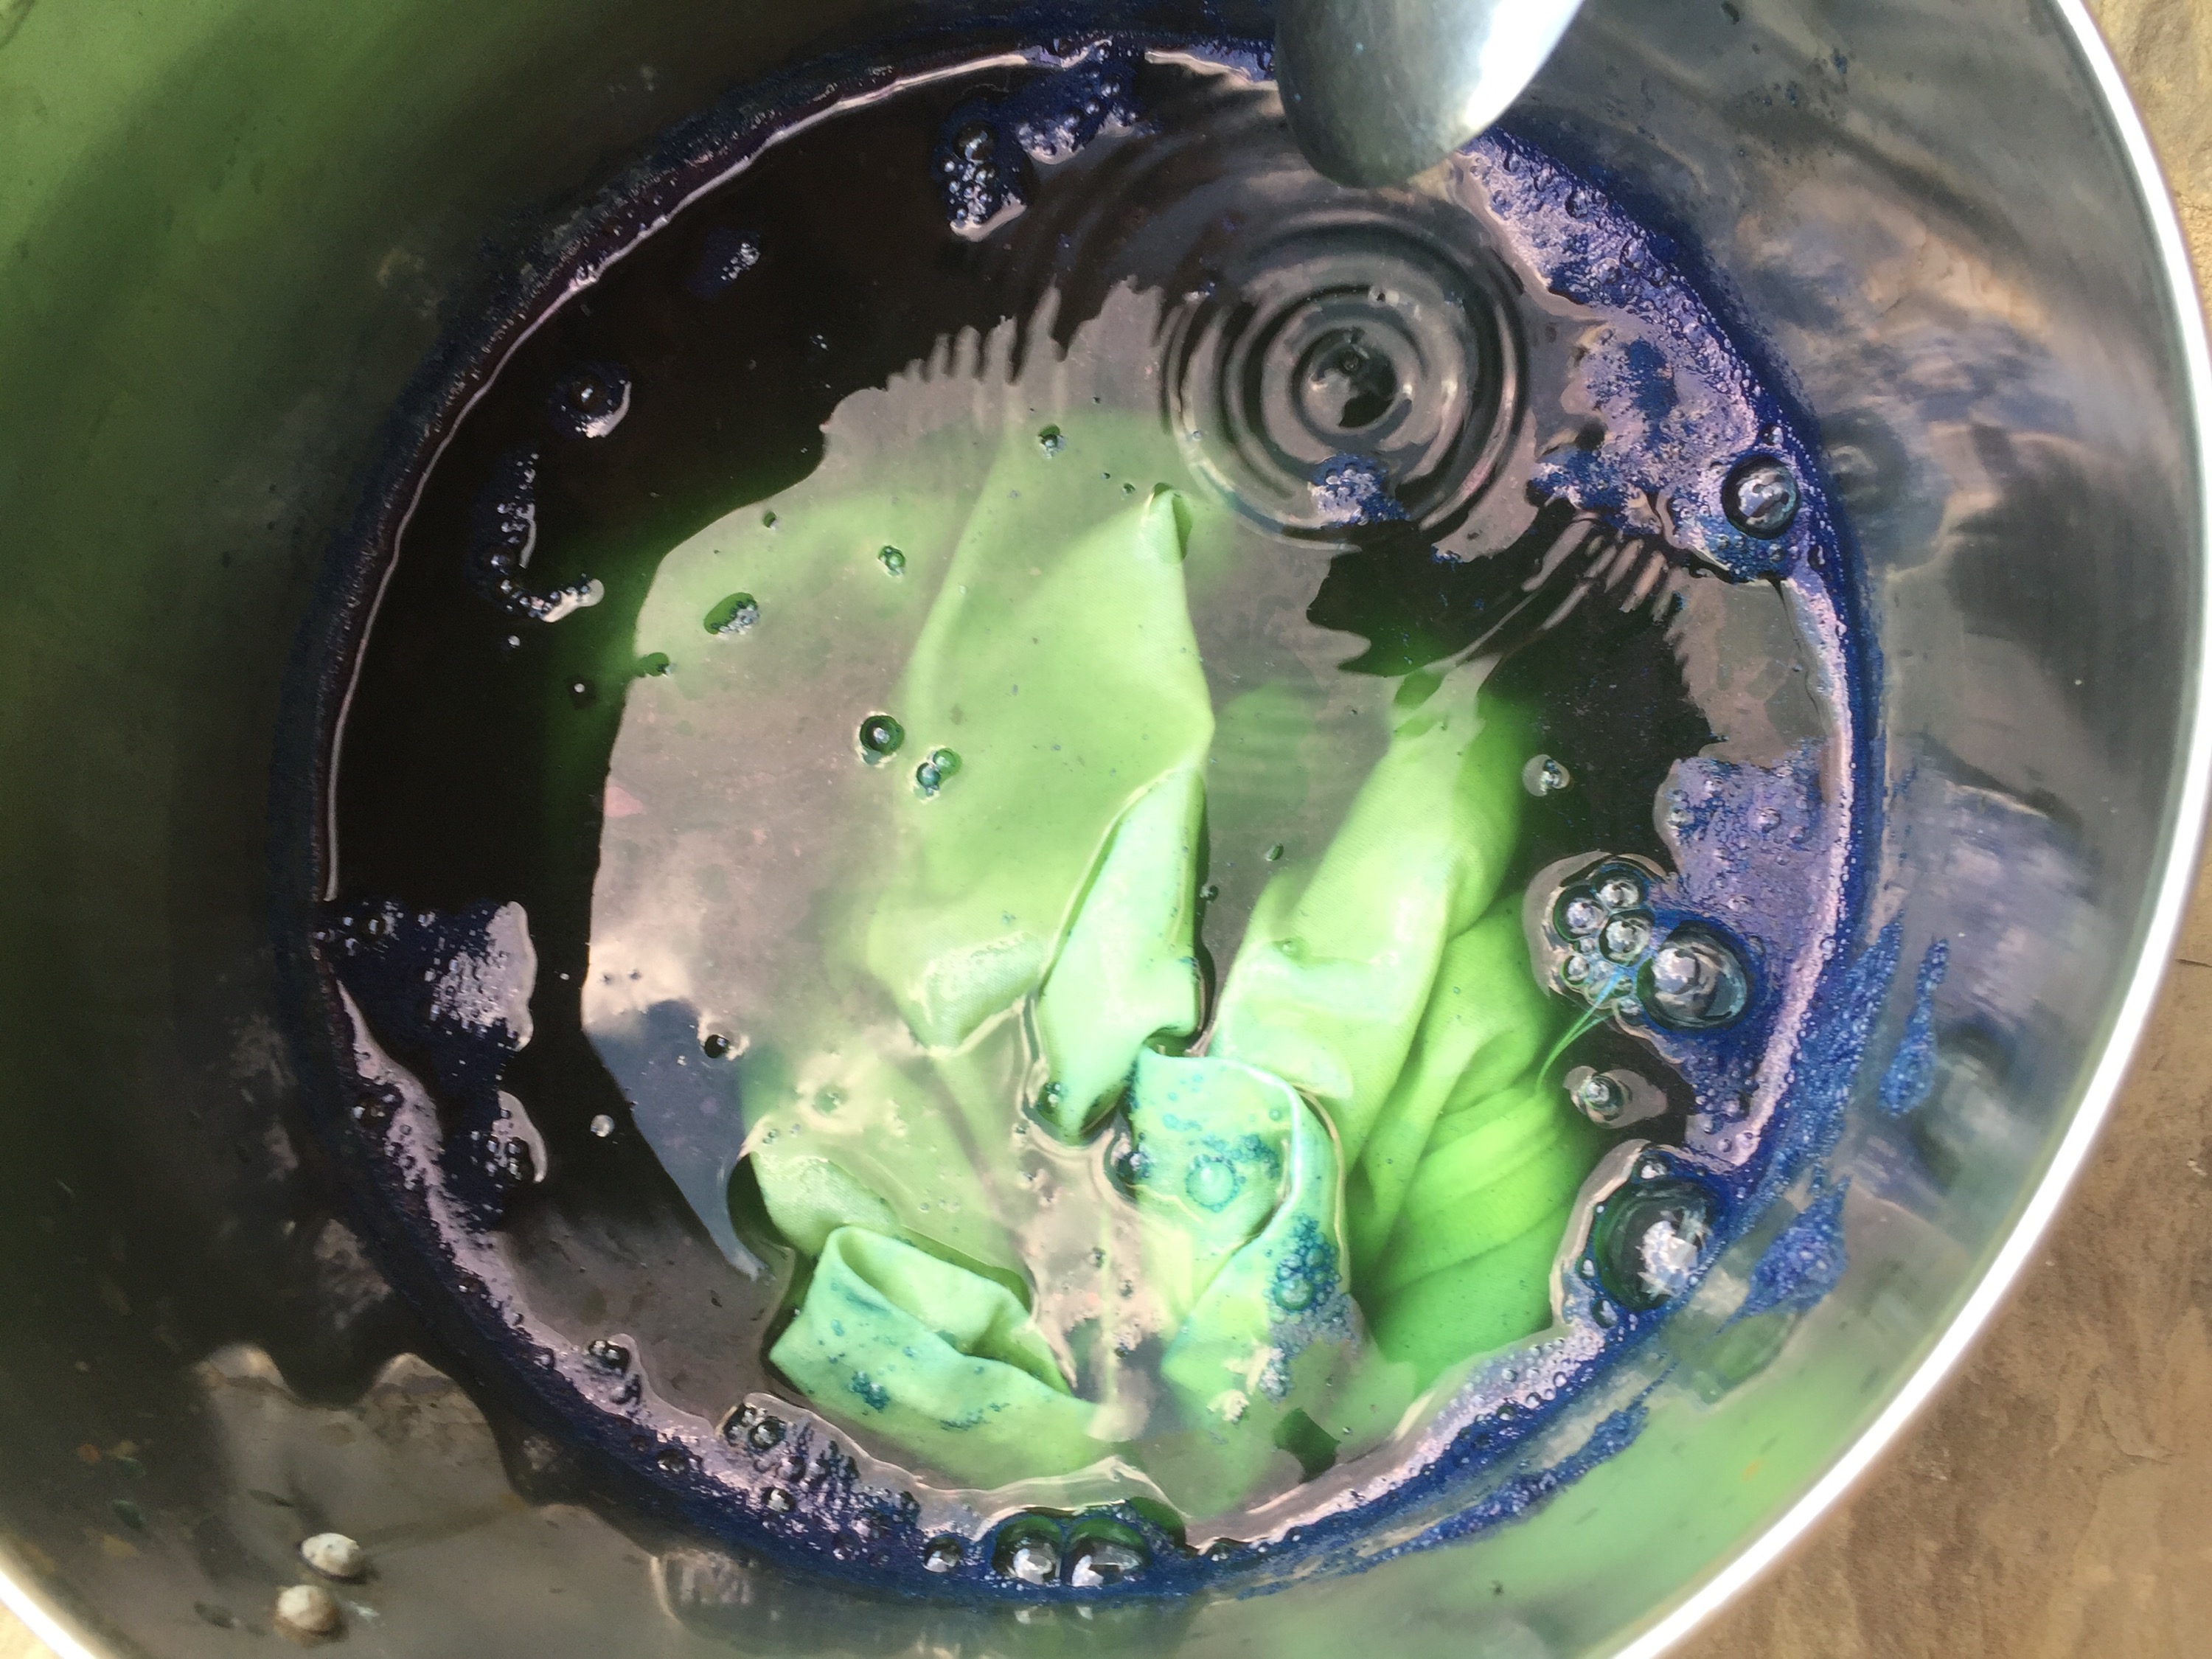
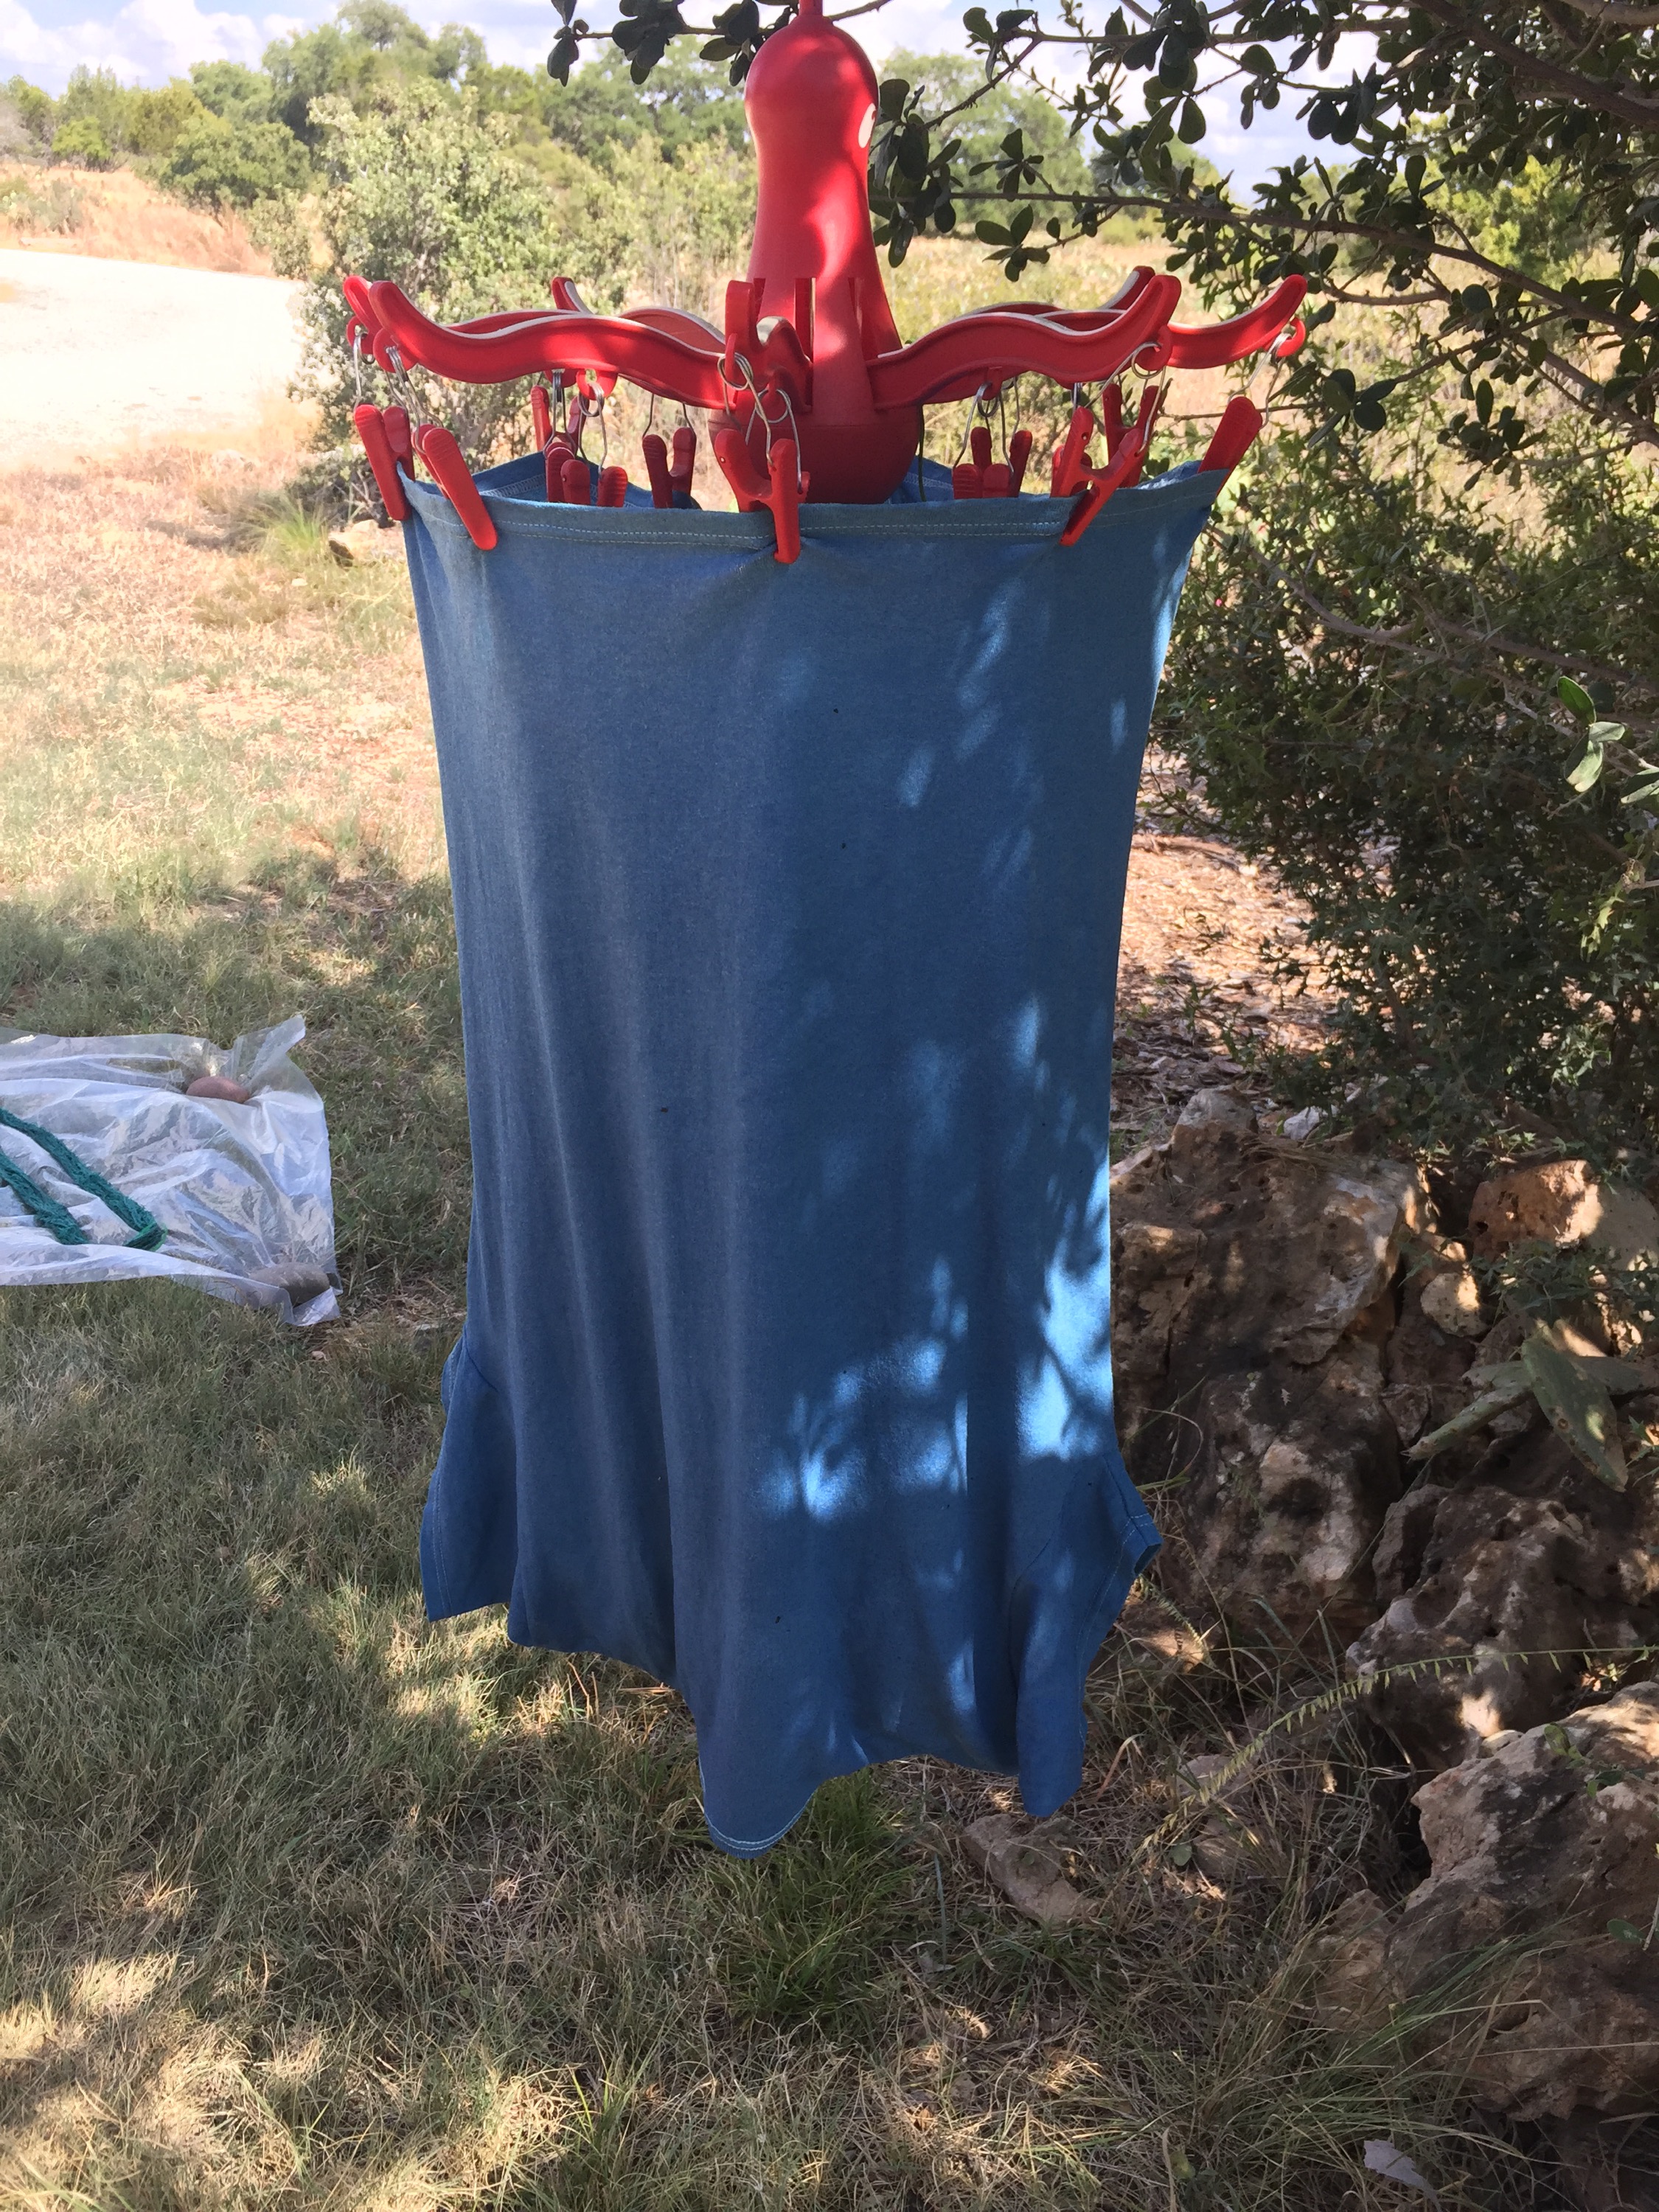

The magic of indigo oxidizing:
Background: I have seen mention of dried indigo in books but no recipes to get me started. Of course I am familiar with the fermented indigo, sukumo, made from dried leaves. Being a small grower I was nowhere near producing the amount needed to get a decent blue. Nor do I have the facilities to ferment over a long period of time with winds and violent temperature swings beyond my control. So either fresh leaf indigo extaction, dried leaves or the traditional purchased indigo powder was the path for me.
When attending an indigo class at John Marshall’s studio he allowed us to look thru his Japanese dye book collection. I do not speak Japanese but I could see tantalizing photos of dried Japanese Indigo. John has been a master working with dyes in surface design over the years with his soymilk mordant and artistic mastery of stencil resist. (Yes, I am a serious fan girl) I asked if he could look thru the recipes and help me figure out a dried leaf path.
His side study along with his stencils has been with Japanese Indigo. He recently took the time to put his thoughts and mastery into a reference book based on his experience and the Japanese dye masters. The dried indigo recipe that I used is sourced from John’ book Dyeing with Fresh Leaf Indigo. His blog has blown up on him. When he reposts a new link I will put it here for you. The book is pricey but has many approaches and recipes and should be considered as a guild resource and brought into a library where folks can benefit.
John has also written about his dried indigo recipe for Turkey Red. It is at the end of his Turkey Red article.
Finally as of July 2018, JOHN has a new book release, click here for more info…
Enjoy, Deb Mc
Walking a 3 legged cat gives one plenty of garden inspection time.
1. The raccoons have been digging in the madder & japanese indigo beds. Where’s my live trap?! But who can blame them digging up the irrigation lines for water.
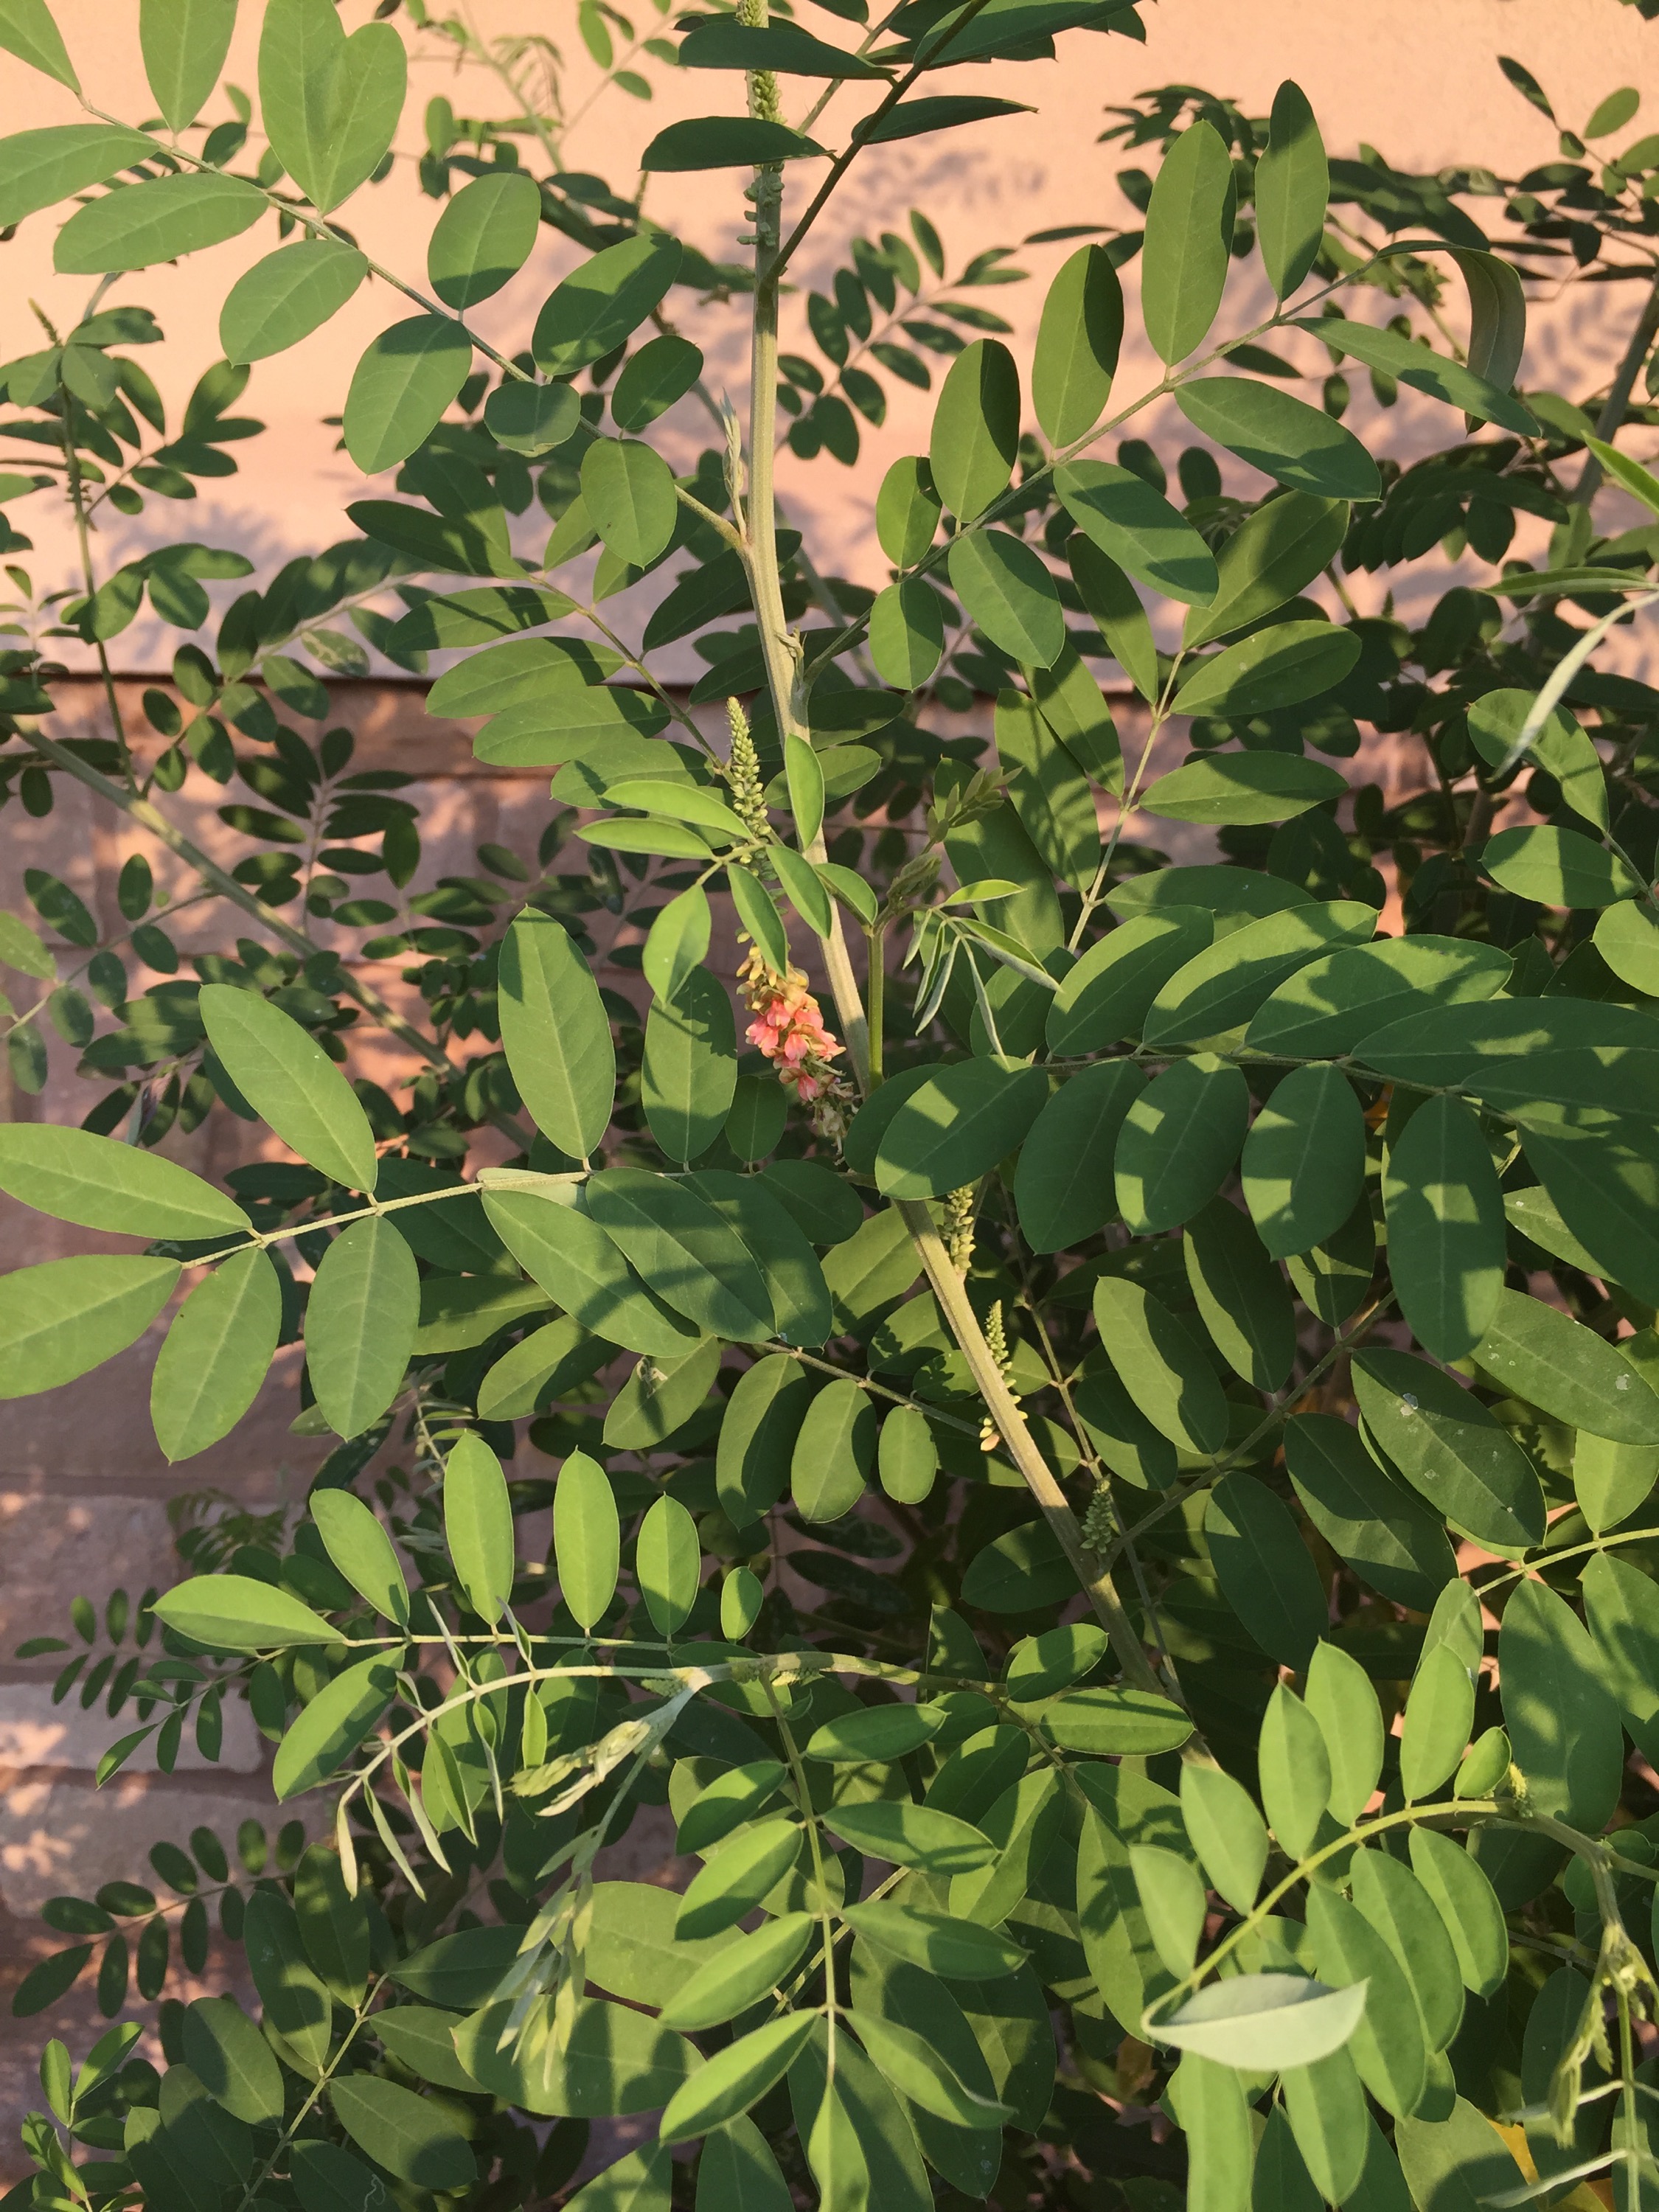
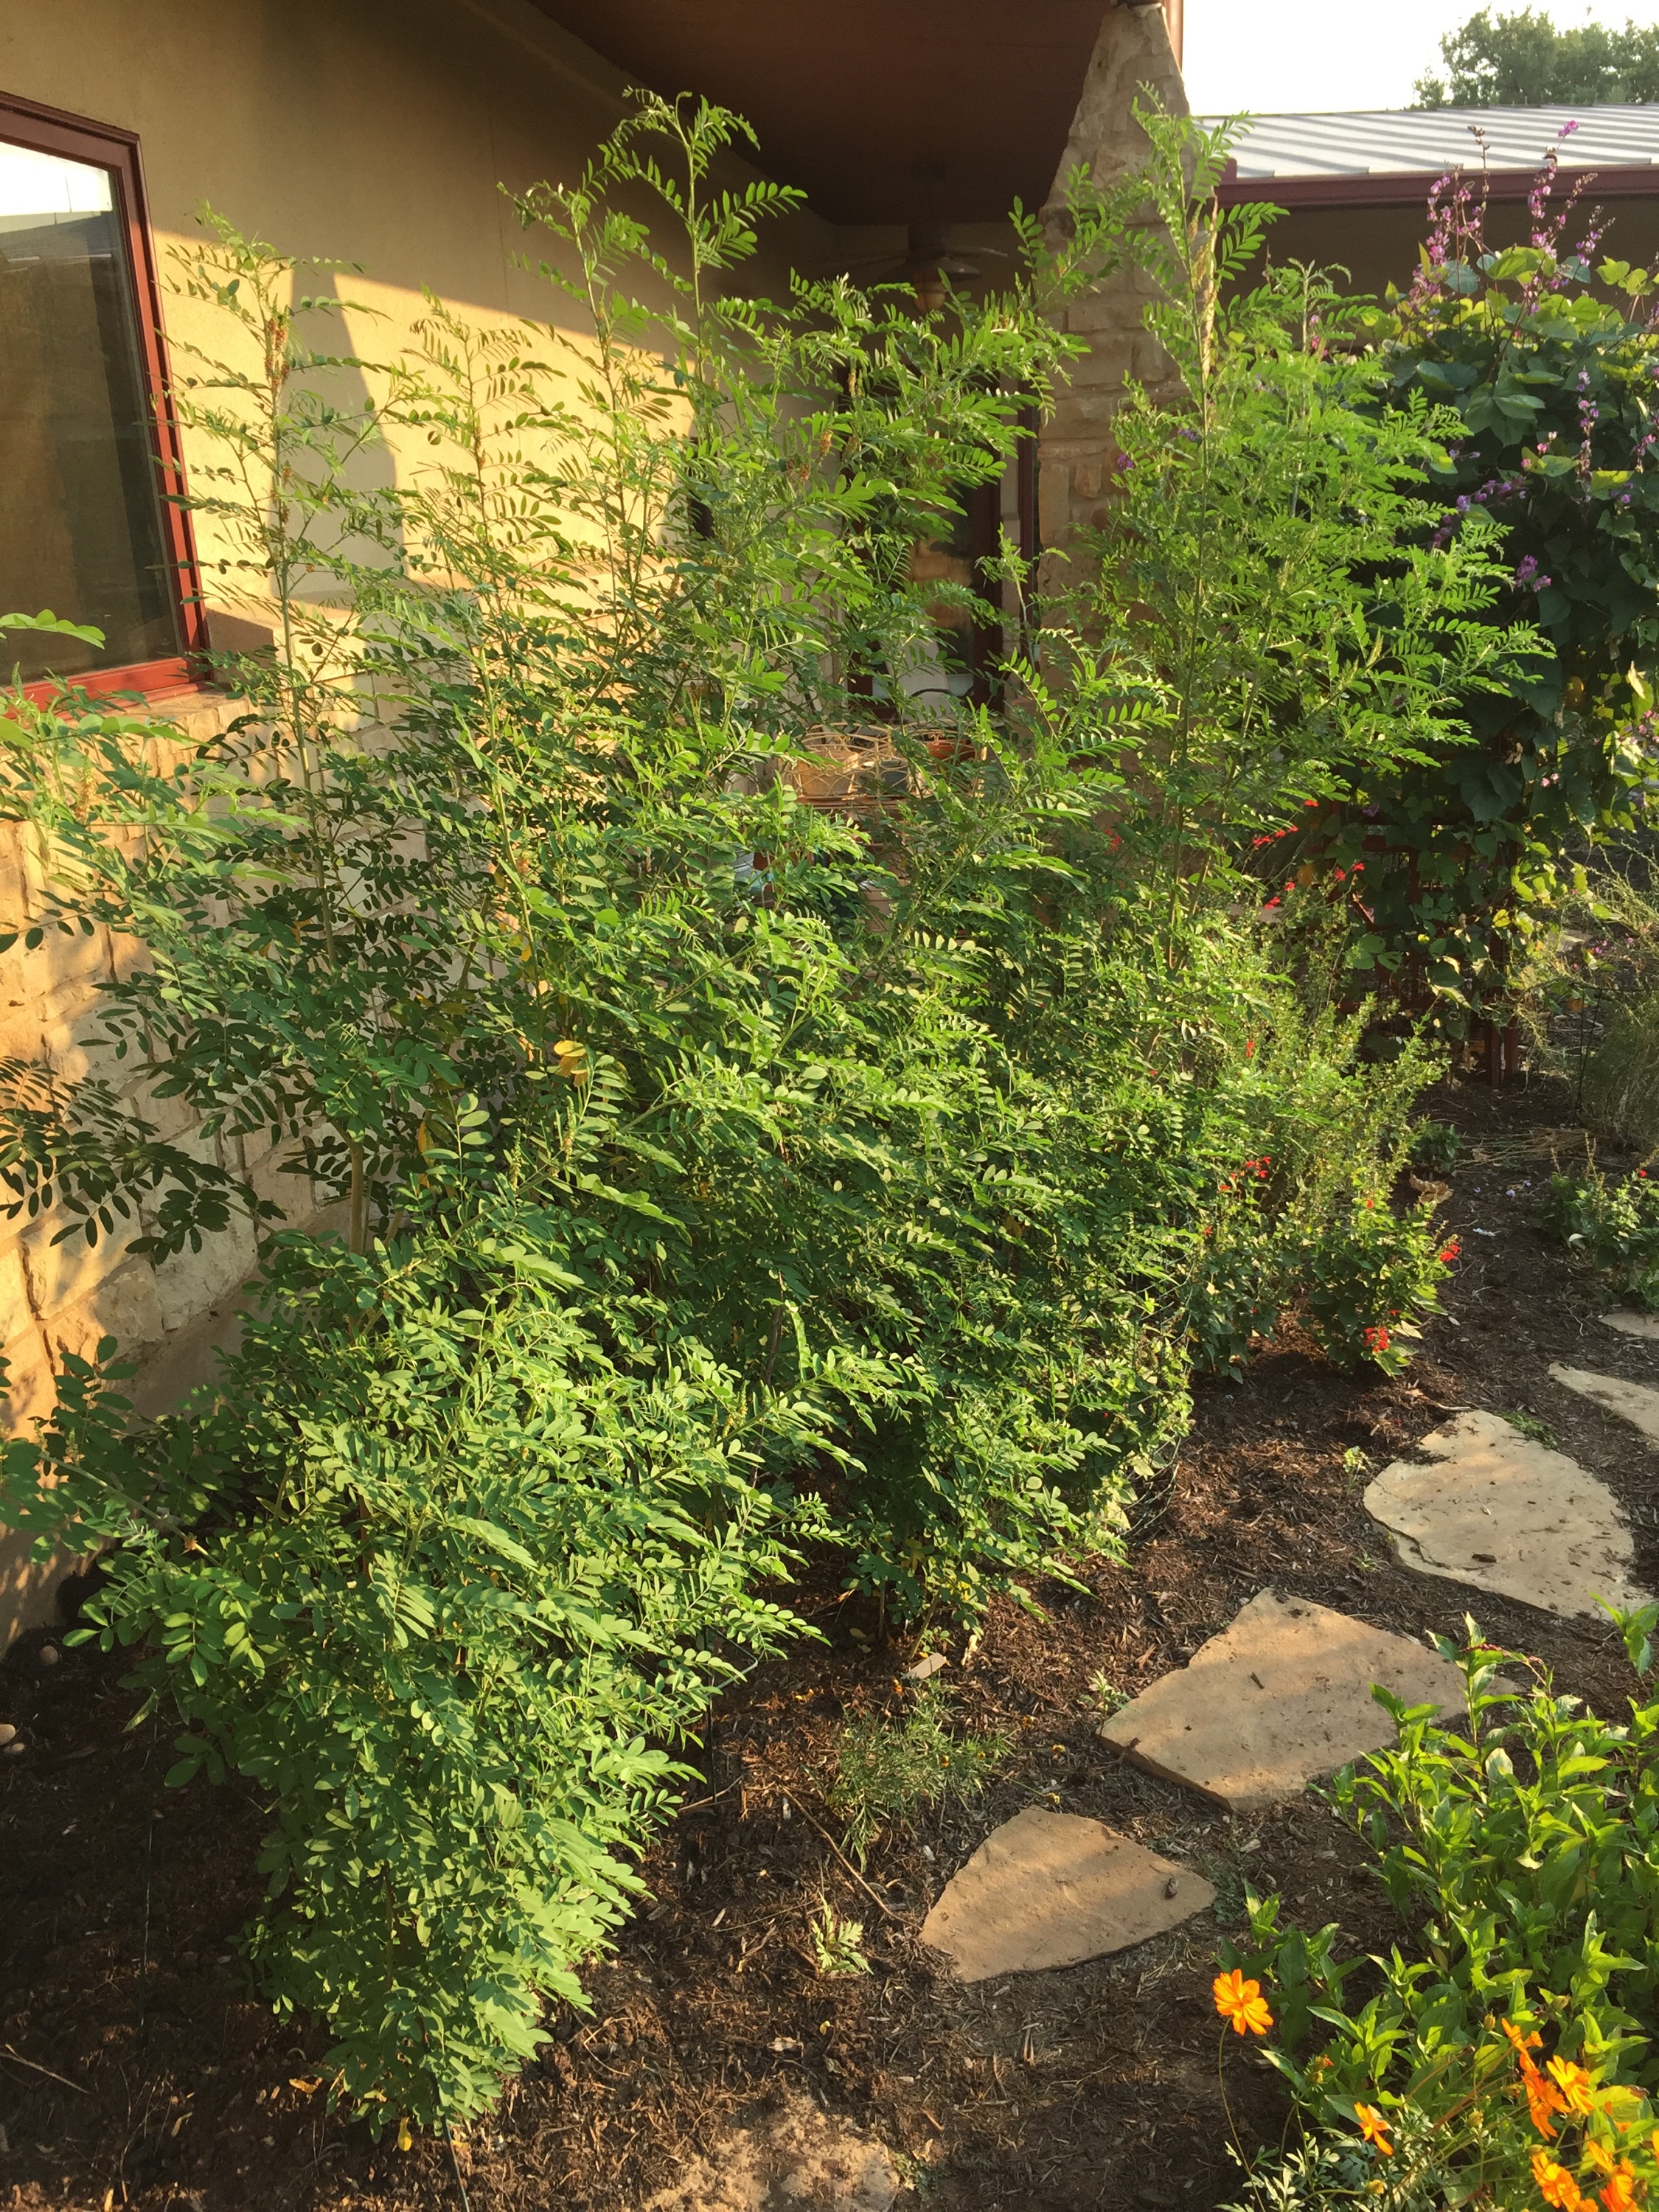
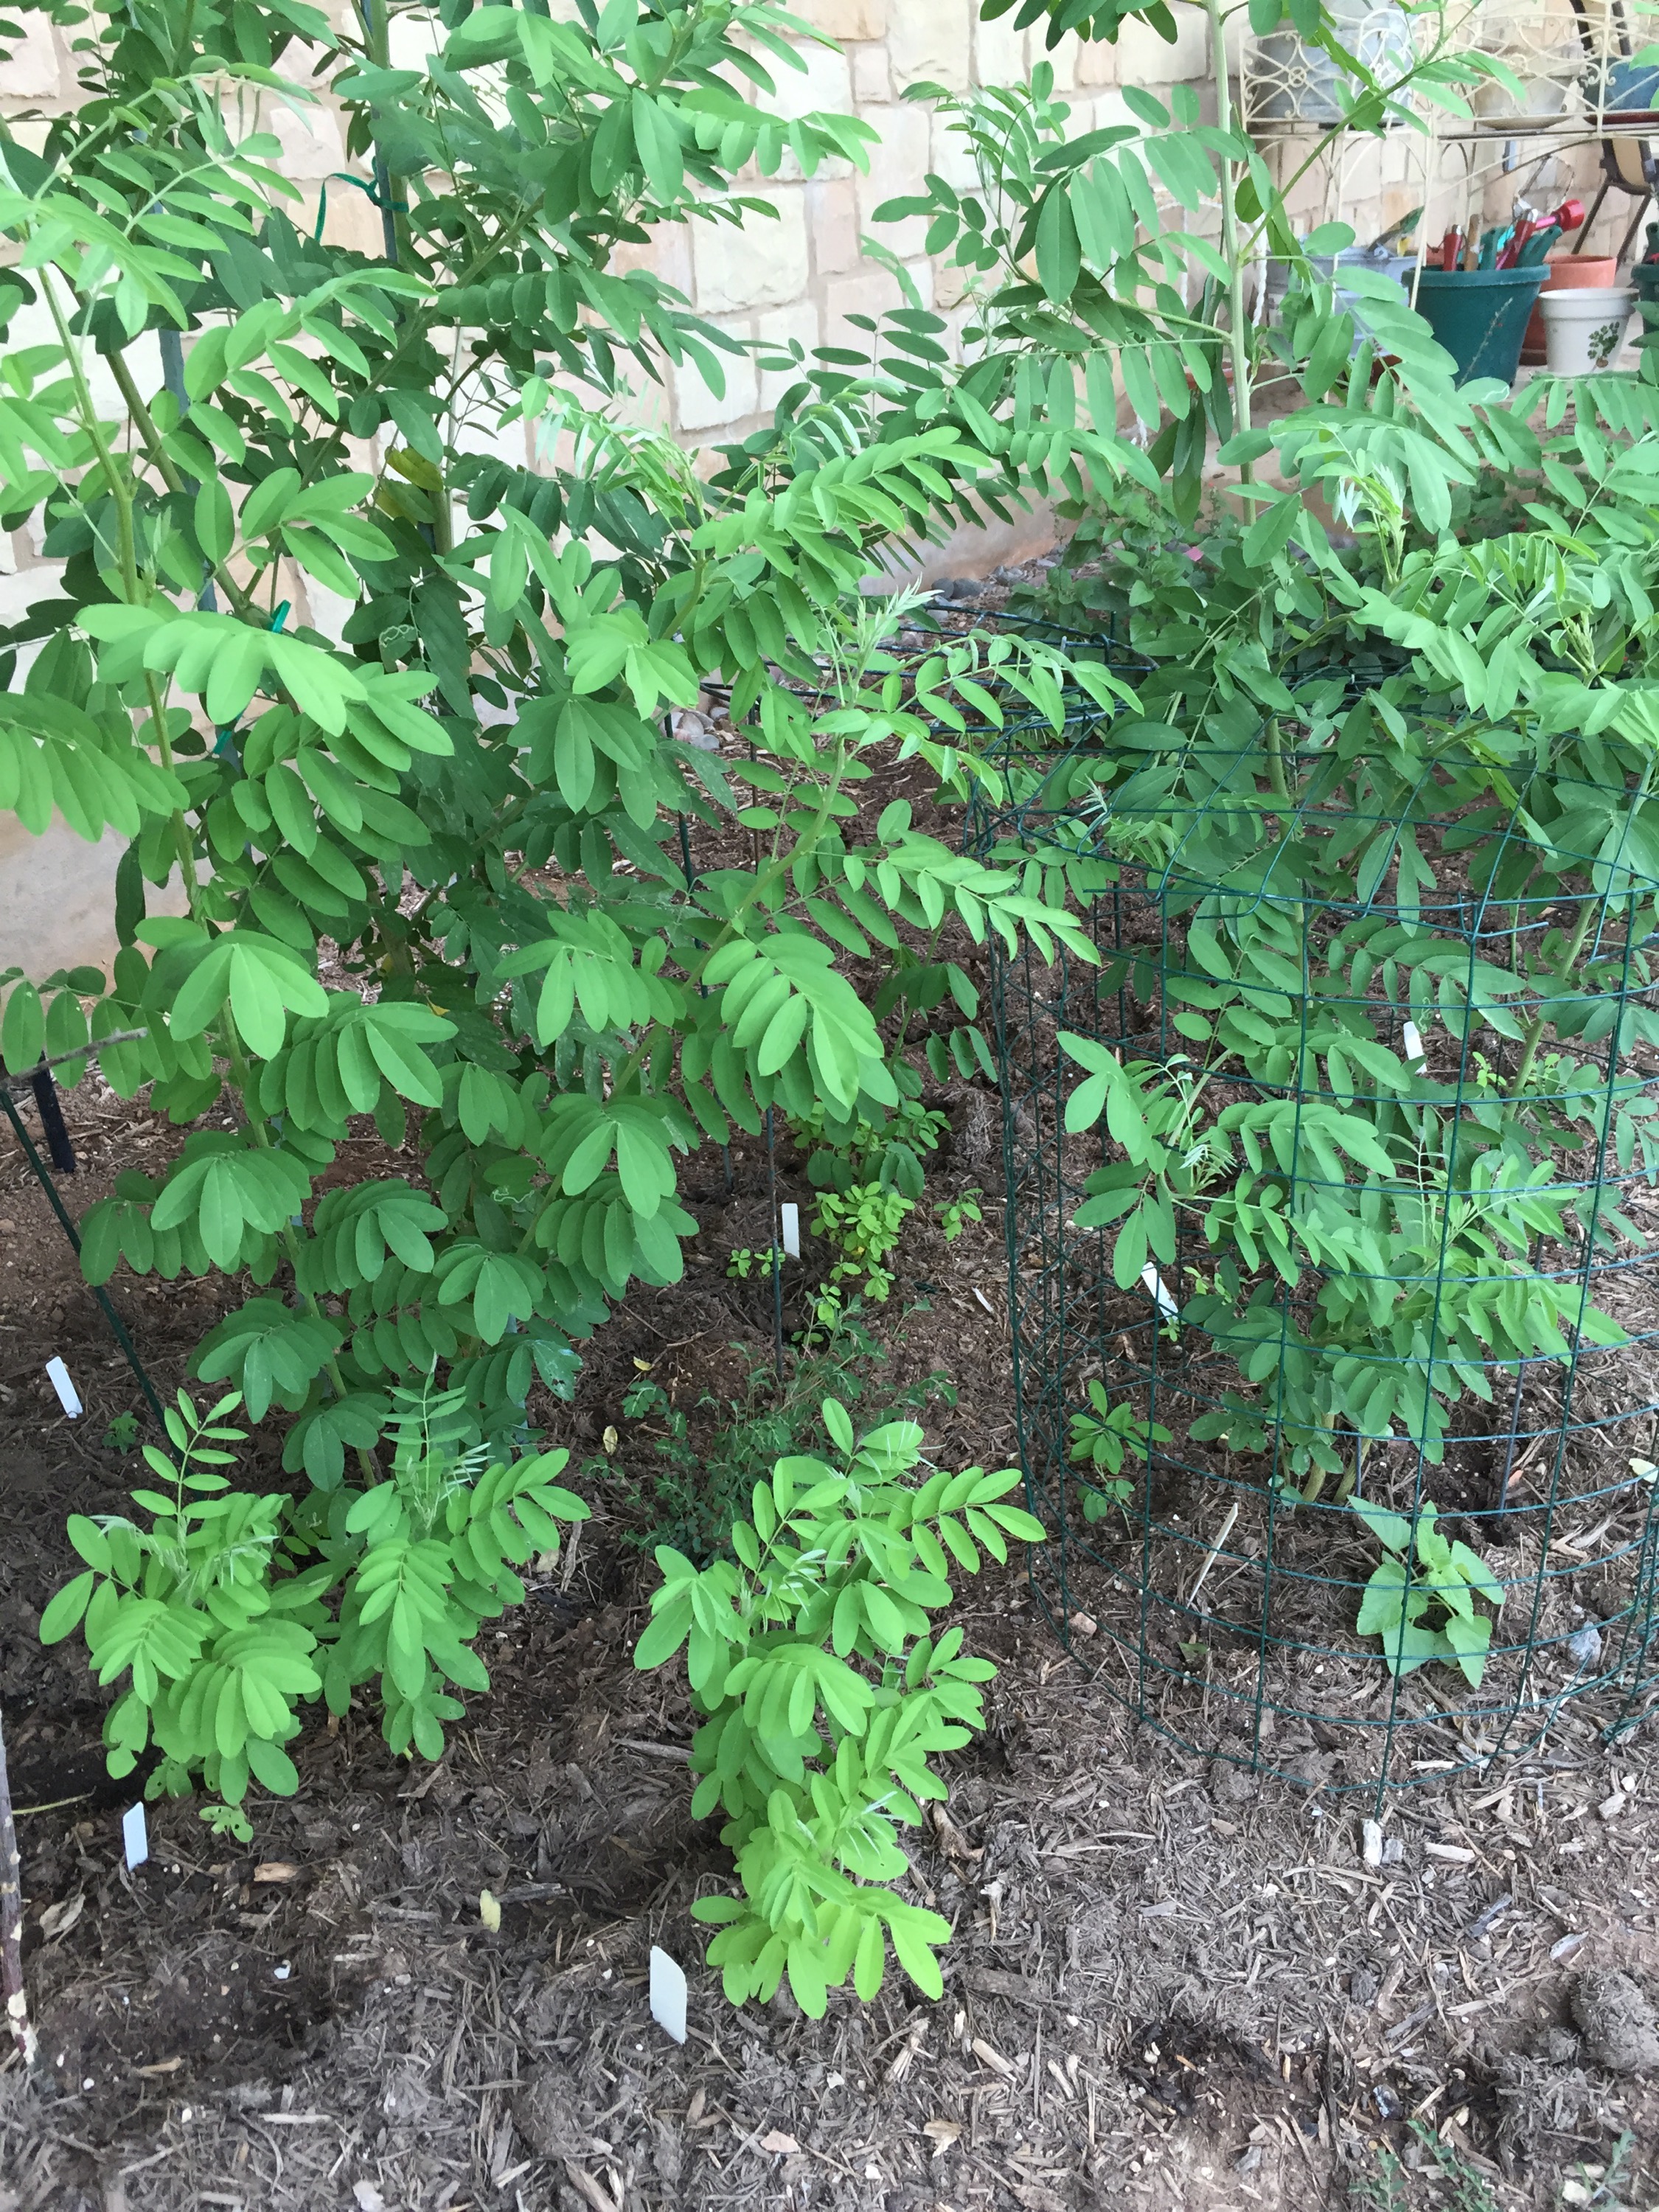
2. The Japanese Indigo is coming into bloom and the Indigo Suffricotosa planted among the JI is coming along. Will be interesting next year to see if they can coexist in the summer heat.
3. The indigo suffruticosais also coming into bloom and seed. Last year’s plants yield great color and this year’s small plants yielded color also. I will say these plants got way bigger than expected but my husband has given them a pass because the hummingbirds use them as a frequent garden perch.
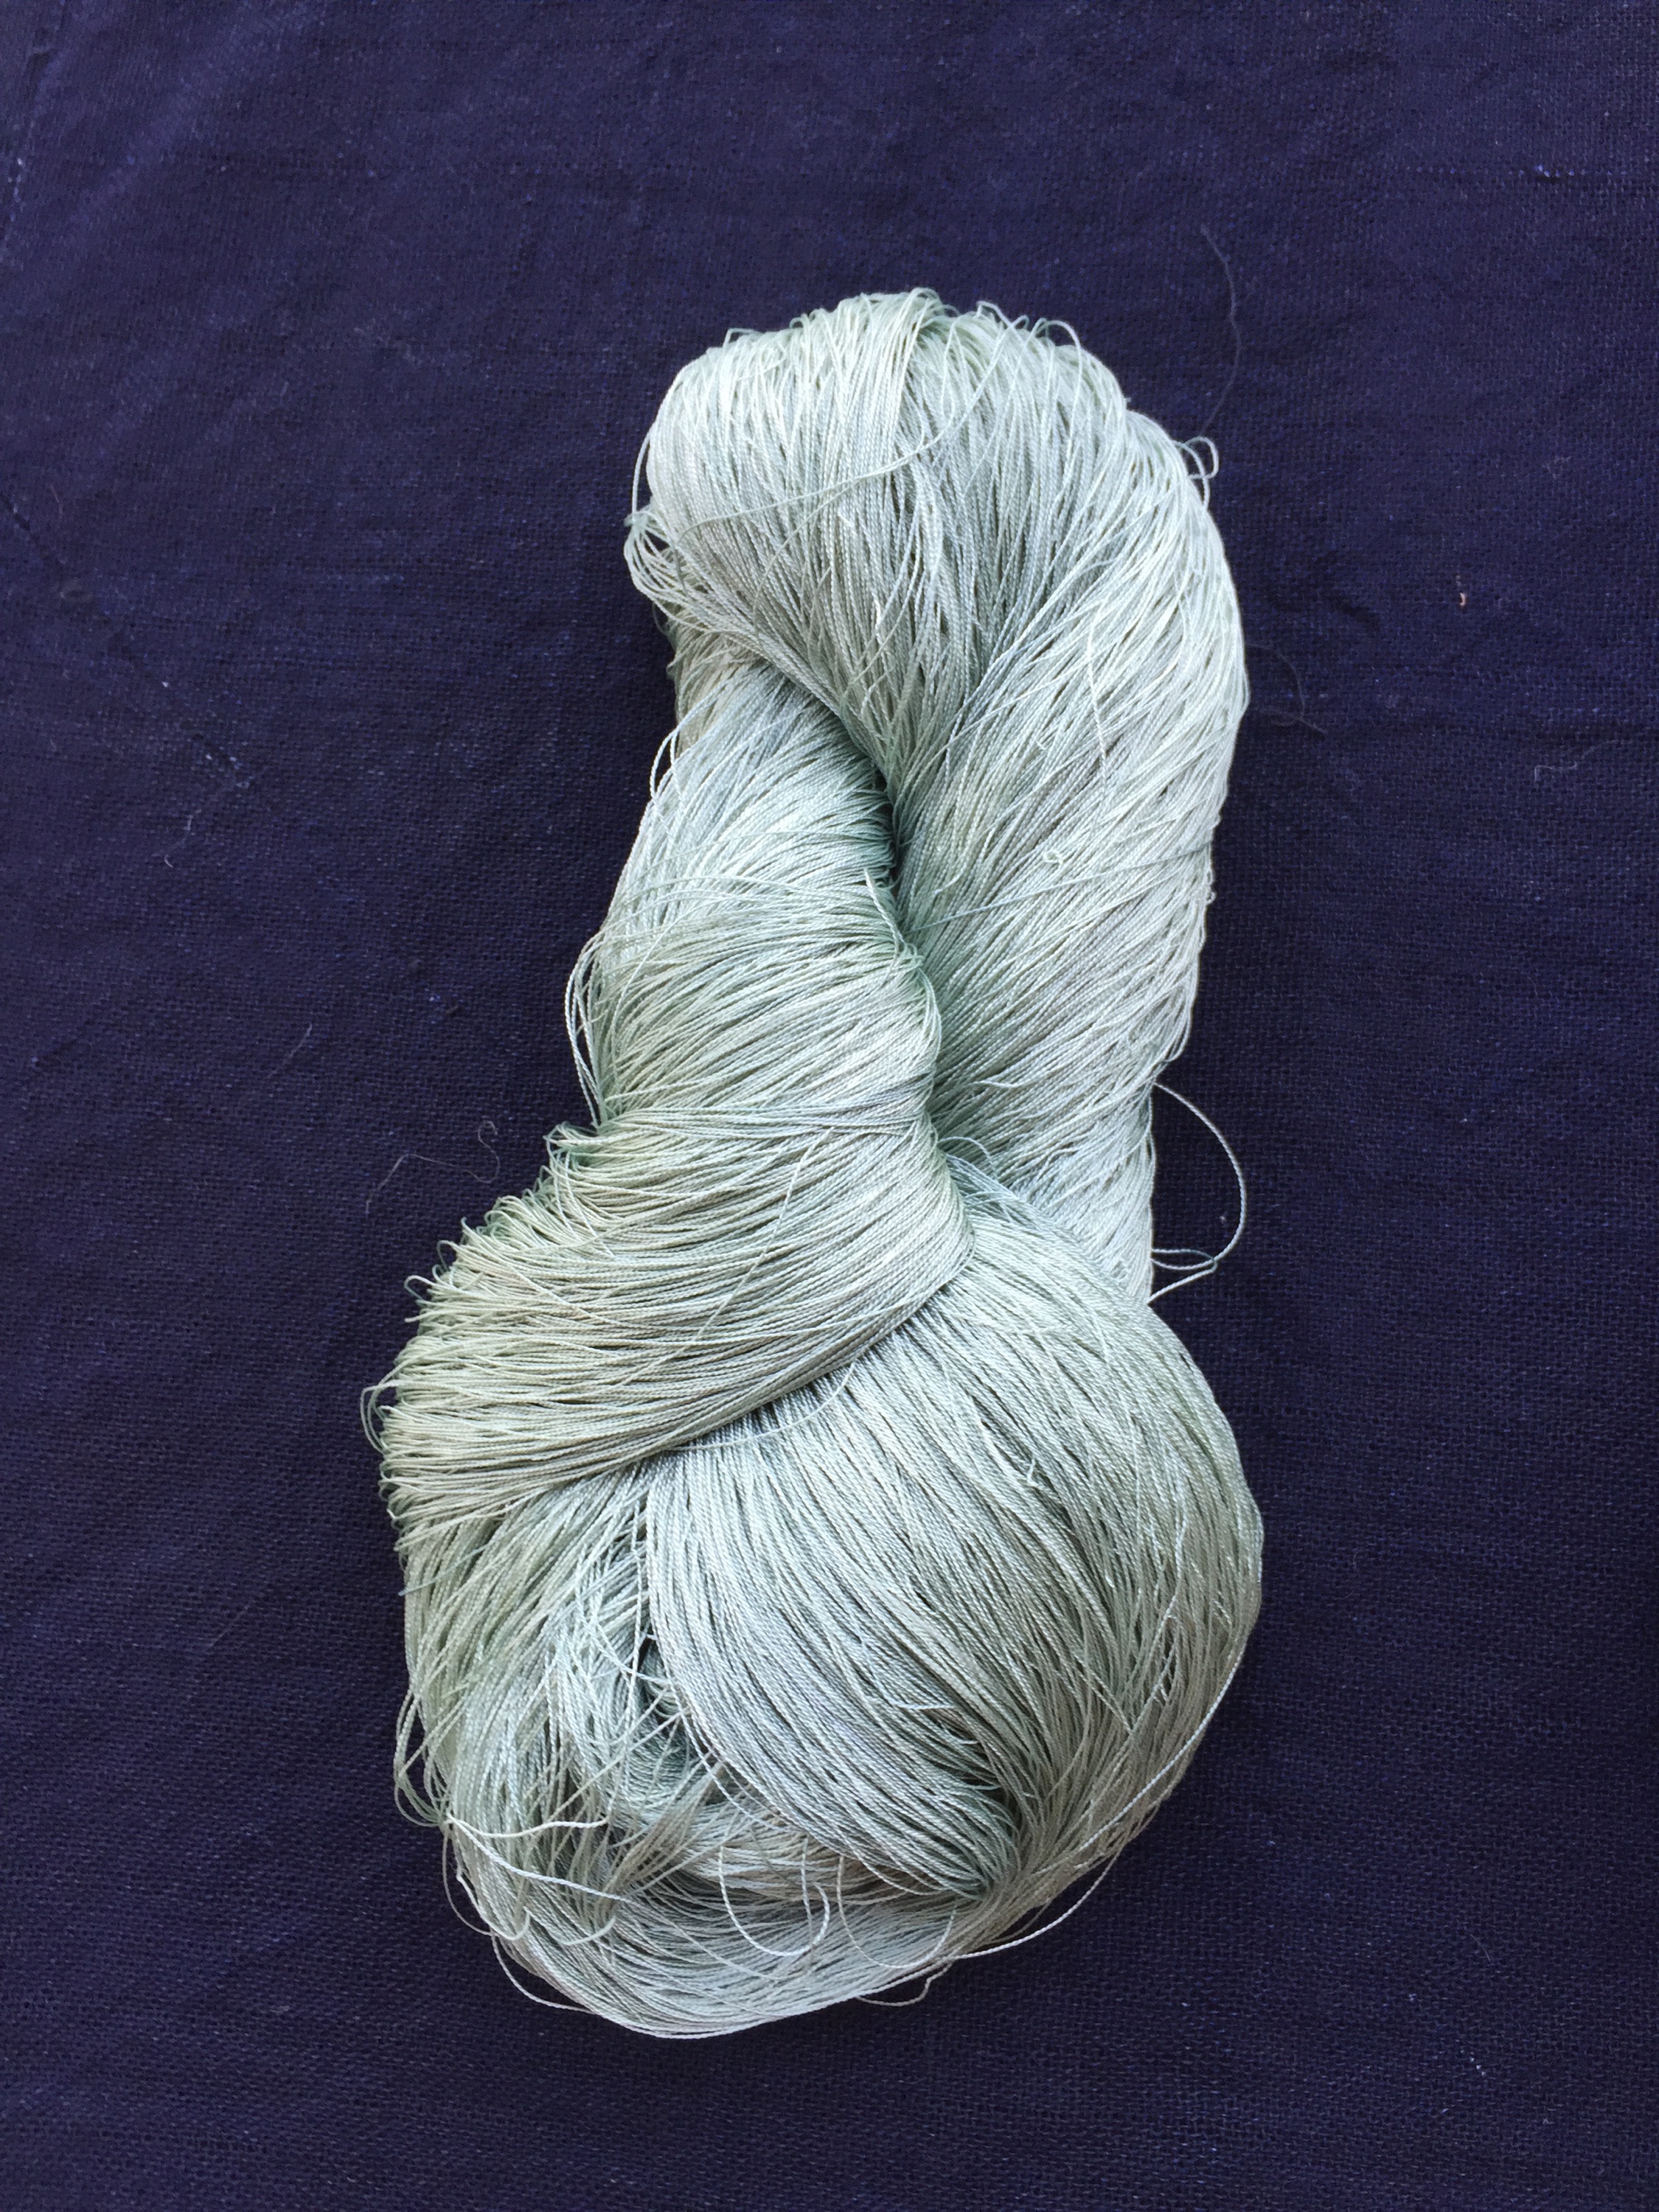
4. Finally the color, I had friends over to do Japanese Indigo blender dye scarves and had plenty dyebath left over. I had a mordanted silk skein on hand and left it in the dye bath. A beautiful mint green resulted, not sure my camera registers the color well. It is deep mint green.
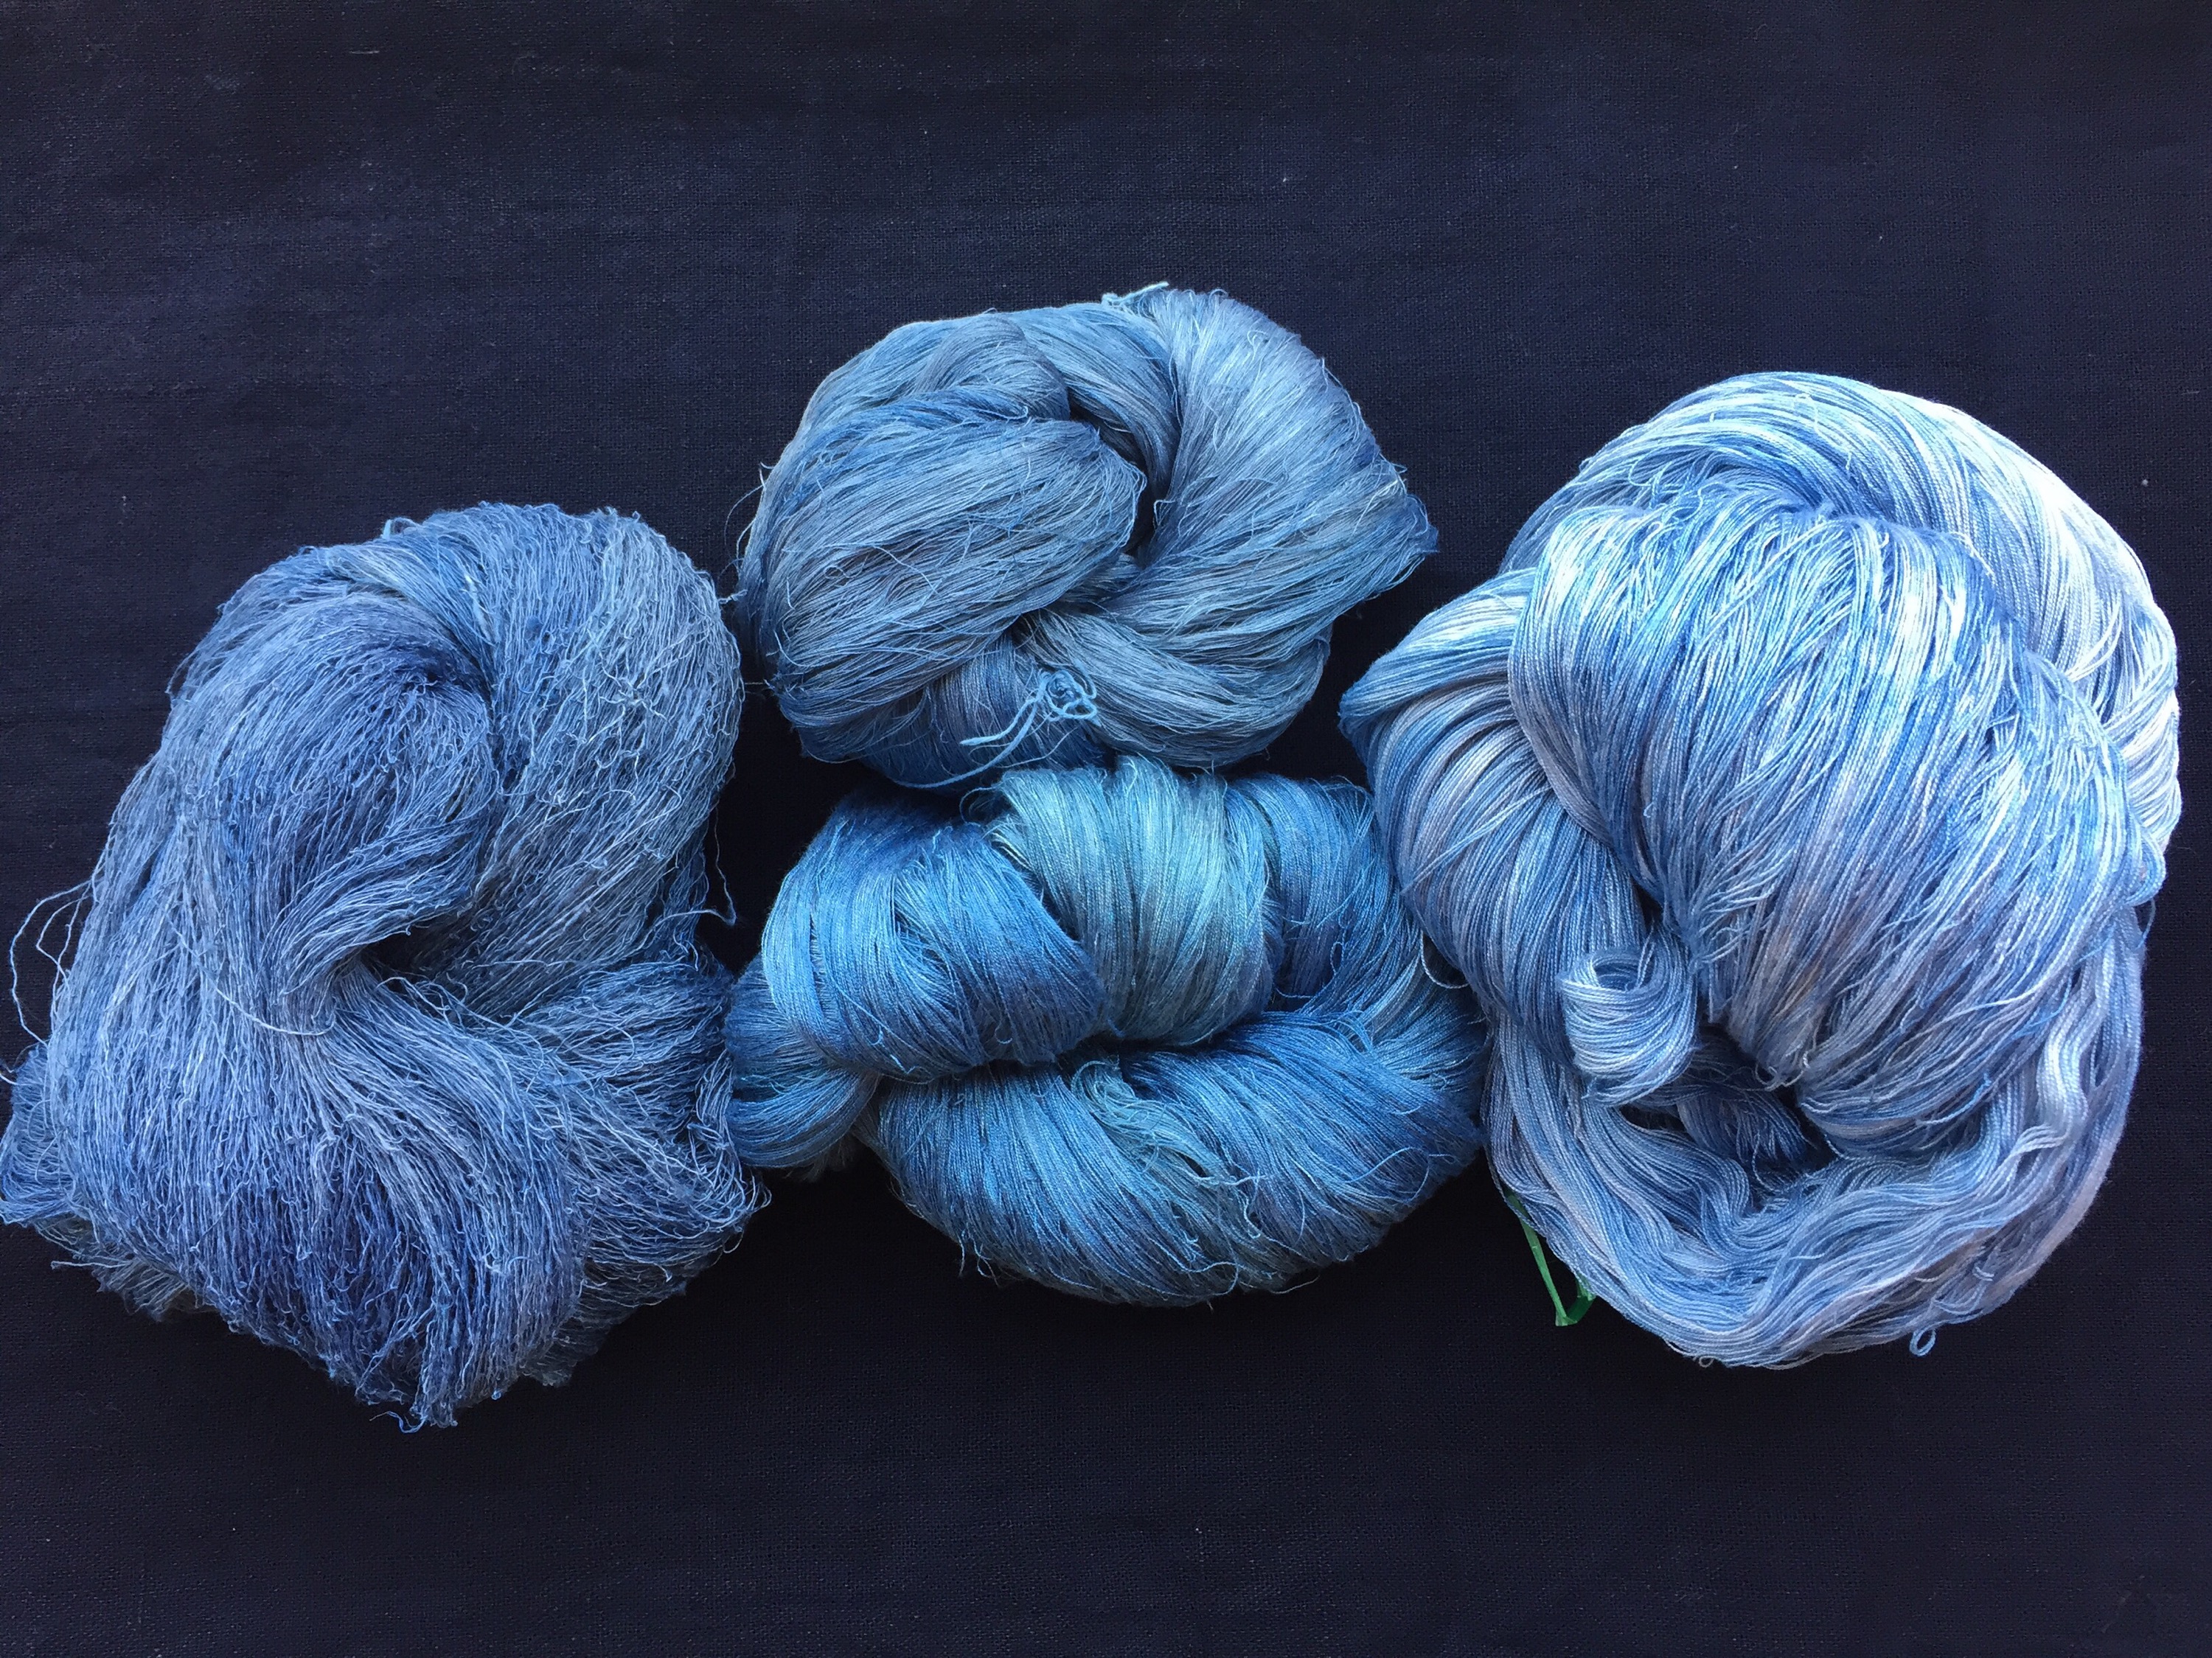
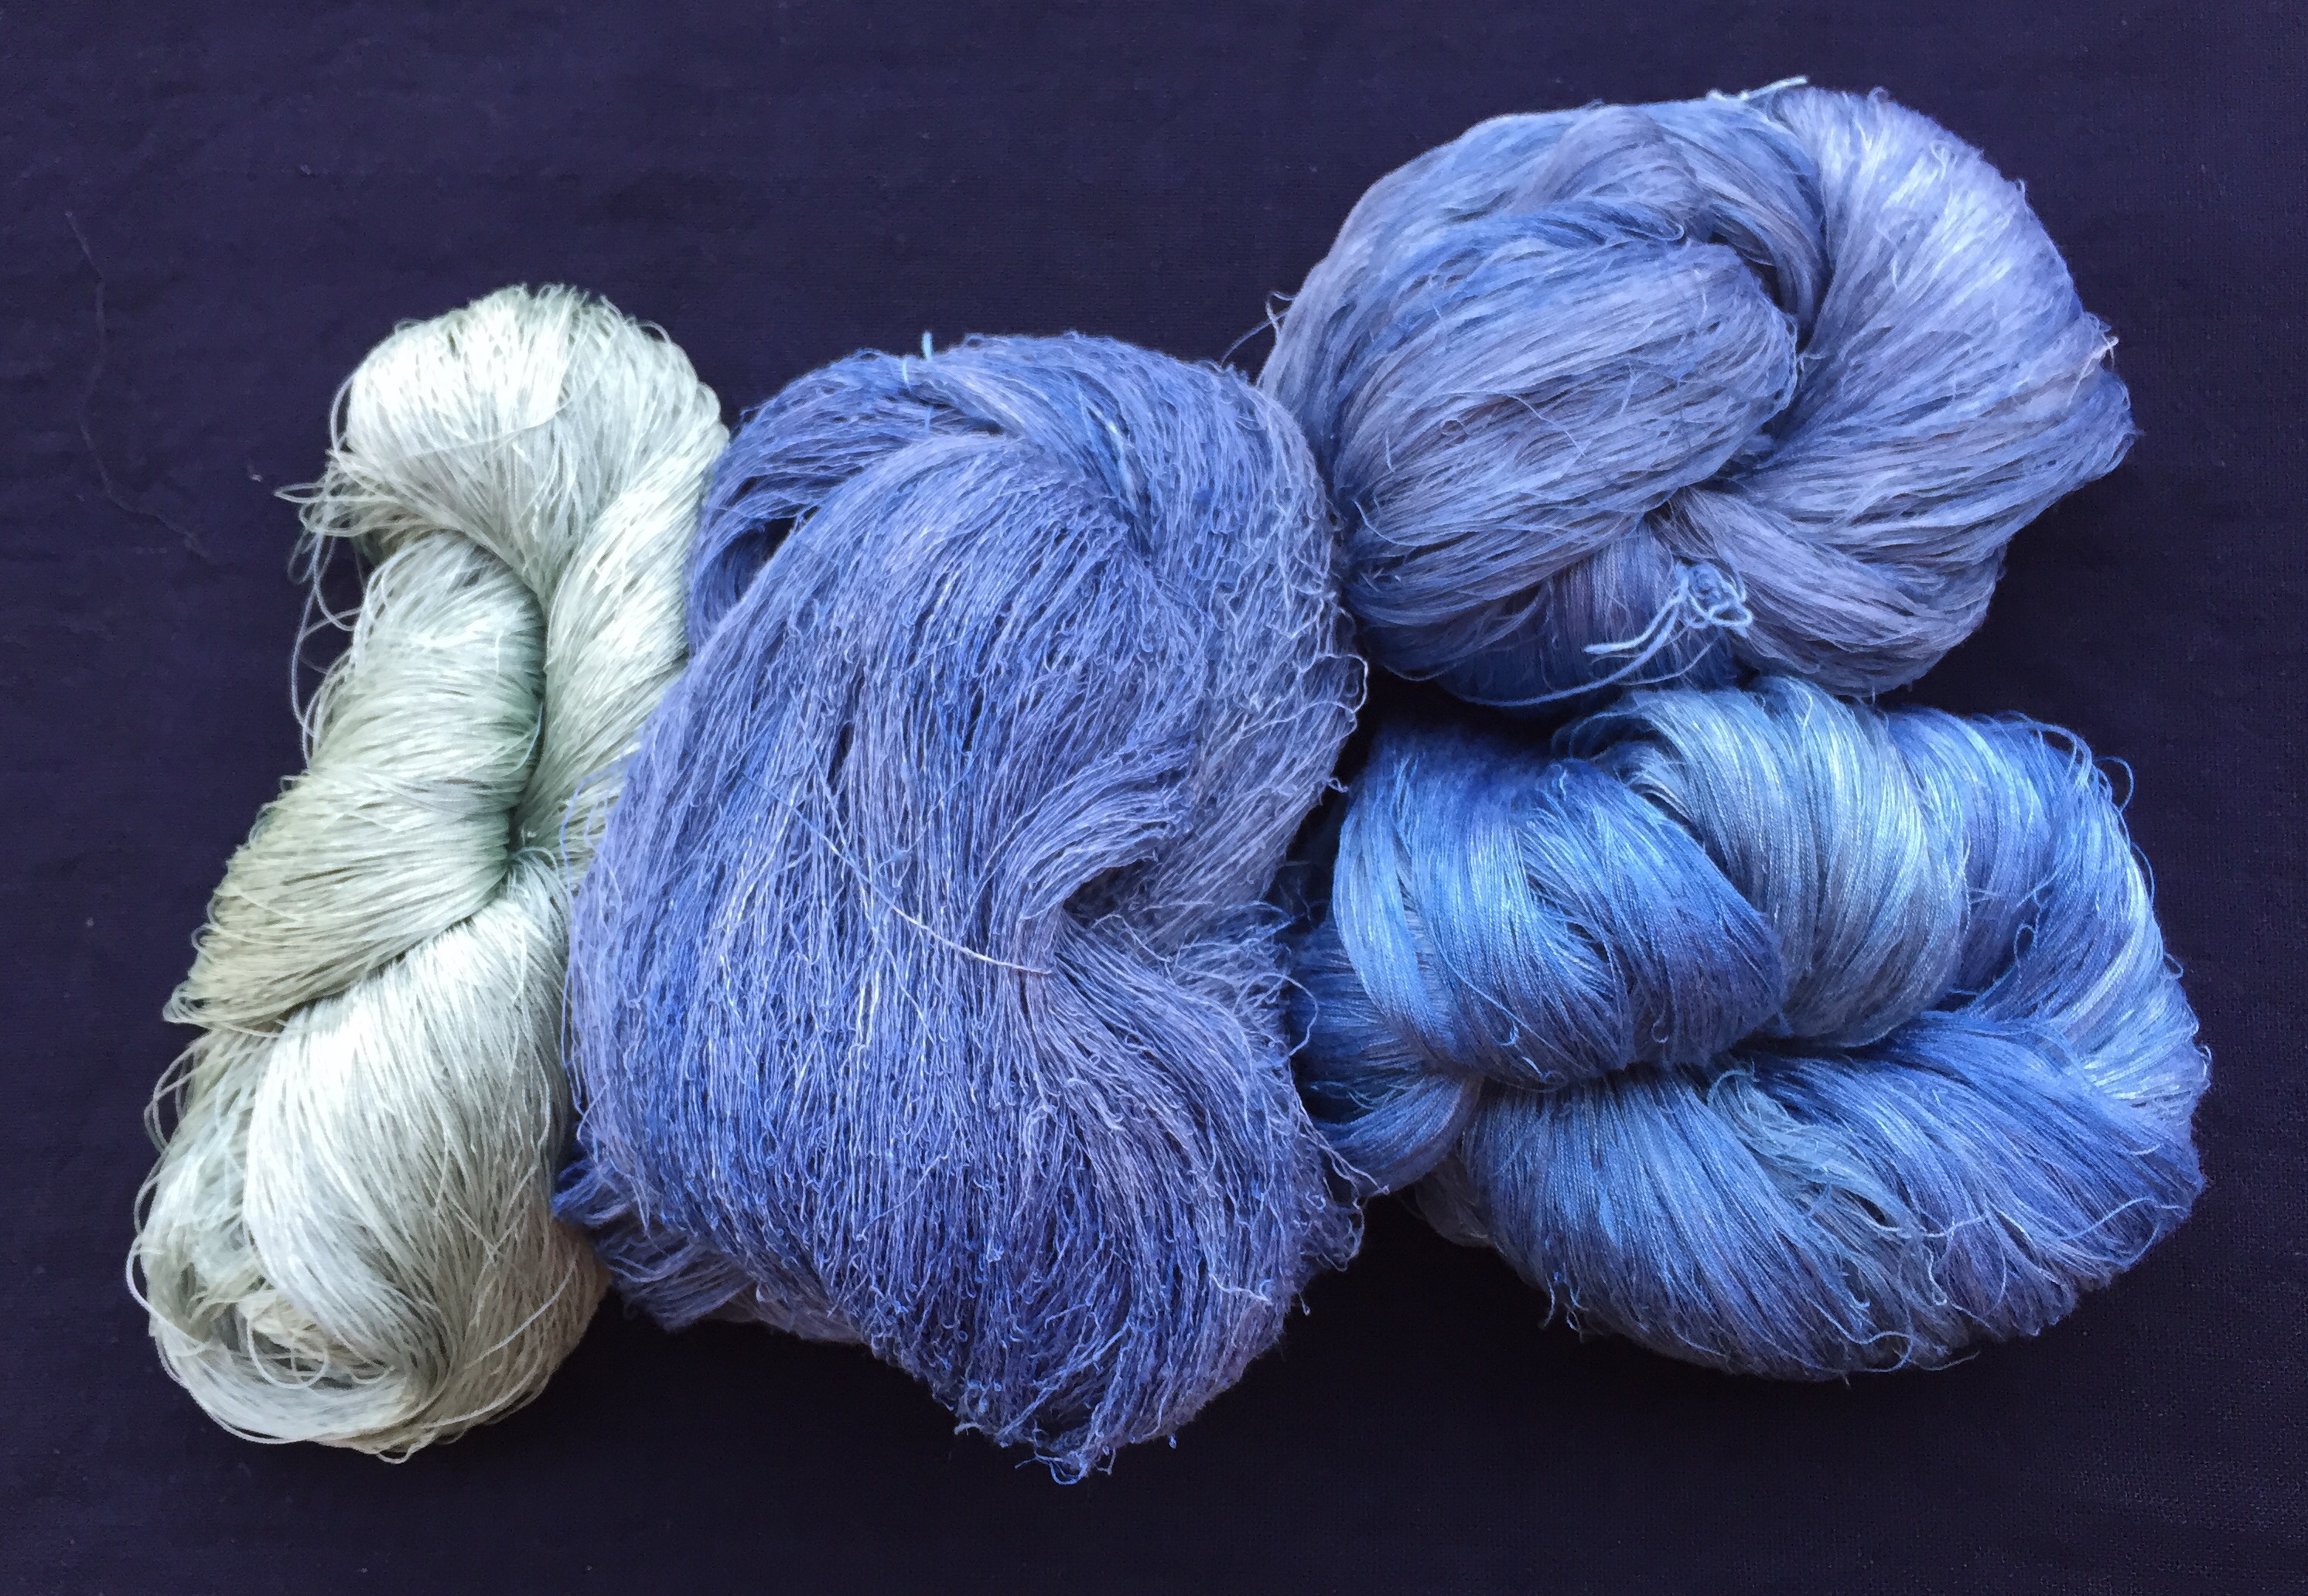
And the indigo suffruticosa yield this color in 2 dips after a thio extraction. The skein on the right was a leftover larger skein which I put in to exhaust the extracted bath. It will go back into the next indigo bath to darken it. I did many other skeins. I’ll update my leaf to substrate ratio for this bath when I am near my notes. One of the things to remember when you are leaf dyeing over the growing seasons is that your skein might revisit baths over the growing sesson in order to build color layers.
I had the privilege to speak about natural dyeing at the Contemporary Handweavers of Texas 2015 Conference in Austin, Tx in late June. As most teachers know, one touches on subjects to make students aware of potential paths but class time constraints prevent one from delving into the details. I needed to stay on the subject of natural dye basics but couldn’t resist mentioning some of these items. One of my students, Fern, was gracious enough to capture a bucket list of those interesting “time sinks” for me. Thank you Fern!
Below are random references for folks that attended my lecture to wander at will. Take your time, enjoy and thank you for letting me share the joy of creating color with you. What color is in your valley?
My apologies, this blog entry covers a lot of ground and no pictures are within this blog post BUT by popping over to some of the links there is plenty of color photos and information created by some of the most talented teachers I have had the privilege to train with. Regards Deb Mc
Natural mordant from leaves, sourced from Indonesia http://plantmordant.org/symplocos/
History of use http://plantmordant.org/symplocos/history-of-symplocos-use/
Consider running some dye pots comparing your mordant choices, alum acetate (cellulose) or alum sulfate (protein) and symplocos. The website above has ample instructions on the different ways you can use the mordant for different fibers.
Natural Dye Extract Suppliers in alphabetical order:
Yahoo Groups, search for NaturalDyes (active) and sustainablenaturaldyepractice (low activity)
Ravelry, search for Natural Dyeing (process) and Plants to Dye For (growing and dyeing)
I will repeat a safety warning. Using alcohol is a good way to pull color from your wood chips or sawdust BUT do not use open flame for your dye bath. Use electric heat for safety. You do not want to flambé yourself or your skeins. Safety FIRST!
The link is below. Look for “Instructions for Extracting Color from Wood Chips”.
http://www.3springshandworks.com/Extras.htm
Another resource is this paper by Kirby online, this was the precursor to the book above, give it a moment to load. http://www.doernerinstitut.de/downloads/Back_to_the_Roots/Back_to_the_roots_Kirby_I.pdf
The 2010 proceedings are probably the richest in dye reference material as that was the conference theme. Look at some of the papers. I referred in my lecture to the South American cochineal harvesting process. Here is it, provided by the TSA organization. Consider joining them to support textile research around the world. We are thankful for the clear photos and comparison of methods. Without the Digital Commons, how would we access information like this without traveling? http://digitalcommons.unl.edu/tsaconf/39/
And finally, folks asked for a natural dye bibliography, this is what I recommend for beginners, Here is my list….
Books as of 07/2015 sort by title, **first dye books recommended for beginners
A Dyer’s Garden ** Rita Buchanan
ISBN: 1-883010-07-01
Approach to natural dyes via touching the ground
Indigo, Madder & Marigold Trudy Van Stralen
ISBN:0-934026-86-6
Good equipment chapter for beginners. Basic instructions for dyestuffs readily available.
Natural Dye Instruction Booklet** Michele Wipplinger
http://www.earthues.com/natural_dyes/books – http://www.earthues.com/natural_dyes/books
Excellent summary on use of natural dye extracts various techniques
Natural Dyes – Sources, Tradition, Technology and Science
Dominique Cardon ISBN-10: 1-904982-00-X
Belongs in any fiber guild library, provides cultural, botanical & practical natural dye research spanning our globe
Salvation Thru Soy John Marshall
http://www.johnmarshall.to/I-bookSOY.htm – http://www.johnmarshall.to/I-bookSOY.htm
Different cultural direction to apply natural dye to cloth
The Craft of Natural Dyeing Jenny Dean
ISBN: 0 85532 744 8
Solid beginner definitions, nice approach to mordants and modifiers
Wild Color ** Jenny Dean
ISBN: 978-0-0230-5879-2
Great index and table of contents for reference. Best mordant and modifier (assistant) table available.
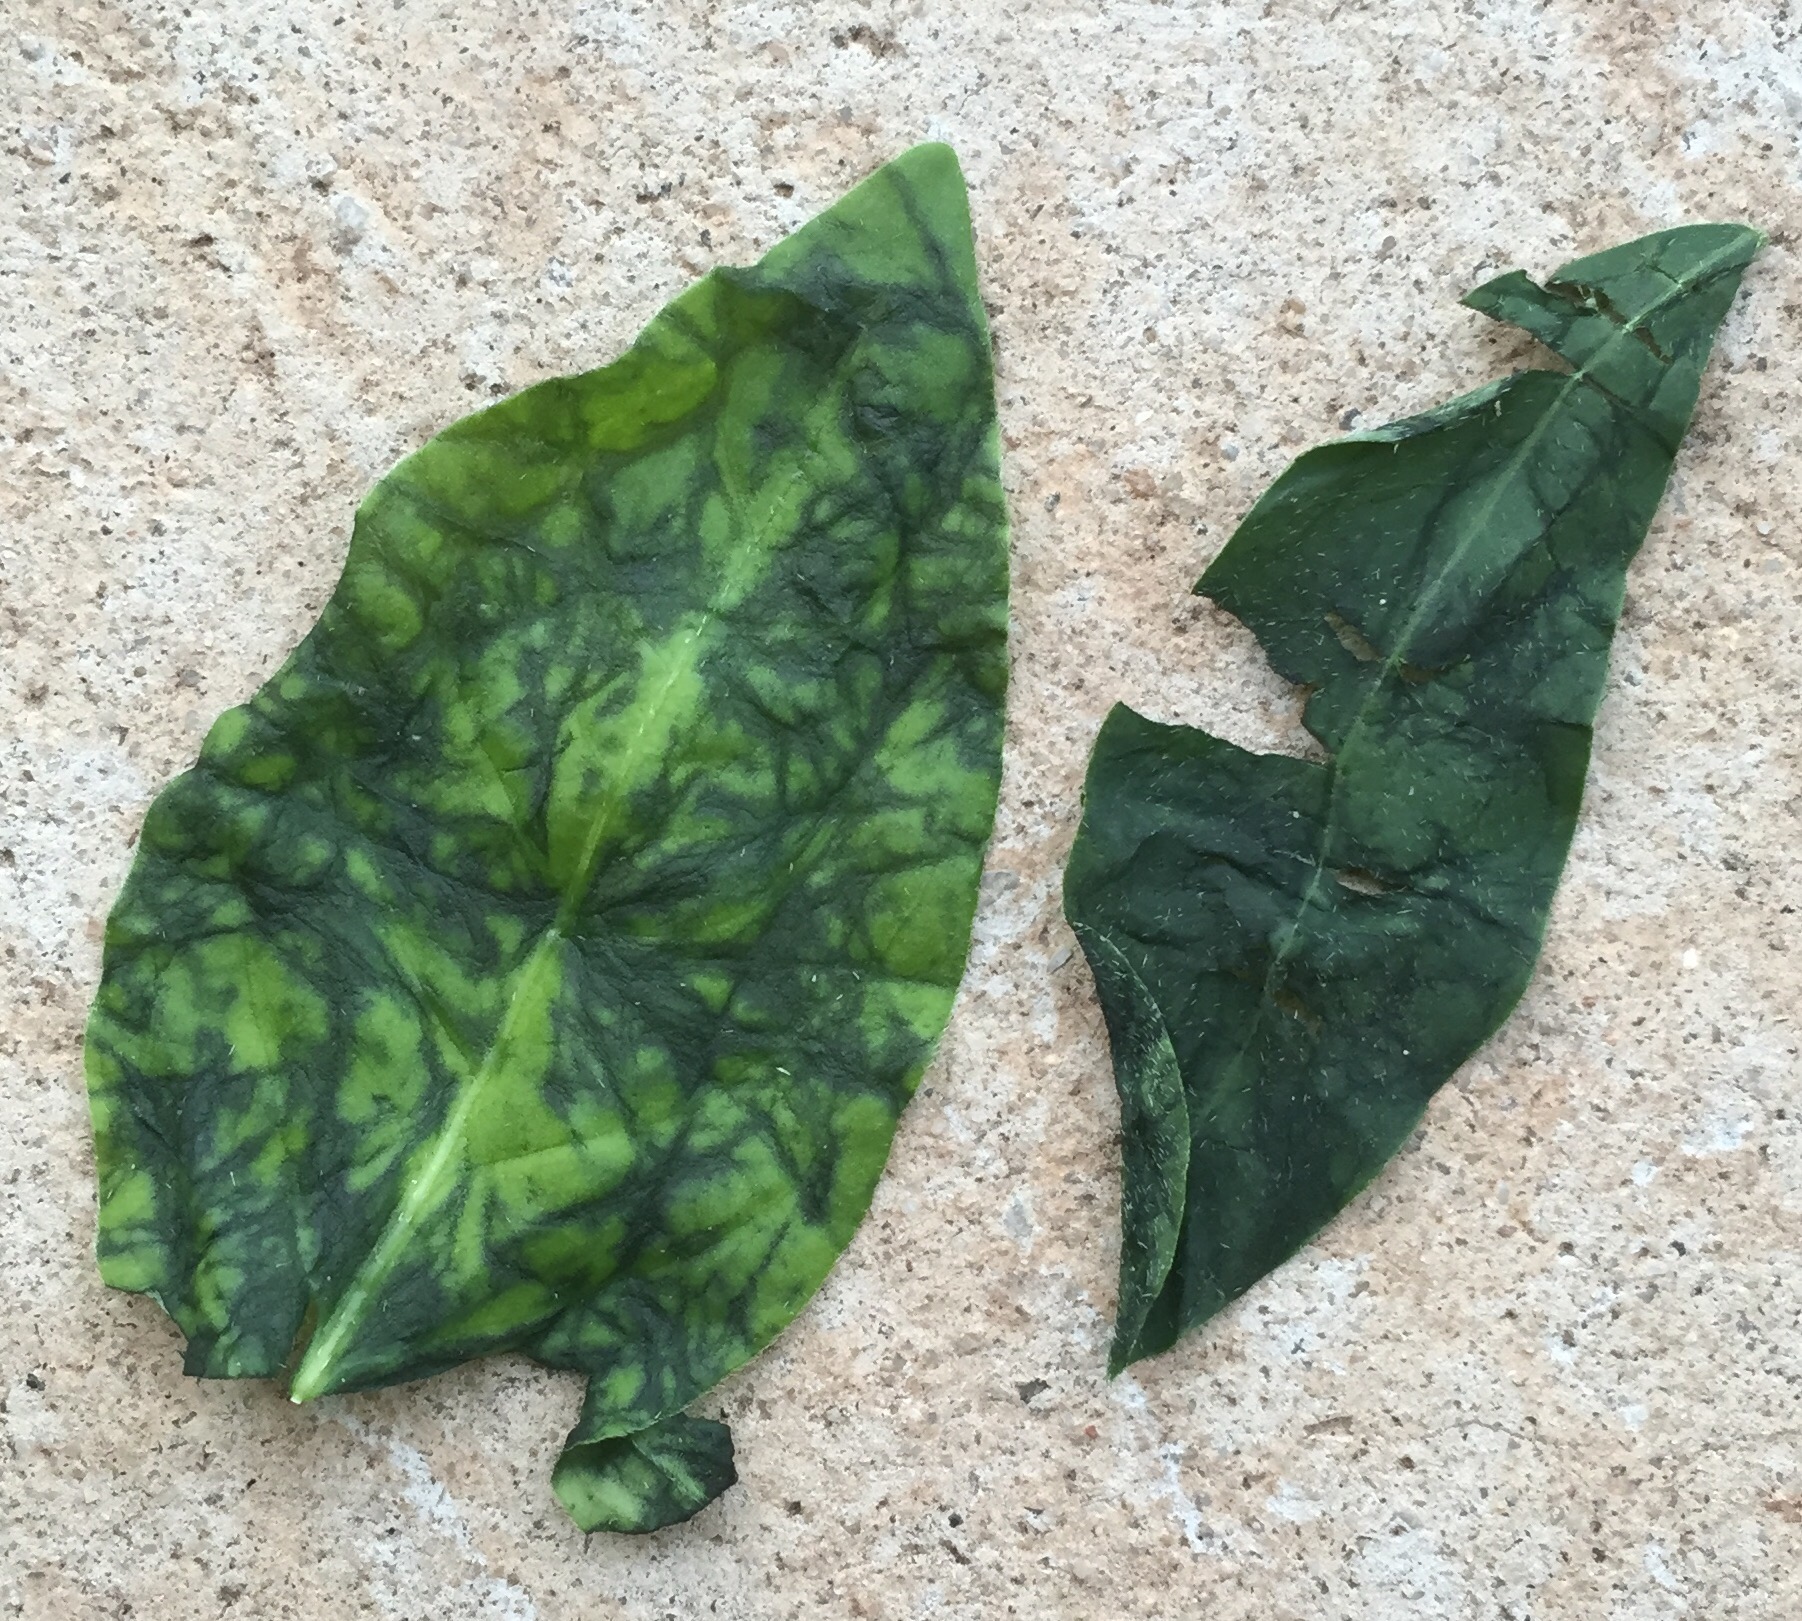
Checking indigo leaves for color…not yet. No sign of blue yet when leaves are crushed, just chlorophyl green. Anyone have any other suggestions for checking for indigo other than the “crush and look for blue” method for either of these species?
Persicaria tinctoria on the left, indigo suffruticosa on right.
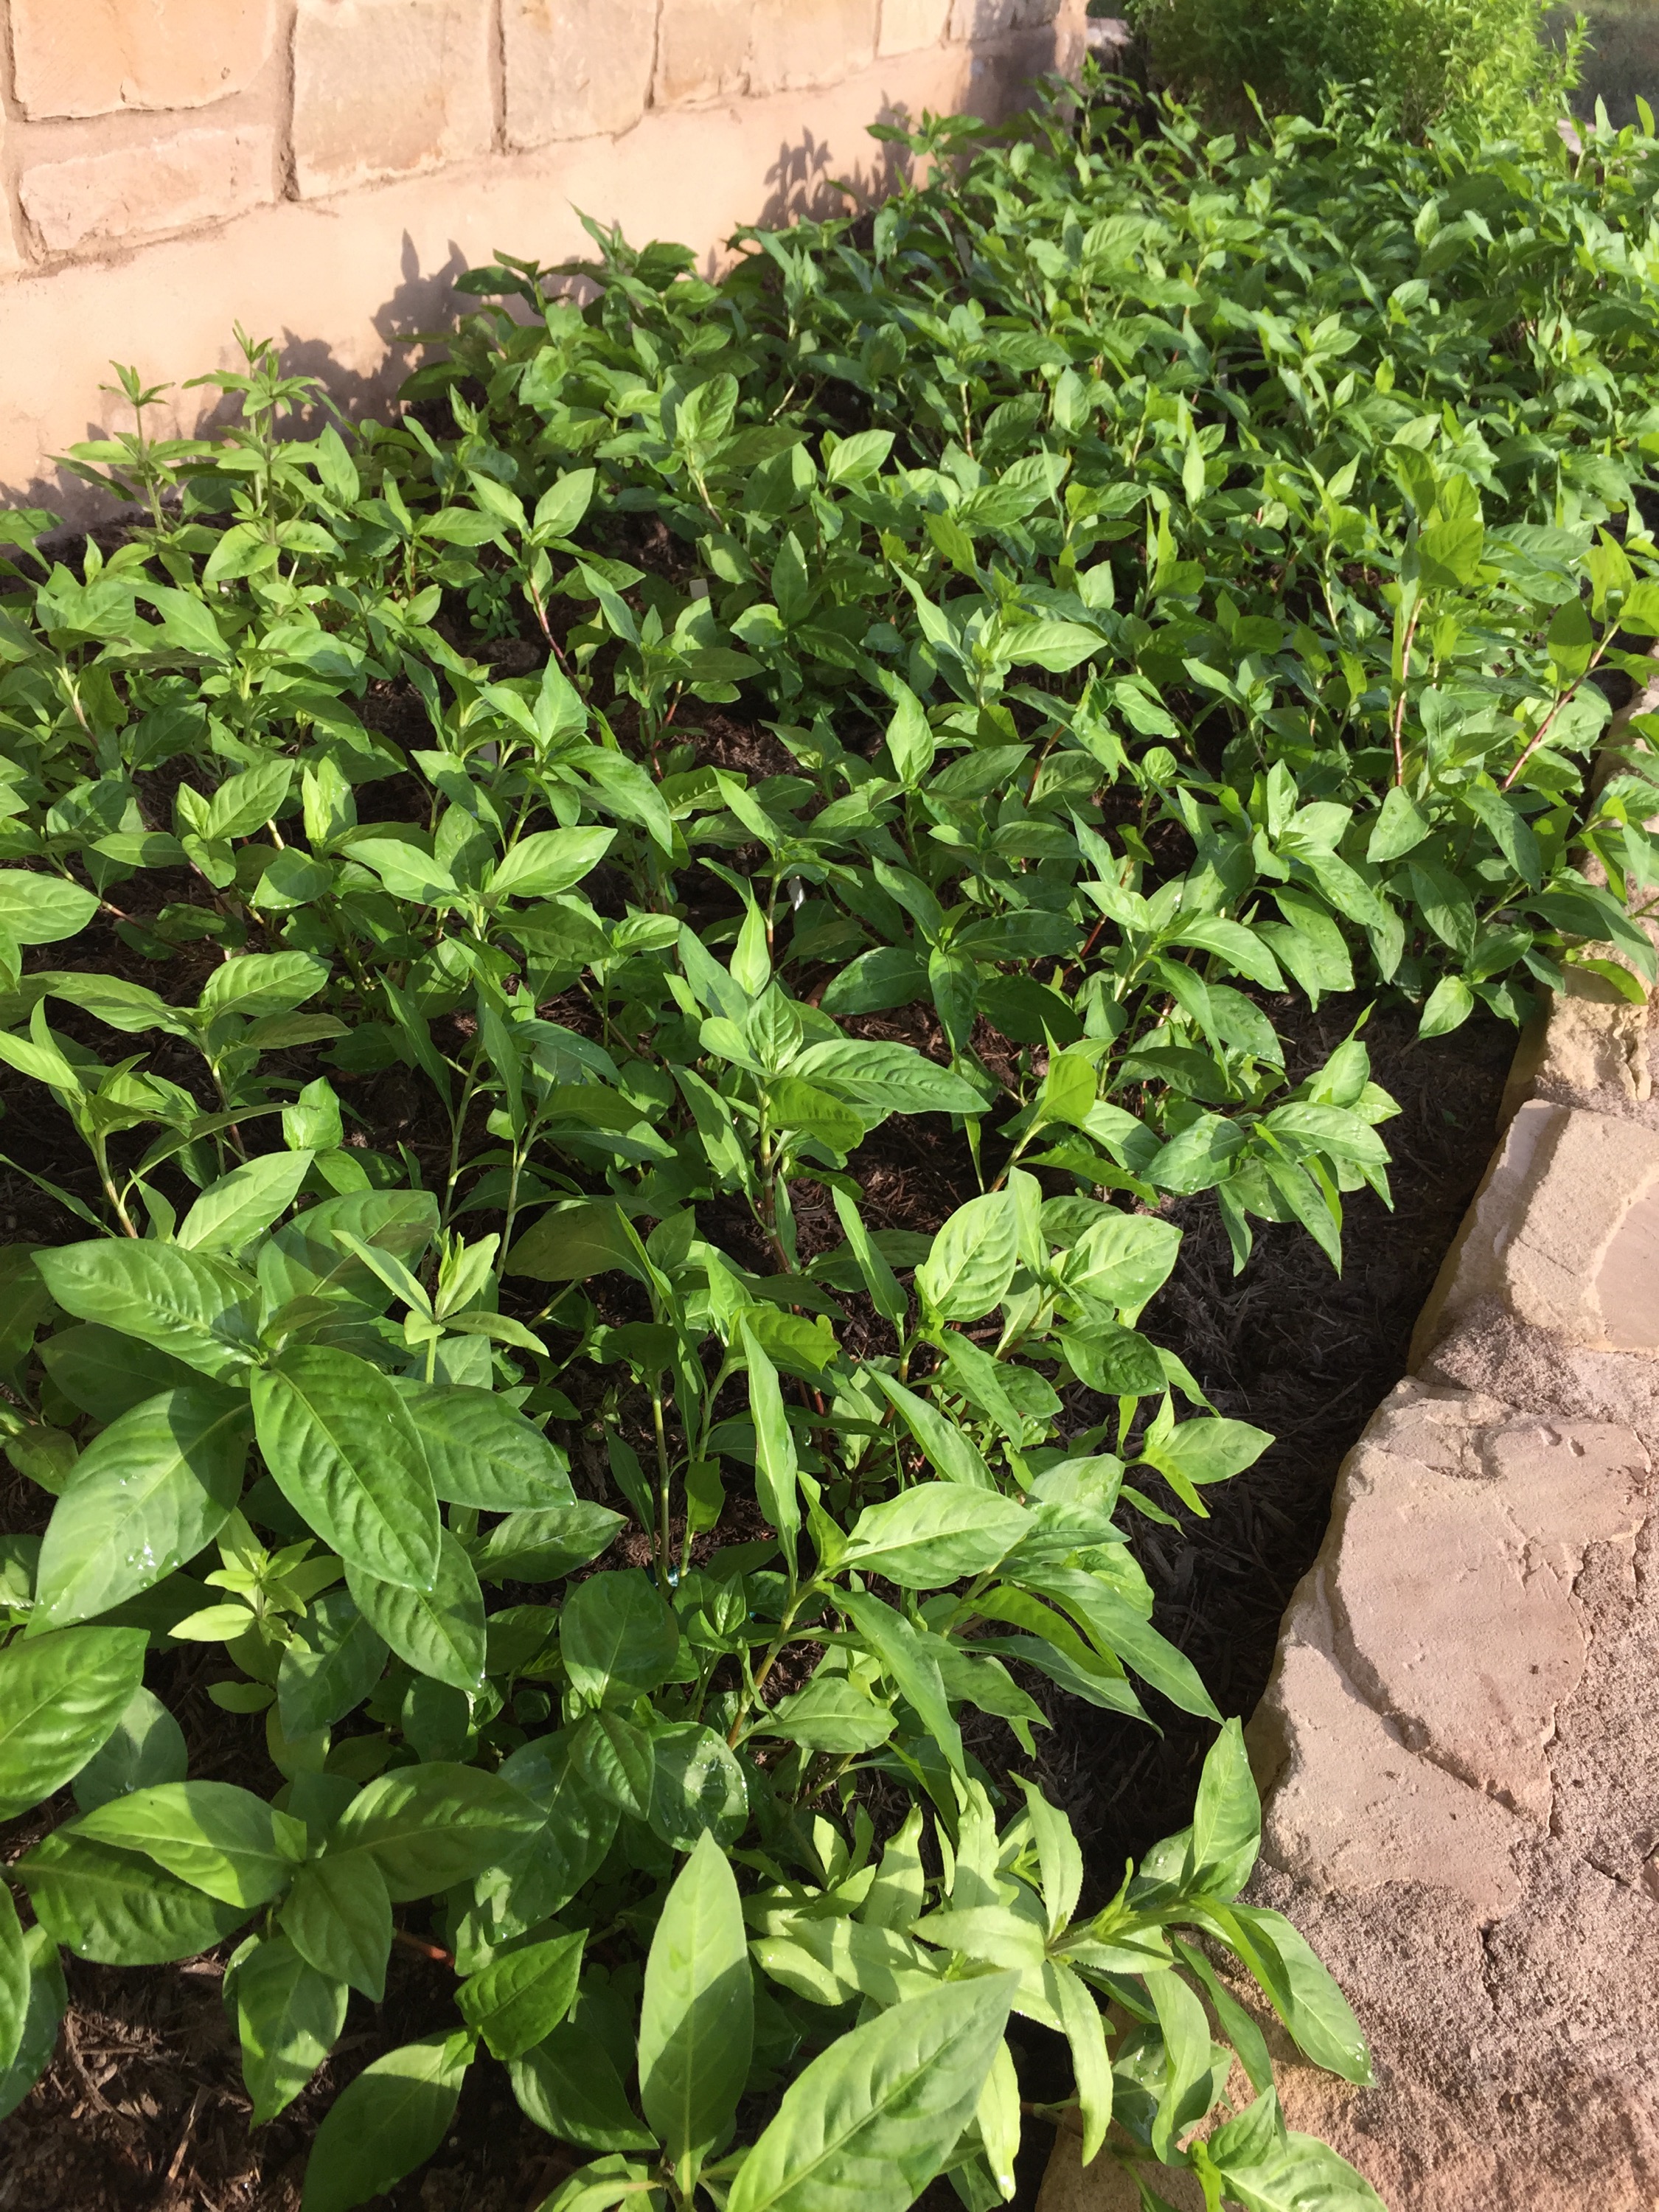
 Japanese Indigo starting to push past 12″ high.
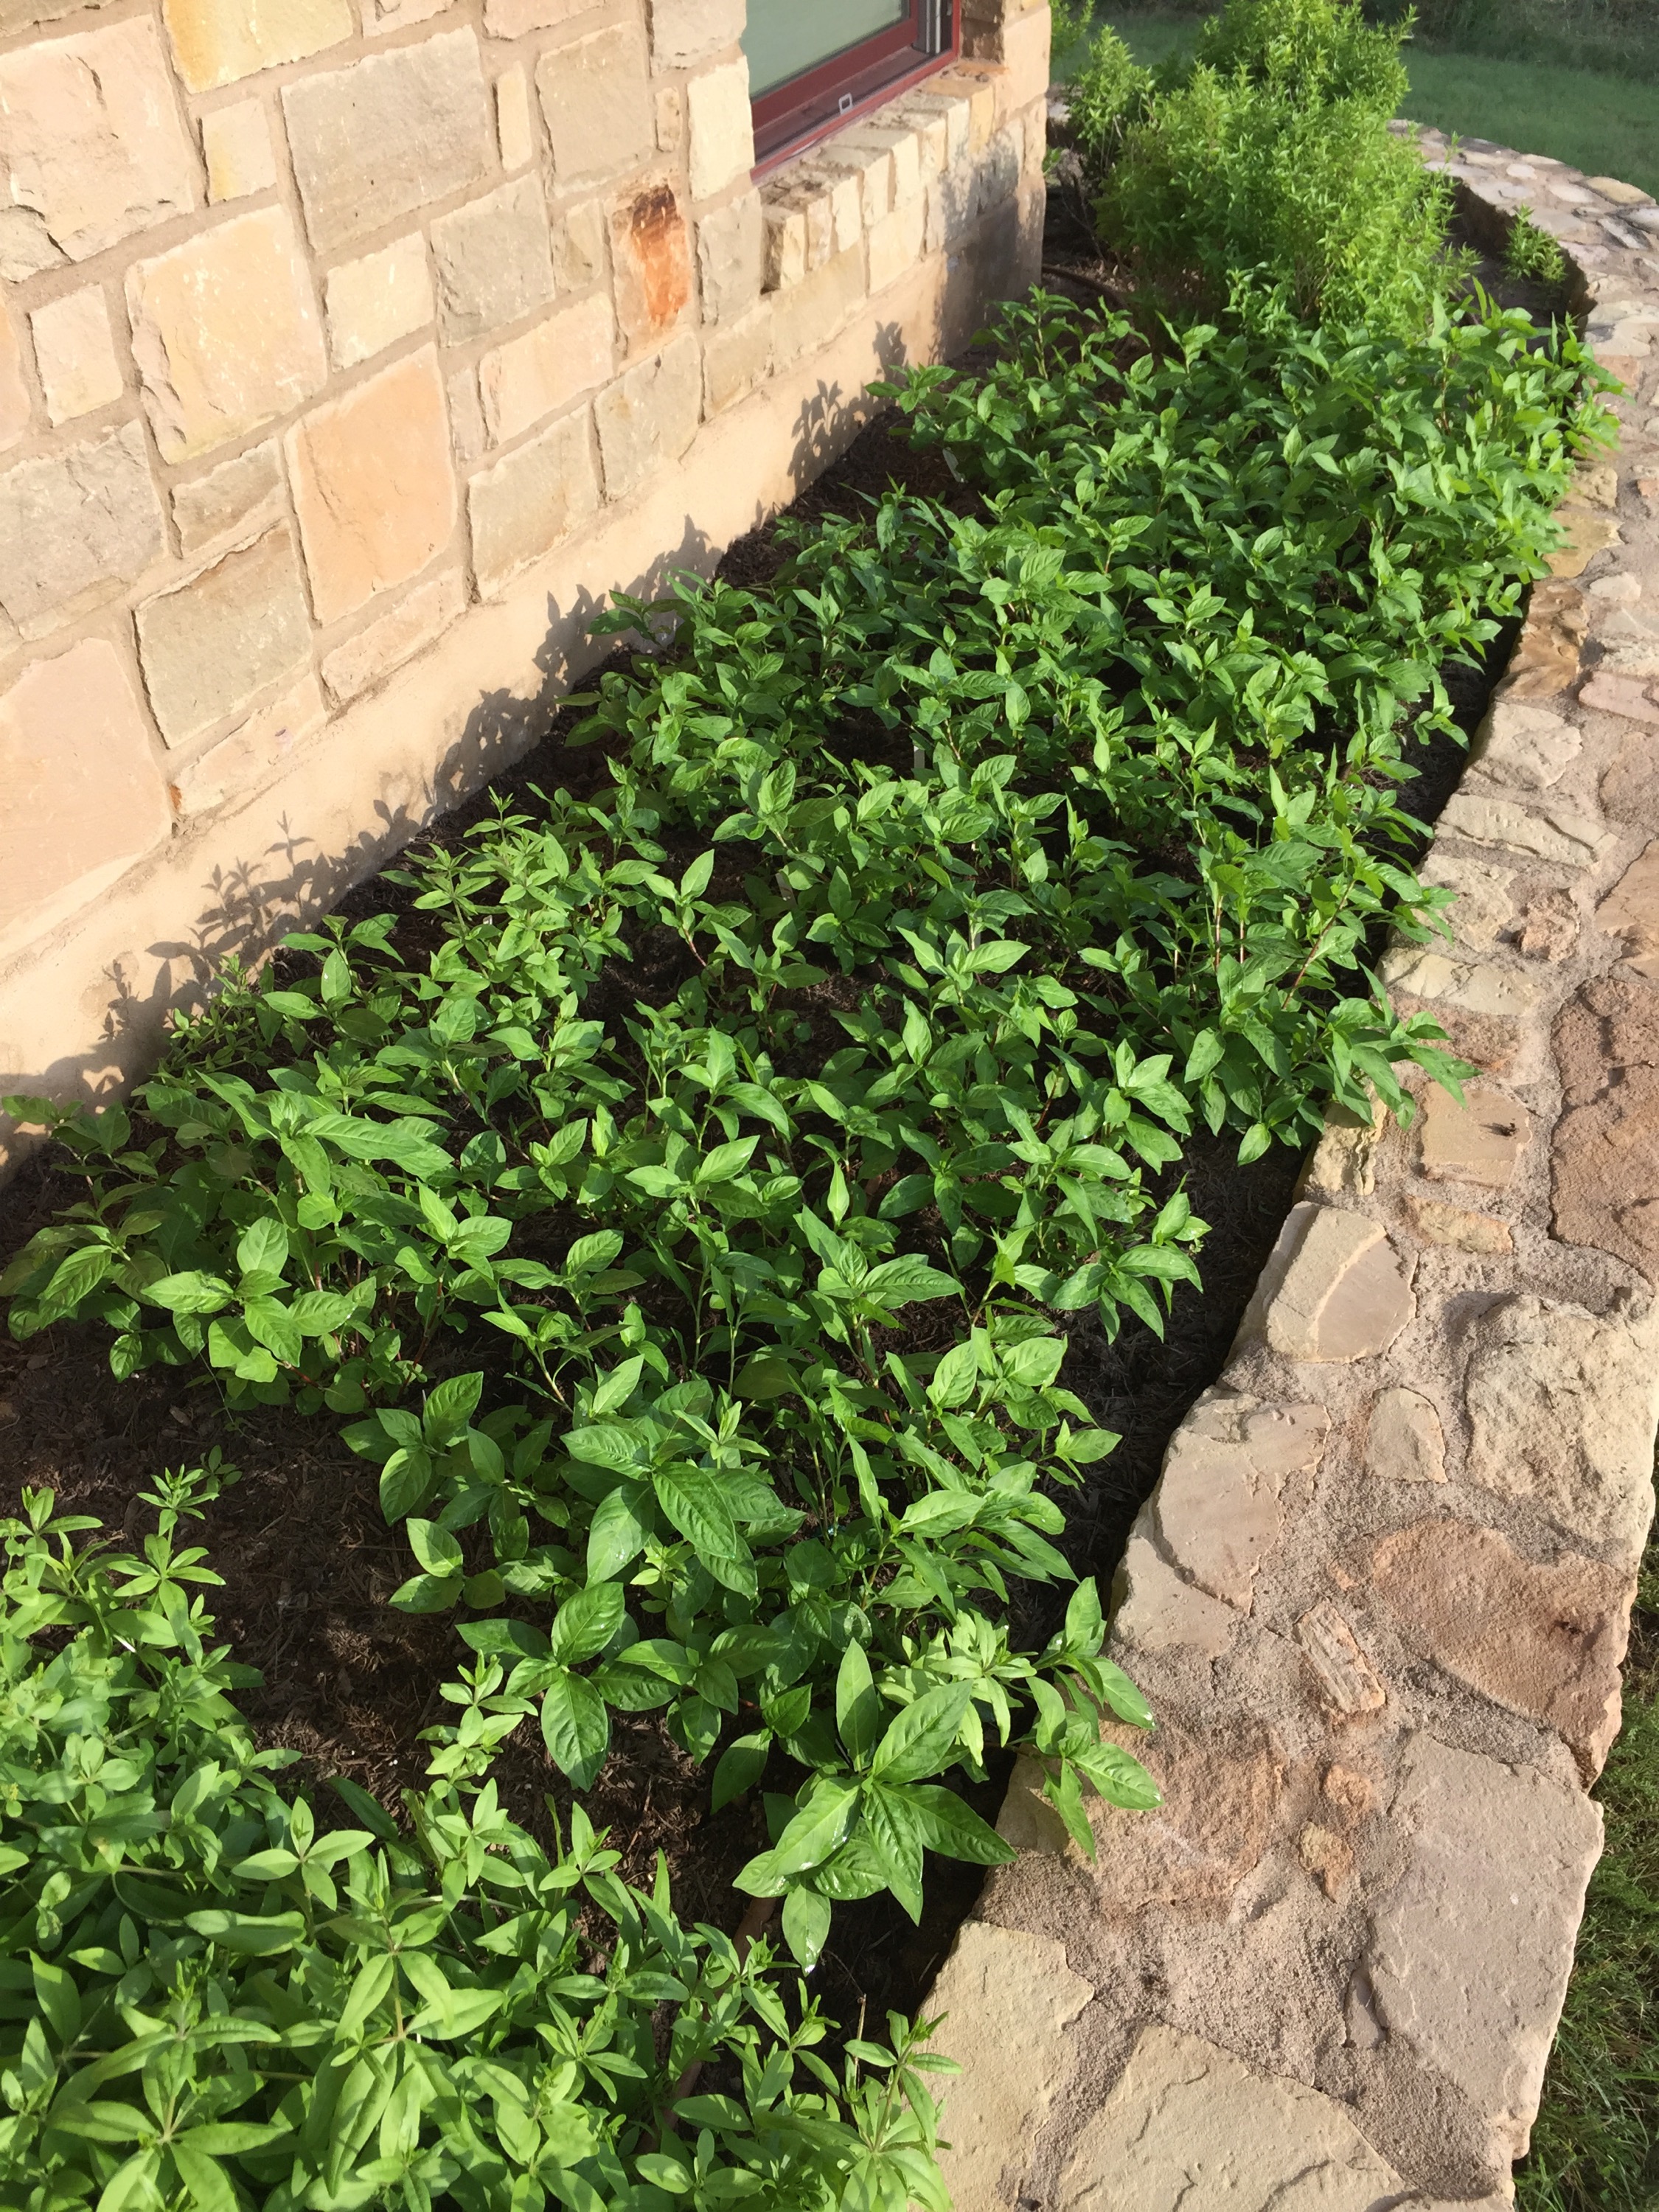
 And the indigo suffruticosa is two heights, the one that overwintered is over 4′, in the foreground you can see this year’s seedlings at about 12″. Curious to see if older plant still yields indigo. And I do provide plant supports, because the wind sometimes really blows here in the Texas Hill country and if a major stalk breaks my gardener’s heart will suffer in sympathy.
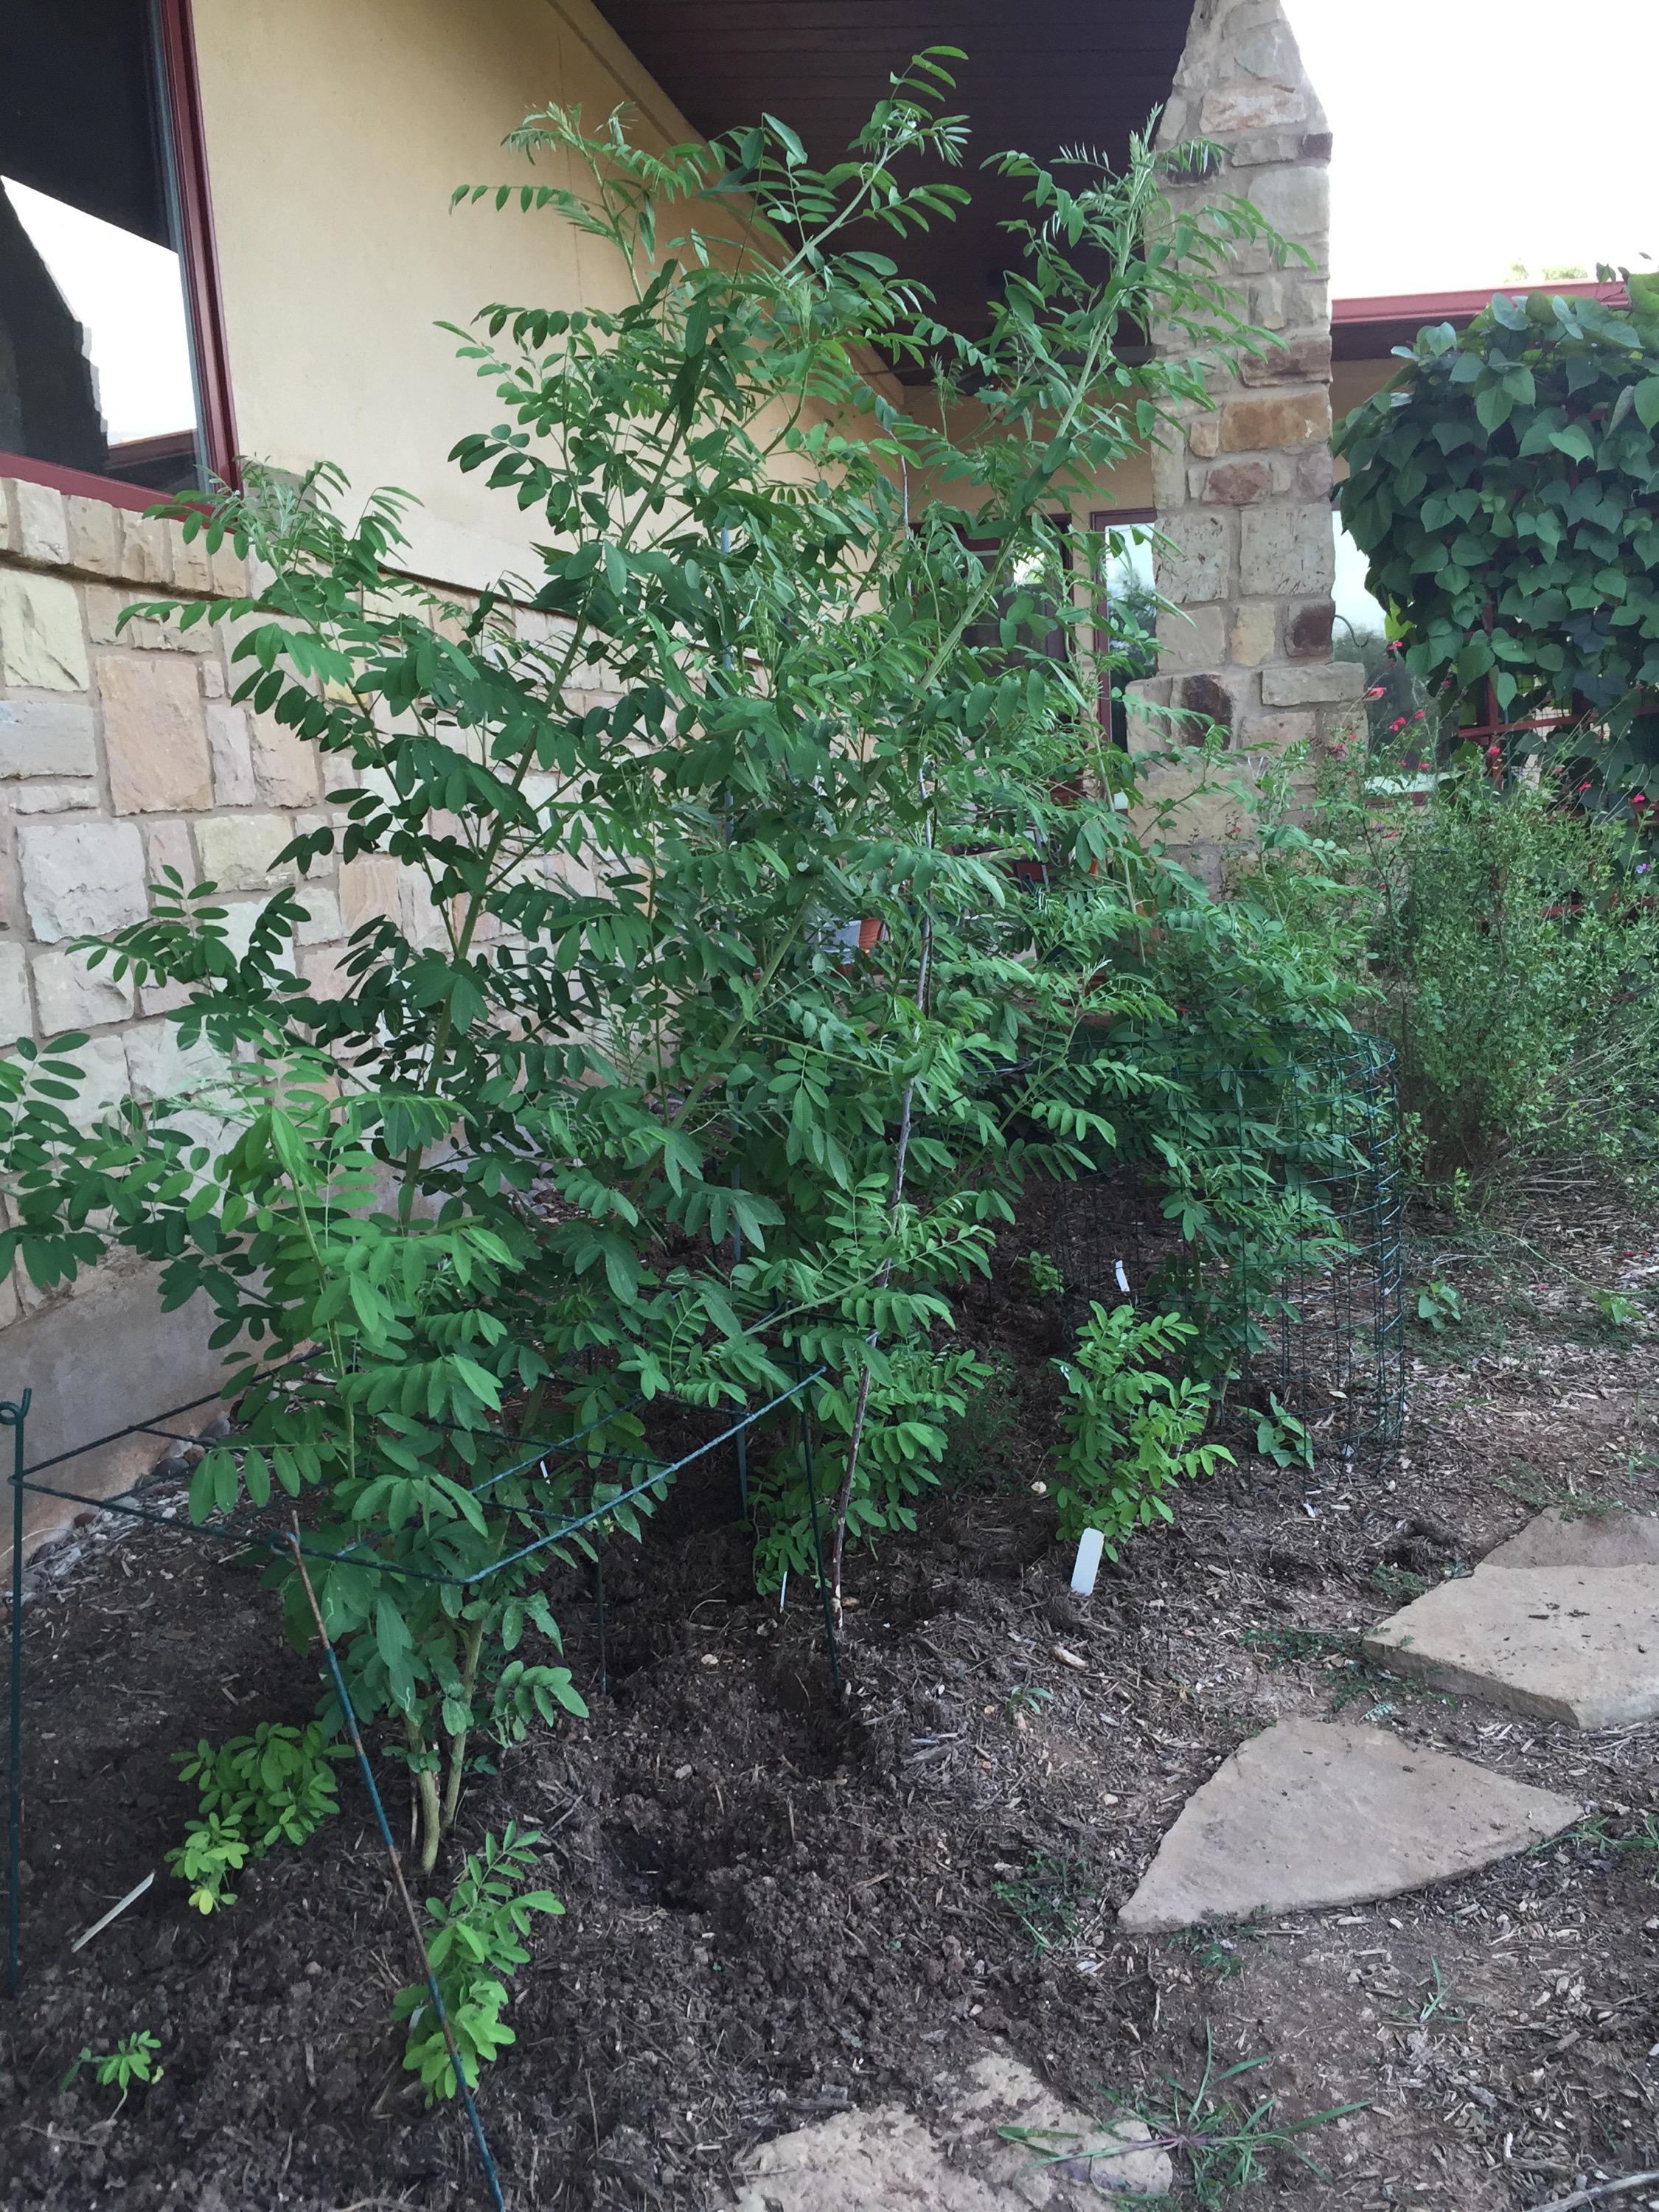

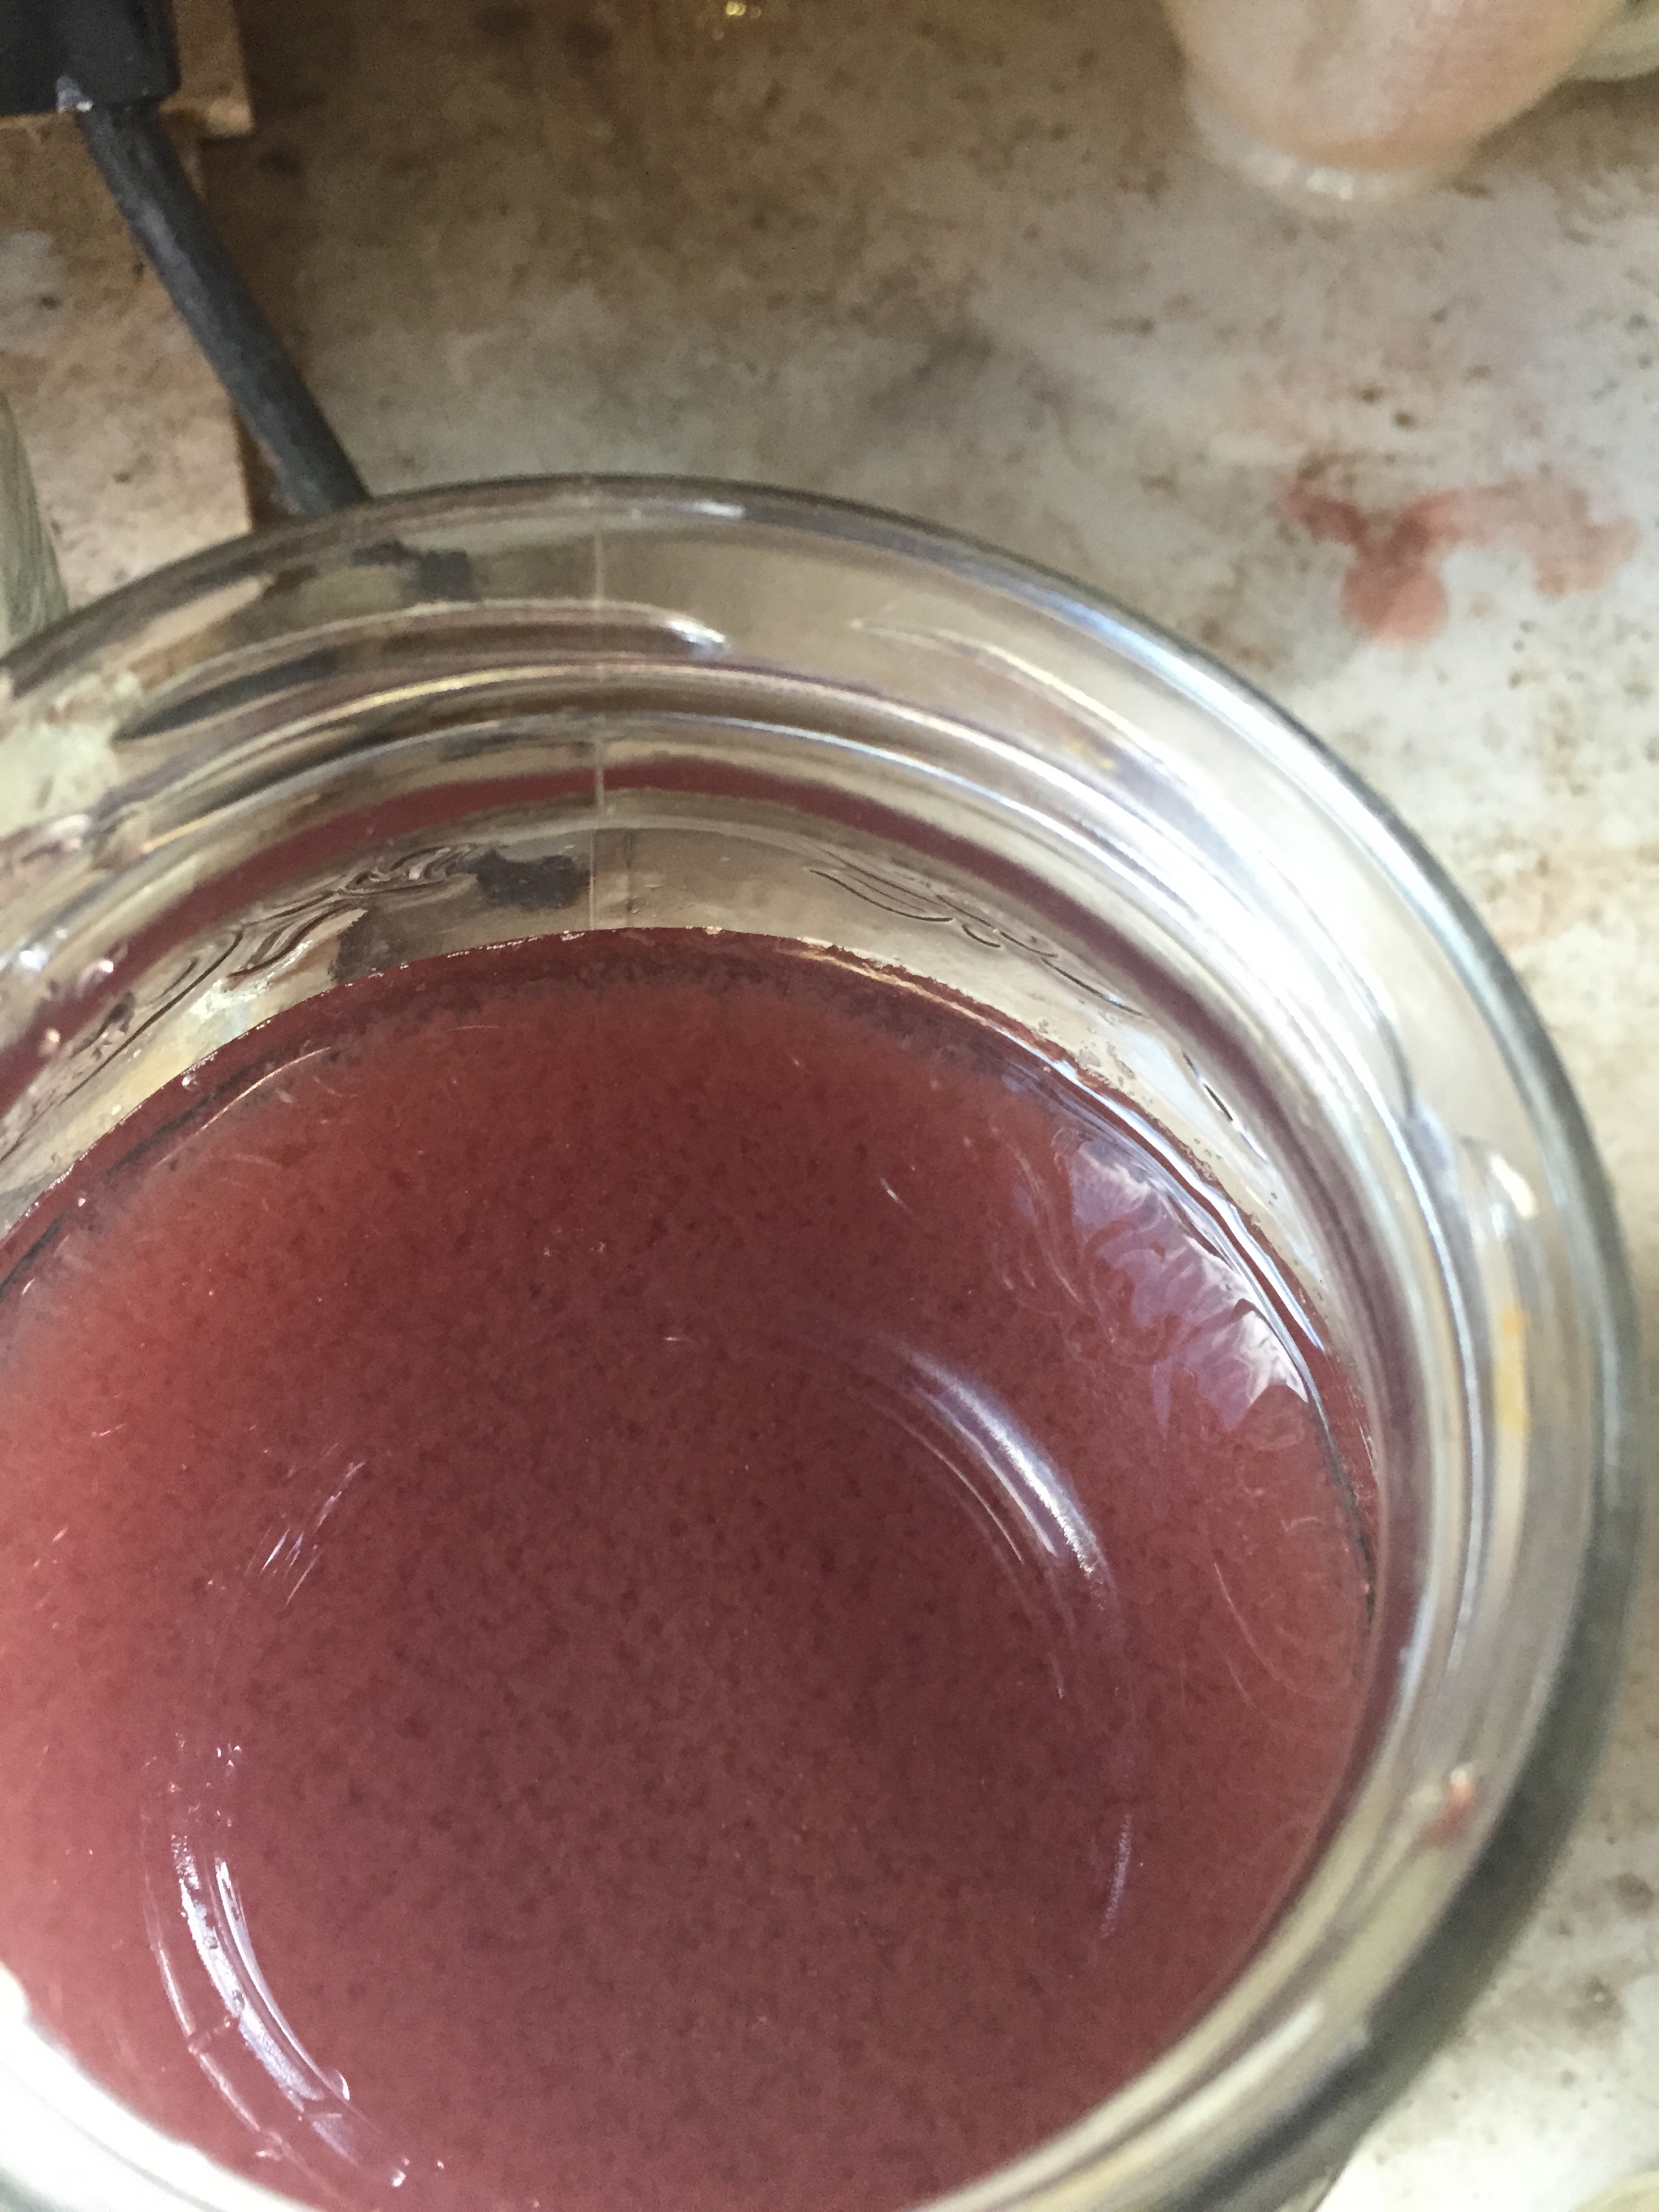
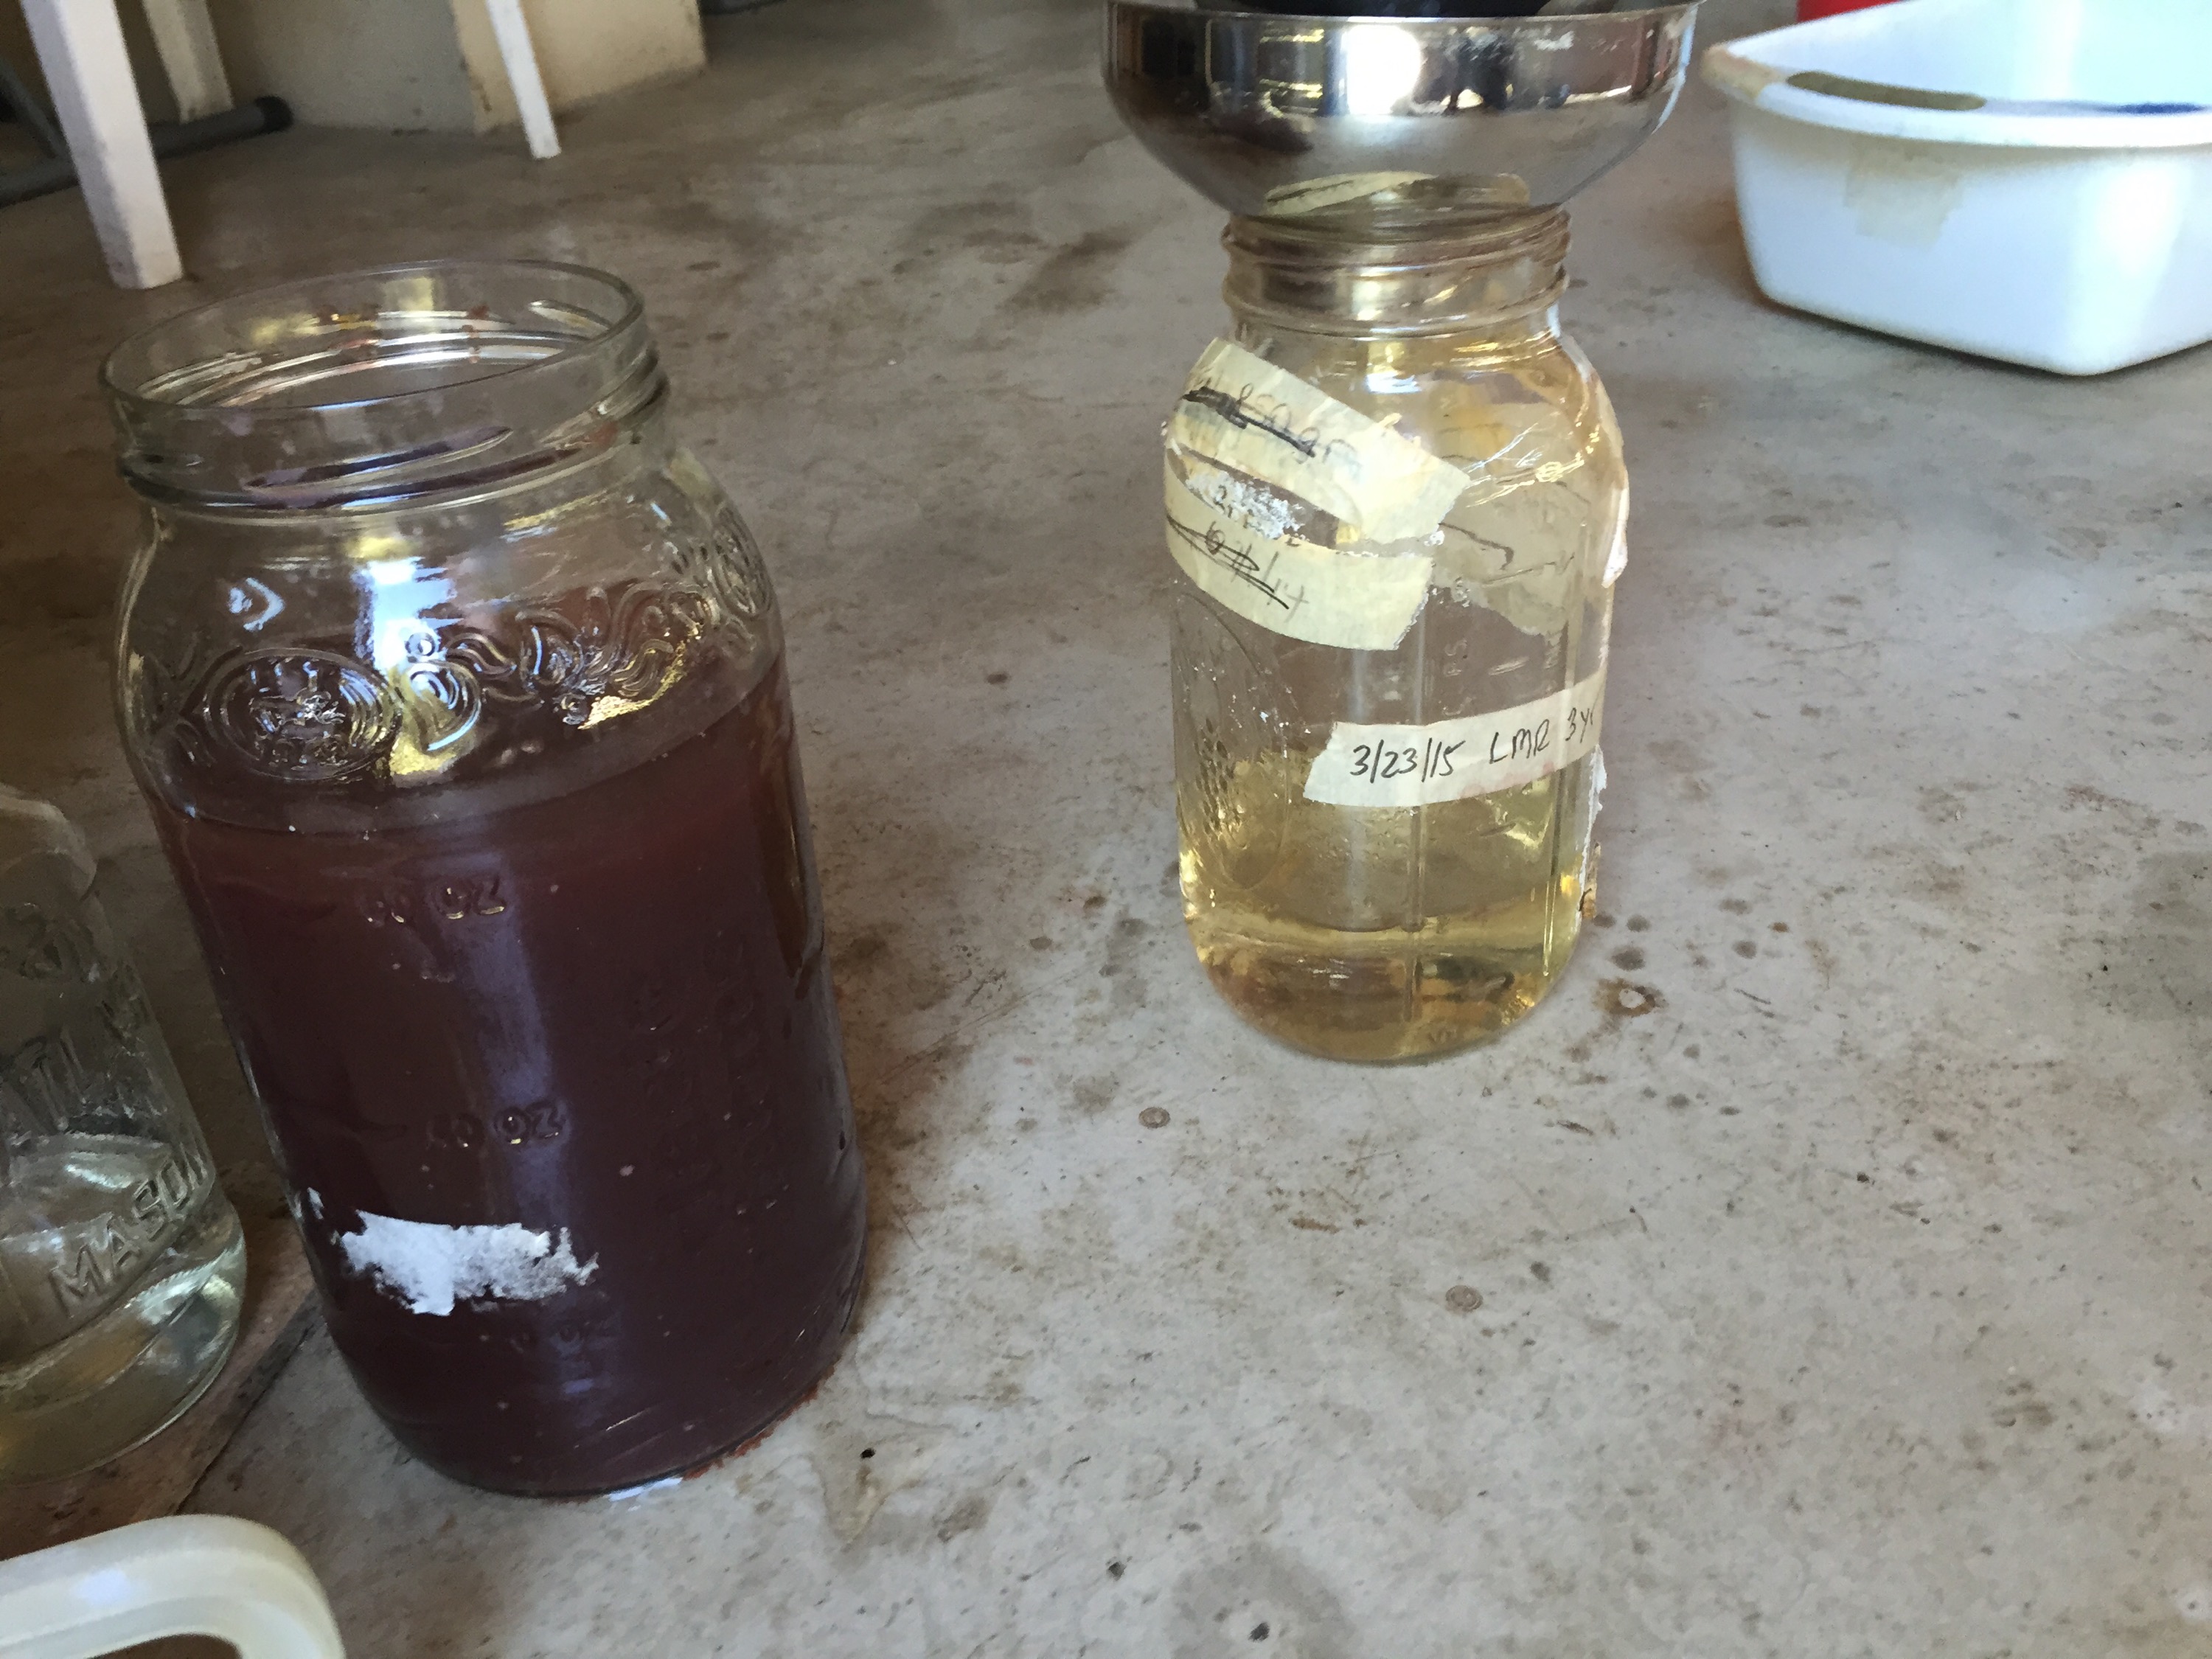
Meanwhile, I am pulling pigment from my madder exhaust pots. Remember the solar dyeing? 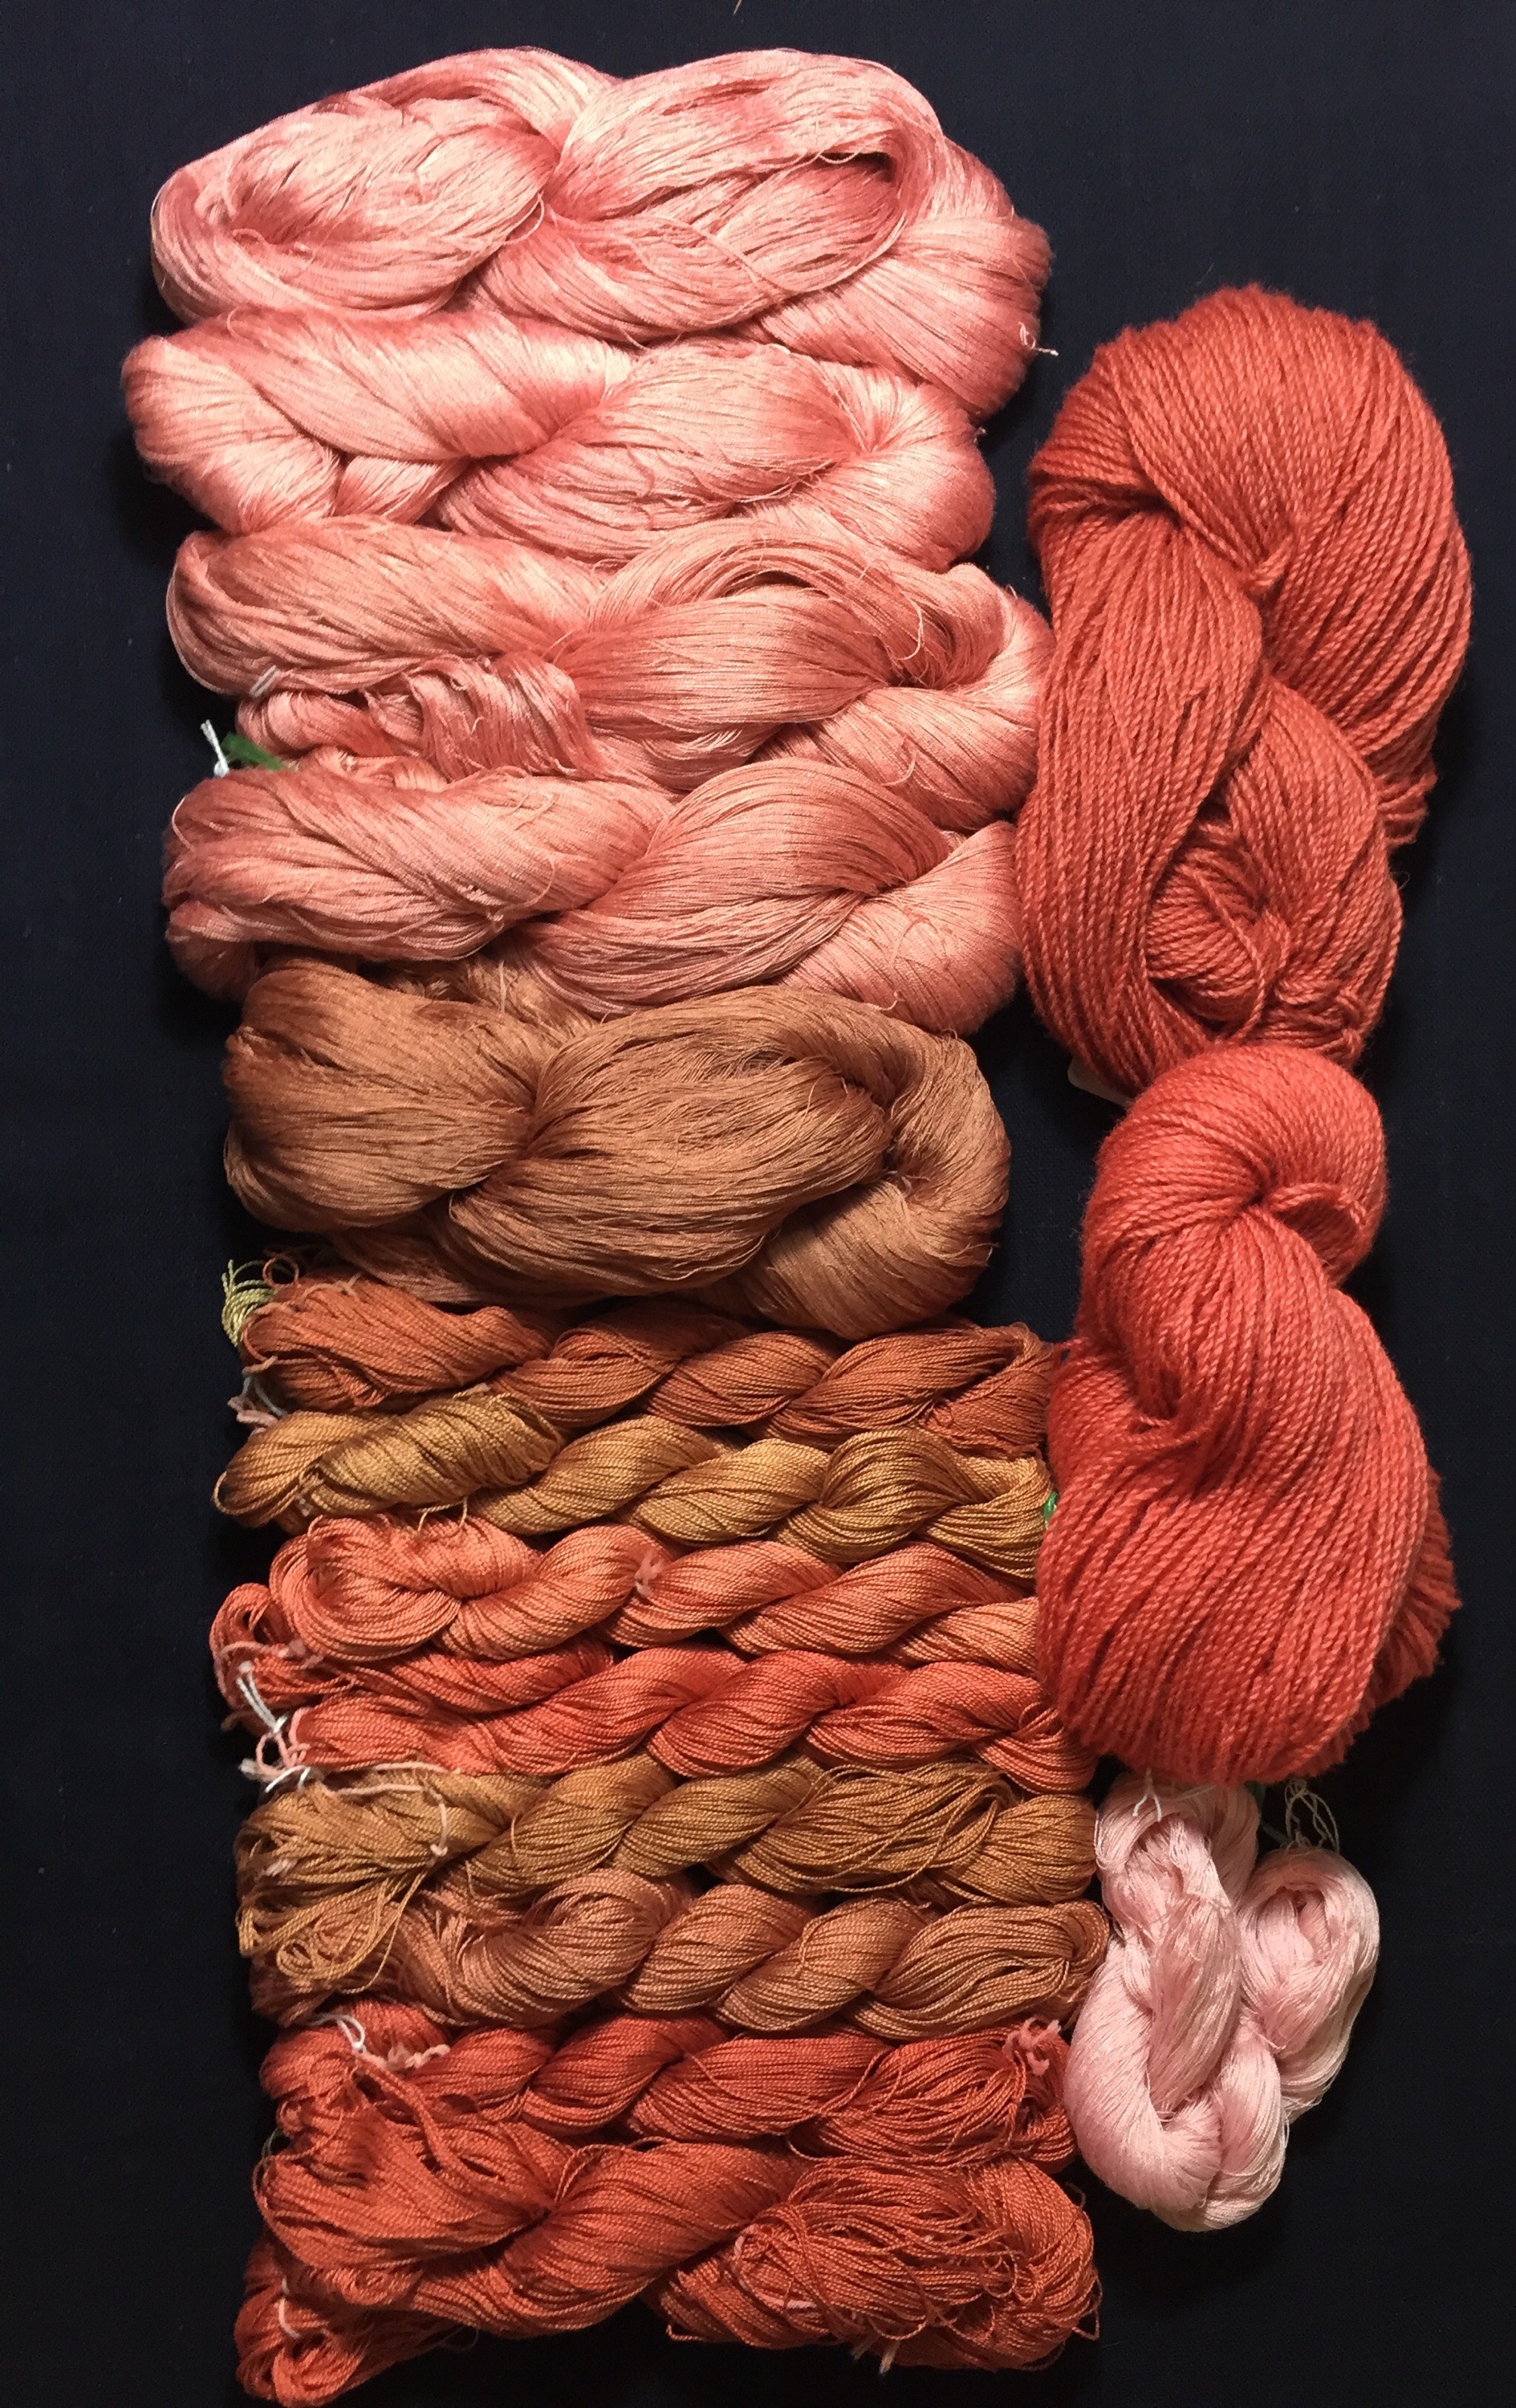 Using recipes in the book Natural Colorants for dyeing and lake pigments I am continuing to pull color out of the madder exhaust pot to store for future use.
Remember the soy milk painting on silk? Not exciting color from my lichen and weld on the left but the technique worked. The brighter color on the left yielded from Daniel Smith watercolor pigment.
 This is why I am continuing to pull color. It’s all about using the color in my valley to create. One just has to be patient.
This particular formula used the dyestuff solution, potassium carbonate and potash alum. When dissolved and stirred into the exhaust in the proper order it pulls the dye molecules and drops out of the water.
 You then pour and then filter out the water and either store the extraction in wet or dry form. You can then circle back & reuse your color.
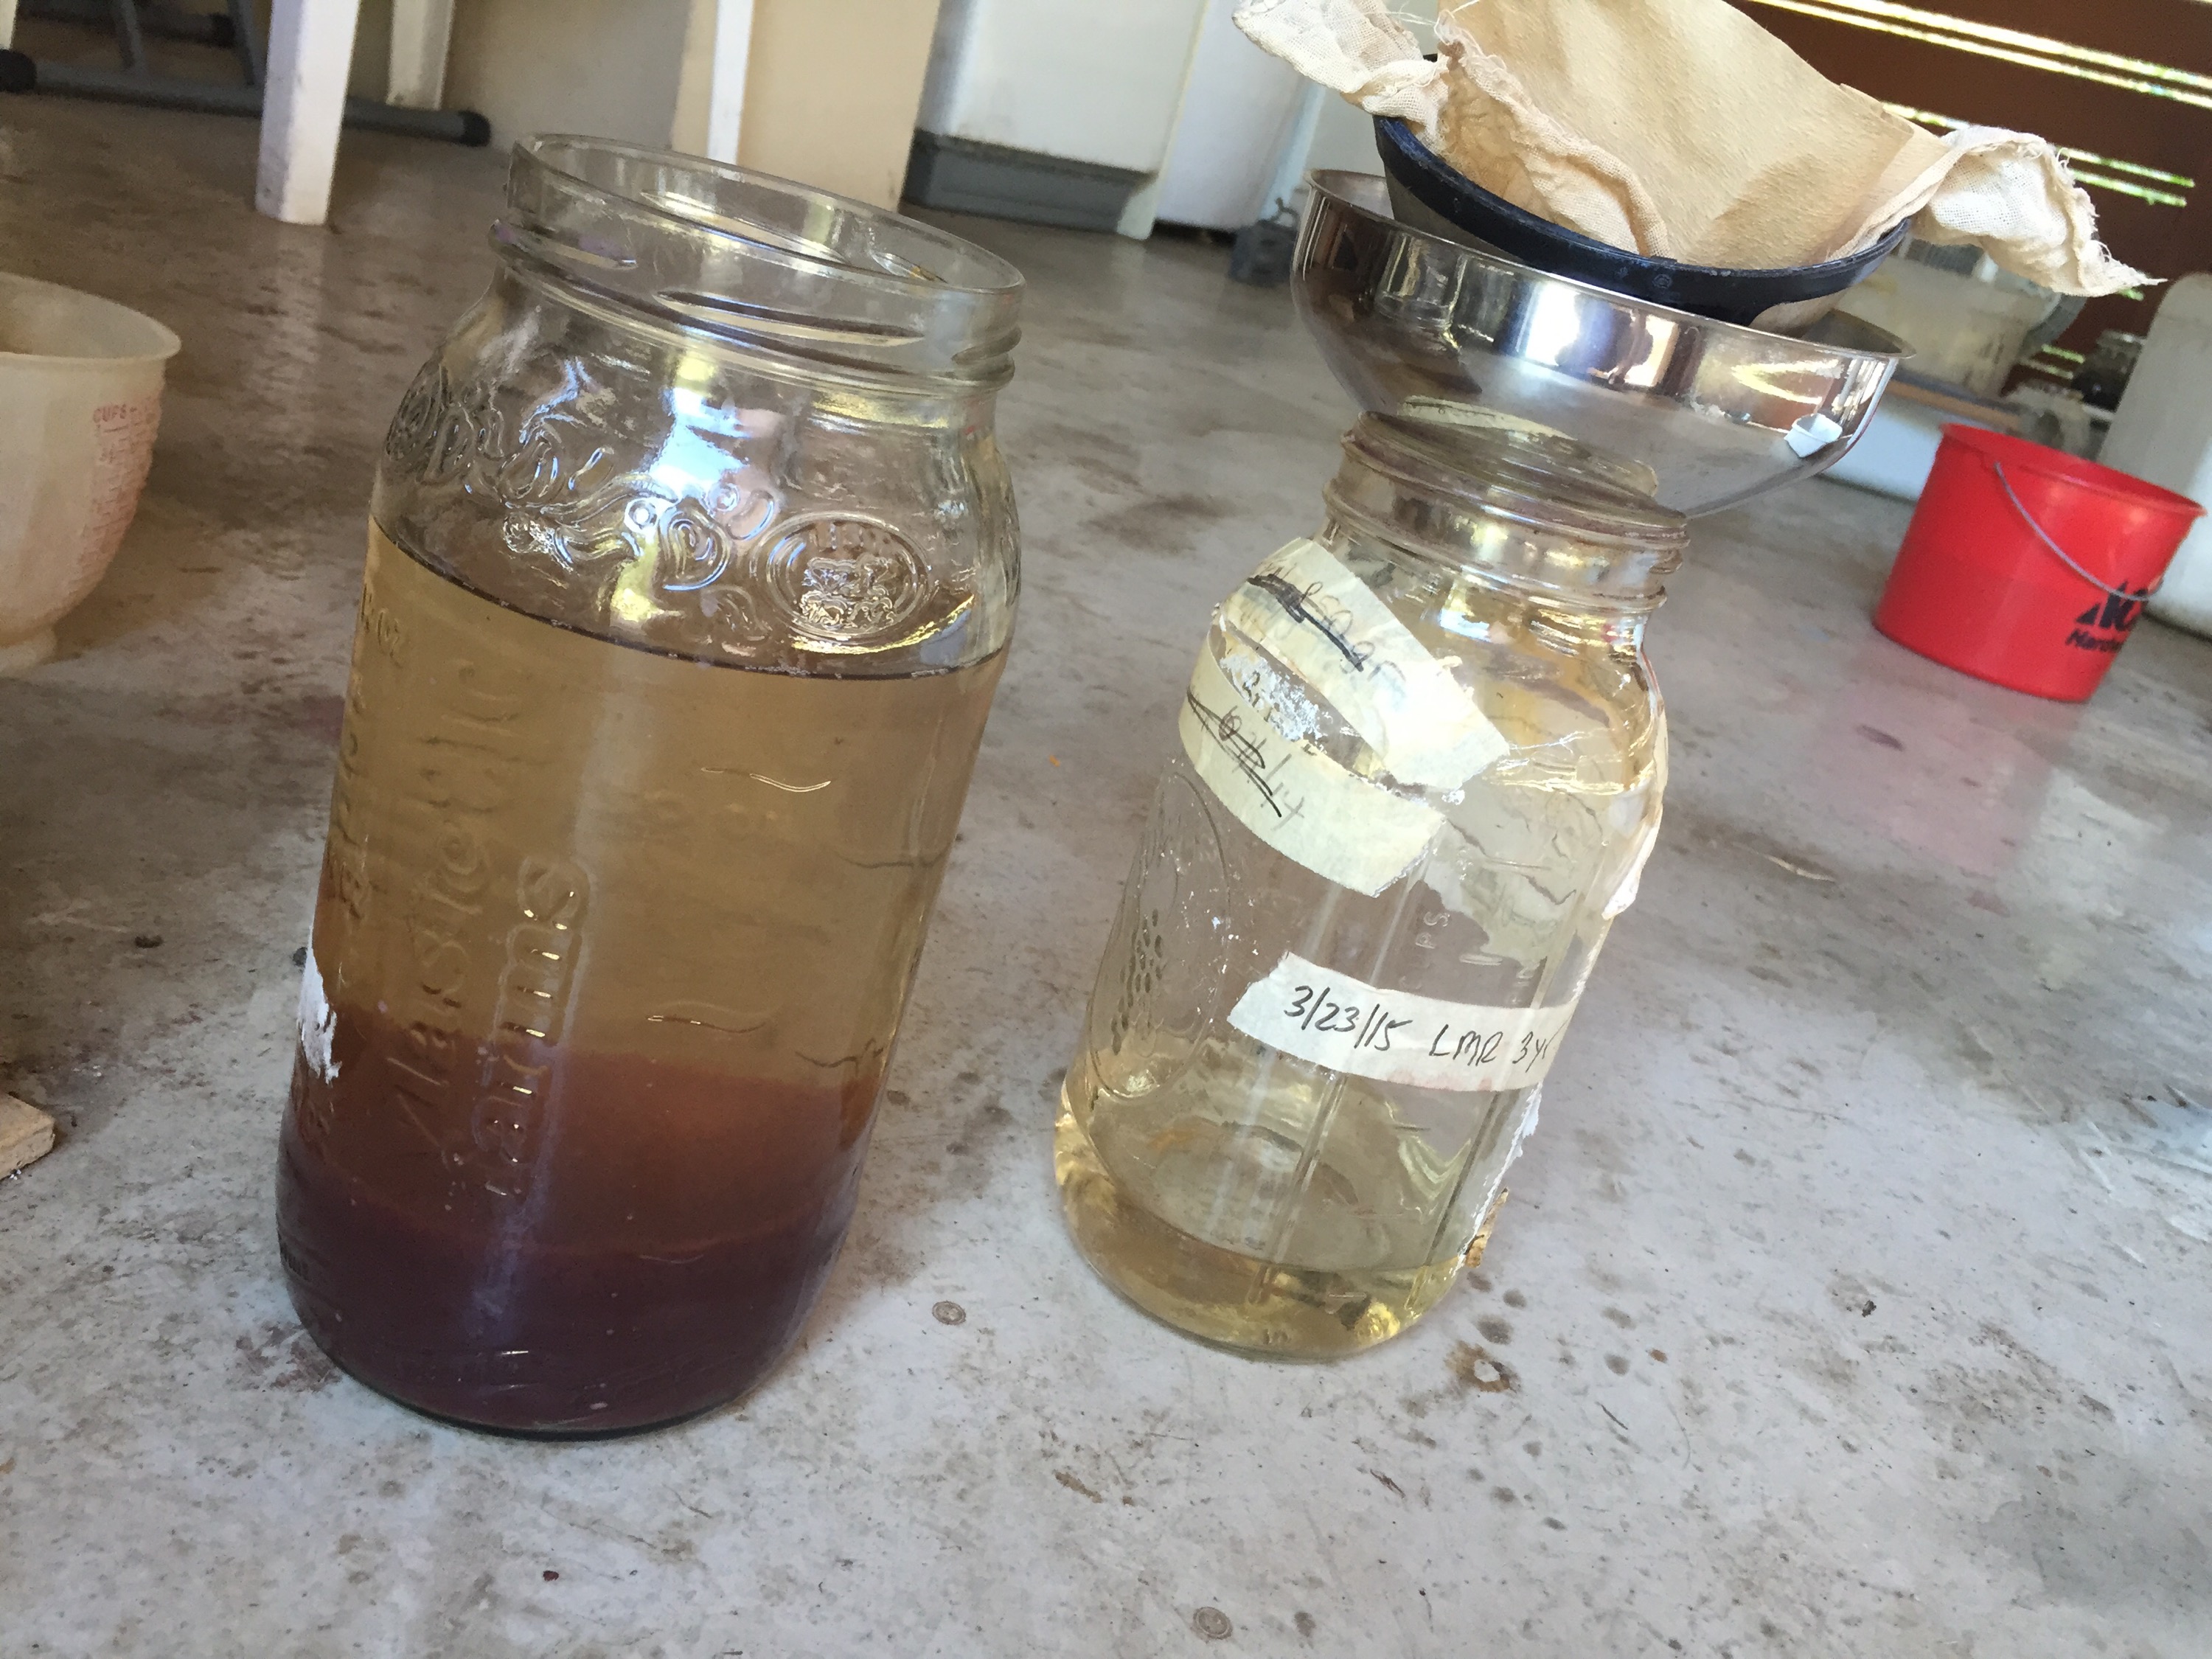
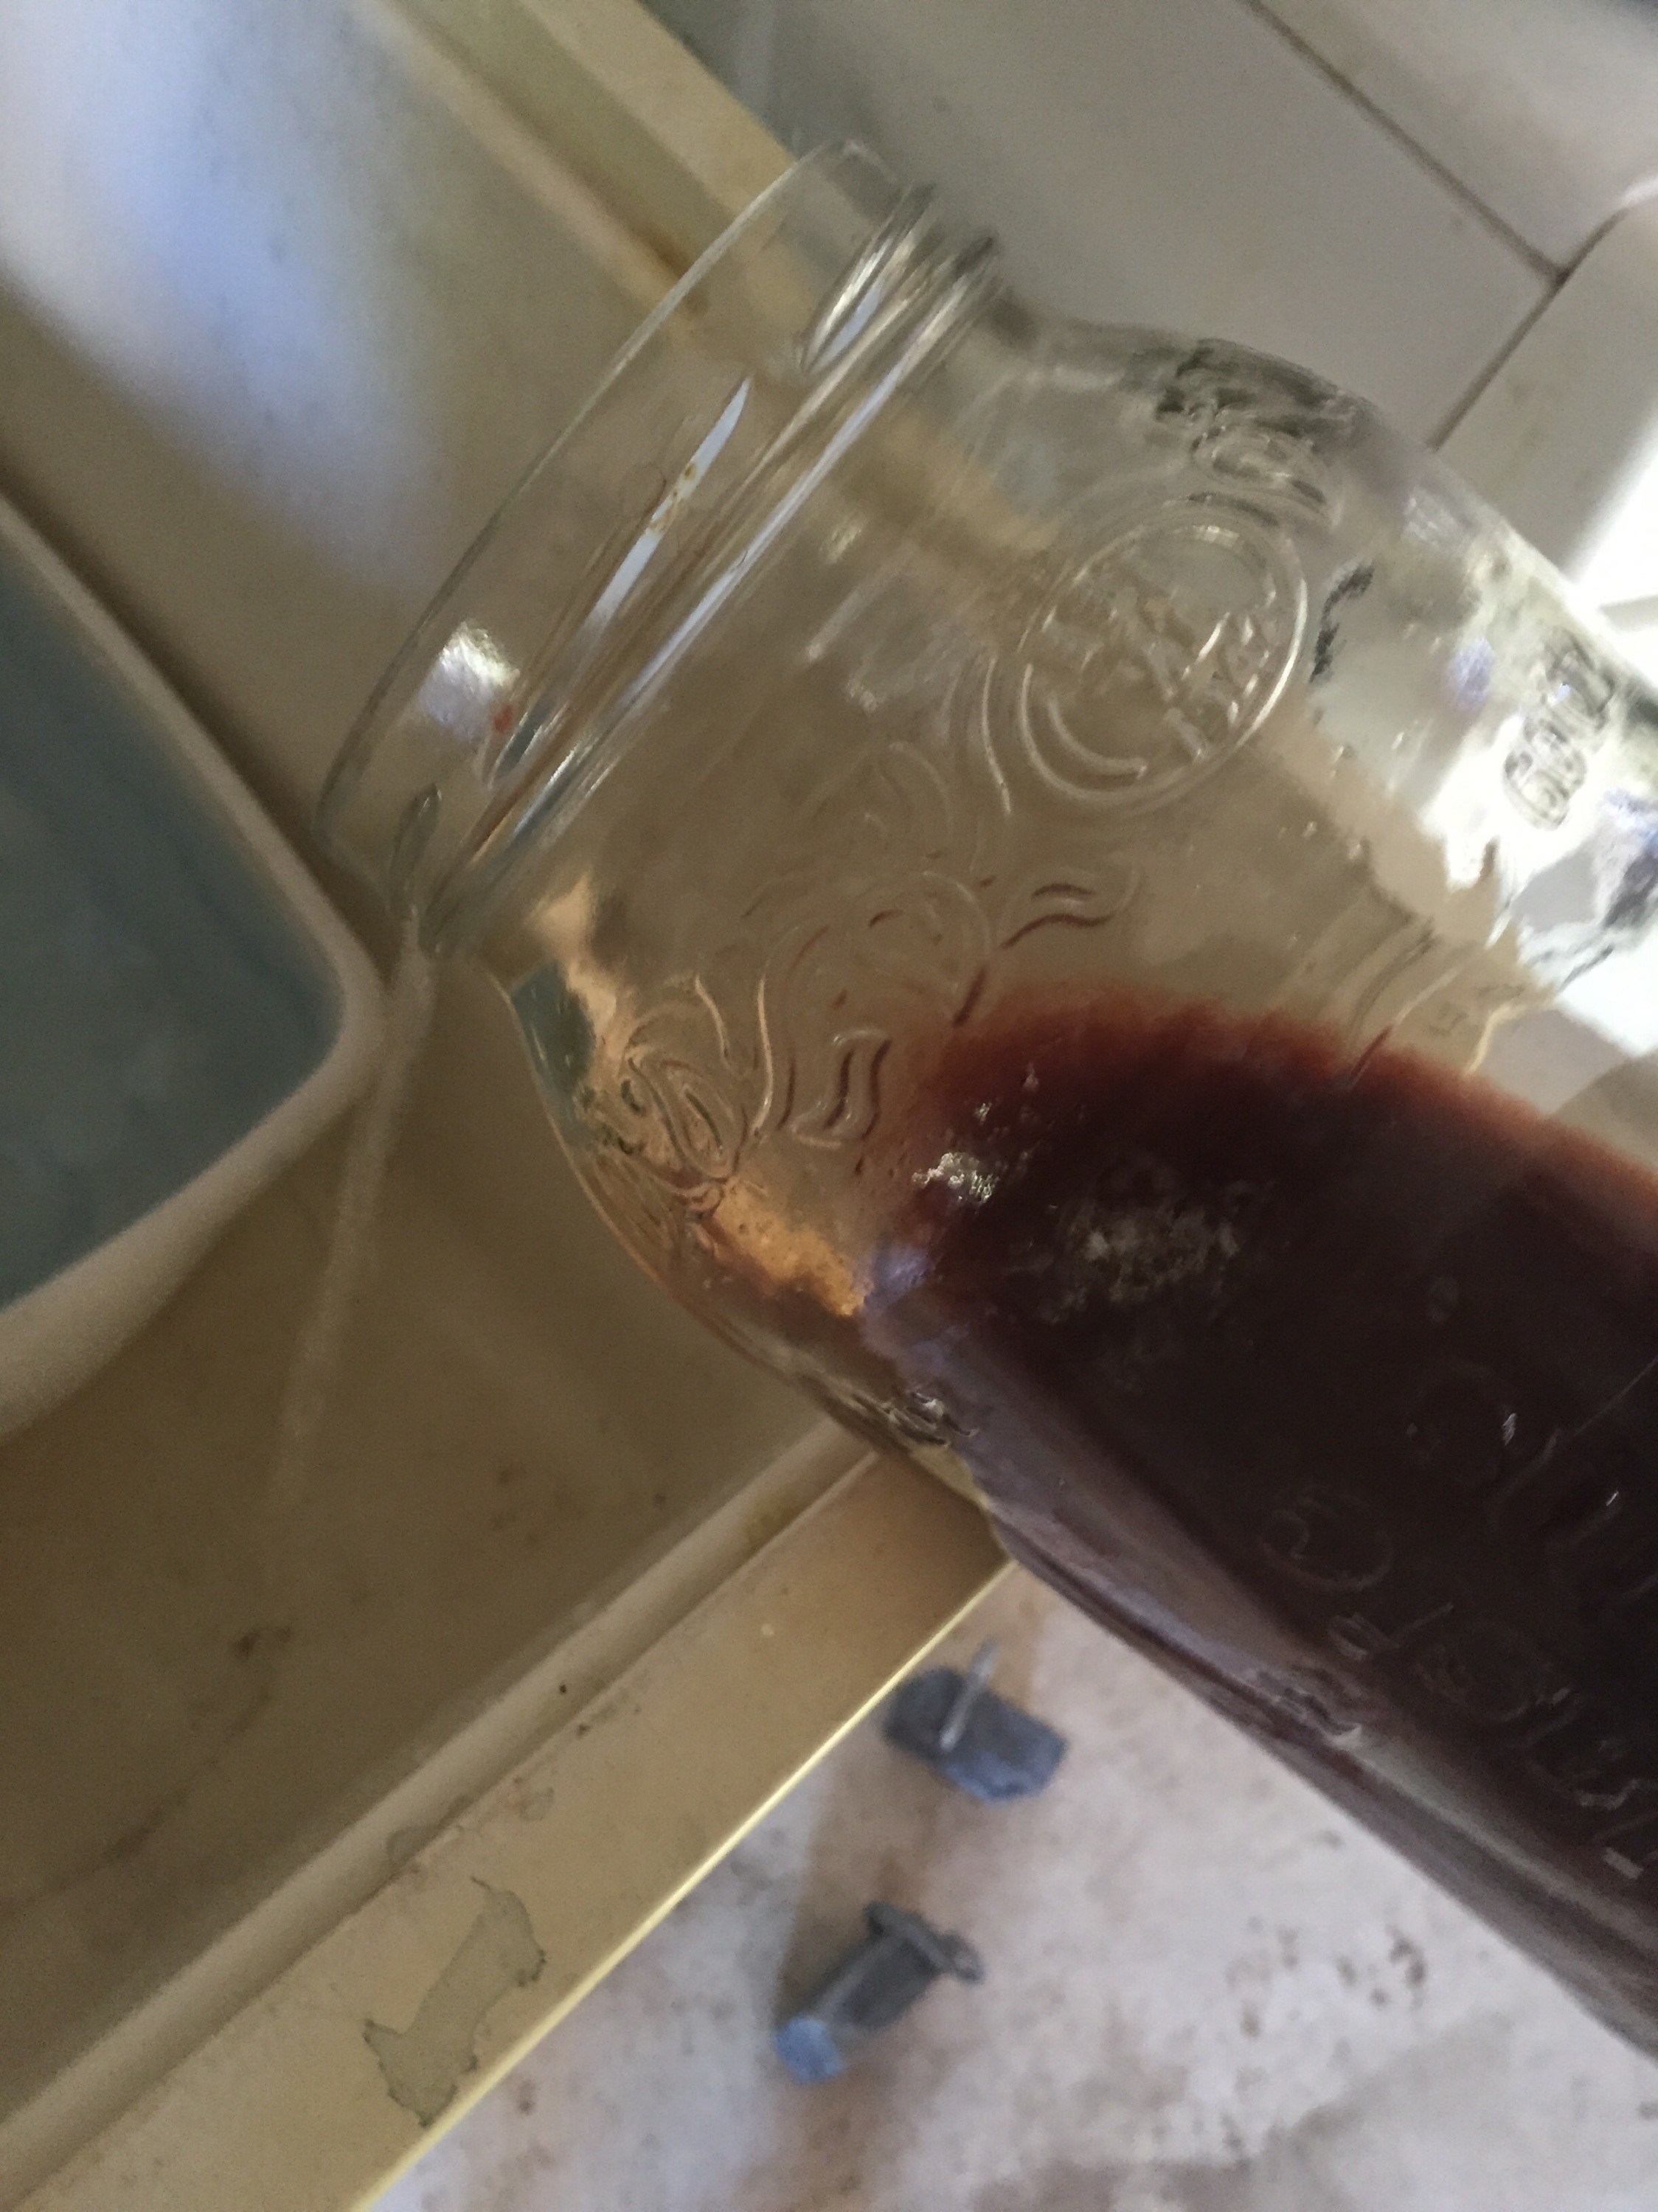 This separation process takes a few days as you “wash” your precip and refilter it again.
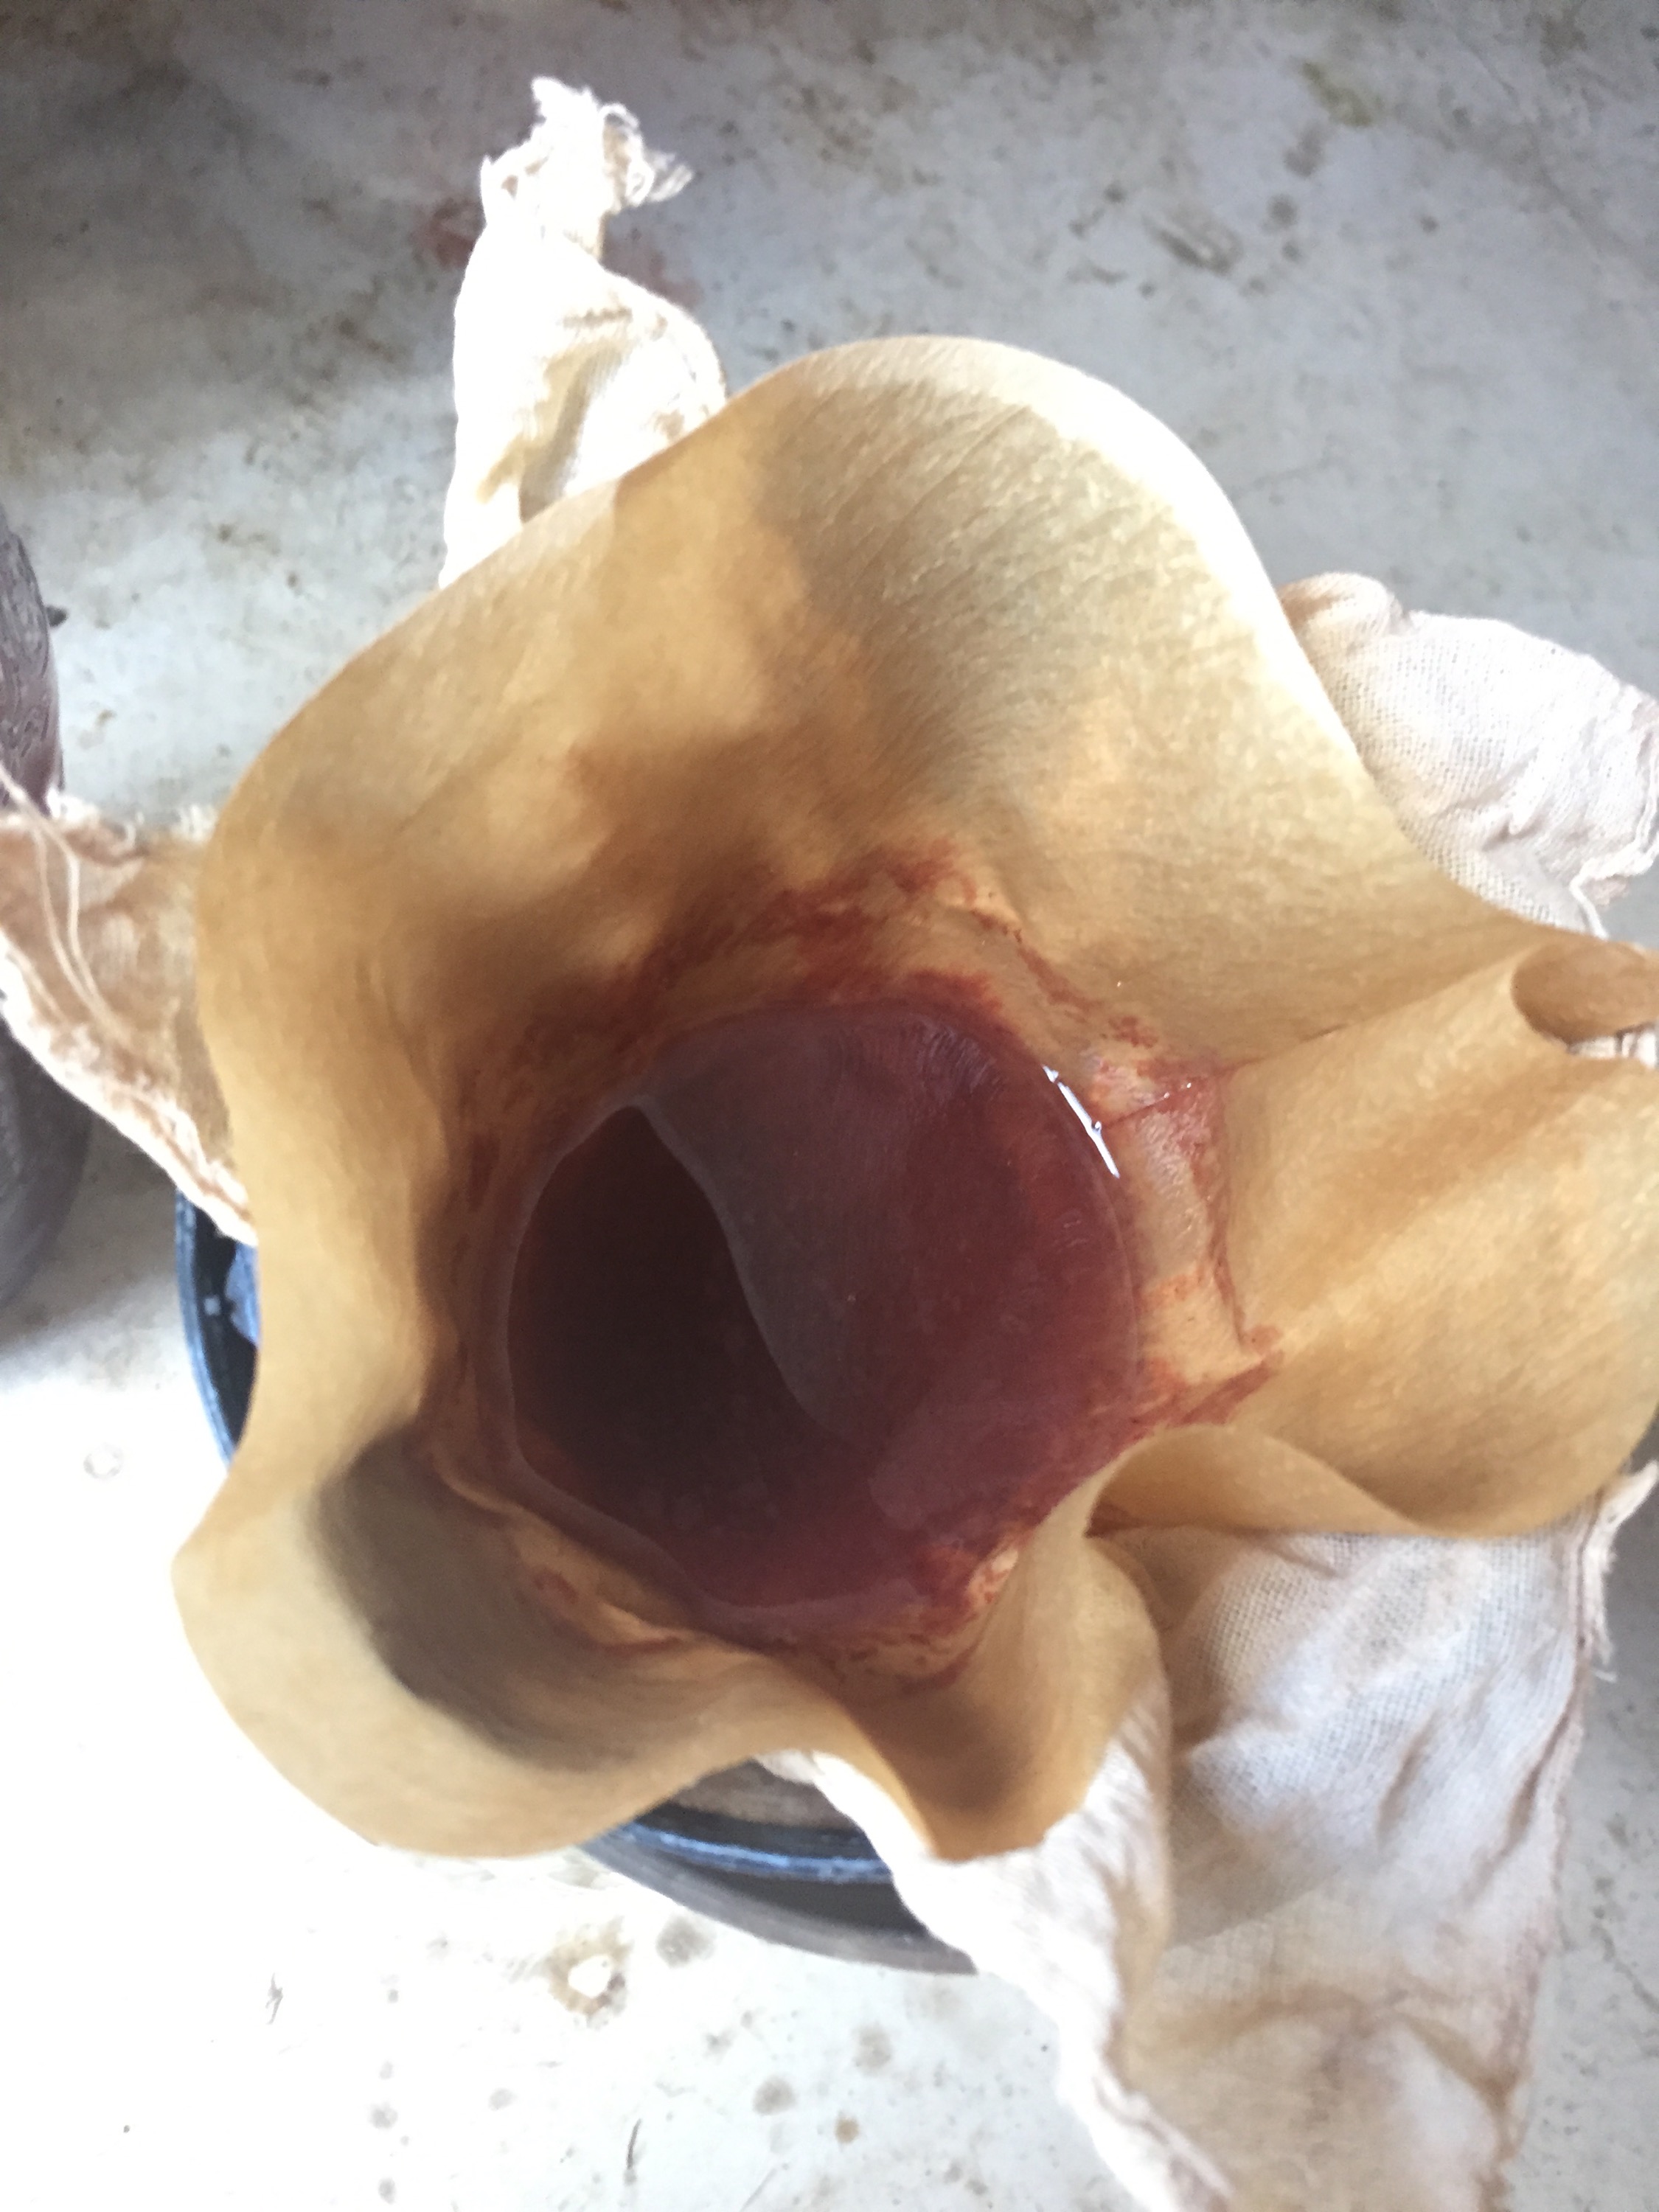 In my case I’ve used it to paint on silk scarves or on warps with soy milk. I’ve seen mention of other dyers using citric acid to use for immersion skein baths but I have not done so. And of course, painters reconstitute with linseed oil and other concoctions for painting. To each their own!
 Thanks to Glenna, Donna or Diane, one of you pointed me to this book to move further into the rabbit hole of storing pigment using this book and other class notes from Michael Garcia & Catherine Ellis. Truly a dye brain trust I am grateful to be able to access. One does tend to mutter over the dyepot and it is good to have company in the journey.

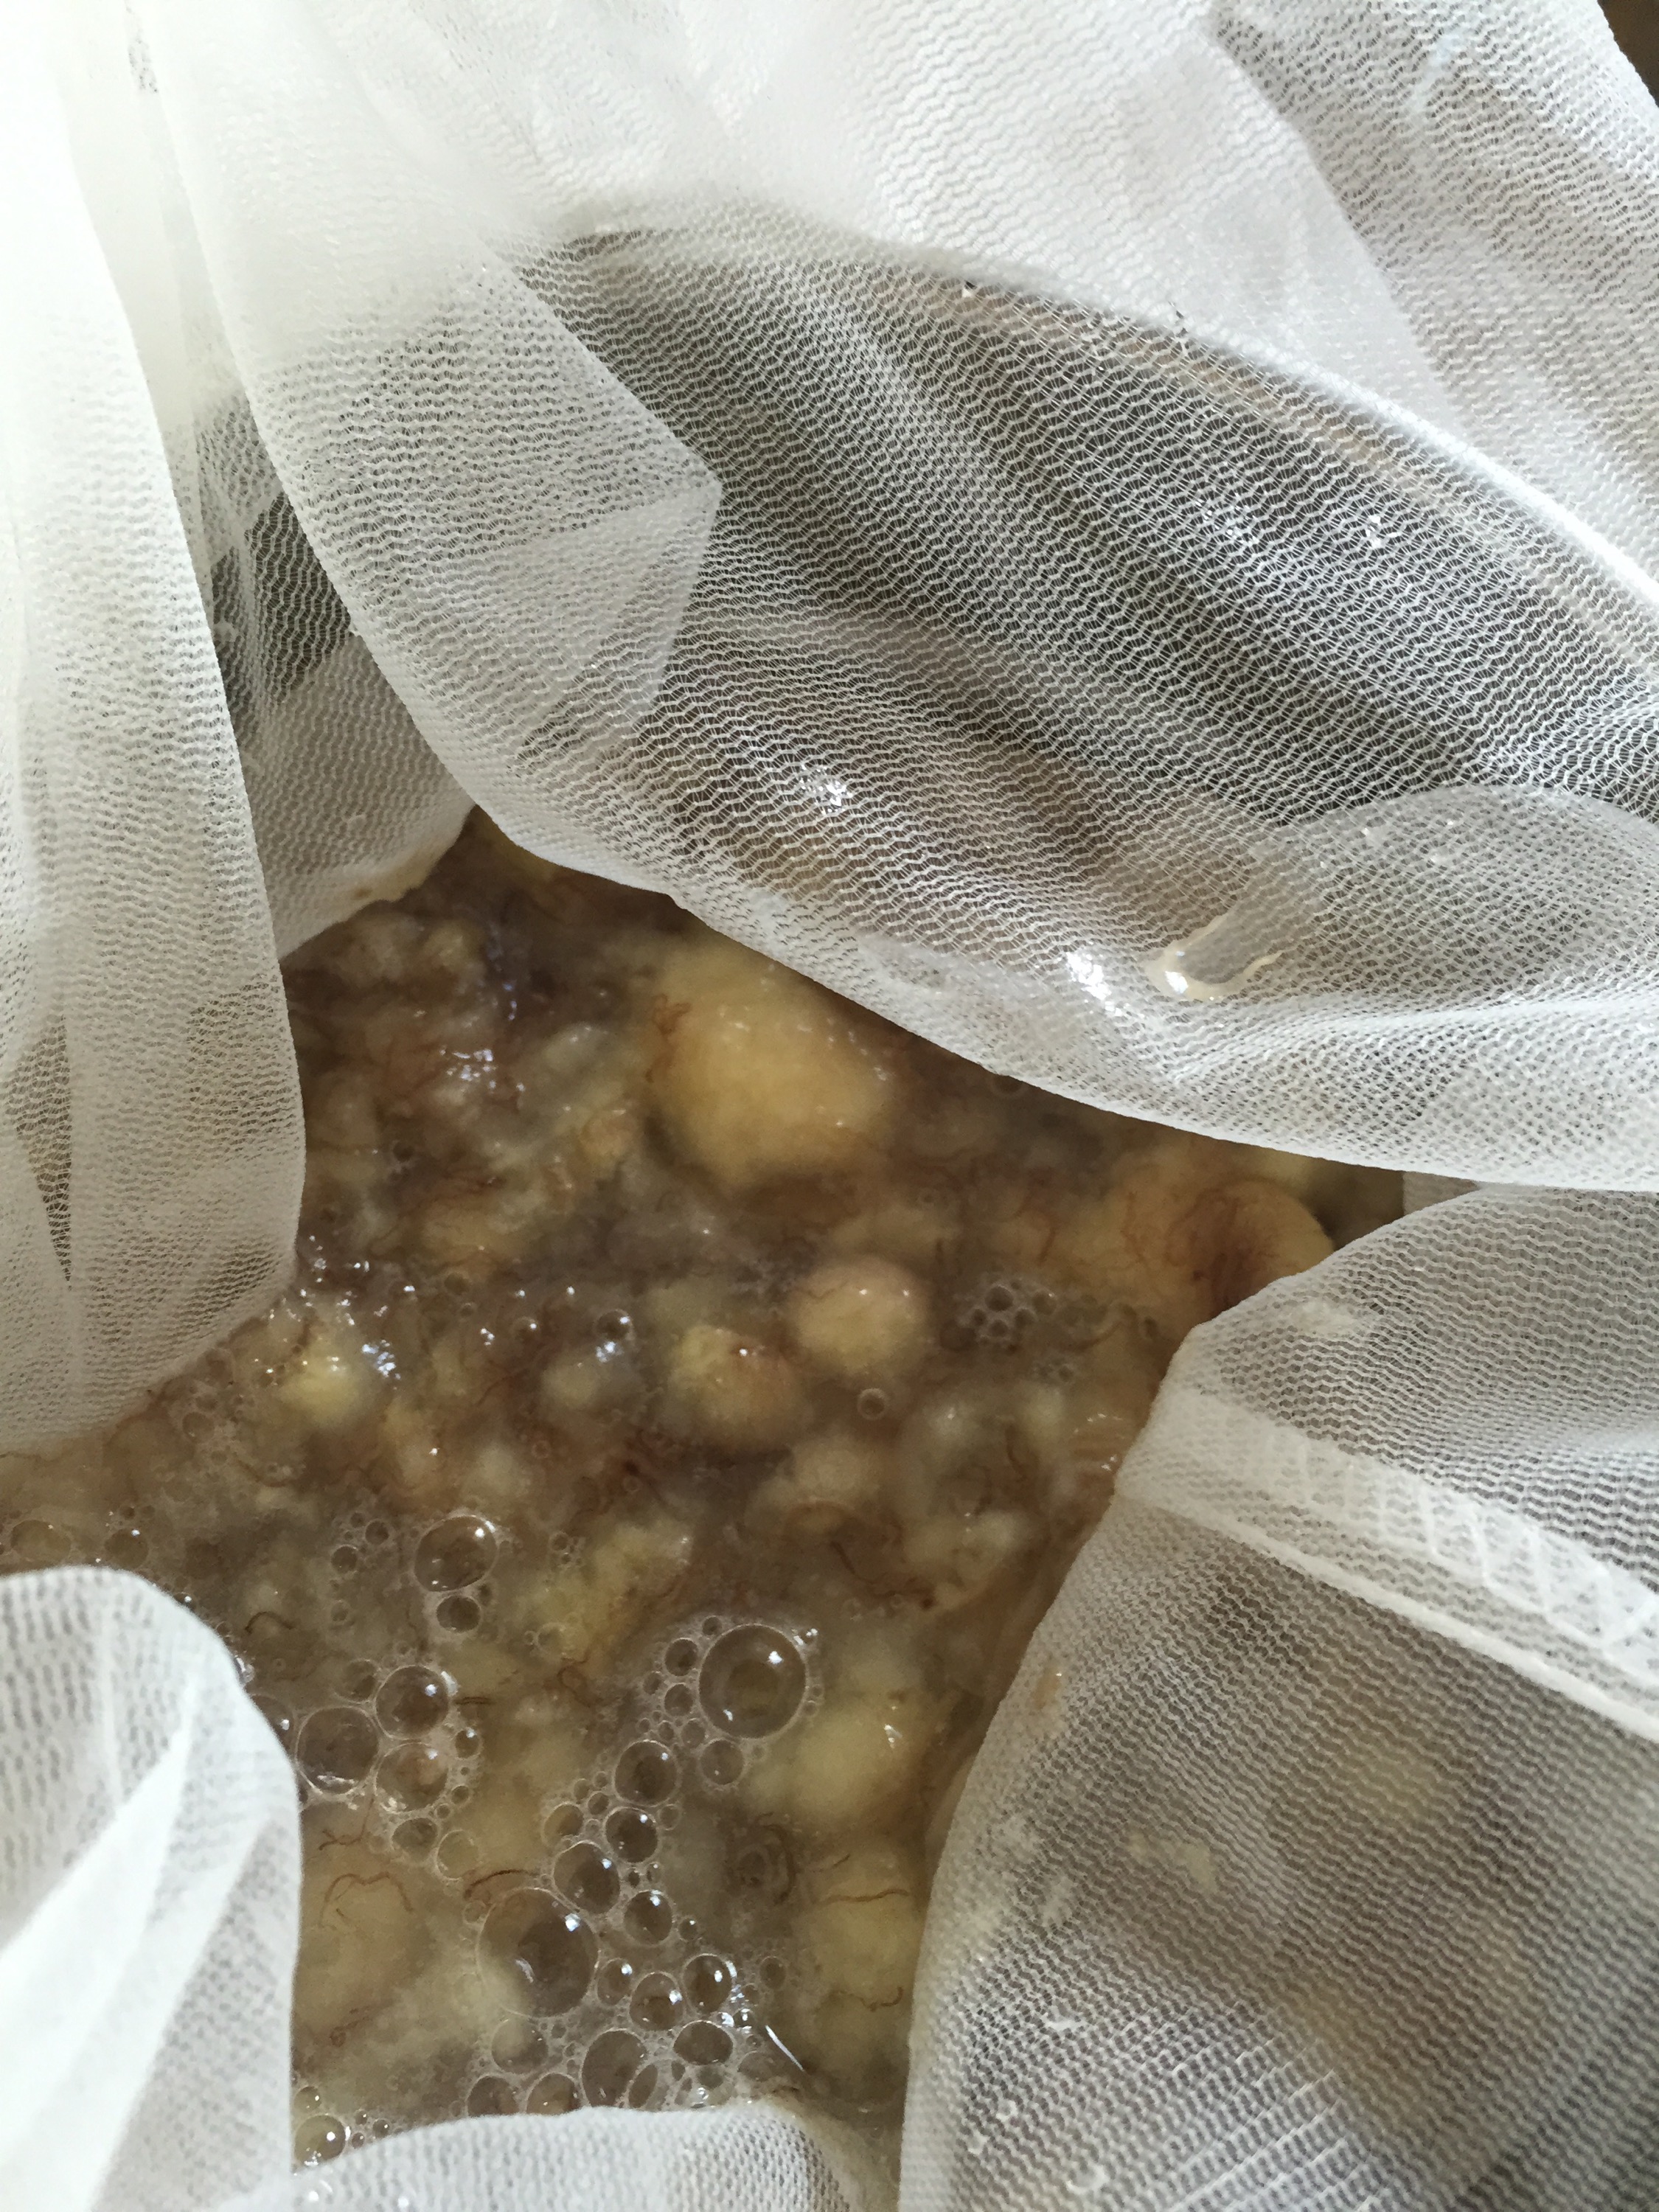
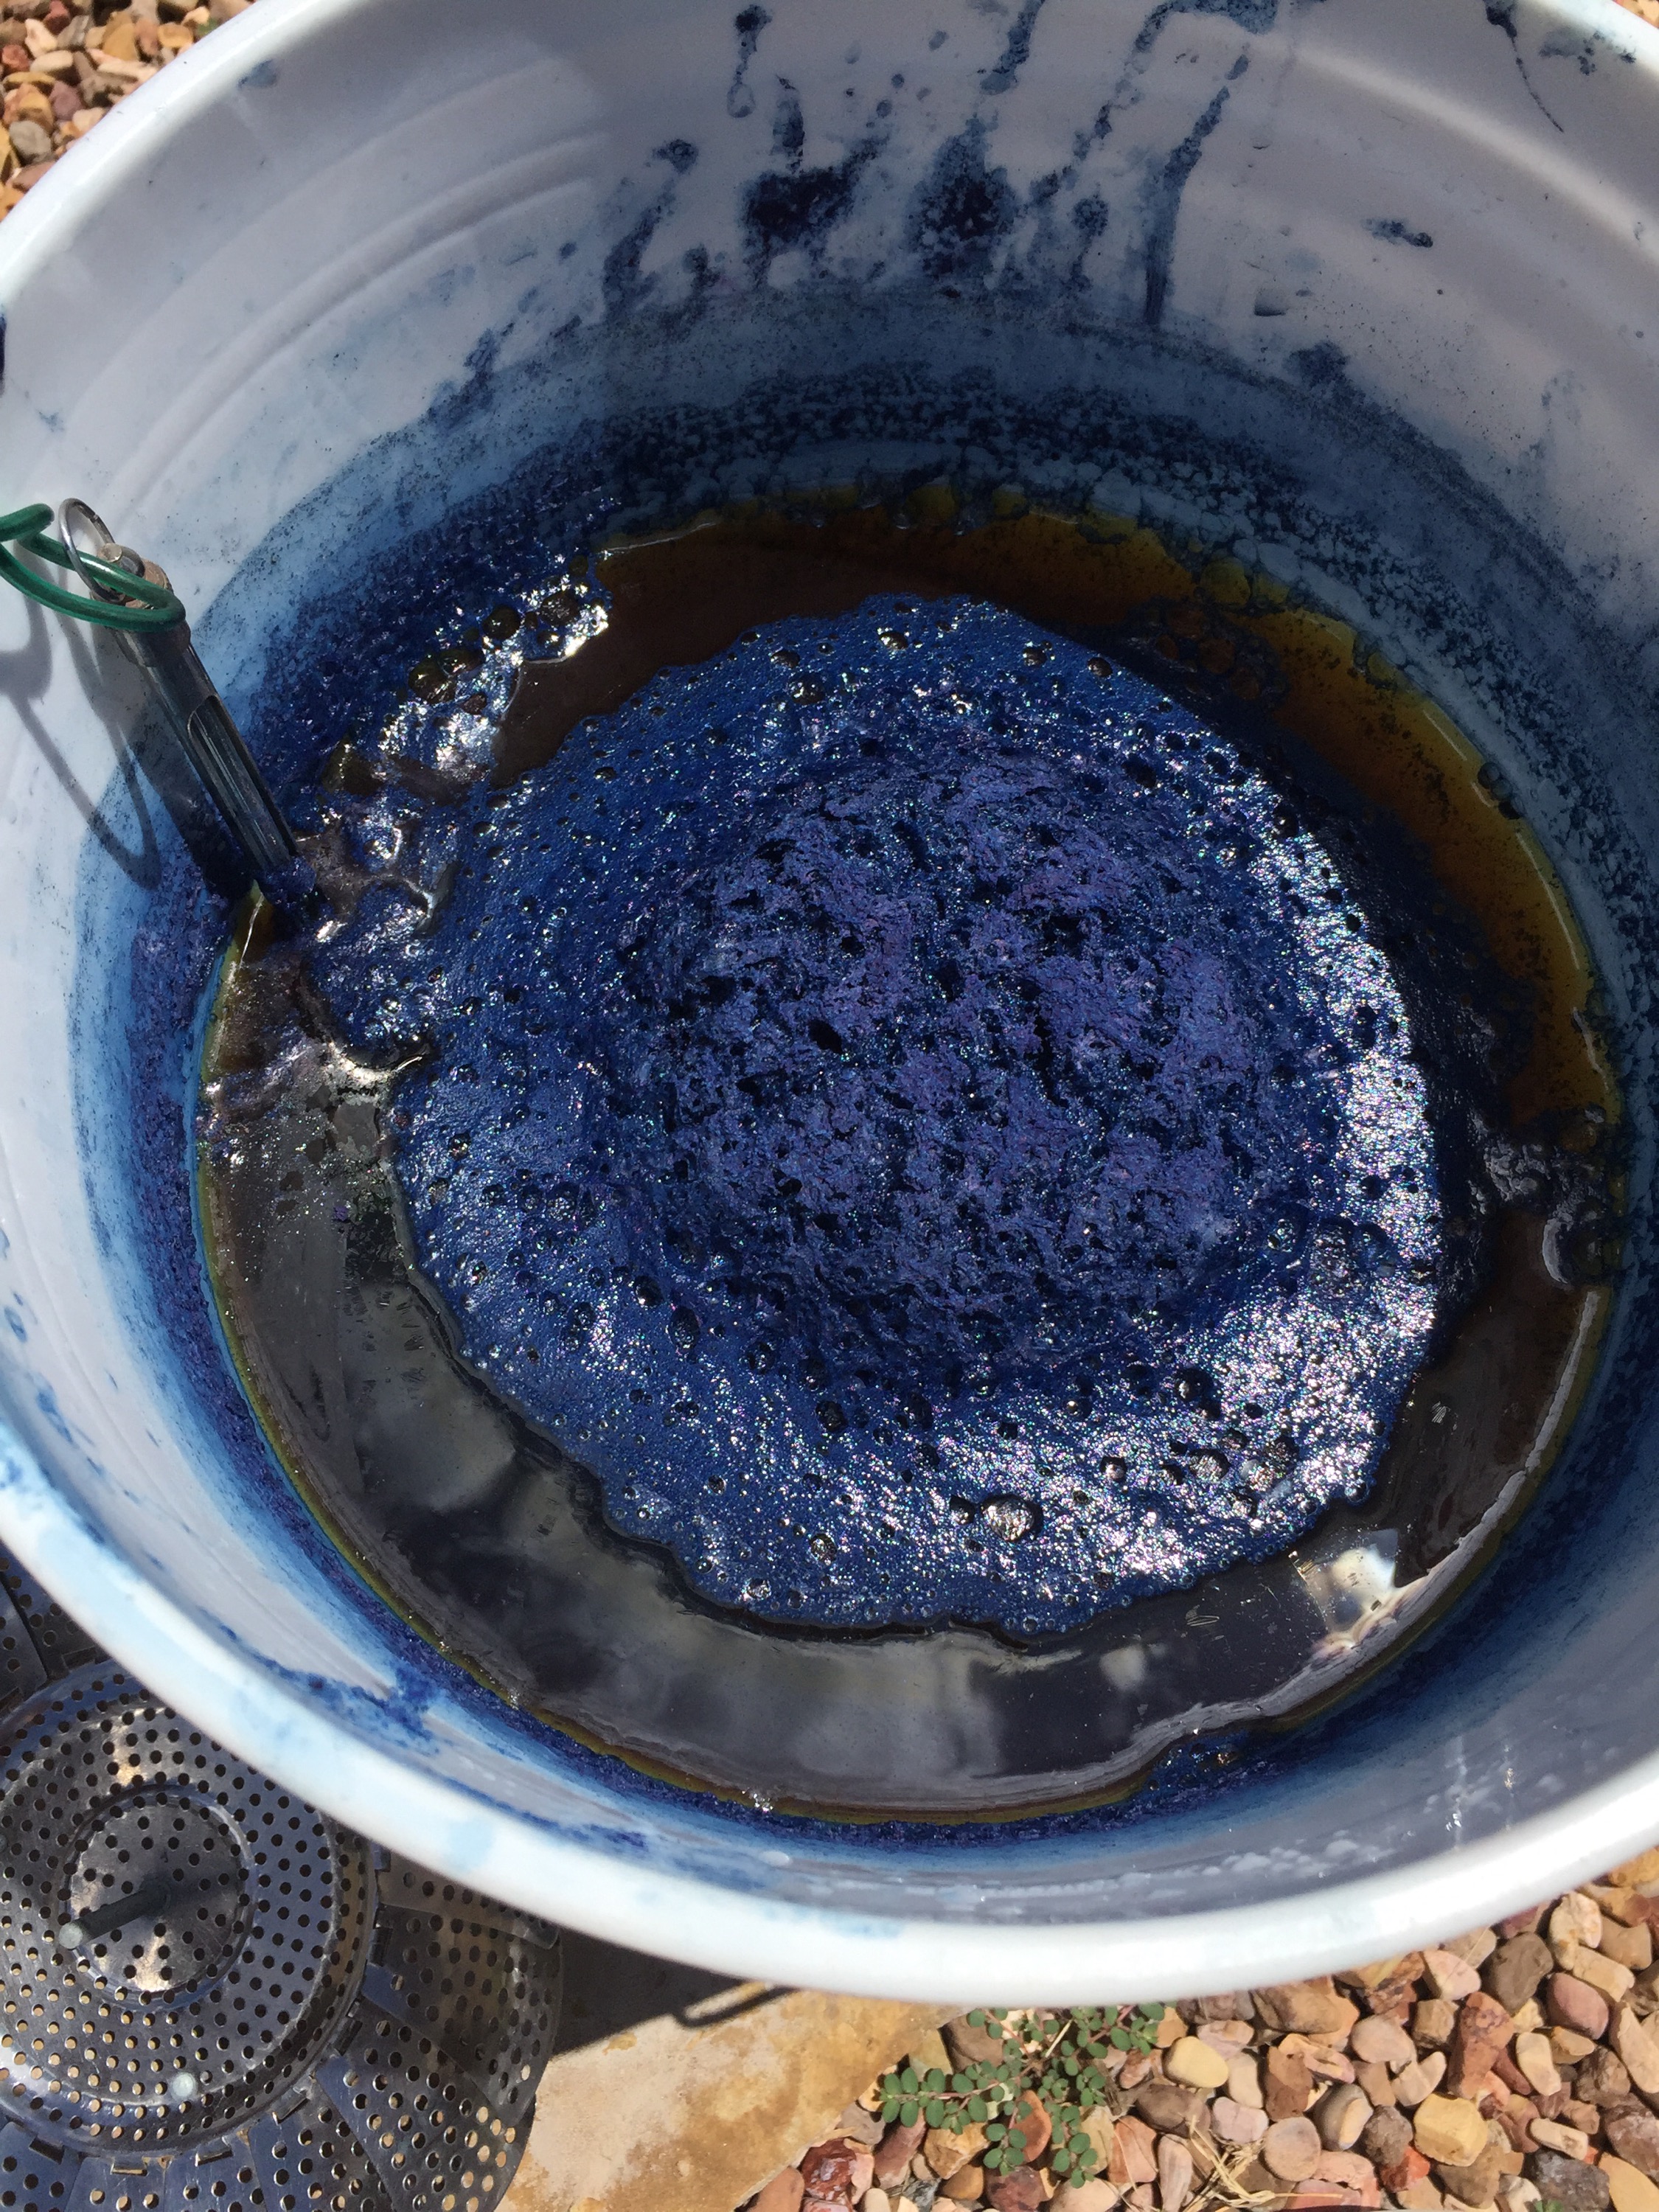
Yesterday was simmering overripe bananas and starting an indigo pot to ferment

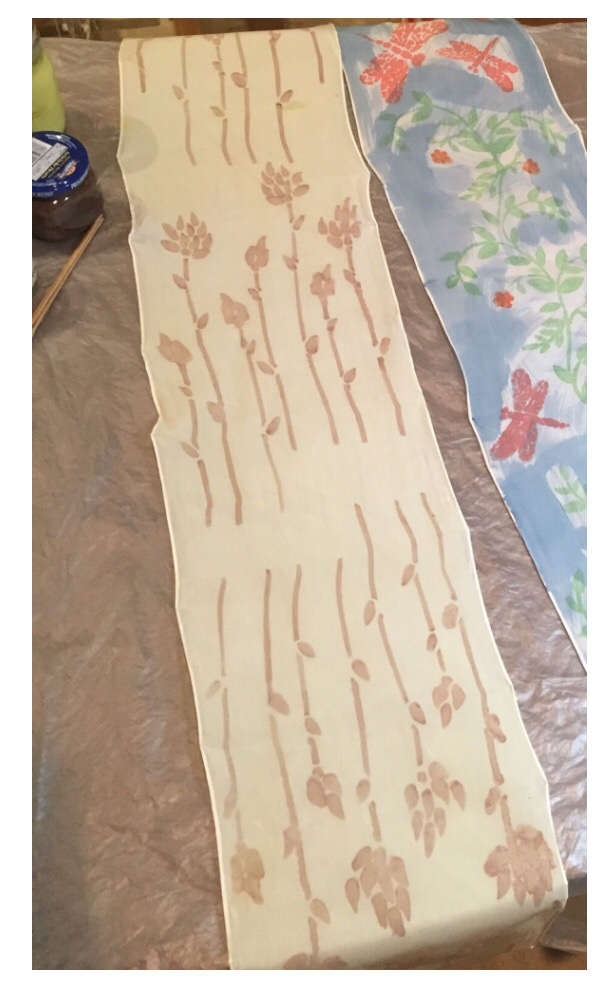
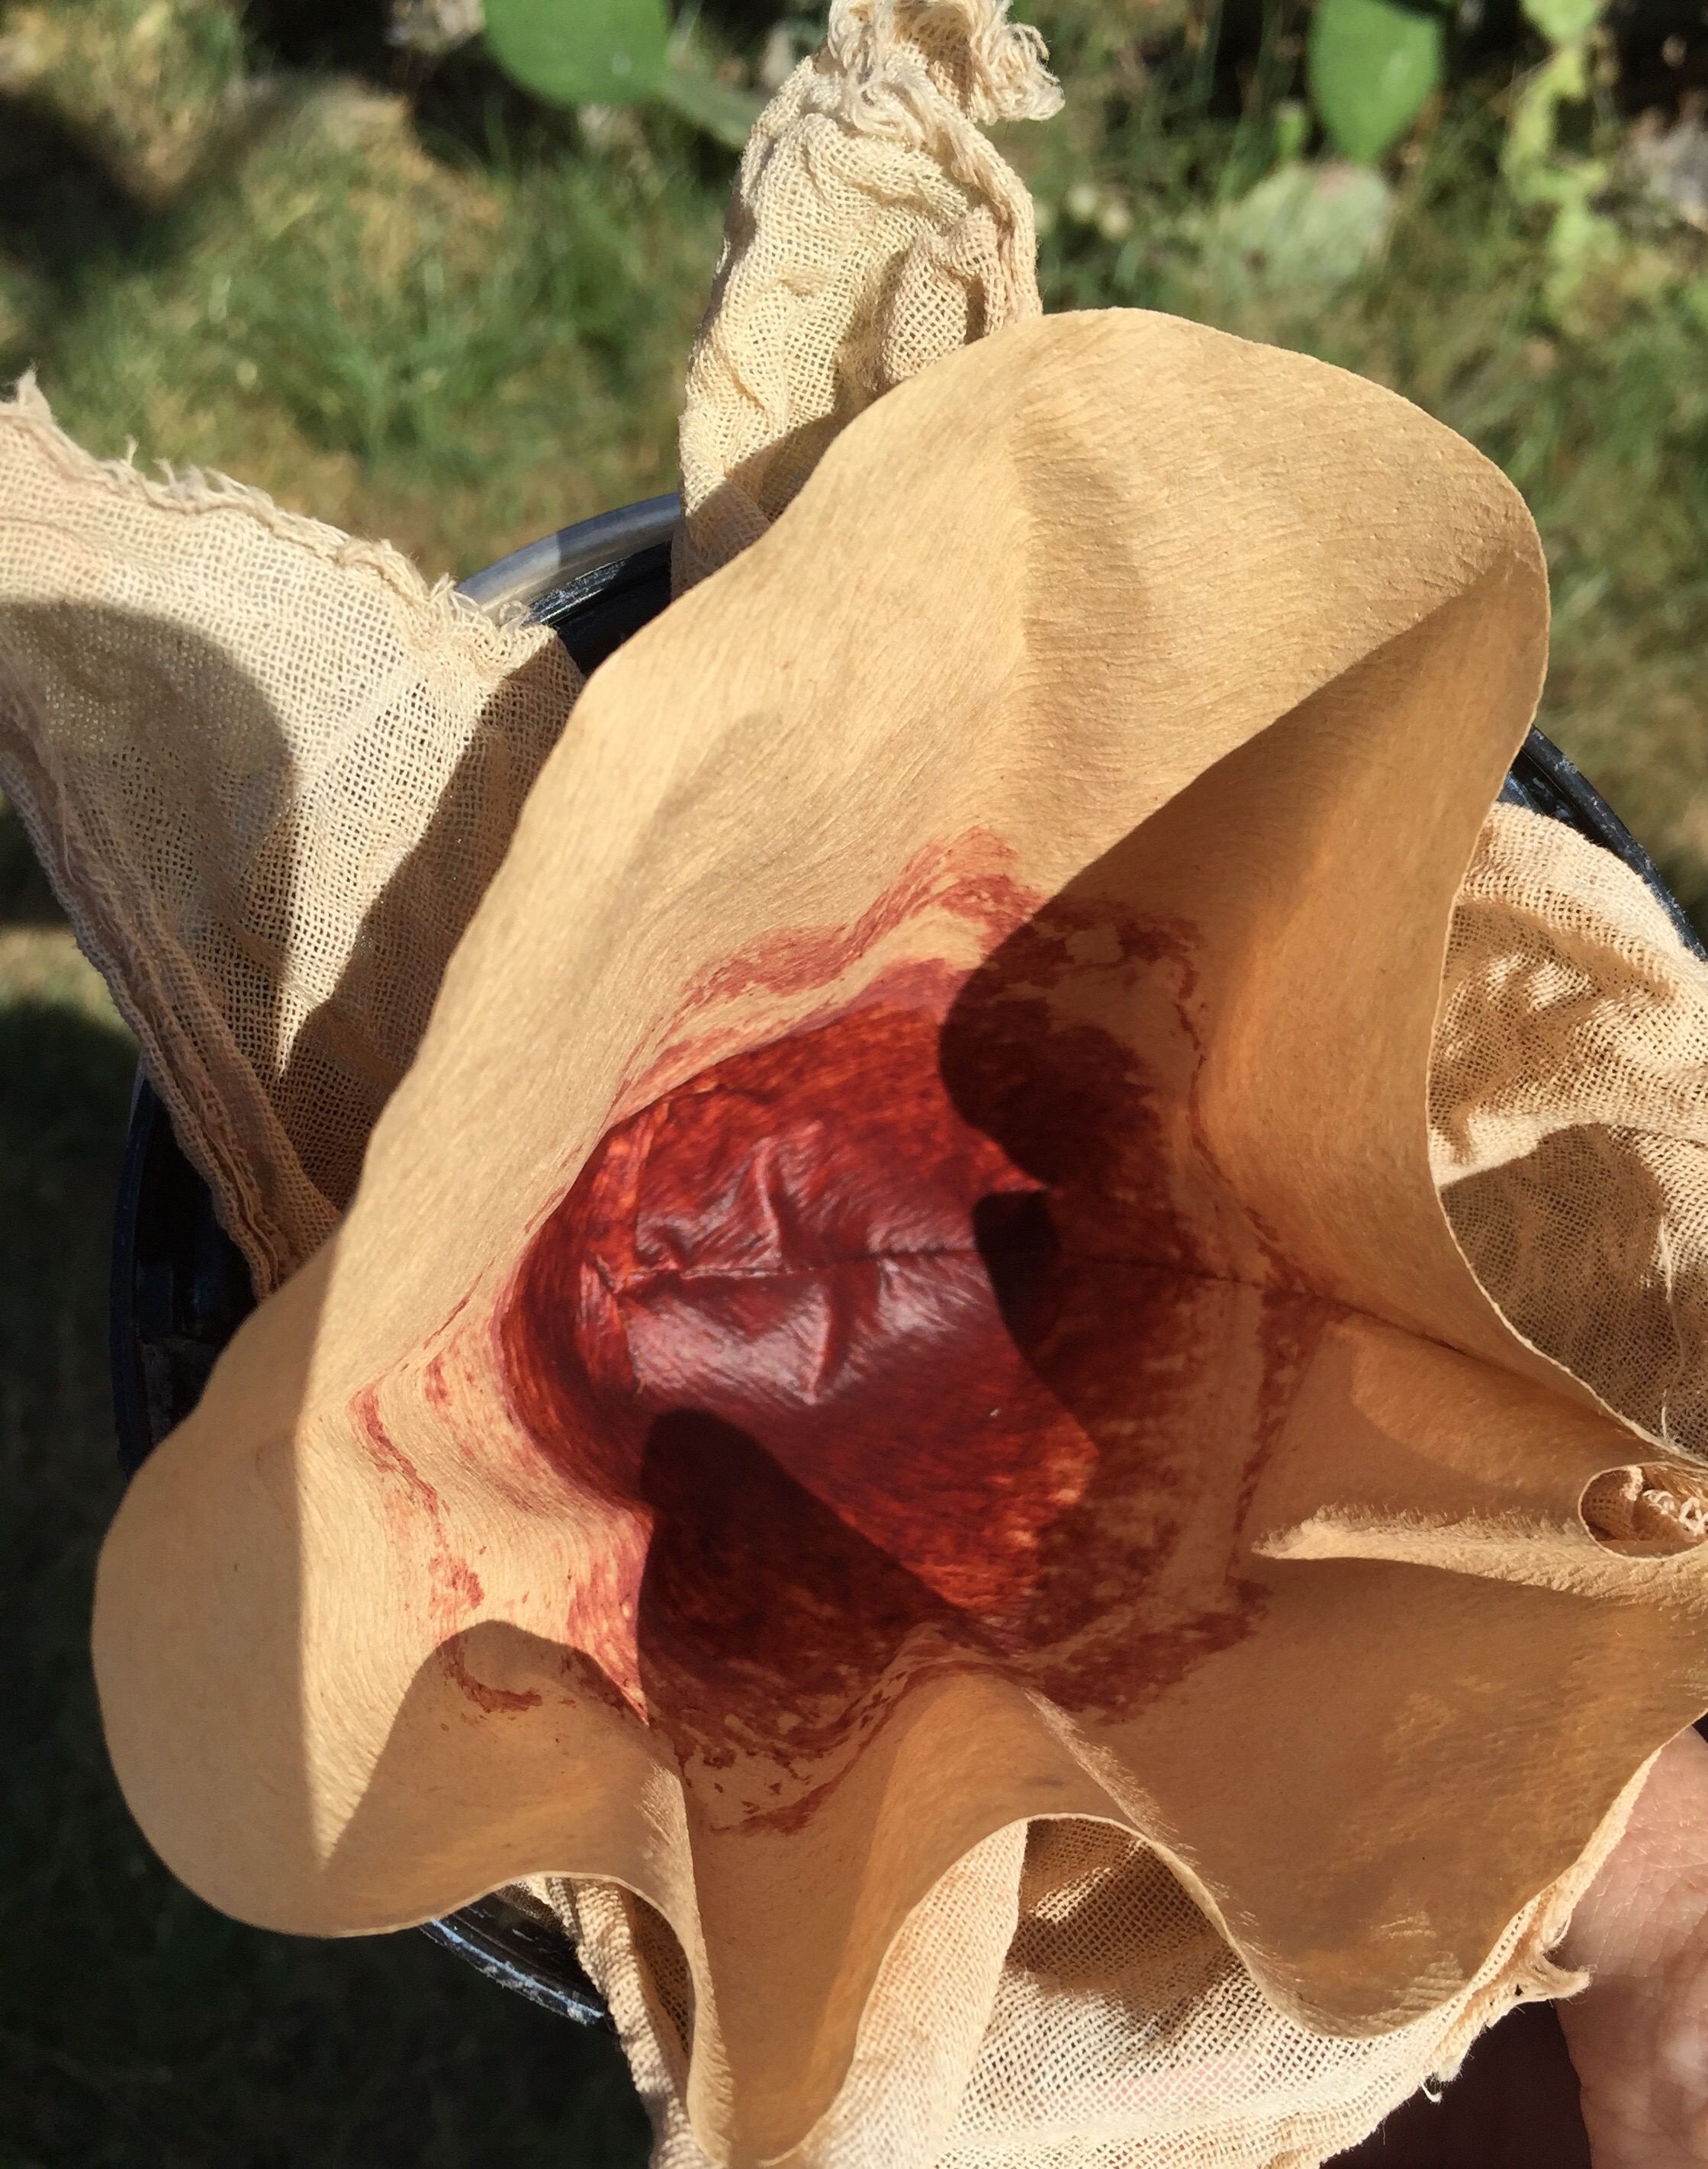
 Last week was clamping a silk scarf with a dragonfly fold and dipping in pomegranate given to me by a dye buddy.
 Today was checking the indigo pot for bloom & color & dipping some skeins to see how the banana sugar juice worked.
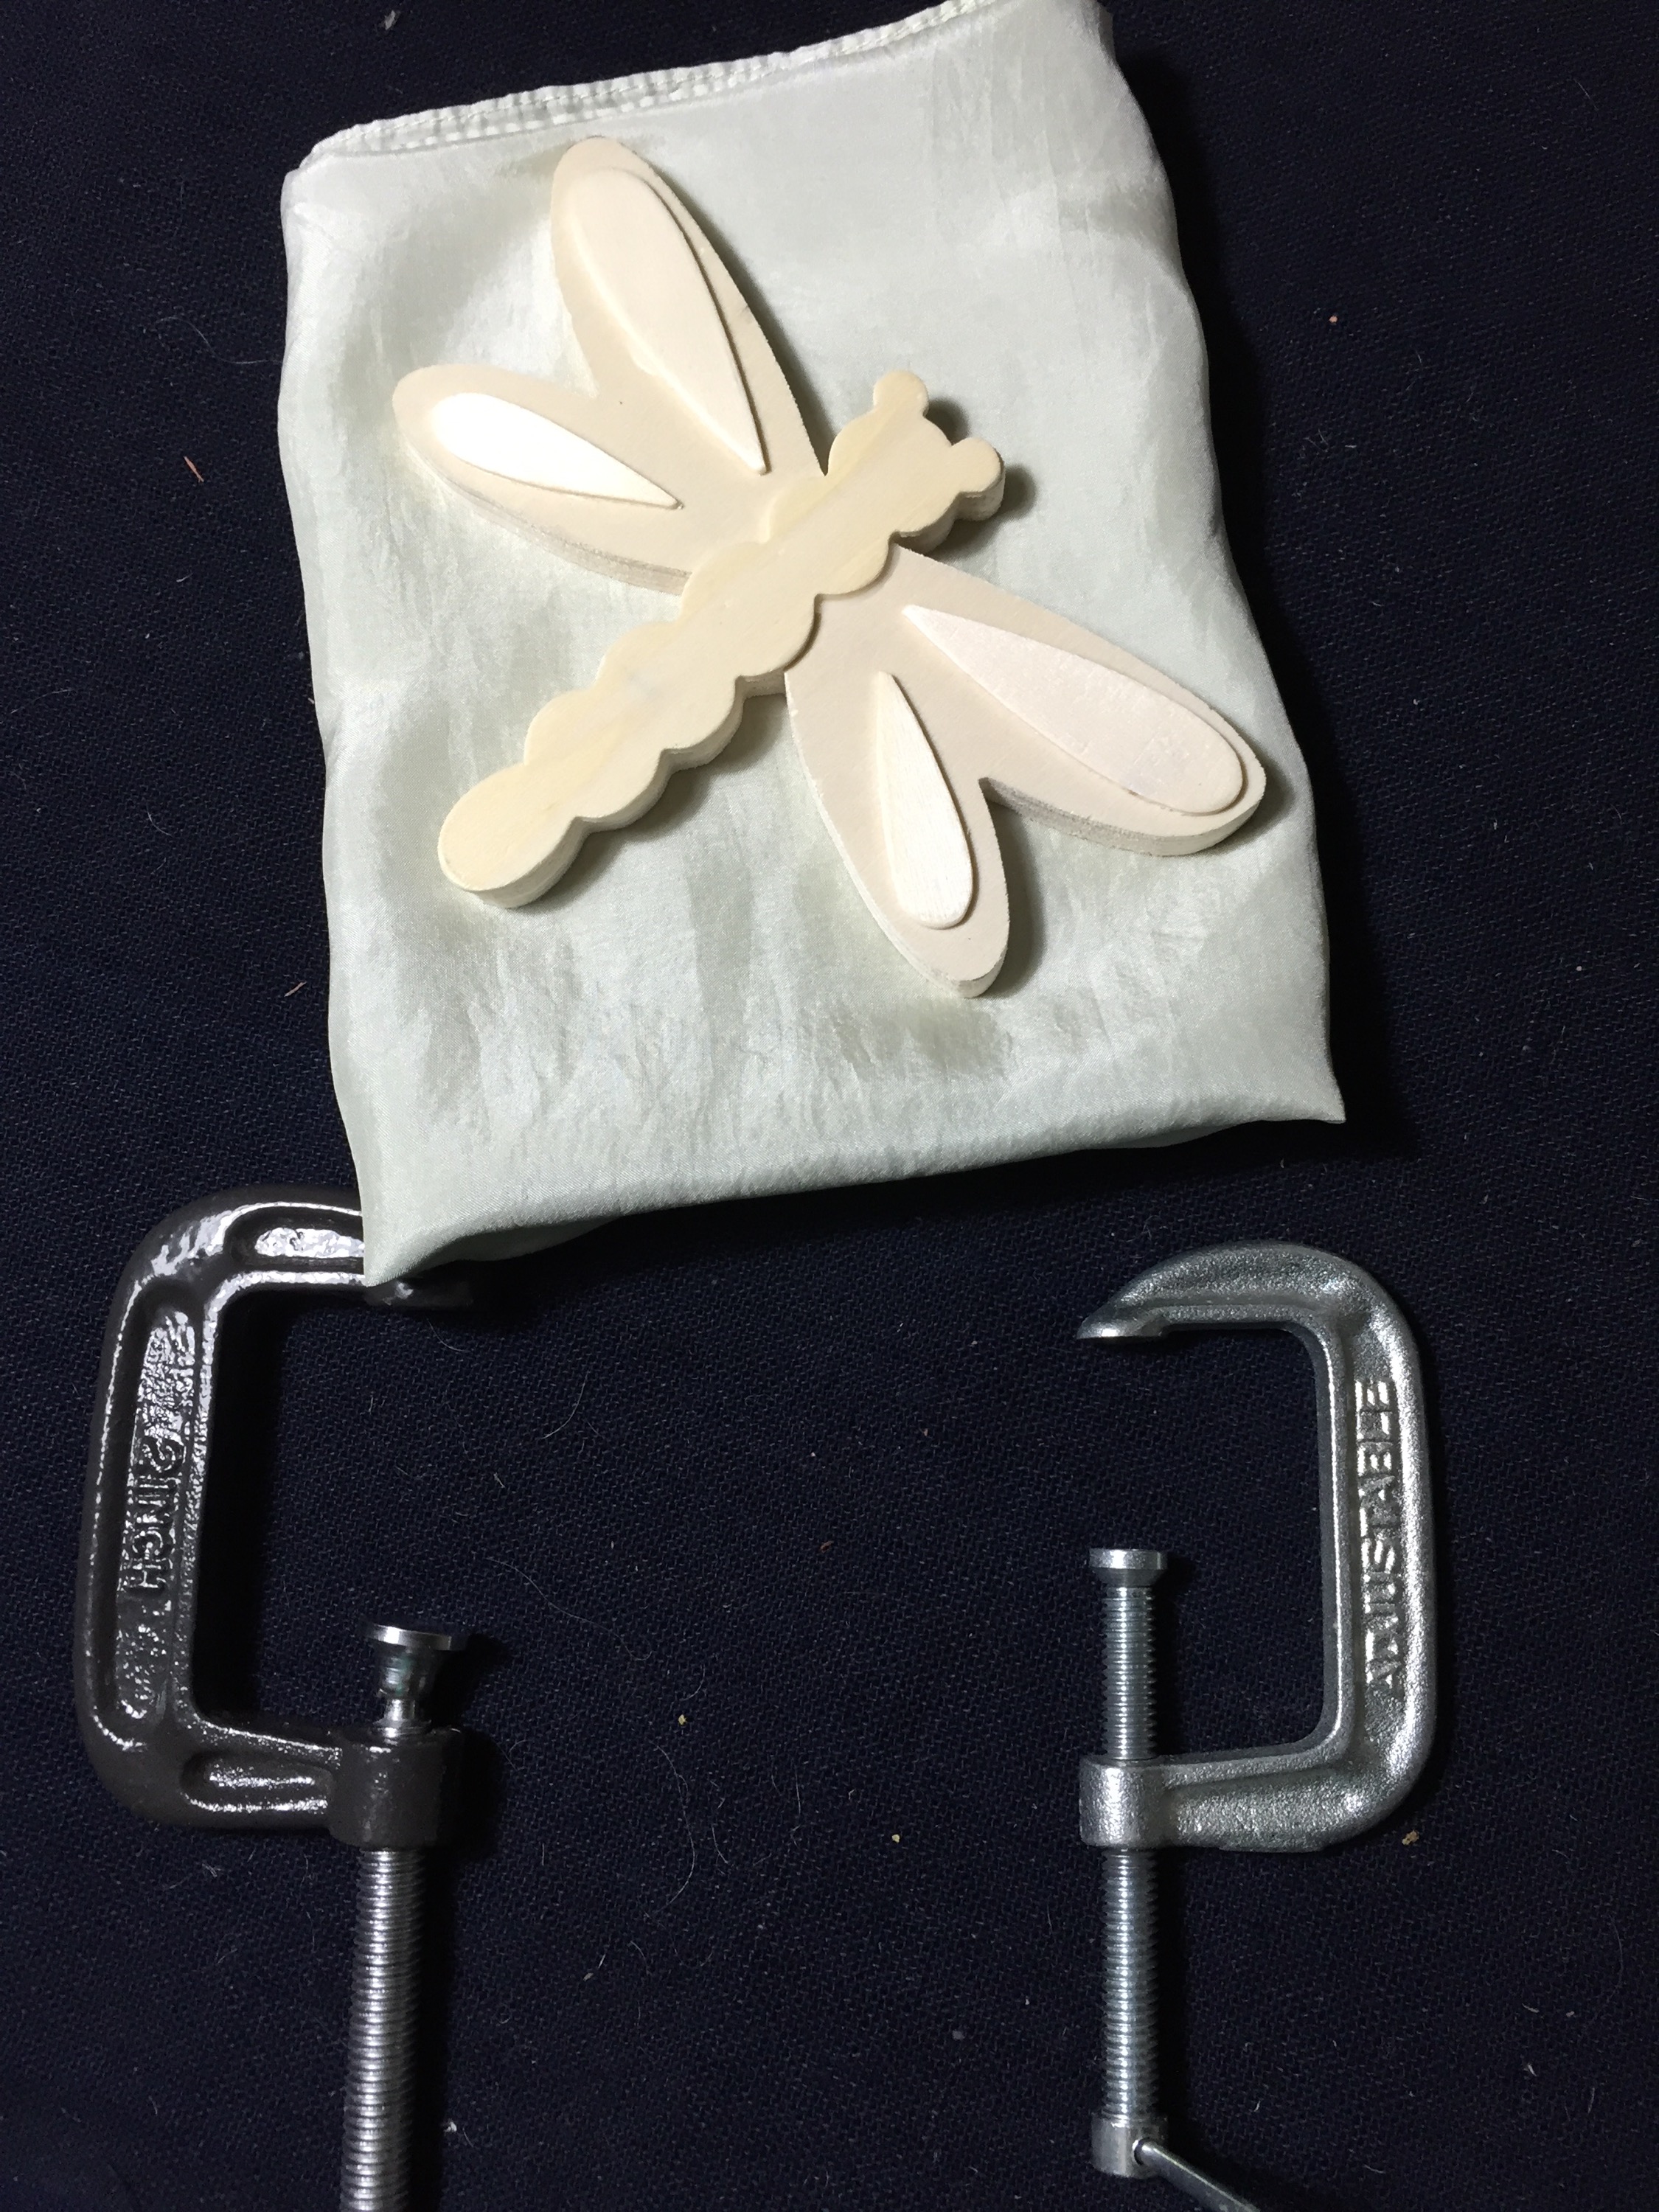
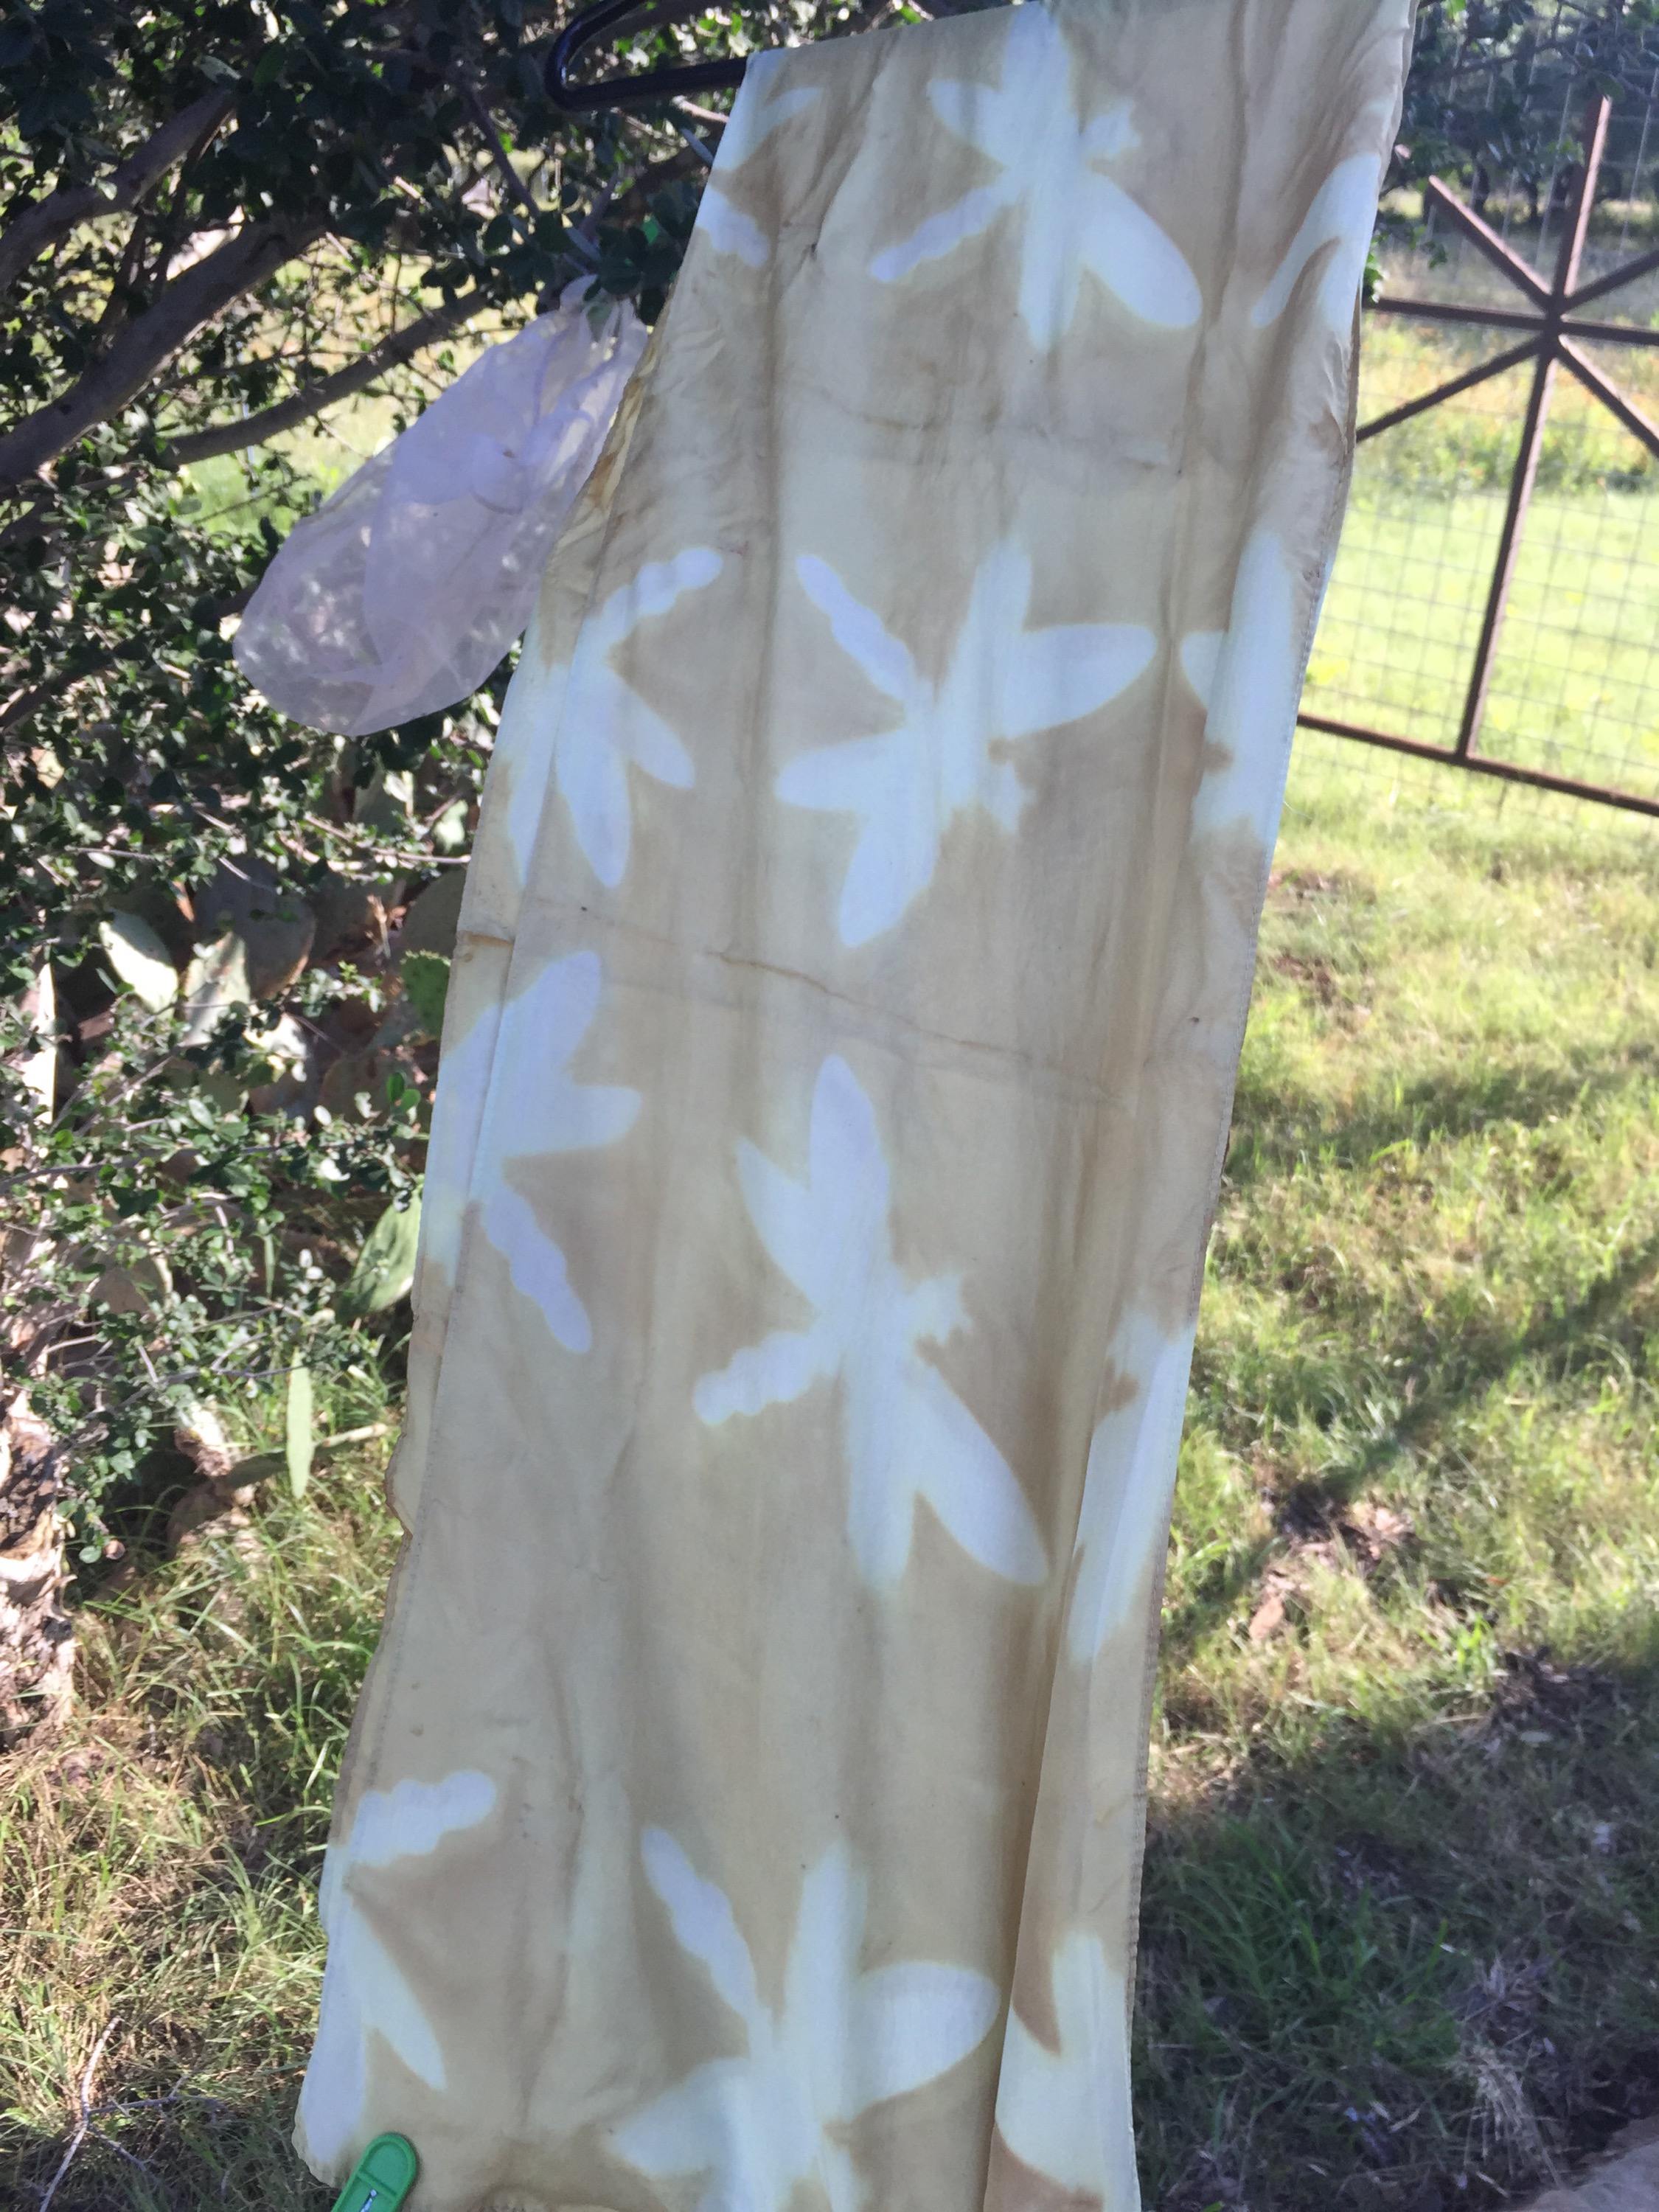
 And finally “attempting” to refold the dragonflies somewhere close to the original, reclamping with detail side of wood block and giving it an indigo dip.
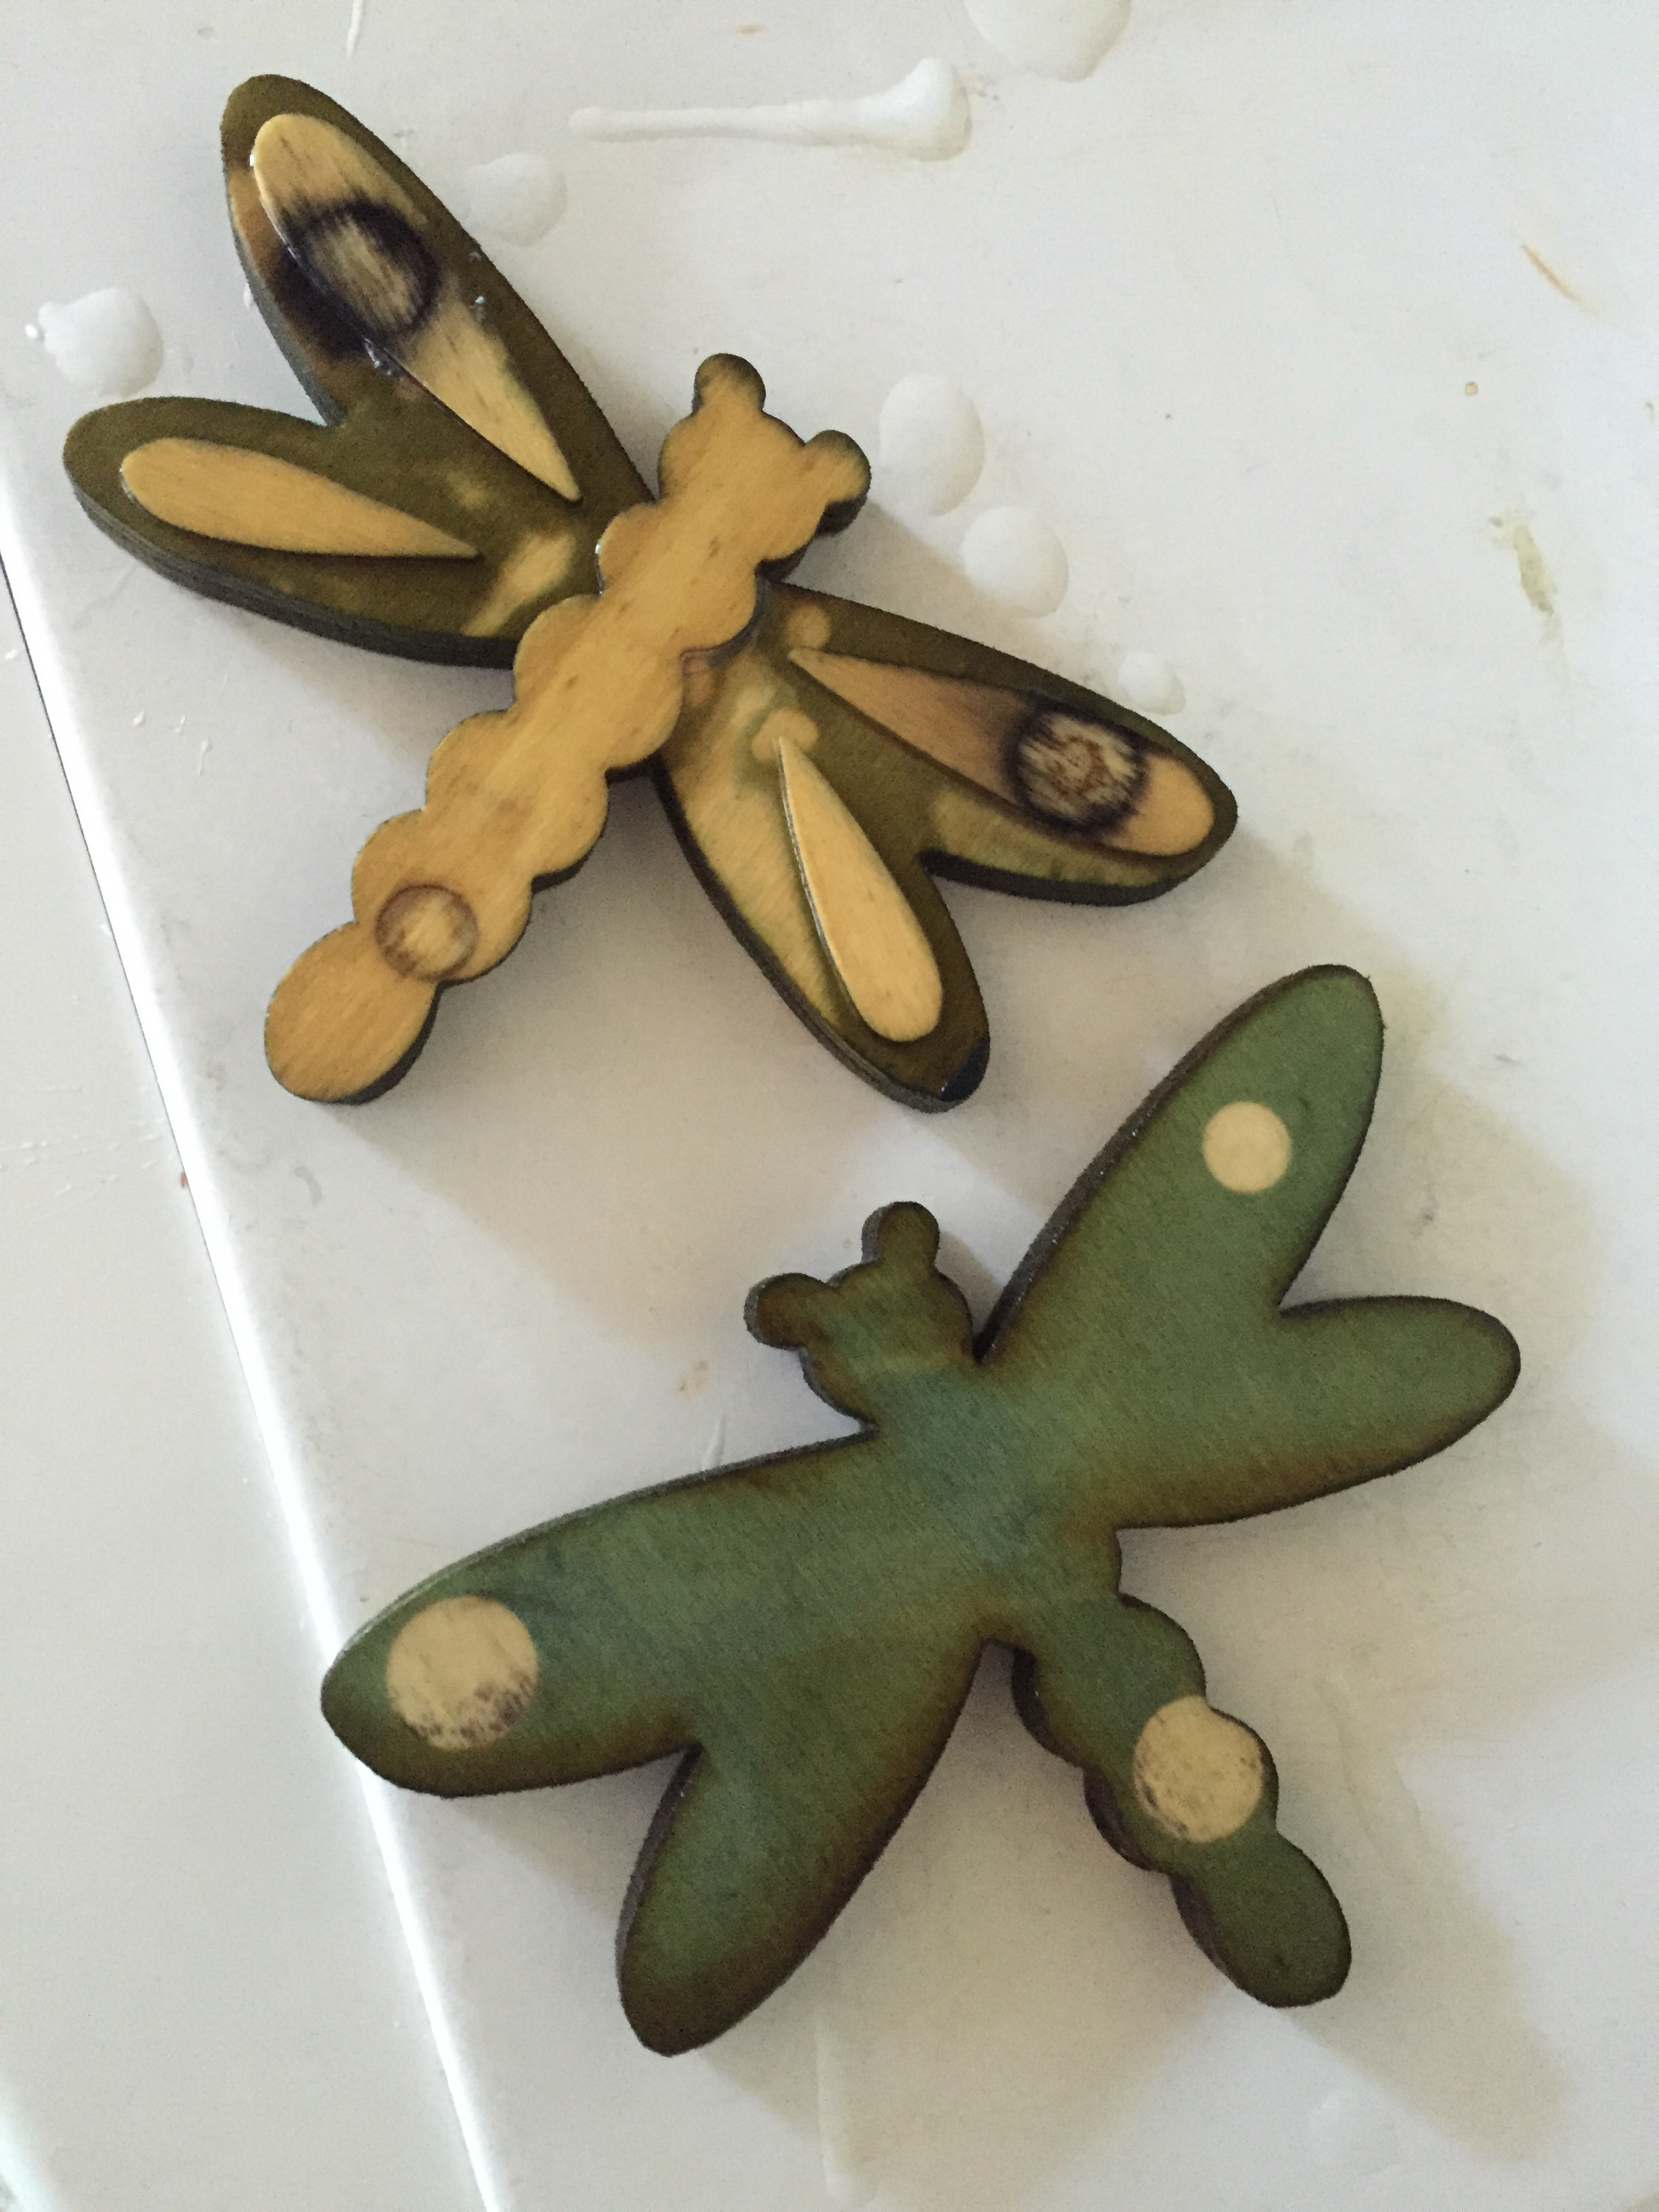
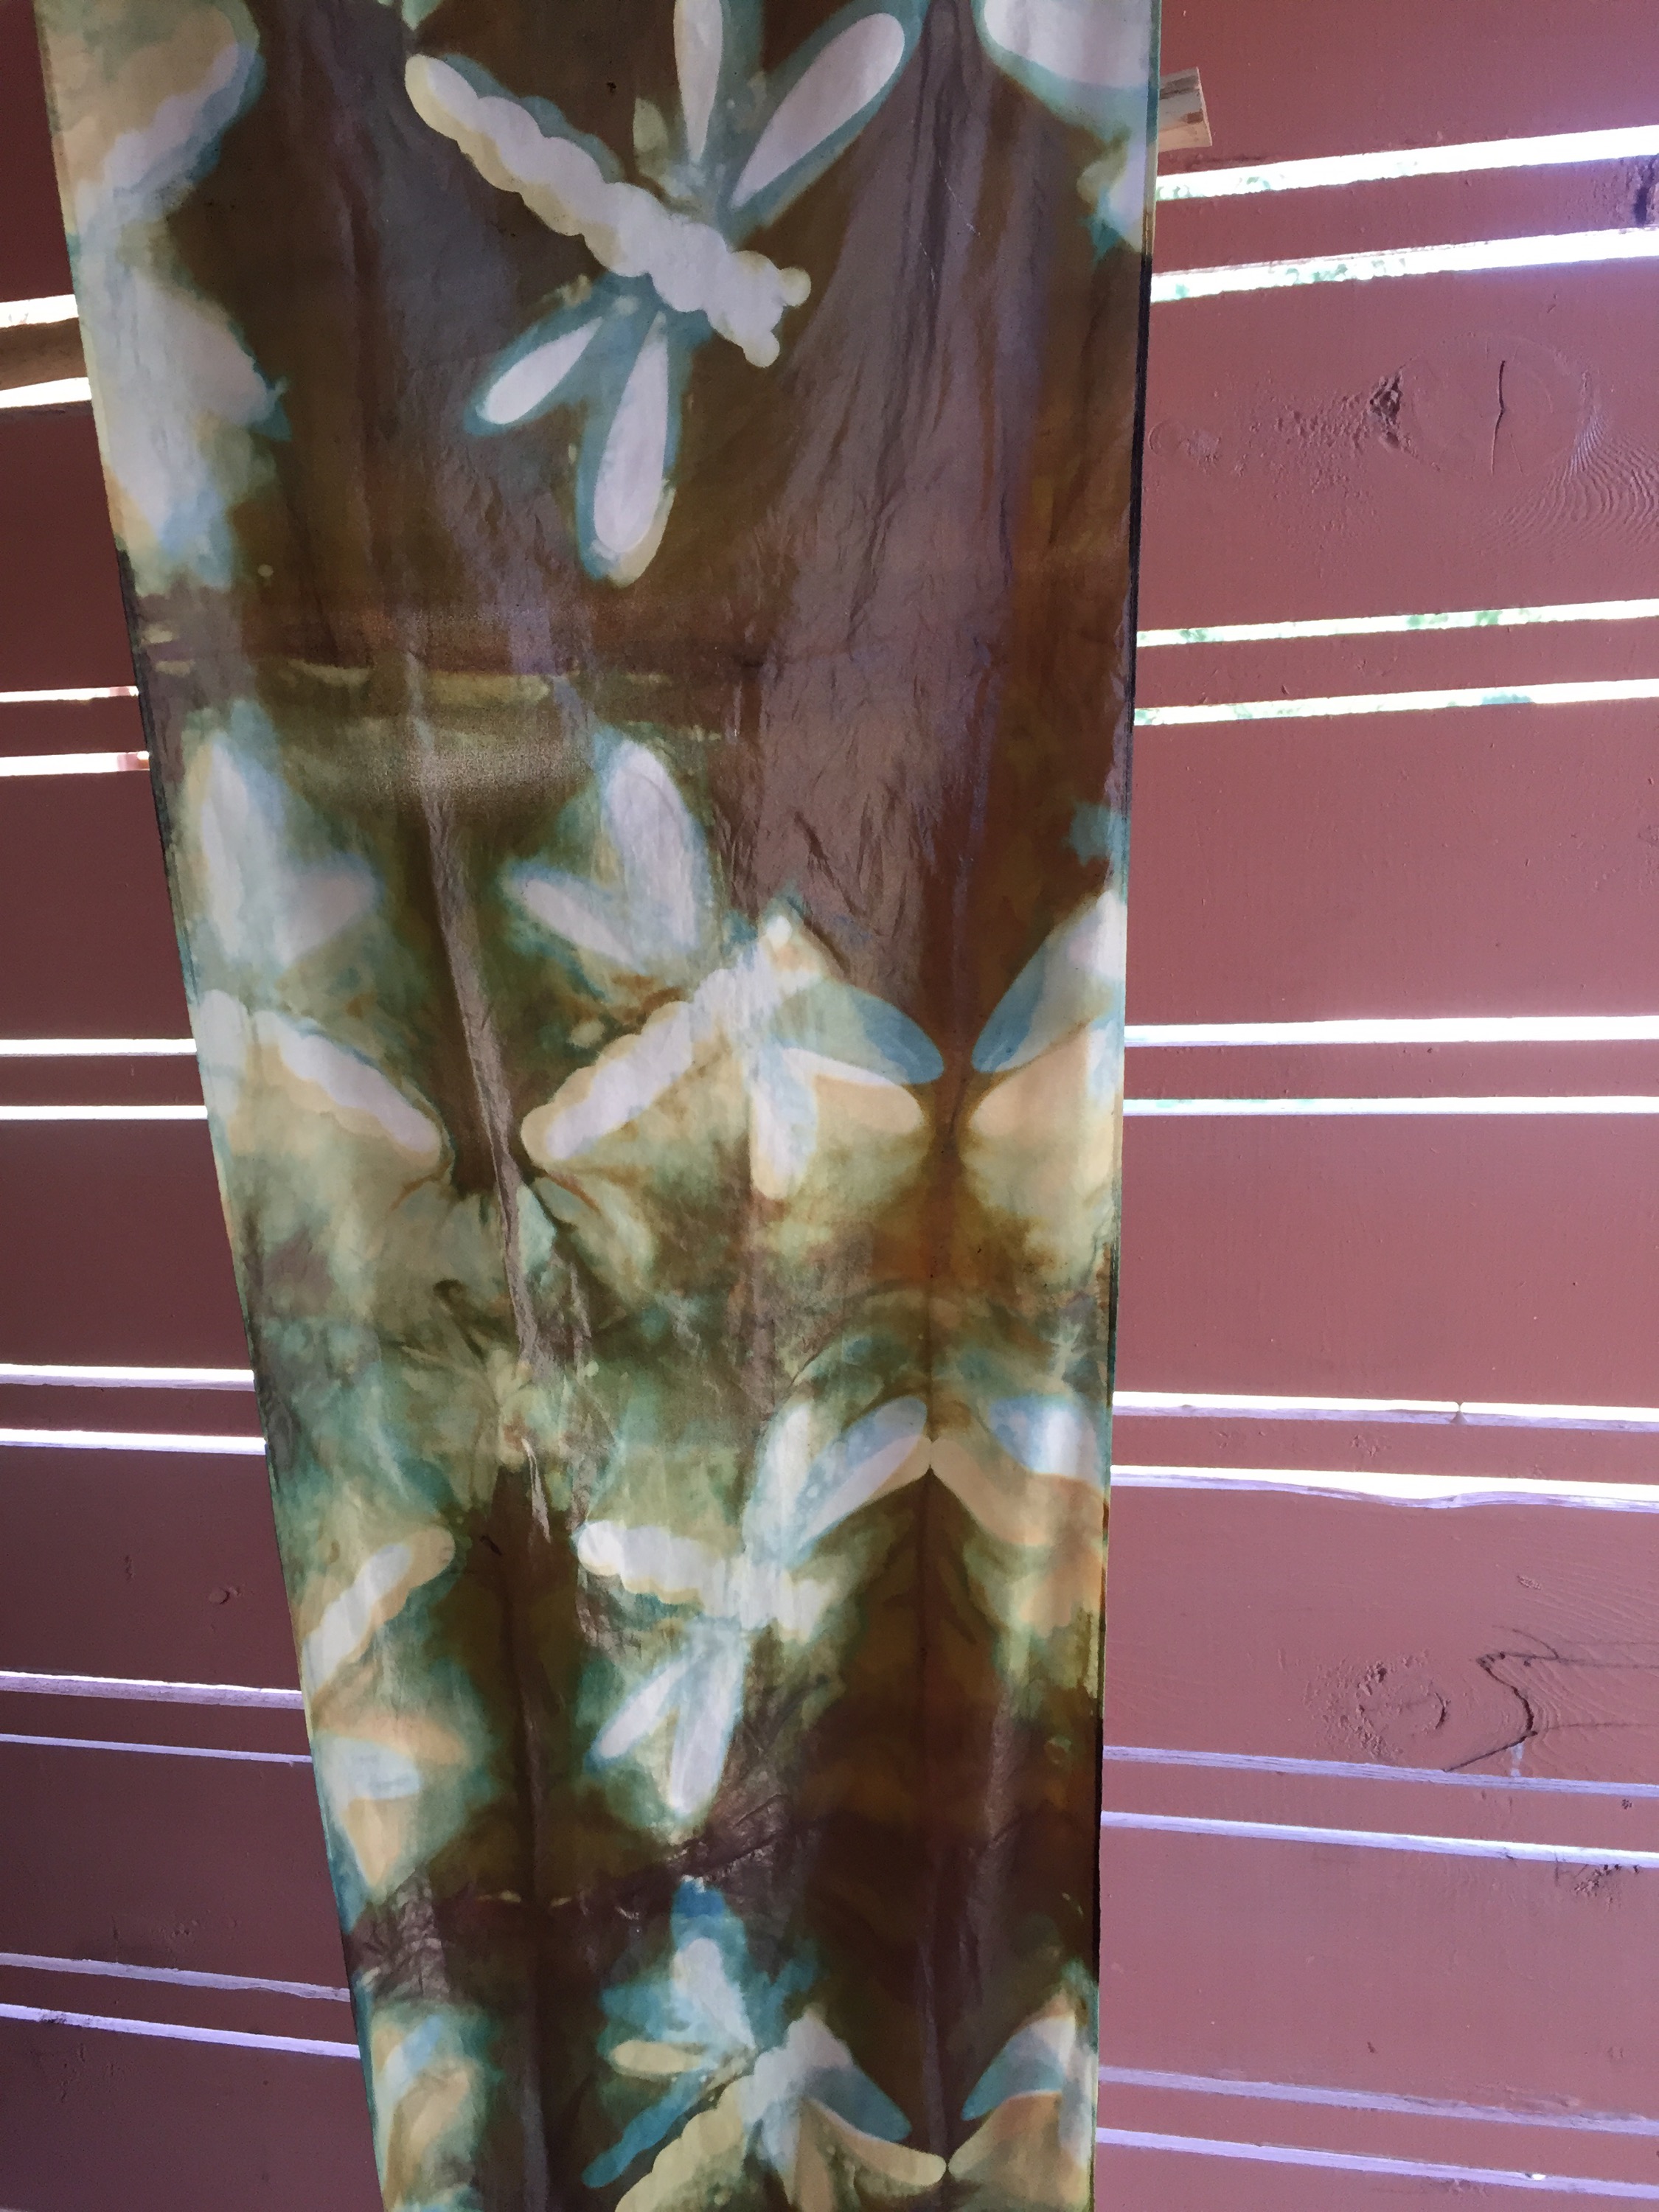
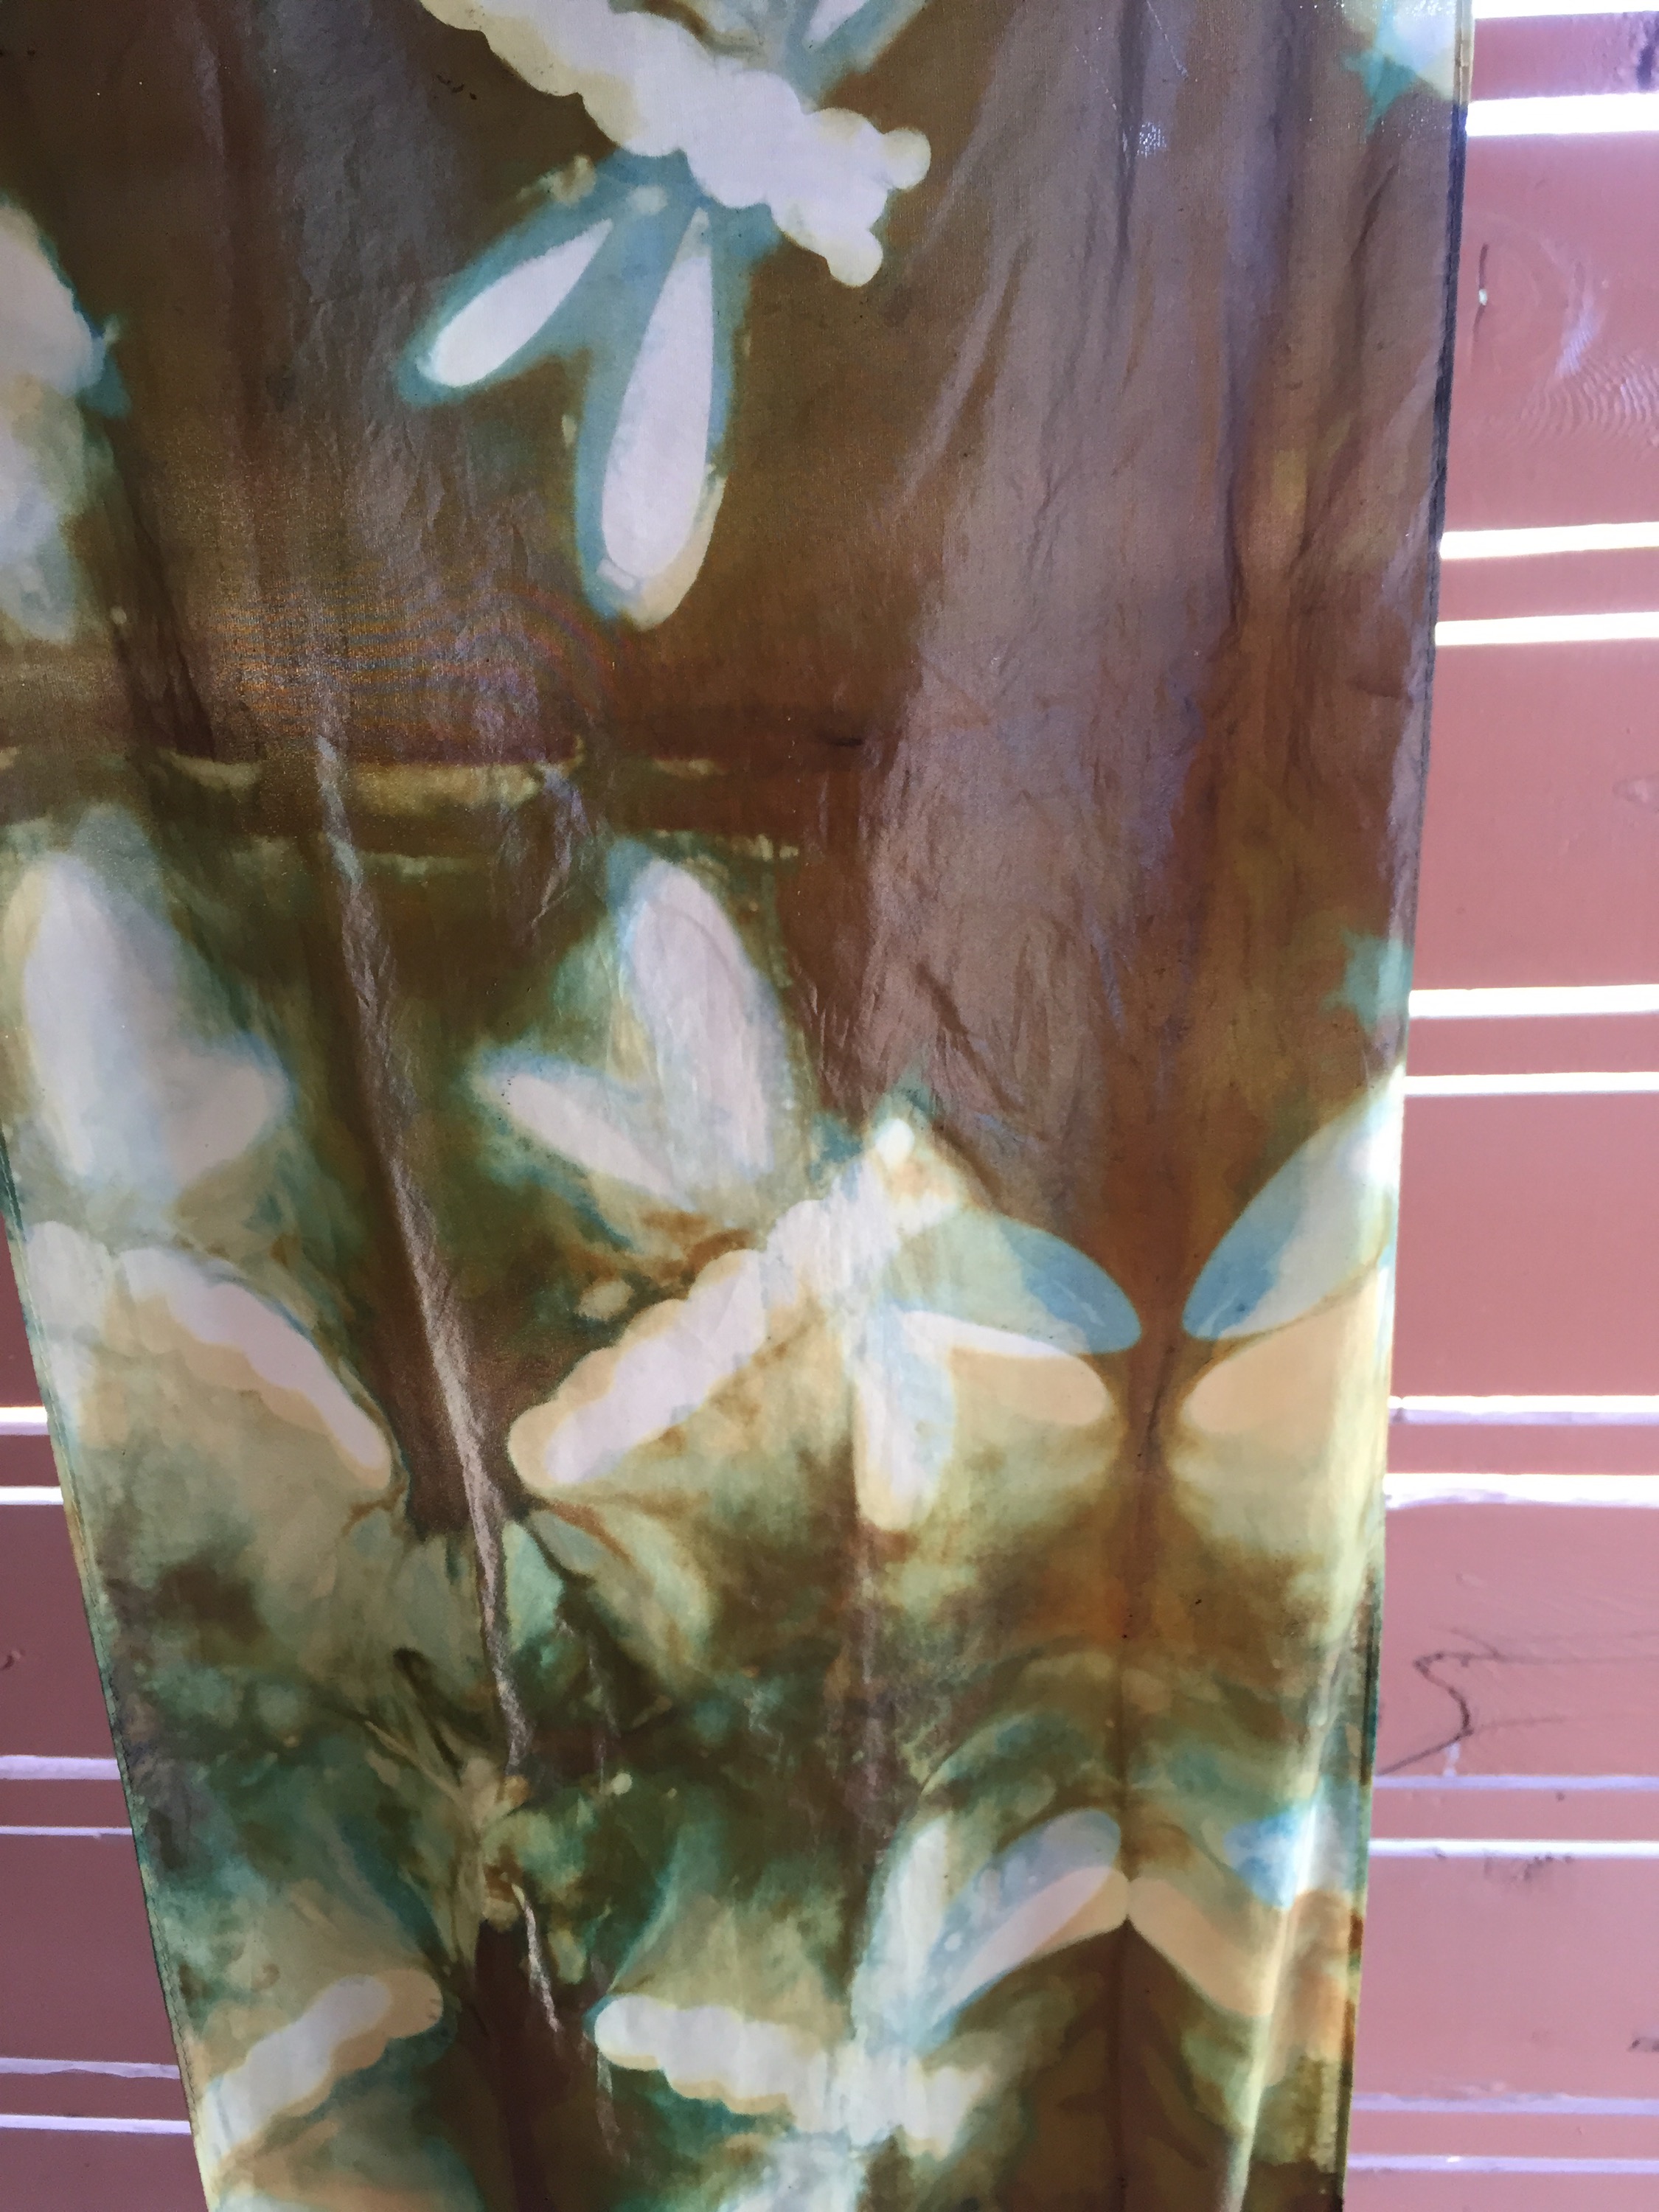 It’s fun and you do have to practice acceptance of slight misslignments. But…it gives movement to the flight of color, don’t you agree?

You must be logged in to post a comment.